
The Two-Tier Package Room Storage Model: Fast-Pickup vs. Slow-Pickup to Cut Re-Handling
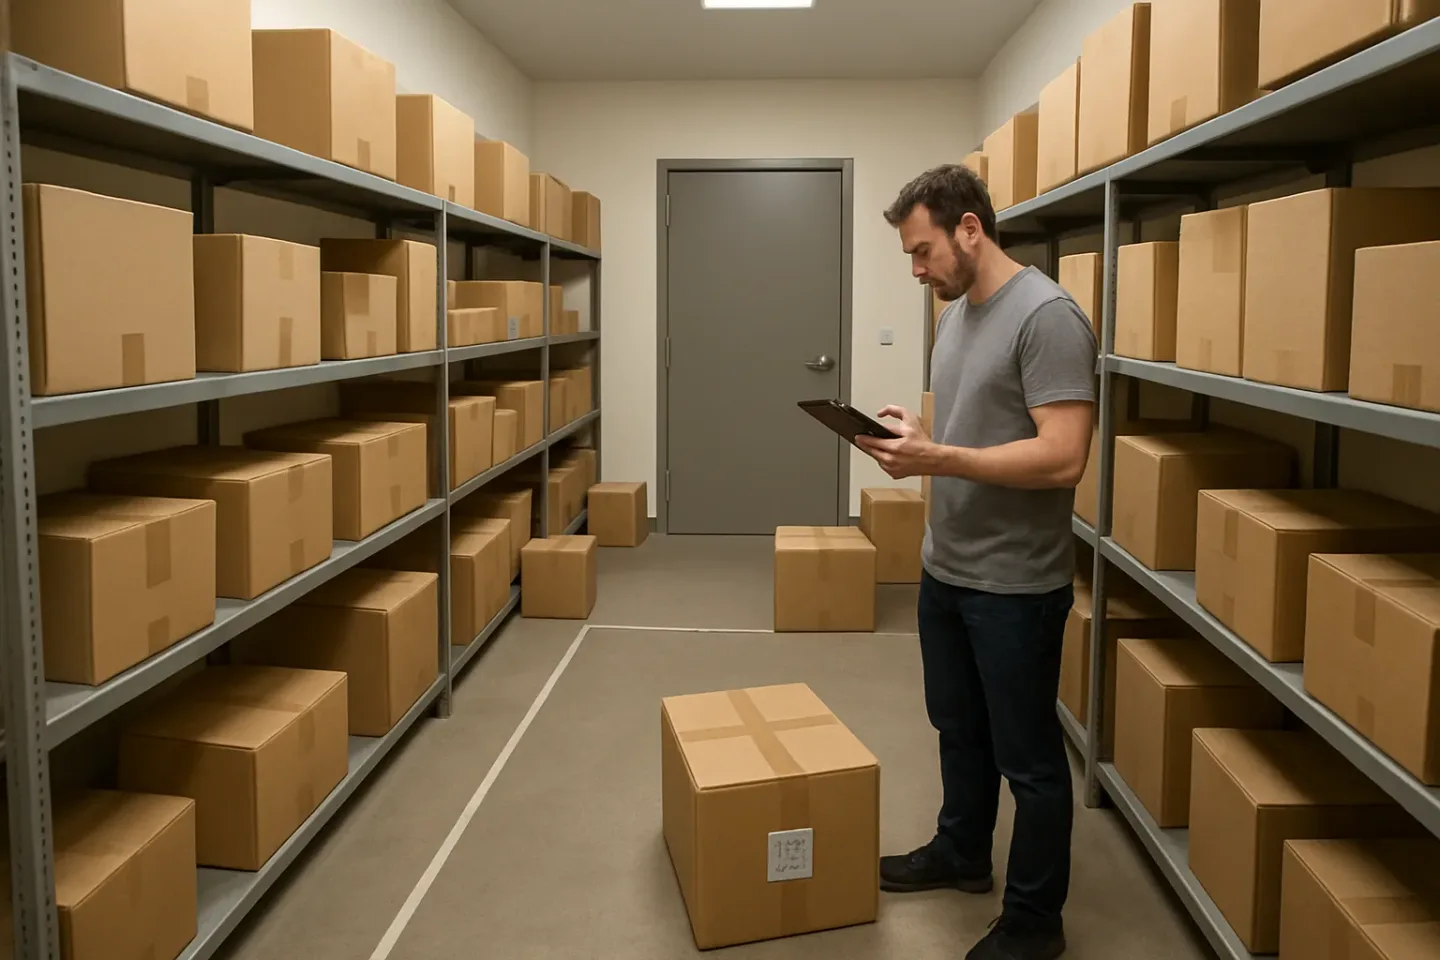
If your package room feels like it is always one delivery away from chaos, the problem is usually not the number of packages. It is how many times each package gets touched. A package arrives, gets set down, gets moved to make space, gets re-stacked to find something behind it, gets shifted again when a resident asks for it, and suddenly the room eats labor all day. The clutter is visible, but the real cost is hidden in constant re-handling and searching.
A two-tier package room storage system fixes that by organizing around pickup velocity, meaning time-in-room behavior, not carrier, size, or unit number. The assumption is simple: most packages get picked up quickly, and a smaller portion linger. When you store those two groups together, the slow movers force you to repeatedly disturb the fast movers, which drives touches up and makes the room feel disorganized no matter how tidy you try to be.
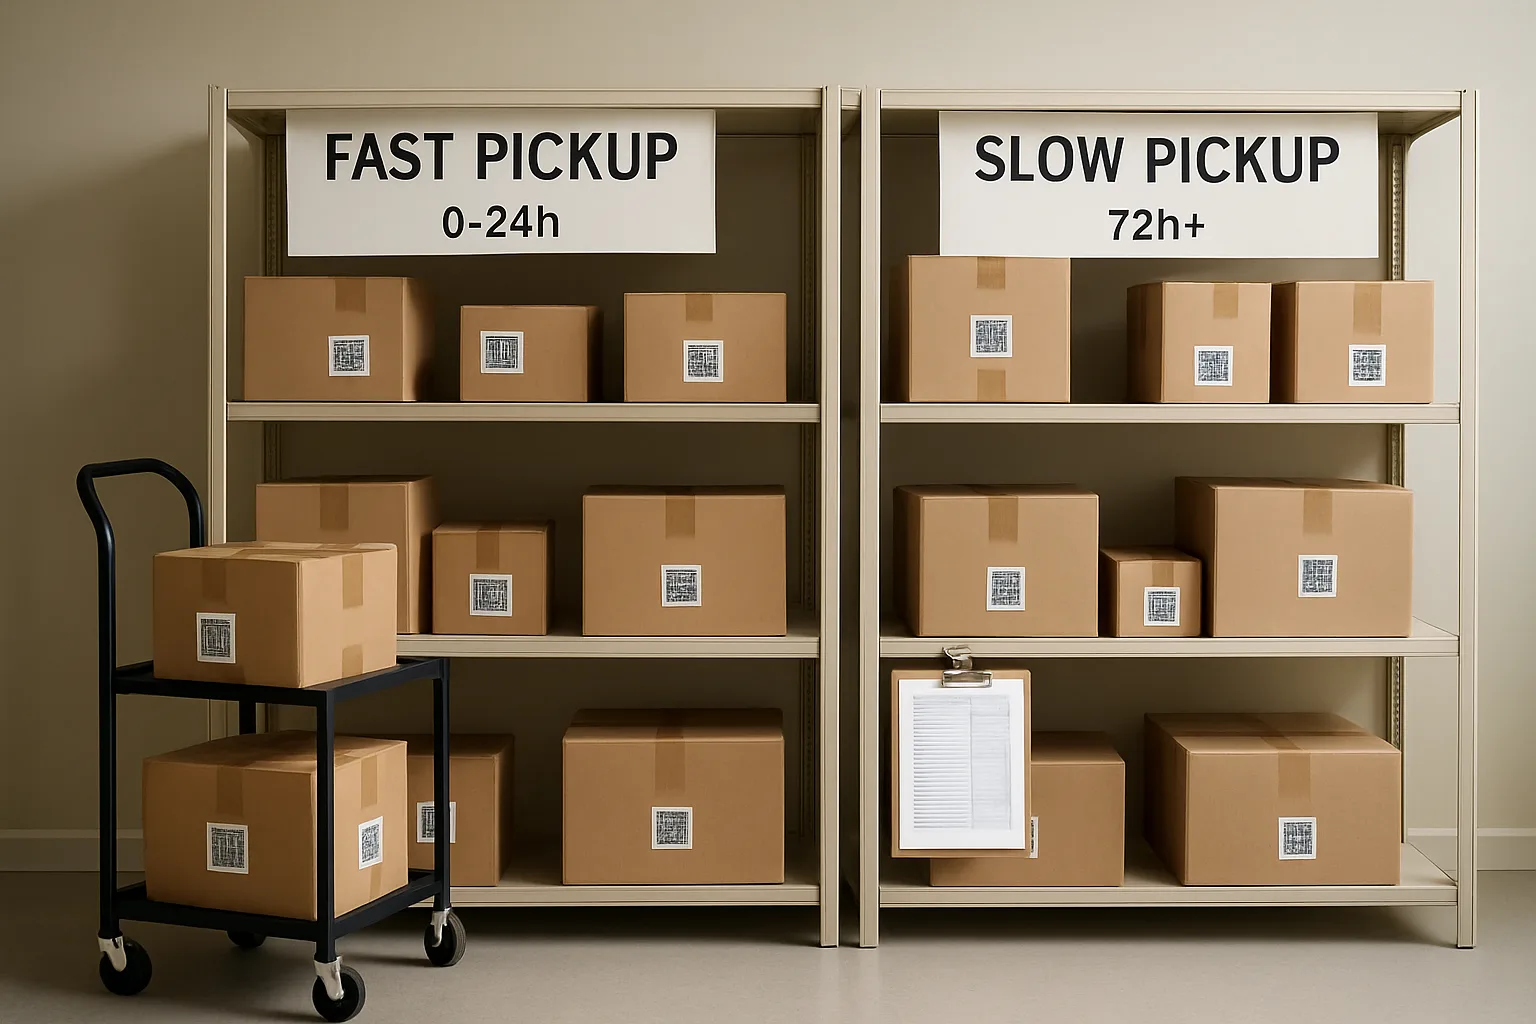
This model separates your room into two clear zones: a Fast Pickup Zone for new arrivals that should turn over quickly, and a Slow Pickup Zone for aging packages that are less likely to leave today. You do not need new shelving or a full redesign. You need clear rules (simple 24-hour and 72-hour triggers) and a short, repeatable migration routine that takes under five minutes per shift. The result is straightforward: fewer re-stacks, faster retrieval at the counter, and a cleaner room that stays clean.
In the sections ahead, you will see how to set the boundaries so any staff member can follow the system instantly, how to run an aging packages workflow without creating a “miscellaneous” pile, and how to build a lightweight handoff so the next shift does not undo your work. The goal is practical apartment mailroom efficiency: less time walking, less time digging, and real package room touches reduction you can feel by the end of week one.
Why ‘Pickup Velocity’ Beats Size or Carrier for Organizing a Package Room
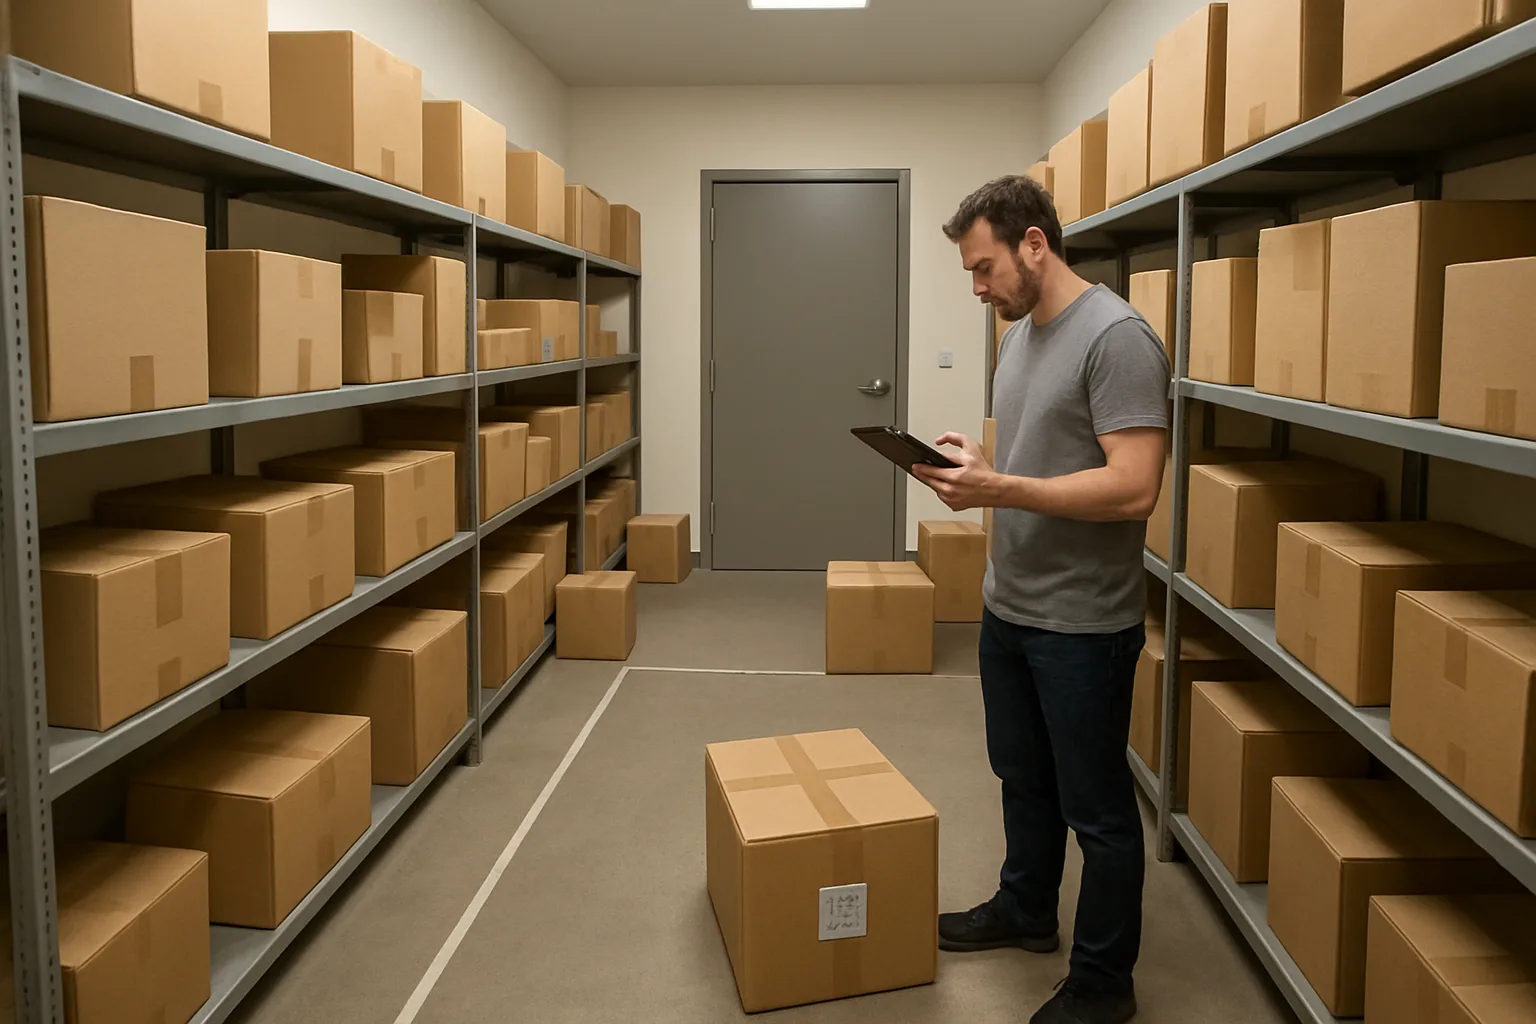
Most package rooms are organized around what is easiest to see at the moment of delivery: carrier, package size, or sometimes unit number. Those approaches feel logical, but they do not match what actually creates clutter and labor: how long packages sit before they are picked up.
Pickup velocity is simply time-in-room behavior: the rate at which residents retrieve packages after delivery. Some buildings have a high-velocity pattern (most items are gone within a day). Others have a predictable slow tail (weekend travelers, corporate leases, short-term rentals, residents who wait until they have multiple items). That time pattern—not the logo on the box—drives repeated re-handling, searching, and floor piles.
A two-tier package room storage system starts with this reality: you can’t control when residents pick up, but you can control where aging packages live so the fast-moving inventory stays easy to access. When you organize by pickup velocity, you spend less time touching the same boxes again and again just to reach newer deliveries.
- Working definition: pickup velocity = how quickly packages leave the room after they are logged in (measured in hours/days, not in carriers or dimensions).
- Why it matters: packages that linger create the most touches (moved to make space, re-stacked, searched for, and re-found).
- Goal of the model: protect the “fresh” packages from being buried by older ones, so daily work stays predictable even when volume spikes.
Common failure modes of carrier-based zones
Carrier-based zones break down because the room doesn’t experience “carrier problems”—it experiences time and space problems. A UPS shelf can look neat at 10:00 a.m. and be chaos by 4:00 p.m. if half the packages from Monday are still sitting there and Tuesday’s drop arrives on top of them.
Typical ways carrier sorting creates extra touches:
1) The “double handling” trap: staff keep shifting older packages to fit new ones inside the same carrier area, touching the same items repeatedly just to make room.
2) Search drift: when a carrier zone fills, overflow lands on any open surface. Now staff must check the carrier shelf, the overflow shelf, and the floor.
3) Mixed handoff behavior: one shift follows the carrier zones, the next shift starts making “temporary” piles. After a day, the room is organized by whoever was busiest, not by any consistent logic.
4) False confidence: carrier labels are easy to apply, but they do not tell you which packages are likely to be picked up today versus next week—so your highest-turnover inventory is not protected from getting buried.
What ‘time-in-room’ looks like in real buildings (front desk vs. locker vs. room)
Pickup velocity looks different depending on how residents access deliveries, but every building still has a time pattern you can plan around.
Front desk handoff: Many items move quickly because residents pass the desk daily, but a smaller set lingers (missed office hours, signatures needed, or residents who wait until they have multiple packages). These lingering items are the ones that end up under counters or in the back corner if there is no aging plan.
Locker-heavy buildings: Lockers handle the fastest pickups well, but overflow items (oversize, high volume days, or locker outages) often become a slow-moving “shadow inventory” in the package room. Without a time-based approach, overflow becomes a random mix of yesterday’s and last week’s items—hard to scan and easy to misplace during retrievals or audits. (And even if lockers send notifications, some residents still wait.)
Package room-only buildings: This is where time-in-room is most visible. New deliveries arrive daily, but a portion of residents pick up on their own schedule. If everything lives in one undifferentiated space, older packages become physical obstacles. Staff end up creating ad-hoc stacks: “today’s drop” in front, “older stuff” behind, and then re-stacking happens every time a resident arrives or a new load comes in.
How velocity-based storage reduces both search time and re-stacking
When you sort by pickup velocity, you’re organizing around the work you actually do: receiving today’s packages and handing them back out quickly. The trick is keeping the fast-moving inventory in a clean, browsable area where labels face out and aisles stay open.
This approach reduces touches in two ways:
First, it limits “digging.” If the packages most likely to be picked up soon are in a dedicated fast pickup zone, staff aren’t constantly moving older, stagnant packages just to reach the newest deliveries. Residents and staff can scan a smaller, more relevant area for recent packages, instead of searching across the entire room.
Second, it prevents the re-stacking cycle. In a single-zone room, every delivery forces a decision: where can this fit? That decision usually means shifting what is already there. With velocity-based storage, the fast pickup zone is allowed to churn (in and out), while older packages are moved out of the way on a schedule. That keeps the “active” shelves from turning into compacted layers that require frequent rearranging.
Operationally, this is how you get package room touches reduction without buying new racks: you stop letting slow movers sit in the path of fast movers.
What this model is and is not (not a full redesign, not more shelving)
What it is:
– A simple operating model for apartment mailroom efficiency that uses time-in-room to decide where packages live.
– A way to keep daily receiving and daily pickup predictable by separating fast-turn items from aging items.
– A set of easy rules that any staff member can follow consistently, even during rush periods.
What it is not:
– Not a remodel, not a shelving project, and not a “perfect layout” exercise.
– Not another sorting scheme layered on top of carrier, size, and unit (those can still exist, but they are secondary to age).
– Not a system that depends on one expert employee knowing where everything is stored.
If your team can answer one question—“How long has this been in the room?”—you can run the two-tier package room storage system. Everything else is just making that answer visible and repeatable across shifts.
The Two Tiers: Fast Pickup Zone and Slow Pickup Zone (Clear Rules, Clear Boundaries)
A two-tier package room storage system works only when the boundaries are obvious and the rules are simple enough that any staff member can apply them without asking, guessing, or “making it work this one time.” The goal is to keep your highest-turnover items in the easiest-to-retrieve real estate (Fast), while pushing anything that is likely to sit into a calmer, more stable area (Slow) so it stops getting bumped, re-stacked, or searched for repeatedly.
Think of this as zoning by pickup velocity. You are not judging packages by carrier, size, or resident. You are organizing by what the package is likely to do next: leave quickly, or linger. That single decision reduces clutter in the prime area and cuts down the number of times staff have to touch the same box just to access something behind it.
To prevent drift over time, you need three things: (1) a clear “line” between zones, (2) a consistent naming convention, and (3) a place for edge cases so they do not become a growing miscellaneous pile. Once those are set, the rest becomes routine. When a new hire walks in, they should be able to answer in 10 seconds: “Where does this go?” and “Where do I look first?”
- Rule #1: Every inbound package has a first home (Fast).
- Rule #2: Slow is not “overflow.” It is a deliberate second home for aging packages, so Fast stays clean.
- Rule #3: The boundary must be physical (tape line, signage, separate shelf run, or separate cage section) to stay enforceable.
- Rule #4: Each zone gets a consistent internal order (example: shelf left-to-right by unit range, or by building/stack), so searching does not turn into rummaging.
- Rule #5: Exceptions get a labeled micro-zone (example: “Hold / Special Handling”) so they remain visible and do not contaminate Fast or Slow.
Fast pickup zone: definition, ideal placement, and what belongs there
The Fast pickup zone is the “front counter” of your package room: the closest, clearest, most reachable storage you have. It is reserved for packages in their first window of life in the room, when most residents are most likely to pick up. Fast should be set up to minimize steps, bending, and moving other items out of the way.
Placement: Put Fast as close as possible to the handoff point (package room door, concierge desk window, scan station). If you have a choke point where staff and residents interact, Fast should be on the staff side of that choke point. The simplest test: if staff can grab a package from Fast without taking more than a few steps or shifting other packages, you chose the right spot.
What belongs in Fast: inbound packages that have not crossed your aging threshold yet. In practice, Fast is the zone that should look “fresh” and “thin” most of the time: clean sightlines, labels facing out, and the fastest-to-find items closest to the pickup point. If Fast becomes dense or stacked in layers, it stops being Fast and starts generating re-handling.
Slow pickup zone: definition, placement, and why it prevents repeated touches
The Slow pickup zone is for packages that are likely to sit. Its job is stability. It should be organized so that once a package lands there, it can stay put until pickup with minimal reshuffling around it. Slow is where you protect staff time by preventing the same older packages from being moved again and again just because they are in the way.
Placement: Slow can be deeper in the room, further from the door, or on shelving that is less “prime” (higher/lower shelves, second aisle, back wall). It does not need to be inconvenient; it just should not steal the best real estate from Fast. Slow also benefits from having slightly wider “parking space” per item (fewer tight squeezes), because tight packing is what creates repeated touches during retrieval.
Why it reduces touches: When older packages live in Fast, every new delivery pushes them around, stacks on top of them, or buries labels. That creates two kinds of waste: time spent searching, and time spent moving unrelated packages to reach the right one. By moving slow-moving items out of the high-traffic zone, you reduce both the frequency and the necessity of re-stacking, which is the core of package room touches reduction.
Physical layout examples (small room, long corridor room, behind-desk cage)
Small room (single-door, limited shelving): Make the first shelving run immediately inside the door your Fast pickup zone. Reserve the back wall or the far-right corner for Slow. Use a clear boundary such as: left wall = Fast, back wall = Slow. If you only have one continuous shelf line, split it into two labeled halves with a hard divider (tape line on the shelf edge and a vertical sign). Keep the floor out of play: if the floor becomes “temporary Fast,” it turns into permanent clutter.
Long corridor room (shelves along both sides): Put Fast on the first 6–10 feet of shelving nearest the entrance on both sides, and label the remainder as Slow. This prevents staff from walking the entire corridor for high-velocity pickups. It also makes it obvious to residents or staff where to look first. If you have frequent traffic passing through, keep Fast on one side only (closest to scan station) to reduce cross-traffic and shoulder-to-shoulder conflicts.
Behind-desk cage (concierge-controlled access): Treat the counter-facing shelves as Fast and the interior/back shelves as Slow. If staff must enter the cage to retrieve packages, set Fast so retrieval is possible without stepping fully into the storage area (example: “Fast = reachable from the cage entrance,” “Slow = deeper shelves”). This limits the number of times staff have to navigate around stacked items and reduces accidental disturbance of older packages.
Simple visual controls: shelf labels, tape lines, bin colors, and QR-label pairing (optional)
Visual controls keep the model consistent across shifts. The best controls are low-effort to maintain and hard to ignore. Start simple: two zone signs, one boundary line, and a repeatable shelf labeling pattern. Add complexity only if it makes the room faster for the newest staff member.
Shelf labels: Use large, plain-language labels at eye level: “FAST (0–24h)” and “SLOW (24h+)”. Within each zone, use a consistent map such as: “FAST A–F” and “SLOW G–L” or “FAST Shelves 1–3” and “SLOW Shelves 4–8.” The key is that a package can be described quickly in a handoff note: “Moved to SLOW Shelf 6.”
Tape lines and boundaries: Put a thick tape line on the floor (or the shelf edge) where Fast ends and Slow begins. Pair it with a small sign that says “Do not store new deliveries past this line.” This prevents the most common drift pattern: staff putting fresh deliveries wherever there is space, which slowly converts Slow into random overflow and ruins apartment mailroom efficiency gains over time. Even a single “boundary stripe” is enough to reset behavior because it forces a conscious decision to cross it (or not). Bin colors: If you use bins, keep it binary. Example: blue bins = Fast, gray bins = Slow. Do not introduce a third color unless you have a defined exception zone (example: red = “Hold / Special Handling”). Too many colors become decoration instead of instruction. If you do not use bins today, you can still use colored shelf-edge tape to mark the two tiers without buying anything new. Optional QR-label pairing: If you already label packages with a QR code or scan sticker for accountability, you can pair it with a simple zone marker: place Fast stickers in one corner orientation (top-right) and Slow in another (top-left), or add a small “F” or “S” mark on the label. The goal is not technology; it is instant recognition during retrieval and during the shift handoff. Keep it optional: the two-tier package room storage system should still work when scanners are down or during peak volume.
Simple Aging Triggers: The 24-Hour and 72-Hour Rules (Plus Exceptions That Don’t Break the System)
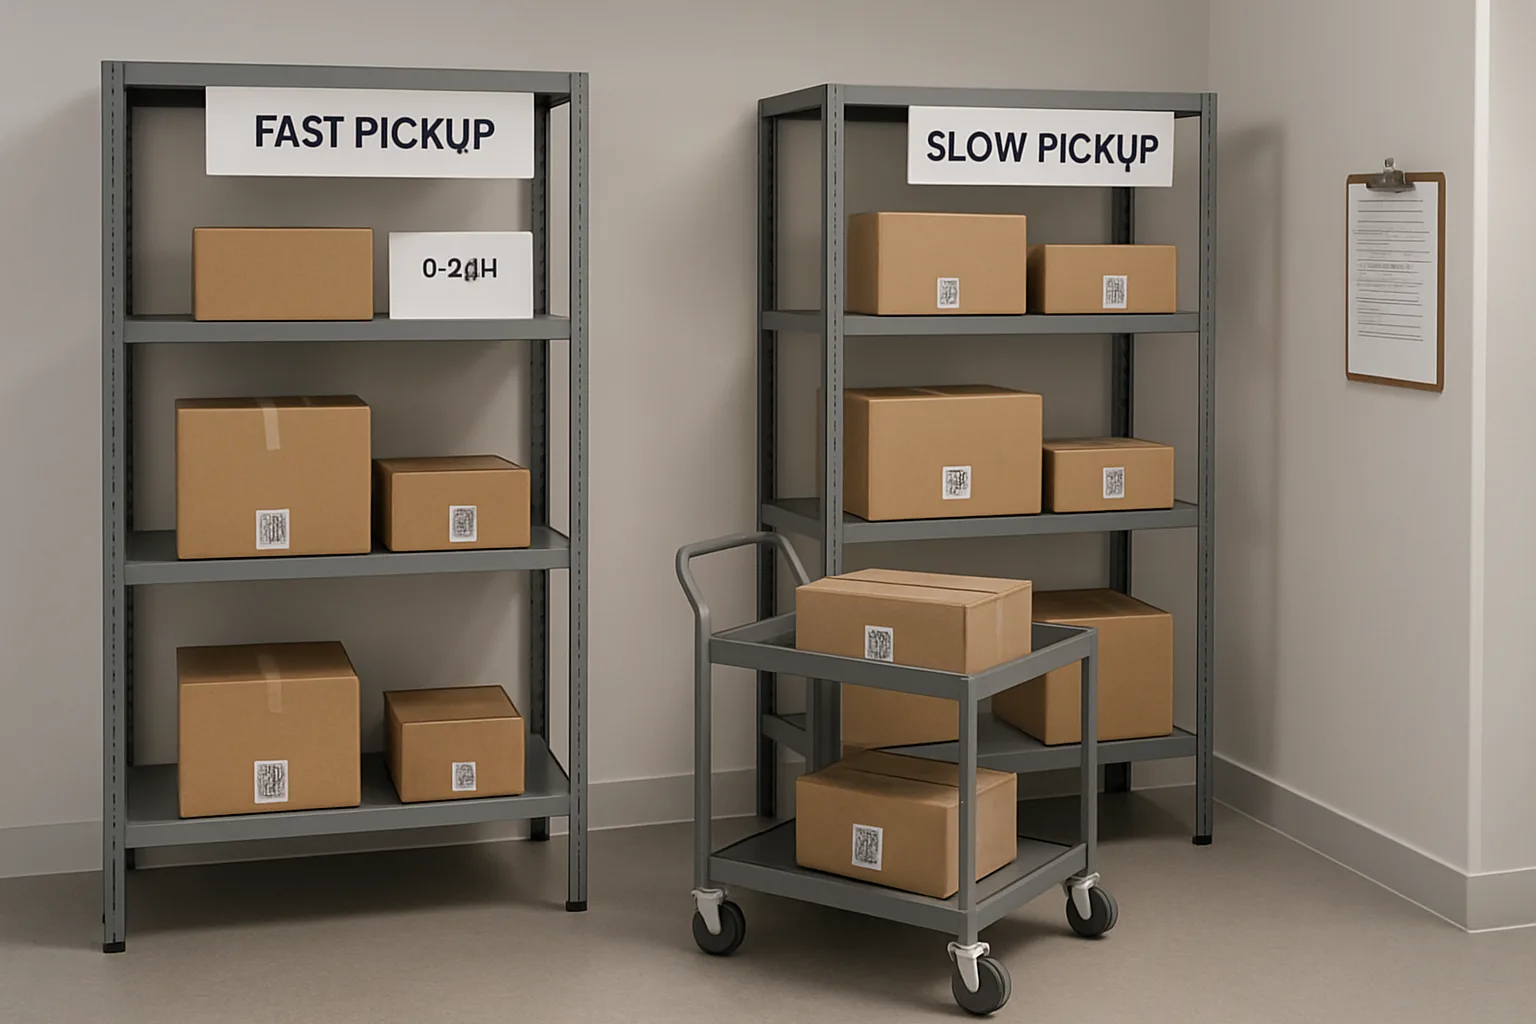
A two-tier package room storage system only works if packages move between tiers on purpose. Without clear aging rules, the Fast pickup zone slowly turns into a ‘whatever fits’ zone, and staff start re-stacking the same boxes every shift.
The simplest way to run an aging packages workflow is to attach two time-based triggers to every package: a 24-hour sorting trigger (to protect the Fast pickup zone) and a 72-hour escalation trigger (to prevent long-term squatters from consuming your best space). These rules focus on time-in-room behavior, which is what drives package room touches reduction and search time in real buildings.
- Goal of the triggers: keep the Fast pickup zone clean, predictable, and easy to scan
- What the triggers are not: a complicated exception matrix or a reason to create a new ‘misc’ shelf
- What you need for this to work: a reliable way to know arrival time (stamp, log entry, QR label scan time, or a simple date/time sticker)
Default trigger: everything starts in Fast for the first 24 hours
Rule: Every inbound package goes into the Fast pickup zone when it arrives, even if you suspect it may sit longer.
Why this matters: the first day is when most residents who pick up quickly will come through. Keeping those items in one consistent area prevents staff from having to search both zones during peak pickup windows.
Operational tip: make the ‘arrival time’ visible at the moment of intake. This can be as simple as a date/time initialed sticker, a marker notation on a small tag, or using a QR-label workflow where the timestamp is captured when you receive it. The key is consistency across shifts, not the tool you choose.
Aging trigger: move to Slow at 24 hours if not picked up
Rule: At (or just after) the 24-hour mark, any package still in Fast gets migrated into the Slow pickup zone.
Why it prevents re-handling: once a package crosses the 24-hour line, the probability it will be picked up ‘any minute now’ drops. Leaving it in Fast guarantees it will be touched again during restacking, new deliveries, or when staff are trying to clear space for the next rush.
How to make it easy on staff: the move should be mechanical. Identify candidates by timestamp, relocate them to Slow, and re-face the remaining Fast shelves so labels and unit numbers are visible at a glance. This keeps the Fast pickup zone from becoming a second storage room.
Escalation trigger: at 72 hours, flag for outreach or manager review
Rule: At 72 hours in-room, a package becomes an ‘aged item’ that requires an action beyond just storage. Storage alone is no longer solving the problem.
What ‘flag’ means in practice: create a simple, consistent next step your team can execute without debate. Examples include: adding an “aged” mark on the label, placing it in a clearly marked ‘72+’ section within the Slow pickup zone, and/or logging it for resident outreach or manager review.
Why 72 hours works operationally: it draws a bright line that prevents slow pickups from quietly consuming prime shelving. It also gives managers a predictable cadence for accountability without requiring daily deep-dives.
Exceptions playbook: oversized, fragile, high-value, refrigerated/perishable, misaddressed
Exceptions are necessary, but they should not create loopholes that undermine the two-tier package room storage system. The best approach is to keep the same timing triggers (24/72) while changing only the handling method or micro-location.
Use this principle: ‘Exceptions still age. They just get an alternate parking spot.’ That keeps the Fast pickup zone from being held hostage by items that are awkward to store or require extra care.
How to keep exceptions visible without turning into a ‘miscellaneous’ pile
The fastest way to break a two-tier model is to create an exceptions corner that no one owns. Instead, give exceptions a small number of named, bounded parking spots that are easy to scan and hard to ignore.
Keep the same 24-hour and 72-hour aging triggers for these spots. The only difference is where the package sits and what additional handling rule applies. Staff should be able to answer two questions instantly: ‘Where does it live?’ and ‘When does it move/escalate?’
The 5-Minute Migration Routine: A Repeatable Per-Shift Workflow
A two-tier package room storage system only works if yesterday’s assumptions don’t linger on today’s shelves. The fix is a short, consistent “migration” routine that intentionally moves aging items from the fast pickup zone to the slow pickup zone (and flags anything that needs attention) before clutter forces extra touches.
This routine is designed for on-site teams who are juggling residents, phones, keys, vendors, and deliveries. It relies on simple cues: time-in-room, clear zone boundaries, and a small set of actions you can complete in under five minutes per shift. Done consistently, it’s one of the most reliable ways to drive package room touches reduction and keep apartment mailroom efficiency high even during peak delivery days.
- Goal of the routine: keep the fast pickup zone “young,” keep the slow pickup zone “orderly,” and keep anything unusual from becoming a mystery pile.
- Inputs: visible labels (date/time received), a clear boundary between zones, and a basic aging packages workflow (e.g., 24-hour move to Slow, 72-hour flag).
- Outputs: fewer re-stacks, faster searching, cleaner handoffs between shifts.
When to run it (start of shift, mid-shift lull, or end-of-day)
Pick a trigger your team can execute even on busy days. Consistency matters more than the exact time.
Recommended options:
1) Start of shift (best for preventing drift): You “reset” the room before the next delivery wave hits, so the fast pickup zone stays truly fast and easy to scan visually.
2) Mid-shift lull (best for high-volume buildings): Run it right after the delivery rush slows (often late morning or mid-afternoon).
3) End-of-day (best for smaller sites): Leaves the room staged and predictable for the next shift, especially if residents pick up heavily after work.
Step-by-step: identify candidates, confirm age, move, and re-face shelves
Use a simple four-step pattern: Find, Confirm, Move, Reset. The point is to touch each aging package once—on purpose—instead of multiple times because it’s in the way.
1) Identify candidates (30–60 seconds)
– Stand at the edge of the fast pickup zone and visually scan for items with “older” receive markings.
– Focus on what’s blocking access first: anything on the floor, anything in front of other items, and anything that forces restacking to reach newer deliveries.
2) Confirm age quickly (60–90 seconds)
– Check the receive date/time on the label or log.
– If you’re using QR-labels, do a quick scan to confirm the timestamp and unit before moving.
– If the timestamp is missing or unreadable, treat it as a problem to fix immediately: re-label it or add a clear “received” mark so it doesn’t become an un-ageable orphan.
3) Move once, place deliberately (90–120 seconds)
– Move anything past your fast threshold (commonly 24 hours) from the fast pickup zone to the slow pickup zone.
– Place it in the slow pickup zone in a way that reduces future searching: keep the label facing out, group consistently (e.g., by unit range or alphabet), and avoid deep stacks.
– If the item is at/over your escalation threshold (commonly 72 hours), flag it for follow-up per your aging packages workflow (for example: a note for outreach, a manager review tag, or a “needs address check” marker).
4) Re-face and reset (30–60 seconds)
– Straighten the fast pickup zone so the newest items are easy to add without shuffling older ones.
– Restore the boundary: fast zone should look sparse and readable; slow zone should look dense but orderly.
paragraphs_2_should_not_exist_but_ok_if_ignored_by_parser
Quick checks that prevent re-touches (clear aisles, visible labels, ‘no stack on floor’ rule)
These checks take seconds, but they prevent the most common causes of extra handling: blocked access, hidden labels, and “temporary” floor piles that become permanent.
Run this micro-audit as you finish the move:
– Clear aisles: Nothing should require moving three other boxes to reach it.
– Labels visible: Every package should be readable from the aisle side (label facing out).
– No stack on floor (default rule): If it’s on the floor, it’s either oversized by necessity or it’s about to become a repeated-touch problem. Move floor items to their intended home or designate one controlled “oversize strip” so the floor doesn’t turn into a third zone.
– Don’t bury the slow zone: The slow pickup zone is allowed to be fuller, but it can’t be chaotic. If you catch yourself making a “miscellaneous” corner, stop and re-place items into the same consistent grouping you use every day.
– One-touch mindset: If you pick something up during migration, it should end the routine in its final correct tier (not back in fast “for now”).
Accountability handoff: what the next shift needs to know (short notes, checklist)
The fastest package rooms run on predictable handoffs. Your next shift shouldn’t have to guess what happened, what moved, or what’s now urgent. Keep handoff notes short enough that they’ll actually be written and read.
What to record (30 seconds):
– Migration completed: Yes/No (and approximate time run).
– Count moved: “Moved 12 from Fast to Slow” is enough to signal volume.
– Exceptions created: List only the items that require human attention, not every package. Examples: “2 items at 72h flagged,” “1 misaddressed held for manager,” “oversize placed in designated strip.”
– Any constraints: “Slow shelf B full—needs re-balance tomorrow,” or “label printer out; hand-marked receive times.”
Simple checklist format (fits on a clipboard page):
– Fast pickup zone scanned
– 24h+ moved to Slow pickup zone
– 72h+ flagged per workflow
– Labels facing out; aisles clear
– Floor cleared (or oversize contained)
– Handoff note logged
What to do when you’re slammed: the ‘minimum viable migration’ version
When the desk is nonstop, you still need a version of migration that prevents the room from collapsing into repeated handling. The goal isn’t perfection—it’s preventing the fast pickup zone from becoming a storage unit.
Minimum viable migration (2 minutes):
1) Floor-first triage (30 seconds)
– Move anything on the floor into the correct tier (or the single designated oversize area). Floor piles create the most re-touches and trip hazards.
2) Oldest-first sweep (60 seconds)
– Pick a small number you can handle fast (e.g., the 10 oldest-looking items in the fast pickup zone) and move them to the slow pickup zone.
– Don’t reorganize the entire slow zone; just place neatly with labels out.
3) One-line handoff (30 seconds)
– “Quick migration done; moved ~10 to Slow; 3 appear 72h+—needs review.”
This abbreviated routine protects the fast pickup zone (and your ability to find packages quickly) until you can run the full 5-minute version later in the shift.
Making It Stick: Training, Accountability, and Measuring Touches Without Fancy Tools
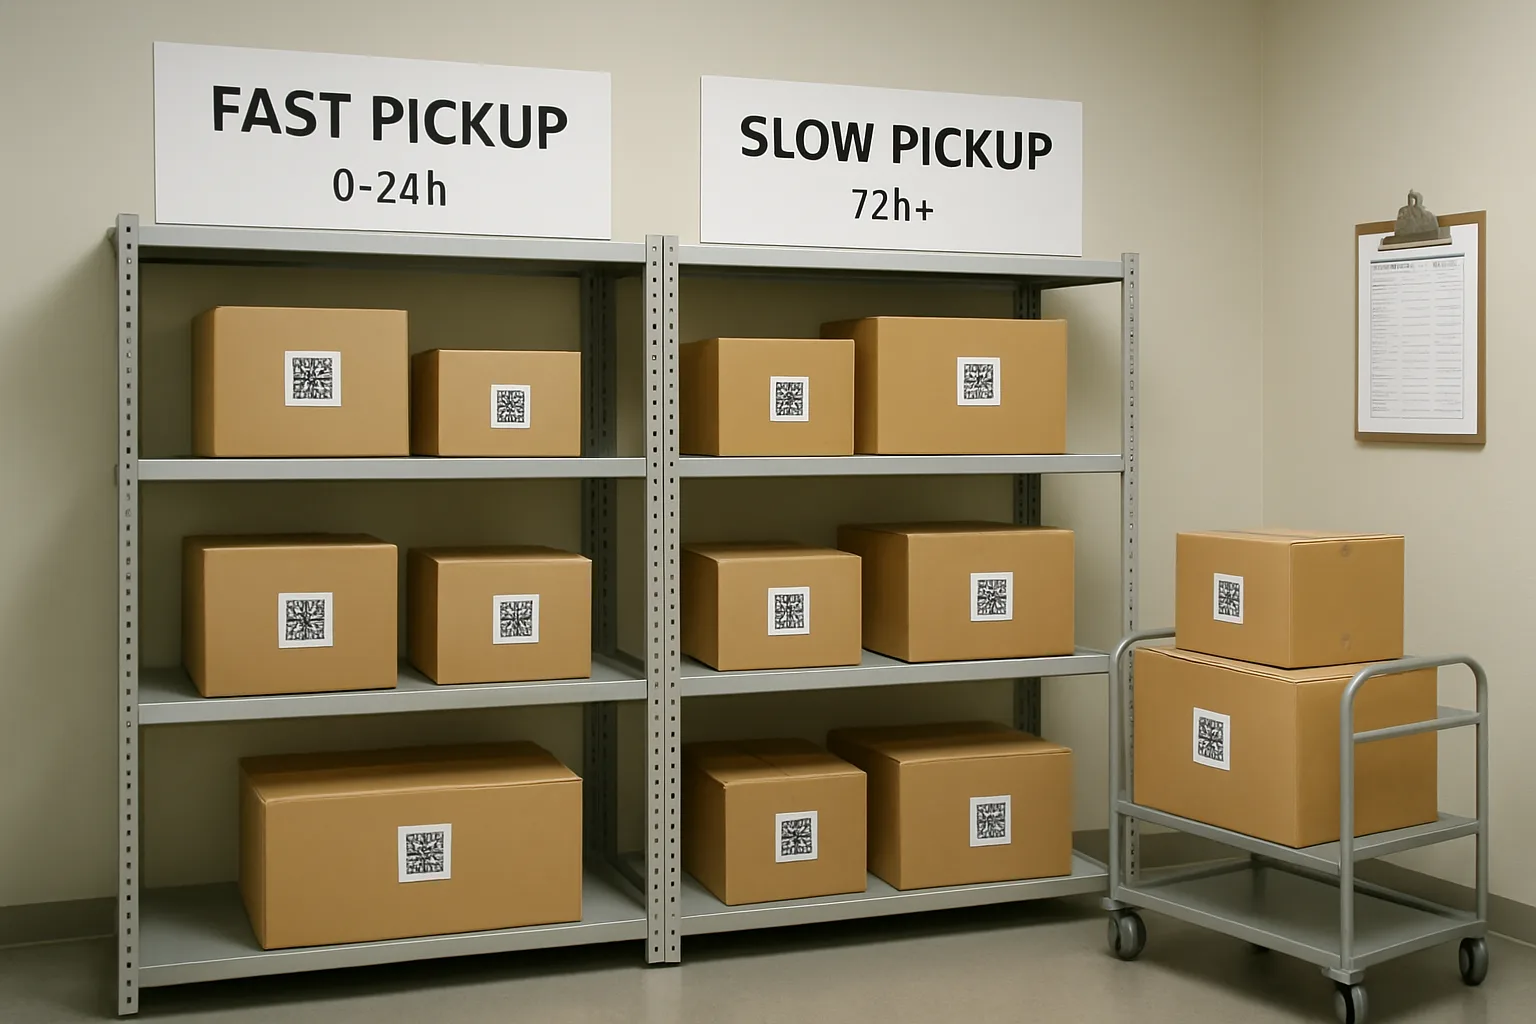
A two-tier package room storage system only delivers package room touches reduction when every shift runs it the same way. The good news: you do not need new shelving, a remodel, or complicated reporting. You need clear rules people can repeat from memory, simple accountability between shifts, and a lightweight way to spot when the fast pickup zone and slow pickup zone are drifting back into “wherever it fits.”
Treat this as an operating standard for apartment mailroom efficiency: a short training moment, a repeatable checklist, and a few manual measurements that tell you whether re-handling is going down and search time is shrinking.
- Goal for consistency: any staff member can walk in cold and answer two questions in 10 seconds: “What tier is this in?” and “What happens next?”
- Use the same language everywhere: “Fast zone (0–24h)” and “Slow zone (24h+)” keeps decisions consistent, especially when coverage rotates.
- Assign one owner per shift (not per day): the person on duty is responsible for keeping tiers true and leaving a clear handoff note.
- Measure behaviors, not guesses: count re-touches and exceptions so you can fix root causes (layout, overflow, notification gaps) instead of blaming “busy days.”
One-page rule card: what to teach in 10 minutes
Make a single-page “rule card” and keep it in three places: at the package room entry, at the front desk, and in the shift binder. The card should be short enough to review during a handoff, and specific enough that a new hire can follow it without interpretation.
A practical rule card for a two-tier package room storage system should include: the tier definitions, the aging packages workflow triggers, and the two or three exceptions that truly require different handling in your building (for example, oversized items or signature-required deliveries).
If you use QR-labels or any package logging method, add one line that standardizes the naming convention so locations remain searchable (for example: “FAST-A3” vs. “SLOW-B1”). Consistency matters more than the tool.
Shift checklist examples (open/close) and common audit points
Checklists are how you keep a velocity-based room from slowly reverting to “stack and hunt.” Keep them short and tied to the physical space. A good checklist prevents the most common causes of extra touches: floor stacking, mixed tiers, and unmarked exceptions.
Below are examples you can copy as-is, then edit to match your room layout and staffing. The goal is that a lead can verify the system in under two minutes.
How to track touches in a simple way (tally sheet or log categories)
You can validate package room touches reduction without dashboards. Use a clipboard by the door (or a simple note on the shift log) to record only the actions that create extra labor. You are not counting every package handled; you are counting avoidable re-handling and time sinks.
A simple method: one tally sheet per day with four categories. Each time a staff member does one of these actions, they make one mark. Review totals weekly, not hourly. You are looking for trends and recurring causes you can fix with layout or rules.
Keep the categories behavior-based and blame-free. When staff feel like tallies are “gotchas,” they stop recording or they stop following the process. Frame it as: “This is how we make the room easier to run.”
Signals the system is drifting (Slow zone overflowing, Fast becoming ‘random’)
Every two-tier system drifts unless you define what “drift” looks like. Drift is not a bad day; it is a pattern where the room stops reflecting pickup velocity and starts reflecting whoever had five seconds to spare.
You can usually spot drift by looking at the floor and the faces of shelves. If staff are re-stacking to reach something, you have already lost time—and you are one busy weekend away from a full reset.
Call out drift signals in plain terms so any shift can self-correct without waiting for a manager.
How to adjust thresholds and layout after a one-week pilot
After one week, you will know whether your 24-hour and 72-hour triggers fit your resident behavior. Do not overcorrect based on one rough day or a holiday spike; adjust based on recurring patterns: when the fast pickup zone overflows, when the slow pickup zone becomes a graveyard, and which exceptions keep forcing re-touches.
Adjustments should be small and operational: shifting shelf space between tiers, changing where oversized items live, or tightening how exceptions are marked. The rule set should stay simple so the system remains trainable.
Most importantly, lock in accountability: define who updates the rule card, who signs off on weekly audits, and what happens when staff discover a repeated failure mode (for example, misaddressed packages or unclear unit labeling).
Frequently Asked Questions
How much space do I need to run a two-tier package room storage system?
You can run a two-tier package room storage system with surprisingly little dedicated space because it is a rules-and-boundaries model, not a shelving project.
Minimum setup:
– One clearly marked Fast pickup zone: a shelf bank, a rolling rack, or even two table-length surfaces.
– One clearly marked Slow pickup zone: a separate shelf run, a caged corner, or a labeled section of the same shelving line.
Rule of thumb: If staff can stand in one spot and see the whole Fast area at a glance, it is probably sized and placed well. Slow can be less prime as long as it stays organized and searchable.
If space is extremely tight, create vertical separation (top shelves = Fast, lower shelves = Slow) but keep the boundary obvious with labels and a tape line so packages do not drift between tiers.
What is the simplest way to label shelves so any staff member can follow it instantly?
Use a three-part label that answers: tier, time, and location.
Example shelf labels:
– FAST (0–24h) – A1, A2, A3
– SLOW (24–72h) – B1, B2, B3
– SLOW (72h+) – C1, C2
Then make the package label or QR-label (if you use one) match the location code (A2, B3, etc.). The goal is that a person walking in mid-shift can find a package without asking anyone, and can put a new package away without inventing a new “system.”
Avoid labels like “Overflow” or “Misc.” Those become permission slips for re-handling and searching.
How do we handle residents who insist we “keep it at the front” even if they pick up late?
Set a consistent, non-personal rule tied to time-in-room behavior, not resident preference.
Practical approach:
– Script for staff: “All deliveries start in the Fast pickup zone for the first 24 hours. After that, we move them to the Slow pickup zone so the room stays searchable for everyone.”
– If you offer exceptions, make them formal and limited (for example: medical equipment, mobility accommodations, or signature-required items) and place them in a clearly labeled Exceptions shelf, not mixed into Fast.
This keeps the fast pickup zone functioning as intended and prevents it from turning into a “VIP parking lot” that forces repeated re-stacking.
What if our building has lockers plus an overflow package room—does two-tier still apply?
Yes. Think of the lockers as an extension of the Fast pickup zone because they are designed for fast pickup velocity.
A workable mapping:
– Locker deliveries = Fast tier by default.
– Packages that cannot fit in lockers or miss locker placement = Fast pickup zone in the room for up to 24 hours.
– Anything not collected within 24 hours (or anything that residents repeatedly fail to pick up from overflow) migrates to the Slow pickup zone.
Key operational note: If staff frequently re-handle locker overflow, it is usually because overflow is not treated as a first-class zone with clear boundaries and a daily aging packages workflow.
How do we keep the Slow pickup zone from becoming a dead-end that no one wants to touch?
Make the Slow zone easier to work than the “random pile” it replaces, and give it a predictable weekly rhythm.
Tactics that work:
– Keep Slow organized by simple location codes, not by resident name or unit number (names change, codes do not).
– Reserve one small section for 72h+ so it is obvious what needs outreach or review.
– During the 5-minute migration routine, always re-face labels so the next shift can scan the shelf quickly.
– Use a short aging packages workflow note: for example “72h+: call box full / send reminder / verify unit number.”
If Slow becomes chaotic, staff will start “temporarily” placing late packages back into Fast, which drives touches up fast.
How can we estimate package room touches reduction without new software or time studies?
Use a simple, low-friction tally for one week that captures avoidable re-handling and search time triggers.
One practical method:
– Keep a paper tally sheet at the package room entrance with three lines:
1) Re-stacked to access another package
2) Searched more than 60 seconds
3) Relocated due to clutter/overflow
– Staff marks one tick each time it happens (no storytelling, no blaming).
At the end of the week, compare:
– Total ticks per day before and after you implement the two-tier package room storage system.
– Where the ticks cluster (often it is one shelf run or one shift).
This gives managers a credible indicator of apartment mailroom efficiency changes and whether the Fast pickup zone and Slow pickup zone rules are being followed—without pretending you can measure every touch perfectly.
Put the Two-Tier Model Into Practice
Want a simple way to make the Fast/Slow zones, label shelves, and run a consistent 5-minute migration routine across shifts? TrackNest can help you standardize package intake, QR-labeling, and handoff accountability so your team spends less time searching and re-stacking and more time moving residents through the pickup line.
A Cleaner Room Comes From Intentional Aging, Not Constant Re-Organizing
A package room gets messy when everything is stored the same way, even though packages behave differently once they land in your building. The two-tier package room storage system works because it matches storage to pickup velocity. New arrivals stay in a dedicated fast pickup zone where staff can retrieve them quickly with minimal digging. Older, slower-to-move items migrate out of the way into a slow pickup zone where they stop disrupting the daily flow.
The power of the model is how simple it stays: clear 24-hour and 72-hour triggers, plus a short migration routine that you can actually complete during a real shift. That routine is what prevents the “we will fix it later” pile, keeps aisles clear, and avoids the repeat handling that burns time at the counter.
To roll it out, pilot the zones for one week with one page of rules and one shift checklist. Keep boundaries obvious, keep exceptions visible but contained, and do a quick end-of-shift scan to confirm nothing aging is still sitting in the fast area. After the pilot, adjust the thresholds or shelf space based on what you saw, then lock in accountability so the system survives busy days. If the room stays searchable and packages stop getting moved twice just to move once, you are doing it right.