
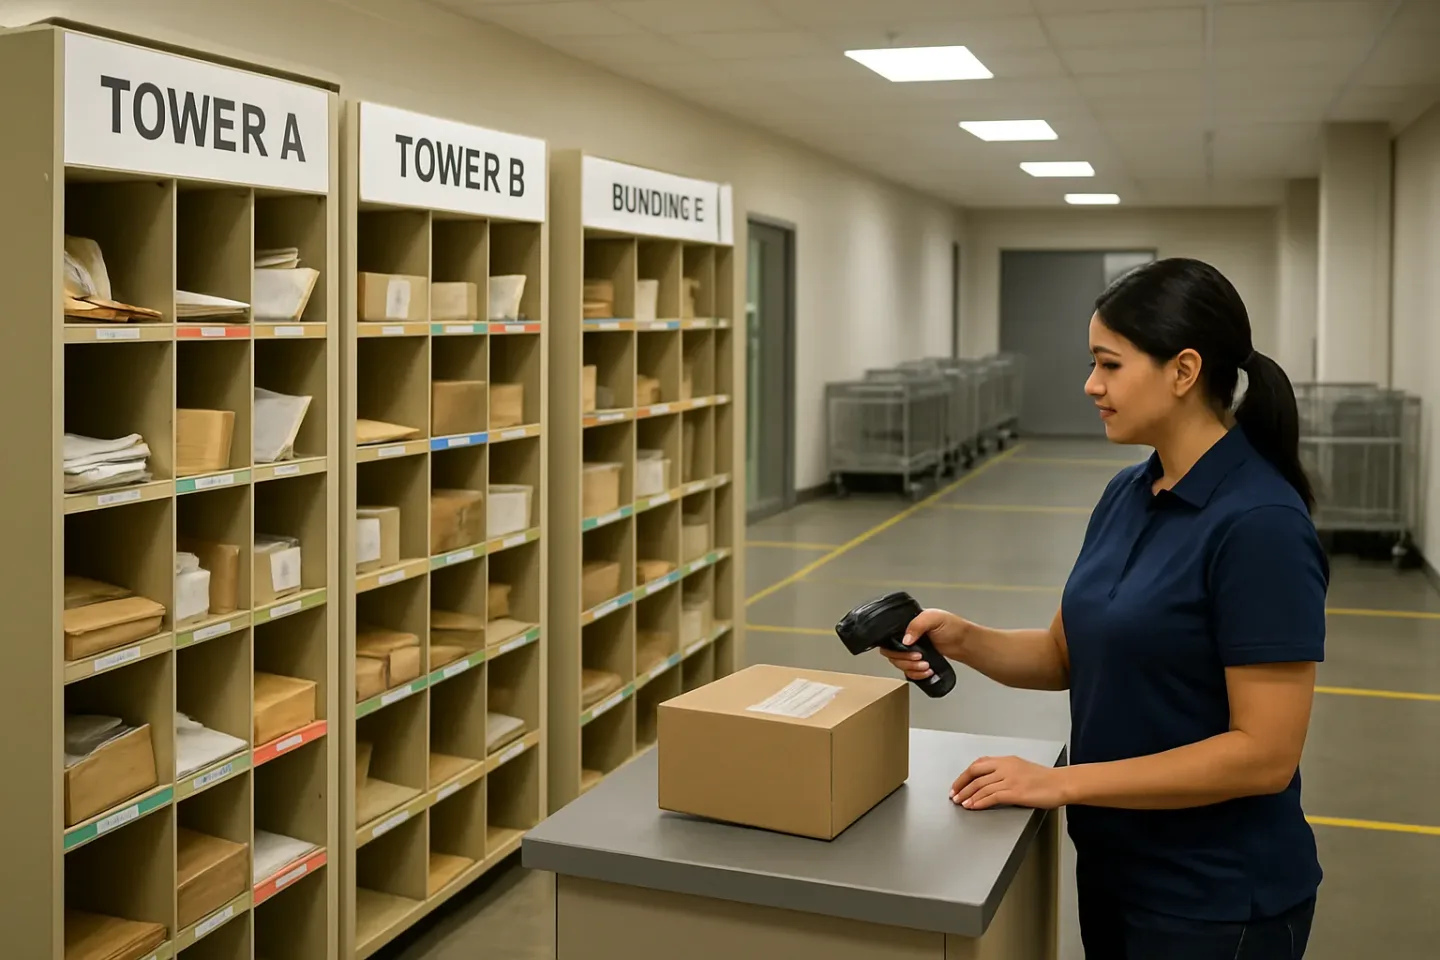
Shared mailrooms and multiple buildings: where misdelivery is born
A centralized receiving area serving multiple buildings sounds efficient until the first cross-building dispute lands on the front desk: a package was scanned in, but it was shelved under the wrong tower; a runner grabbed the wrong pile; a cart got mixed during a shift change; or an item with a partial label “found a home” on whatever shelf had space. These failures are predictable because most shared mailrooms are designed like a single-building room with extra shelves, not like a routing system.
This article lays out a practical shared mailroom routing system built around a hub-and-spoke model. The mailroom is the hub. Each building (tower, wing, residence hall, department stop) is a spoke. Instead of relying on staff memory or “we usually put it over there,” you encode building + unit into shelf locations, you stage packages by dispatch waves so piles never mix, and you quarantine anything ambiguous into exception buckets so it cannot contaminate the main flow.
The goal is not more process for the sake of process. The goal is fewer cross-building errors without extra headcount by making the correct routing decision obvious at every touchpoint: receiving, shelving, staging, and runner handoff. If your site is mixed-use, multi-tower, student housing, or a corporate campus with a centralized receiving area, this playbook is designed for the pace and constraints you actually have—busy counters, short staffing, overflow days, and frequent handoffs.
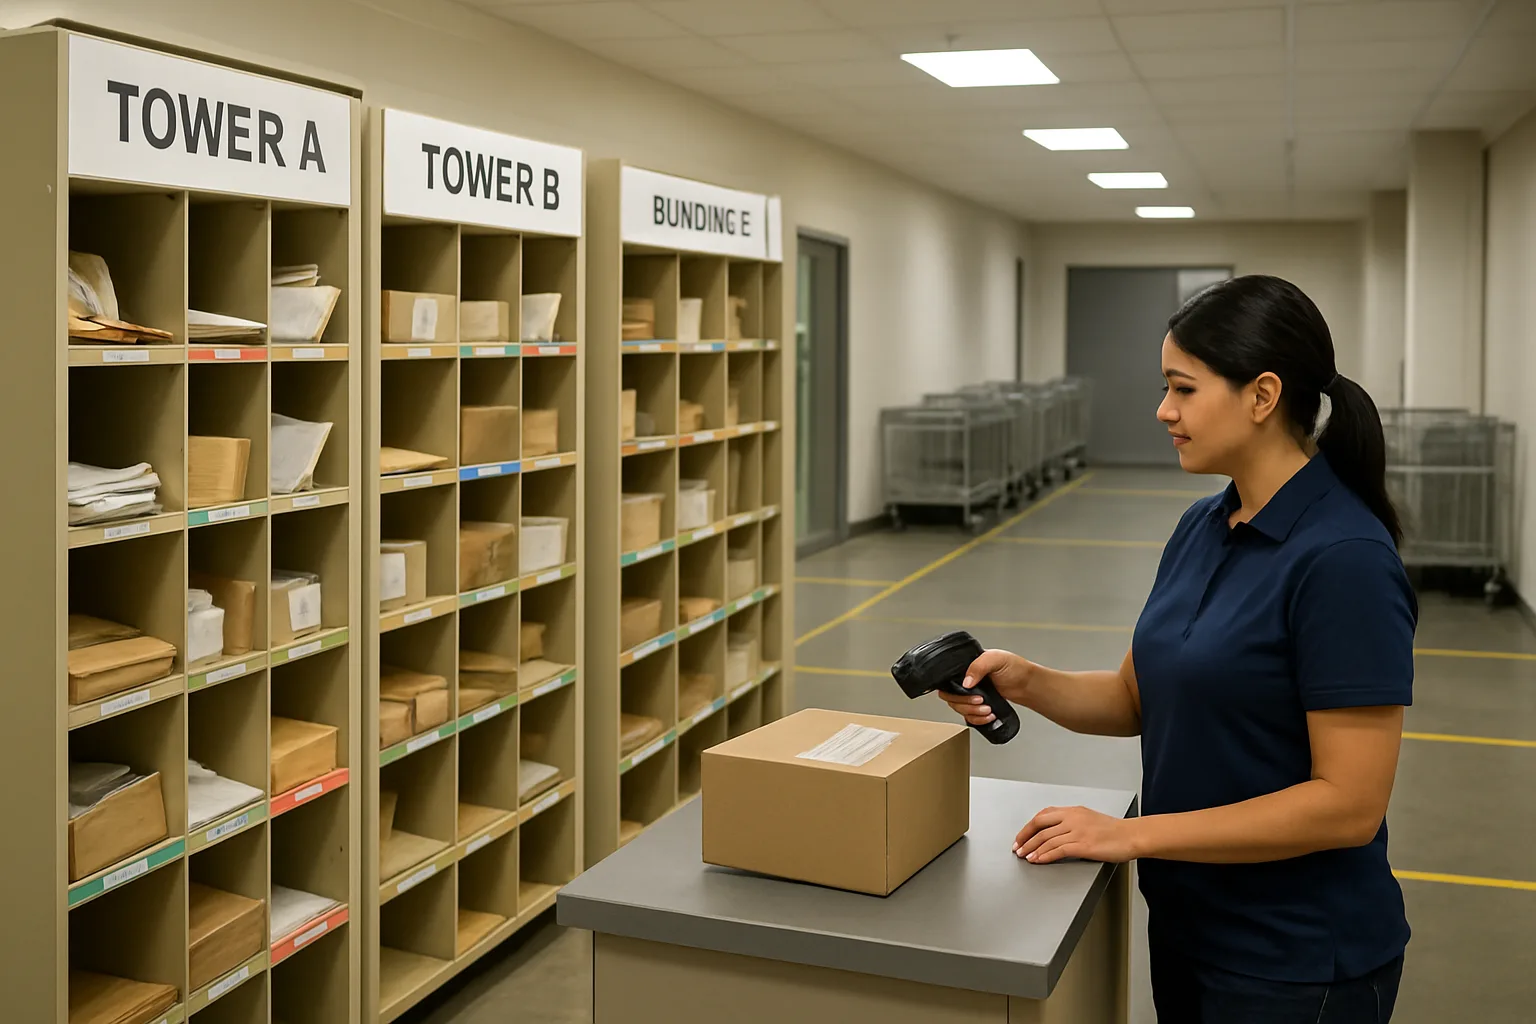
Build a hub-and-spoke map: define buildings as spokes and the mailroom as the hub
A shared mailroom routing system breaks down when people do not share the same definition of “Building A,” “Tower 2,” or “West Wing.” Before you touch shelf labels, QR codes, or software fields, lock the routing logic: what counts as a spoke (a deliver-to destination), what counts as the hub (your centralized receiving area), and where the handoff between them happens. This is the fastest way to eliminate the root cause behind cross-building disputes: ambiguous language and fuzzy boundaries.
headingNotes
subsections:[{"heading":"How to name and scope each ‘building’ in mixed-use and campus settings","paragraphs":["Start by defining the spoke list. A spoke is any destination that should never be mixed with another destination during storage, staging, or delivery batching. In a multi-tower or campus environment, that is usually a physical building with its own lobby or mail stop. But in mixed-use sites, it may be a combination of building plus use-type (residential vs. retail vs. office) if those flows must remain separated for access control or staffing reasons.","Naming rules matter because they become the language used in scan prompts, shelf locations, staging zones, and handoff logs. Keep names short, unambiguous, and consistent with how carriers label shipments when possible.","A practical approach is to pick a primary identifier that is stable (building letter/number) and a secondary identifier that clarifies the destination type when needed."]},{"heading":"Decide where the hub ends and the spoke begins (handoff points)","paragraphs":["Next, define the exact moment a package leaves the hub workflow and becomes the spoke’s responsibility. Without a clear handoff point, teams end up arguing about whether a misdelivery happened at receiving, at the staging table, on the cart, or at the destination lobby.","Choose one of these handoff models and document it in plain language:","1) Hub-to-runner handoff: The hub owns items until a runner scans/picks up a building-specific batch. After that, the runner is accountable.","2) Hub-to-destination handoff: The hub owns items until they are scanned into a destination lobby room or secure cage for that building.","3) Hub-to-tenant handoff: The hub owns items until final recipient pickup. This is common in student housing with a single pickup counter, but it requires stricter staging controls.","Whatever model you choose, make it operationally obvious. The handoff should occur at a single physical point (a pickup counter, a cart lock area, a cage doorway) so it can be supported by a simple checklist and a consistent scan step."]},{"heading":"Create a one-page routing map for staff, carriers, and runners","paragraphs":["Make the hub-and-spoke design visible. A one-page routing map is not a marketing poster; it is a working reference that reduces questions at the counter and prevents “I thought it went to the other lobby” errors during busy periods.","Your routing map should include:","- The official spoke list (each building/spoke name exactly as staff should say it)","- The accepted carrier-facing address format per spoke (what you want residents/tenants to use)","- The hub receiving point(s) (where carriers drop, where items are first sorted)","- The handoff point definition (where responsibility transfers)","- The allowed delivery paths (runner routes, carts, secure elevators, or service corridors)","- A short “if unsure, do this” rule (for example: place in Exceptions, not on shelves)","Keep this map posted where decisions happen: carrier drop counter, intake station, and runner dispatch area. Also keep a version in your onboarding packet so new staff learn the vocabulary on day one."]},{"heading":"Common edge cases: shared addresses, connected podiums, and multiple lobbies","paragraphs":["Most cross-building mistakes are born in the gray areas. Resolve these in advance and put the rules directly on the routing map.","Shared street address across towers: If multiple towers share one street address, do not rely on the street number alone. Treat each tower as a separate spoke with a distinct building code. Require the building code in internal handling even when a carrier label is vague.","Connected podium with separate towers: A connected podium often creates the illusion of “one building.” If residents use different lobbies/elevators, treat each tower as its own spoke. If a single secured back-of-house corridor feeds multiple towers, still keep spokes separate; the corridor is a path, not a spoke.","Multiple lobbies for one tower: Decide whether the lobbies are separate spokes or sub-destinations within one spoke. If packages can be safely re-routed internally by lobby staff without mixing with other buildings, keep them as one spoke with clearly defined internal drop points. If not, treat each lobby as its own spoke.","Retail and office components: Mixed-use sites commonly need a separate spoke for retail/office deliveries because access hours, receiving signatures, and storage rules differ. If you cannot enforce those differences within a single flow, separate the spoke.","Same unit numbers across buildings (e.g., 101 in Building A and 101 in Building B): This is a classic dispute generator. Your spoke definition must make building selection mandatory before unit selection in every workflow step, including manual sorting conversations.","Service suites, departments, and mail stops on campuses: For corporate campuses, a “building” may function as a department mail stop if the physical delivery is handled by internal courier routes. If that is the case, define spokes as the mail stops that runners serve, not necessarily the architectural buildings.","Temporary destinations (construction trailers, pop-up leasing offices): Add temporary spokes with clear start and end dates. When a temporary spoke expires, remove it from the spoke list and archive the routing rule so it does not linger in staff habits."]}]]},
bullets:[
- Define spokes first: every destination that must never be mixed with another destination during storage, staging, or delivery batching.
- Standardize names: short, unambiguous building identifiers that match how people actually speak and how labels typically appear.
- Pick one handoff model and one physical handoff point so accountability is clear during peak volume and shift changes.
- Publish a one-page routing map at intake and dispatch, with a single “if unsure” rule that routes ambiguity into Exceptions.
- Pre-decide edge cases (shared addresses, connected podiums, multiple lobbies, duplicate unit numbers) so staff do not improvise under pressure.
How to name and scope each ‘building’ in mixed-use and campus settings
Start by defining the spoke list. A spoke is any destination that should never be mixed with another destination during storage, staging, or delivery batching. In a multi-tower or campus environment, that is usually a physical building with its own lobby or mail stop. But in mixed-use sites, it may be a combination of building plus use-type (residential vs. retail vs. office) if those flows must remain separated for access control or staffing reasons.
Naming rules matter because they become the language used in scan prompts, shelf locations, staging zones, and handoff logs. Keep names short, unambiguous, and consistent with how carriers label shipments when possible.
A practical approach is to pick a primary identifier that is stable (building letter/number) and a secondary identifier that clarifies the destination type when needed.
Decide where the hub ends and the spoke begins (handoff points)
Next, define the exact moment a package leaves the hub workflow and becomes the spoke’s responsibility. Without a clear handoff point, teams end up arguing about whether a misdelivery happened at receiving, at the staging table, on the cart, or at the destination lobby.
Choose one of these handoff models and document it in plain language:
1) Hub-to-runner handoff: The hub owns items until a runner scans/picks up a building-specific batch. After that, the runner is accountable.
2) Hub-to-destination handoff: The hub owns items until they are scanned into a destination lobby room or secure cage for that building.
3) Hub-to-tenant handoff: The hub owns items until final recipient pickup. This is common in student housing with a single pickup counter, but it requires stricter staging controls.
Whatever model you choose, make it operationally obvious. The handoff should occur at a single physical point (a pickup counter, a cart lock area, a cage doorway) so it can be supported by a simple checklist and a consistent scan step.
Create a one-page routing map for staff, carriers, and runners
Make the hub-and-spoke design visible. A one-page routing map is not a marketing poster; it is a working reference that reduces questions at the counter and prevents “I thought it went to the other lobby” errors during busy periods.
Your routing map should include:
– The official spoke list (each building/spoke name exactly as staff should say it)
– The accepted carrier-facing address format per spoke (what you want residents/tenants to use)
– The hub receiving point(s) (where carriers drop, where items are first sorted)
– The handoff point definition (where responsibility transfers)
– The allowed delivery paths (runner routes, carts, secure elevators, or service corridors)
– A short “if unsure, do this” rule (for example: place in Exceptions, not on shelves)
Keep this map posted where decisions happen: carrier drop counter, intake station, and runner dispatch area. Also keep a version in your onboarding packet so new staff learn the vocabulary on day one.
Common edge cases: shared addresses, connected podiums, and multiple lobbies
Most cross-building mistakes are born in the gray areas. Resolve these in advance and put the rules directly on the routing map.
Shared street address across towers: If multiple towers share one street address, do not rely on the street number alone. Treat each tower as a separate spoke with a distinct building code. Require the building code in internal handling even when a carrier label is vague.
Connected podium with separate towers: A connected podium often creates the illusion of “one building.” If residents use different lobbies/elevators, treat each tower as its own spoke. If a single secured back-of-house corridor feeds multiple towers, still keep spokes separate; the corridor is a path, not a spoke.
Multiple lobbies for one tower: Decide whether the lobbies are separate spokes or sub-destinations within one spoke. If packages can be safely re-routed internally by lobby staff without mixing with other buildings, keep them as one spoke with clearly defined internal drop points. If not, treat each lobby as its own spoke.
Retail and office components: Mixed-use sites commonly need a separate spoke for retail/office deliveries because access hours, receiving signatures, and storage rules differ. If you cannot enforce those differences within a single flow, separate the spoke.
Same unit numbers across buildings (e.g., 101 in Building A and 101 in Building B): This is a classic dispute generator. Your spoke definition must make building selection mandatory before unit selection in every workflow step, including manual sorting conversations.
Service suites, departments, and mail stops on campuses: For corporate campuses, a “building” may function as a department mail stop if the physical delivery is handled by internal courier routes. If that is the case, define spokes as the mail stops that runners serve, not necessarily the architectural buildings.
Temporary destinations (construction trailers, pop-up leasing offices): Add temporary spokes with clear start and end dates. When a temporary spoke expires, remove it from the spoke list and archive the routing rule so it does not linger in staff habits.
Encode building and unit in shelf locations: a location-code standard that is hard to misuse
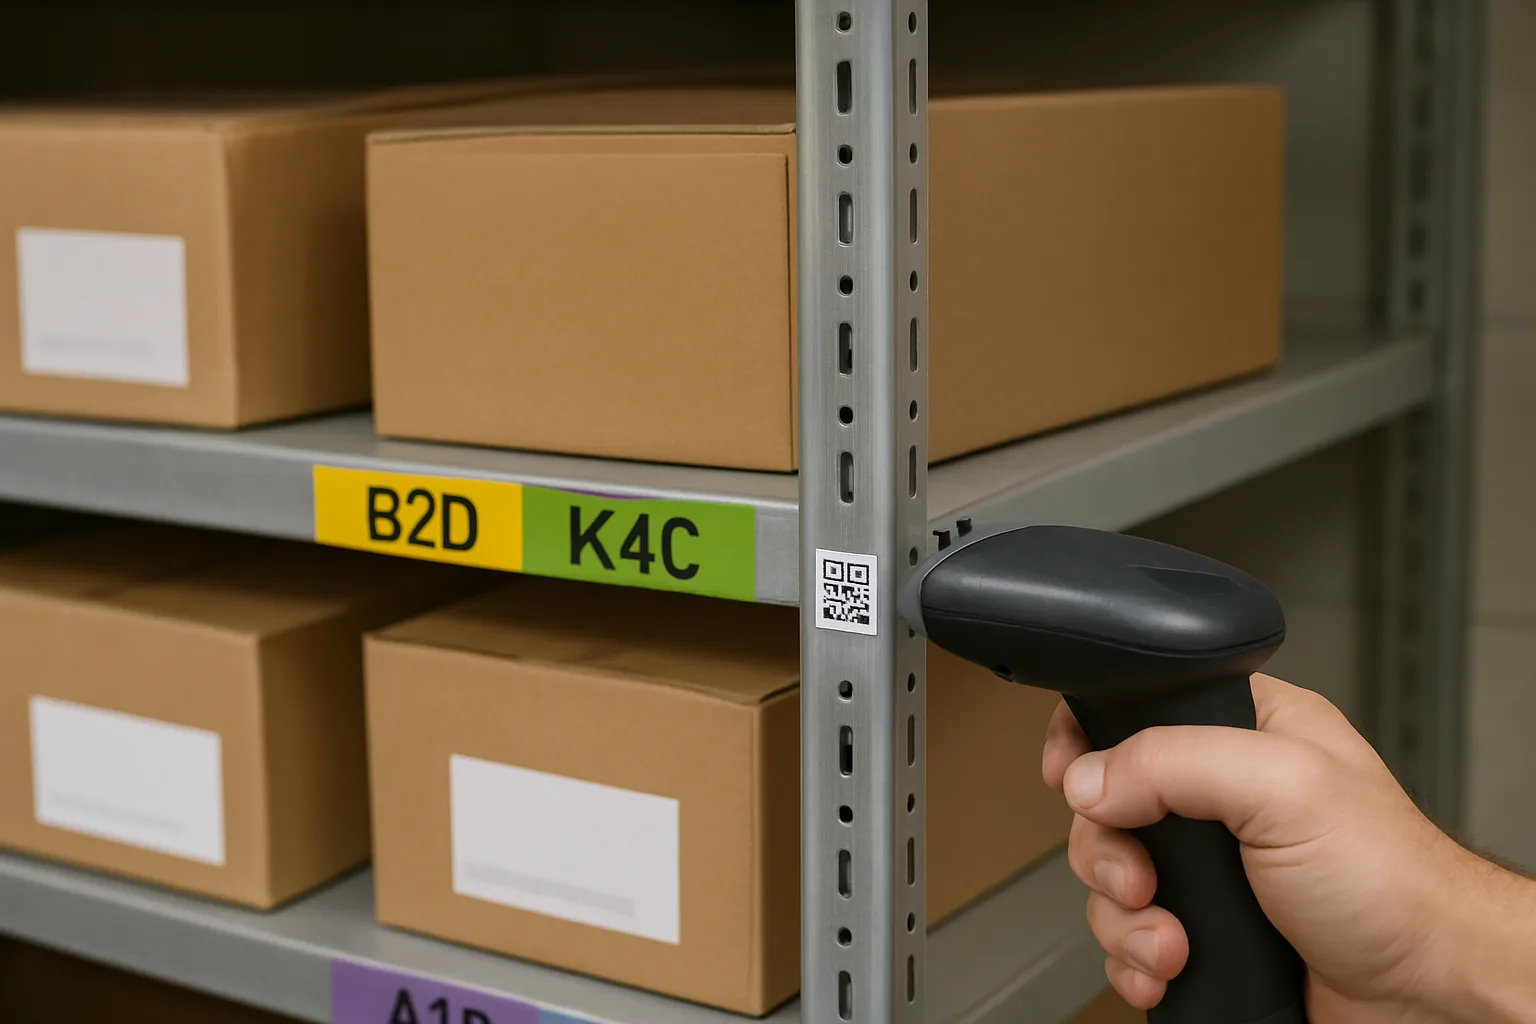
A shared mailroom routing system breaks down most often at the shelf: a package gets placed in the first open spot, the next staffer cannot tell which building that spot belongs to, and a later runner ‘proves’ it was misdelivered because the shelf itself did not enforce building separation. The fix is a location-code standard that makes the correct placement obvious at arm’s length and easy to confirm during scanning—so the shelf location carries the building+unit intent, not just the package label.
A strong standard does two jobs at once: it is human-readable (big building cue, predictable structure) and scanable (consistent codes that your logs can search and audit). Think of it as your mailroom’s addressing scheme: if it’s ambiguous, your disputes will be too.
- Design principle: building must be the first thing anyone sees on the shelf label and the first thing anyone says out loud when confirming placement.
- Design principle: every shelf location code should be unique across the entire hub (no duplicate ‘A-01’ if there are multiple ‘A’ areas).
- Design principle: locations should be stable over time; avoid renaming zones every semester or after every reflow.
- Design principle: overflow should be planned and labeled, not improvised.
A simple location format: BBB-ZZ-BAY-SHELF (and when to add UNIT)
Use one consistent format for all storage locations in the hub. A practical default is:
BBB-ZZ-BAY-SHELF
Where: BBB is the building code, ZZ is the zone within the mailroom, BAY is the shelving run or rack identifier, and SHELF is the vertical position (or bin). The point is not the exact characters; it is the consistency and the fact that building is encoded into the location itself—so cross-building shelving looks wrong immediately and scans wrong if you enforce it in your workflow logs or prompts (even with a basic scanner app).","","Recommended field definitions (keep them simple):","- BBB (Building): 2–4 characters. Examples: T1, T2, W1, W2, NTH, STH, LAB, ADM.","- ZZ (Zone): 2 characters that describe a part of the room: IN (intake), ST (standard storage), OS (oversize), CL (cold/controlled), LO (locker-staging only if you must store there).", "- BAY: 2 digits or a letter+digit (01–20, A1–D4) printed on the rack endcap.","- SHELF: 2 digits for shelf level or bin (01–06).","","Examples:","- T1-ST-03-04 means Tower 1, standard storage zone, rack 03, shelf 04.","- W2-OS-02-01 means Wing 2, oversize zone, rack 02, floor-level oversize position 01.","- ADM-ST-01-02 means Admin building mail stop, standard storage, rack 01, shelf 02.","","When to add UNIT to the location code:","Most sites should not bake unit numbers into permanent shelf labels—units change, volumes shift, and you will spend time relabeling. Instead, the shelf location is the ‘where’, while unit is captured from the package label and confirmed by scan prompts.","Add UNIT only when your storage model is permanently unit-assigned (e.g., a student housing wall of bins or a corporate mailstop grid). In that case, append UNIT at the end:","BBB-ZZ-BAY-SHELF-UNIT","Examples:","- T2-ST-05-02-1217 (fixed bin for Unit 1217)","- LAB-ST-02-03-MAIL05 (fixed bin for Mail Stop 05)","","Guardrail: if you add UNIT, do it only for areas where you can keep it accurate. Mixing fixed-unit bins and flexible bins on the same rack is a common source of misplacement. If you must mix, separate by zone (e.g., one rack is ‘fixed bins’, another rack is ‘flex bins’).
Building code labels: size, placement, color discipline, and redundancy
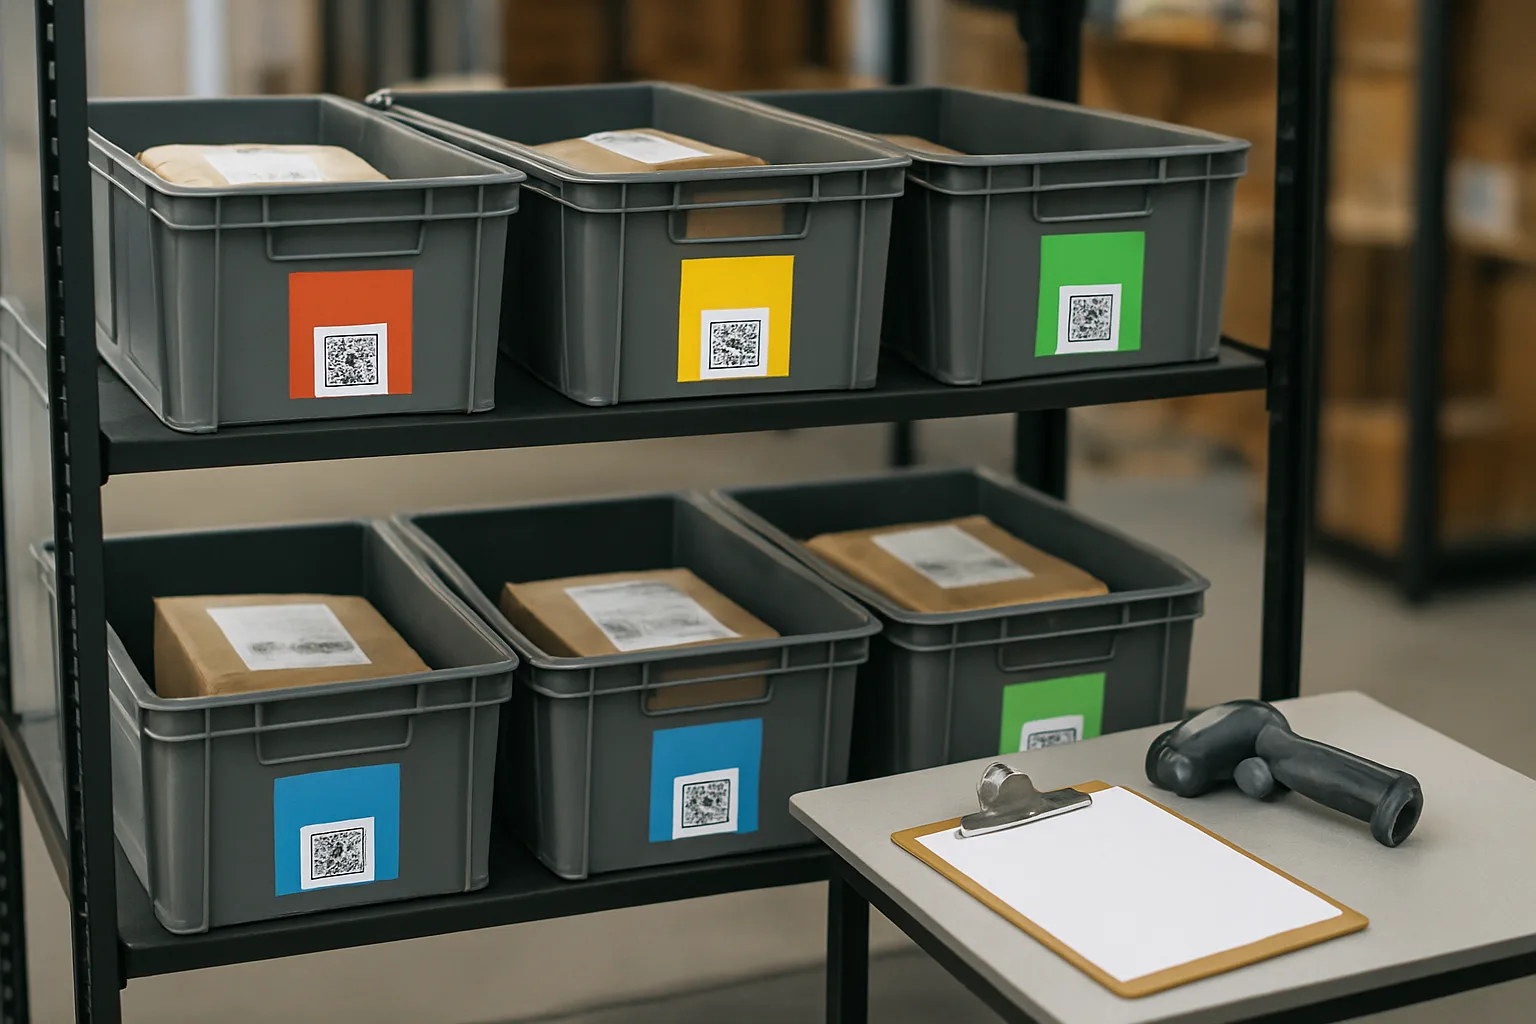
Your codes fail if staff cannot see them when busy. Treat building identification like a safety label: visible, redundant, and consistent across the room.
Size and placement rules that work in real mailrooms:
– Rack endcaps: put the building code (BBB) and zone (ZZ) on both ends of every rack run. This is what a runner sees when approaching.","- Shelf-edge labels: print the full location code (BBB-ZZ-BAY-SHELF) on the shelf edge where the package touches down.","- Eye-level cue: repeat BBB in large text at roughly eye height on the rack upright (so it is visible even when shelves are full).","","Color discipline (optional but powerful):","Color is a cue, not the primary identifier. Use it only if you can maintain it consistently:","- Assign one color per building (or per building group) and keep it the same across shelf labels, staging signs, and carts.","- Do not ‘borrow’ colors for special projects; it trains staff to ignore the system.","- If you have more buildings than distinct colors, use color for building groups (North campus vs. South campus) and rely on big-text BBB for the exact building.","","Redundancy that prevents disputes:","- Print BBB twice on shelf labels: once at the beginning (standard), and again in a bold ‘BUILDING: BBB’ line.","- Use a scannable element (QR label or barcode) that encodes the full location code. This avoids misreads of similar codes (T1 vs. TI).","- Avoid look-alike building codes. If you have Tower 1 and Tower I, rename one. If you have Building A and Annex A, choose distinct codes (BLDA and ANXA).","","Maintenance rule: label ownership matters. Assign one role (not ‘everyone’) to review damaged/missing labels weekly and replace them. When labels degrade, staff start improvising—and your shared mailroom routing system becomes a guessing game again.
Examples of workable codes (towers, wings, floors, departments)
Below are patterns that keep the building signal strong while staying flexible across mixed-use, student housing, and corporate campuses. The goal is that anyone can point at a location and answer two questions instantly: ‘Which building is this for?’ and ‘Where exactly is it?’
1) Multi-tower apartments with one central package room","- Buildings: T1, T2, T3","- Zones: ST (standard), OS (oversize), FR (fragile/handled)","Example locations:","- T1-ST-01-01 through T1-ST-10-06","- T2-ST-01-01 through T2-ST-08-06","- T3-OS-01-01 through T3-OS-03-02","How it helps: even if someone sets a T2 package on a T1 shelf, the building mismatch is visible before scanning.","","2) Connected wings with shared podium (mixed-use)","- Buildings/spokes: RESN (residential north), RESS (residential south), RET (retail), OFC (office)","- Zones: ST, OS","Example locations:","- RESN-ST-04-03","- RET-OS-01-01","Tip: treat each occupancy type as a ‘building’ if delivery rules differ (e.g., retail tenant pickup hours vs. residential notifications).",
3) Student housing with floor-based delivery batching","If runners deliver by floor bands, don’t embed floors in the shelf code unless shelves are also permanently floor-assigned. Instead, keep floor as a scanned attribute at intake or on the package record.","- Buildings: NTH, STH","- Zone: ST","- Racks: 01–12","Example locations:","- NTH-ST-06-02 (flex storage)","Optional fixed-bin area:","- NTH-ST-12-01-3A12 (fixed bin for Unit 3A12)","Tip: if you use fixed-unit bins, reserve them for high-volume dorms only; keep the rest flex to avoid constant relabeling.","","4) Corporate campus with mail stops instead of units","- Buildings: HQ1, HQ2, LAB","- Zone: ST","- UNIT field becomes MAILSTOP","Examples:","- HQ1-ST-02-04-MAIL12","- LAB-ST-01-02-MAIL07","Tip: if departments change frequently, keep MAILSTOP codes stable even if names change (e.g., MAIL12 remains MAIL12; the directory maps it to ‘Facilities’ this quarter).","","5) Multiple lobbies, one receiving hub (front desk plus back-of-house)","If there is a back-of-house storage area plus a front desk holding area, treat them as zones under the same building code—not separate buildings.","Example:","- T1-IN-01-01 (intake sort shelf)","- T1-ST-03-02 (back-of-house storage)","- T1-FD-01-03 (front desk short-term holding, if needed)","This avoids staff thinking ‘FD’ is a different spoke; it is just a zone in the hub.
Rules for overflow: what to do when a shelf is full without ‘borrowing’ another building’s space
Overflow is where well-intentioned teams quietly break routing. Someone sees open space under another building, uses it ‘just for now’, and the next shift treats it as normal. Prevent that by pre-labeling overflow capacity inside each building’s spoke and by defining what happens when that capacity is exhausted.
Overflow rules that keep building integrity intact:
– Rule 1: Never place Building B items into Building A labeled locations, even temporarily. If it is temporary, it still creates the same misdelivery risk.","- Rule 2: Each building gets a defined overflow area in each relevant zone (standard and oversize). Label it like any other location.","Example:","- T2-ST-OV-01 (Tower 2 standard overflow position 01)","- T2-OS-OV-01 (Tower 2 oversize overflow)","If you prefer to keep the BBB-ZZ-BAY-SHELF structure strict, treat OV as a BAY value:","- T2-ST-99-01 (rack 99 reserved for overflow)","- T2-OS-99-01","- Rule 3: Overflow must be physically constrained: tape a boundary on the floor or dedicate a clearly signed cart. A label without a physical boundary gets ignored on busy days.","- Rule 4: When a building’s overflow is full, escalate to a planned action—not improvisation. Options include:"," a) Open a second overflow cart for that building (same building code, new cart ID).", " b) Trigger a dispatch wave earlier for that building (move items from storage to staging, then out).", " c) Temporarily convert a neutral, pre-designated ‘surge rack’ into that building’s overflow—but only if it is re-labeled endcap-to-shelf and logged as such for the day.","- Rule 5: Do not create ‘neutral overflow’ where any building can place items. Neutral space becomes contaminated immediately and defeats your shared mailroom routing system.","- Rule 6: End-of-shift reset: overflow carts or surge racks must be cleared or revalidated. If an overflow area persists for days, it becomes a shadow system with its own undocumented rules.","","A simple, practical overflow playbook (what staff actually do):","1) Try the correct building’s standard shelf locations first.","2) If full, place in that building’s labeled overflow location (shelf or cart).","3) Mark it for the next dispatch wave (or notify the runner) so overflow drains quickly.","4) If overflow is also full, stop and escalate to the supervisor/on-duty lead for a surge decision (open a surge rack, run an extra delivery batch, or temporarily restrict intake staging until space is cleared).","","If you adopt only one overflow rule, make it this: overflow is still spoke-specific. The building code never changes just because space is tight.
Design staging zones that match dispatch waves: stop mixing before it starts
In a shared mailroom routing system, the highest-risk moment is not receiving—it is the moment packages leave “safe storage” and become a movable pile. If packages for multiple towers, wings, or departments get staged together “just for a minute,” cross-building misdelivery becomes predictable: runners grab the wrong stack, carts get topped off with whatever fits, and the handoff conversation becomes “I thought this was for Building B.”
The fix is a hub-and-spoke staging design: storage can be dense, but staging must be separated. In practice, that means staging zones are organized by building first (the spoke), then by dispatch wave (how you batch deliveries). When you do this consistently, staging zones become a visual control—anyone can see when Building C has items in the Building A lane—and supervisors can spot problems before they become disputes.
This section shows how to define staging zones, choose a wave model (AM/PM, route-based, or peak locker runs), set up a workable physical layout, and enforce simple “dispatch-ready” rules so multi-building package management stays clean even when volume spikes.
- Staging is a short-term “ready-to-move” area; storage is long-term “do-not-touch” parking—treat them differently.
- Stage by building first, then by delivery batching wave; never stage “by carrier” or “by size” without a building boundary.
- Use physical separation (lanes, bays, carts) plus unmistakable building code labels so mixing is visibly wrong.
- Only dispatch-ready packages enter staging; exceptions and unknowns stay out to prevent contamination.
Staging zones vs. storage shelves: different jobs, different labels
Storage shelves exist to keep items findable over hours or days. Staging zones exist to move items correctly in minutes. When teams treat staging like overflow storage, the staging area becomes a jumble that invites cross-building grabs—especially in a campus-style mailroom workflow where multiple runners cycle in and out.
A practical rule: storage locations can be dense and high-capacity; staging must be low-capacity and unmistakable. Staging zones should be labeled like “BUILDING A – WAVE 1” rather than like a generic “OUTGOING” table. In multi-tower communities, the building code labels should be large enough to read from the runner’s pickup point, not only from up close.
To keep roles clear, use different label conventions. For example: storage gets full location codes; staging gets bold building + wave identifiers. If staff can’t immediately tell whether an area is staging or storage, you will eventually see “temporary” piles that migrate across buildings.
Wave design: choosing batching logic (by building, floor band, or time window)
Dispatch waves are your delivery batching plan—how you group items so runners can move fast without thinking too hard. The best wave design is the one your team can execute every day without debate, even when the hub is busy.
Start with building-first logic, then choose one of these wave models based on your site’s reality:
1) Building + time window (AM/PM or hourly): Ideal when resident pickup windows, staff availability, or elevator traffic matter. Example: “Building B – AM,” “Building B – PM.” This keeps the spoke boundary intact while giving you predictable cycles for runners and front desk staff.
2) Building + route number (Route 1/2, East/West, Towers 1–3): Ideal when buildings are far apart or you have consistent runner paths. Example: “Building A – Route 1 (Floors 1–10)” and “Building A – Route 2 (Floors 11–20).”
3) Building + floor band (low/mid/high): Useful in high-rises where elevator runs dominate time. Example: “Tower C – Low (1–8), Mid (9–16), High (17–24).”
4) Building + peak locker runs (locker top-ups): Useful when you operate parcel lockers per building or per lobby. Example: “Building D – Locker Run 12:00” and “Building D – Door/Office Drop.” This prevents locker-bound items from mixing with desk pickups or office suite deliveries.
5) Building + mail stop/department (corporate campuses): Works when internal mail stops are consistent. Example: “Building E – Finance,” “Building E – Labs,” “Building E – Facilities.” The “building” spoke still matters if multiple buildings share receiving but have distinct drop points or security rules.
A simple test: if a new runner joined today, could they look at the staging plan and know what to take, where to go, and what not to touch? If not, simplify the wave model before adding more waves.
Physical layout patterns: linear lanes, U-shaped lanes, and cart-based staging
You can implement staging zones with almost any footprint if you commit to separation and clear building code labels. The goal is to remove decision-making at pickup: the runner should only have one “correct” place to pull from for their building and wave.
Common patterns that work in shared mailrooms:
1) Linear lanes (tape-on-floor or low barricade): Create parallel lanes on the floor or on long tables, one lane per building per wave. Example: Lane 1 “BLD A – W1,” Lane 2 “BLD A – W2,” Lane 3 “BLD B – W1,” etc. Linear lanes are easy to audit: any box sitting in the wrong lane is visible.
2) U-shaped lanes (per building pods): Assign each building a “pod” that wraps around a pillar or uses three sides of a work area. Inside each pod, subdivide by wave. This is effective when you have many buildings but limited sight lines; staff can stand at the mouth of the “U” and see everything for that building.
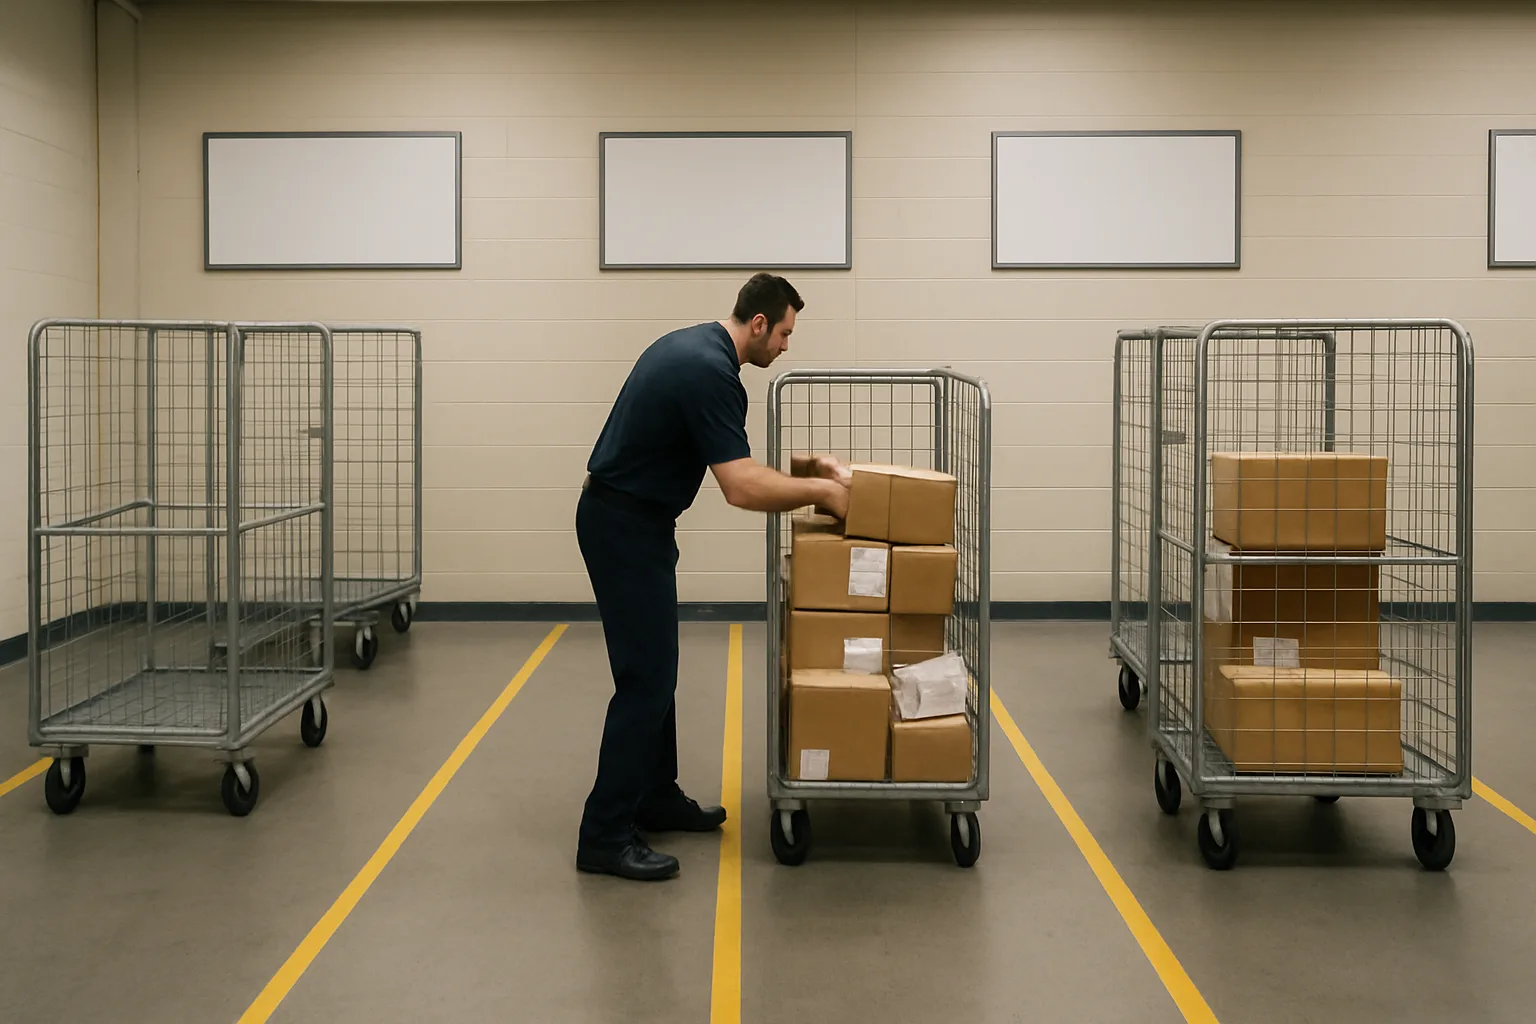
3) Cart-based staging (one-building-per-cart): Use dedicated carts as movable staging zones. Each cart is labeled with a large building code label and a wave indicator. The cart becomes the boundary: nothing from another building rides that cart, even “for one trip.” This is especially strong in campus-style mailroom workflow setups where distances are long and elevators are shared.
Practical setup details that prevent mixing:
– Make building identifiers readable from 10–15 feet: large text, consistent abbreviations, placed at eye level.
– Use physical separators (tape lines, shelf dividers, cones) so “just set it down” still lands in the right zone.
– Define a single direction of flow: receiving table → sort surface → staging zone → runner pickup. Avoid backtracking paths that cut through another building’s staging.
– If you handle oversized items, give each building a clearly marked “Oversize – Building X” spot so big boxes do not get parked in whichever open space exists.
If your site has extremely high volume, a hybrid approach works well: cart-based staging for runners plus a small fixed staging lane for each building to buffer until a cart is ready. The key is that both buffers still respect the building boundary.
Dispatch-ready criteria: what must be true before a package enters a staging zone
Staging zones should only contain items that are fully routable for that dispatch wave. If “maybe Building A” or “unit unknown” items enter staging, you are effectively seeding cross-building disputes—because runners will assume everything in their zone is safe to take.
Use dispatch-ready criteria that staff can apply quickly, without slowing the hub. A workable standard looks like this:
Dispatch-ready checklist (keep it simple and consistent):
– Building is confirmed: the label clearly indicates the correct building (or your internal building code is confidently mapped).
– Unit/suite/mail stop is present and legible: no guessing, no “probably 1203.”
– The item is assigned to the correct wave: it matches the current delivery batching rules for that building.
– The item is not an exception: anything with missing identifiers, duplicate names, or carrier mismatch stays out of staging.
– Size is compatible with the planned move: if it cannot safely go on the cart for that wave, it gets routed to that building’s oversize staging spot (still within the correct building boundary).
Operationally, this means the “staging decision” happens before the package hits the lane or cart. When volume spikes, staff can still keep the system clean by staging fewer items more accurately (building-by-building), rather than trying to stage everything at once and sorting later.
A final control that helps: treat staging zones as “dispatch-only,” not “holding.” If a wave is delayed, do not allow staging to become a parking lot that accumulates mixed time windows. Instead, cap how much can sit in staging for each building/wave, and push the remainder back to the correct storage locations until the next dispatch cycle begins. That single rule prevents the staging area from turning into an unsupervised cross-building mixing bowl.
Use exception buckets for missing identifiers: quarantine ambiguity and resolve fast
In a shared mailroom routing system, most cross-building disputes start the same way: one ambiguous package gets shelved “somewhere for now,” then it contaminates the main flow. The fix is not more detective work at the counter; it is a quarantine lane that keeps unknowns out of building shelves and staging zones until they are resolved.
paragraphs are not the point of exception handling—speed and separation are. Exception buckets create a controlled off-ramp so your multi-building package management process stays clean: clearly labeled bins, a short triage script, and simple aging rules so nothing sits indefinitely.
Treat exceptions as their own mini-workflow with its own locations, scans, and ownership. That is how a campus-style mailroom workflow stays fast even when carriers bring imperfect labels.
- Principle: If building or unit is not confidently known, it does not touch any building-coded shelf or staging zone.
- Make exceptions visible: physical bins or shelves in a designated “EX” area, not mixed into normal storage.
- Make exceptions scannable: each exception bucket is a location code (EX-E1, EX-E2, etc.) so it can be tracked like any other location.
- Keep resolution lightweight: aim to identify, re-label, and route without turning the front desk into a research desk.
Exception bucket types and labels (E1 No Building, E2 No Unit, E3 Duplicate Names, etc.)
Start with a small, standard set of buckets that match the real failure modes you see at receiving. Each bucket should have (1) a plain-English name on the sign, (2) an alphanumeric code staff can say out loud, and (3) a scannable location label (QR label works well) so the package is never “floating.”
Place these buckets at the hub, near receiving, but physically separate from normal shelving. The separation is what prevents cross-building misdelivery when the mailroom is busy. Keep the labels consistent with your building code labels so staff do not confuse an exception code with a building code.
Recommended starter set (use what fits your site)
Use these as a baseline and adjust to your recurring issues. The goal is coverage without complexity.
E1 No Building: Label has a name and maybe a unit, but no tower/building identifier (common when buildings share an address).
E2 No Unit: Building is known, but unit/suite/department is missing.
E3 Illegible/Incomplete: Smudged label, torn label, barcode won’t scan, or handwriting only; cannot confidently read building/unit/name together.
E4 Duplicate Names: Two or more residents/tenants match the same name across different buildings or units (e.g., “J. Kim” appears in Building A and Building C).
E5 Carrier Mismatch/Unrecognized: Drop-off does not match expected carrier paperwork or looks like it belongs to a different property or mail stop (especially on corporate campuses).
E6 Oversize Pending Routing: Item is too large for standard shelves and is waiting for identification before it can be placed in the correct building’s oversize area.
Operational tip: Make E-buckets distinct from staging zones. Staging zones are “ready to dispatch.” Exception buckets are “not safe to dispatch.” Use different signage styles so nobody mistakes one for the other.
A fast triage workflow: what staff do in 60 seconds vs. what gets deferred
The most important rule is timeboxing. At receiving, you cannot afford unlimited research per package. Use a two-tier workflow: a 60-second triage (done immediately) and a deferred resolution block (batched later by a designated person or during low-traffic minutes).
This preserves throughput at the hub while still resolving exceptions quickly enough to prevent pickup delays and “where is my package” tickets.
60-second triage (do now, at the counter)
Train staff to do only the checks that are fast and reliable. If it cannot be solved quickly, it goes to the correct exception bucket and the main line continues.
1) Read the label once, slowly: look specifically for building code cues (tower letter, street line 2, “Dorm,” “Suite,” department) and unit/suite.
2) Check for a known building keyword list: for example, “North Tower,” “NT,” “Bldg C,” “Residence Hall West.” If it matches one building clearly, you have building; if not, you do not.
3) Look for internal reference marks: sometimes prior deliveries include a resident ID, department code, or mail stop on the label or packing slip visible through the box window. Use only what is already visible—do not open packages as a routine step unless your site policy explicitly allows it for address verification and it is documented (many sites avoid this).
4) If still unclear, scan/enter minimal data and put it away: capture carrier + recipient name + any visible identifier, then assign the package to EX-E1/E2/E3/etc. location immediately.
5) Place a quick “needs info” sticker (optional): a small note like “Missing unit” can help during the deferred block, but do not rely on sticky notes as the system of record. The bucket location is the control.
Deferred resolution (batch later)
Set two or three daily “exception sweeps” (for example: mid-morning, mid-afternoon, end-of-day). During a sweep, a staff member works the EX area in priority order, resolves what they can, and either routes packages into the correct building shelves/staging zones or returns them to carrier.
This is also where you handle any outreach (tenant contact, department email, resident portal message) so those actions do not interrupt peak receiving.
Resolution playbooks: contacting residents/tenants, directory checks, and return-to-carrier rules
Each exception type should have a short playbook so staff do not improvise. The purpose is consistency: the same package should be resolved the same way regardless of shift, which reduces disputes when a package crosses buildings. Keep the steps written on a laminated card at the EX area.
E1 No Building (name present, building unclear)
Goal: determine the correct building without guessing.
Playbook:
1) Check your property directory or tenant list by exact name and common variants (e.g., “Mike” vs. “Michael”). If there is one match, assign building and proceed to unit verification if needed; if multiple matches, treat as E4 Duplicate Names and do not choose one at random (this is a common source of cross-building misdelivery). 2) Look for previous delivery history in your logs (same name + same carrier tracking often repeats). 3) If still unclear, contact the recipient using the contact method your site already supports (text/email/phone or internal department channel). Keep the message template short: “We received a package for [Name]. Reply with your building + unit to route it.” 4) If you cannot reach the recipient within the aging window you set (see aging rules), return to carrier or follow your site’s unclaimed package policy.
E2 No Unit (building known, unit missing)
Goal: find the unit or mail stop quickly; avoid shelving in a “building general” area that becomes a black hole.
Playbook:
1) Search directory by name within that building only. If one match, assign unit and re-route. 2) If multiple matches within the same building, treat as E4 Duplicate Names (unit is required). 3) If the label has a phone/email, attempt contact with a single outbound message. 4) If it is a corporate campus, route to the department mail coordinator only if your policy allows it and the department is clearly indicated on the label; otherwise keep in EX-E2 until confirmed.
E3 Illegible/Incomplete (cannot confidently read label)
Goal: re-establish readable identifiers without inventing them.
Playbook:
1) Try a second scan attempt (some barcodes scan even if text is smudged). If scanning reveals tracking details that help identify recipient/building (e.g., carrier system shows recipient name/address line), use that information per policy. 2) If carrier paperwork or manifest exists for that drop, compare tracking numbers (do not slow down the carrier at the counter; do it during exception sweeps). 3) If you still cannot identify, mark as “unable to identify” and return to carrier in the next scheduled pickup cycle. Do not shelf it under any building code labels just to get it out of the way.
E4 Duplicate Names (more than one plausible recipient)
Goal: avoid the most expensive mistake: routing to the wrong building when the label is technically “complete enough” to tempt a guess.
Playbook:
1) Require a second identifier to resolve: unit number, phone number, email, company/department, or carrier-provided address confirmation. 2) Contact the recipient(s) using a neutral message: “We have a package for [Name]. Reply with your building + unit to confirm.” 3) If no response by the aging threshold, return to carrier or hold per policy; do not “pick the most likely building.”
E5 Carrier mismatch/unrecognized (possibly wrong property)
Goal: prevent your hub from becoming storage for other sites’ deliveries.
Playbook:
1) Verify whether the address line matches any of your buildings/spokes. If it does not, isolate and return to carrier promptly. 2) If it partially matches (shared street address with a neighboring complex), treat as E1 and attempt a quick confirmation; if unclear, return to carrier rather than risk cross-property handoff. 3) Document the return reason consistently (“Wrong property” vs. “Insufficient address”) so patterns can be escalated with carrier reps if needed.
Aging rules: when exceptions escalate, get re-labeled, or get sent back
Exceptions fail when they become permanent. Aging rules keep the EX area from turning into a second mailroom. They also protect staff: when residents ask why an item was returned, you can point to a clear, consistently applied policy.
Define aging in two dimensions: time since receipt and confidence level. A package missing both building and unit should age out faster than a package that is clearly for Building B but missing a unit.
Practical aging framework (adjust to your operations)
Use simple tiers that staff can remember and enforce. The key is consistency, not perfection.
Scan prompts and handoff checks: make the right action the easiest action
A shared mailroom routing system fails most often at the human-speed moments: a carrier line forming, a front-desk phone ringing, a runner arriving early, or a shift changing mid-sort. The fix is not longer training. It is short scan prompts and handoff checks that force building correctness in the flow, so a package cannot quietly drift from one building’s spoke into another.
The guiding principle for multi-building package management is simple: every transfer should confirm the building twice (once from the label, once from the location or staging zone). When those two do not match, the item is paused into an exception path instead of being ‘made to fit.’
- Design prompts to be answerable in 2 to 5 seconds (fast enough for peak).
- Require building selection before unit, and unit before final location (prevents ‘I’ll fix it later’).
- Use the same building codes everywhere: shelf labels, staging zones, carts, dispatch sheets, and QR labels.
- Treat mismatches as a process event, not a person problem: route to an exception bucket, then resolve.
- Keep checks lightweight and repeatable: one-line confirmations, not audits.
Receiving prompts: capture building first, then unit, then location
Receiving is where cross-building disputes are either prevented or guaranteed. If staff can scan a package and immediately choose any shelf, they will sometimes choose the closest shelf under pressure. Instead, structure receiving as three short confirmations that mirror your hub-and-spoke map: building, then unit (or stop), then placement.
Operationally, this looks like a simple set of prompts your team runs in the same order every time, whether they are handling five items or five hundred. Even if you are not changing software, you can implement the same logic with a clipboard intake sheet and location QR labels.
Shelving prompts: ‘Does scanned location building match label building?’
Shelving is the most common mis-shelve point because it feels ‘done’ once the item leaves the intake counter. The goal is to make wrong-building shelving feel obviously wrong before it happens by forcing a building match at the moment of placement.
Use a single, consistent shelf interaction: scan item, scan shelf location code, confirm building match. If the building in the location code differs from the building captured at receiving, shelving stops and the package is routed to a clearly labeled exception bucket (for example, E1 No Building or E4 Building Mismatch). This is how a campus-style mailroom workflow stays clean without relying on memory.
Practical scan prompt wording that works at the shelf can be blunt and binary: Label building: A. Scanned location: B. Mismatch. Move to Exception: Building Mismatch. The staff member does not need to decide what ‘probably’ happened; the system tells them what to do next.
Runner pickup: cart-level verification and ‘one-building-per-cart’ rule
Dispatch is where mixing becomes expensive, because a single wrong item can trigger a cross-building dispute and a second trip. A staging zone only prevents mixing if pickup reinforces it.
A simple rule that scales in mixed-use sites and corporate campuses is one-building-per-cart (or one-building-per-bag/bin) during delivery batching. If a route truly needs multiple buildings, split by hard containers: Cart 1 = Building A only, Cart 2 = Building B only. Label the cart with a large building code and, if helpful, a wave identifier (for example, A-W1).
At pickup, do a cart-level verification instead of re-checking every package in detail: the runner scans the cart label (building code) and then spot-verifies a small set of packages from the top, middle, and bottom of the load. If any scanned package building differs from the cart building, the cart is not released until the mismatch is removed and the staging zone is re-checked. This keeps delivery batching fast while still catching the most damaging errors.
Shift-change and accountability: micro-checklists that prevent silent drift
Shift changes are where good routing systems quietly degrade. One person knows ‘we are staging Building C in the overflow lane today’ and the next person does not. A micro-checklist makes that knowledge explicit without creating blame or paperwork.
Keep shift-change checks to 60 to 90 seconds and focus them on building separation and exception control. The objective is to ensure that staging zones and shelves still reflect your building code labels and that exception buckets have not become a hiding place for unresolved items.
A practical approach is to assign ownership by role rather than person: the outgoing desk lead verifies staging zones and exceptions; the incoming runner verifies carts and wave labels; both acknowledge the handoff on a single line (time, initials). This preserves accountability while staying realistic for front-desk pace.
Frequently Asked Questions
How do we pick building codes so carriers and temps do not confuse them?
Use 2–4 character codes that are visually distinct and non-sequential when buildings are adjacent (e.g., NTH, STH, EAS, WES; or T1, T3, T5 if T2/T4 do not exist). Avoid B1/B2 if there is also “Building 1/2” in resident language. Publish a one-page code legend at the dock, on carts, and in the package room.
What is the minimum physical setup to start a shared mailroom routing system without redoing the whole room?
Start with: (1) one clearly marked shelf section per building, (2) one staging lane per building (tape on floor is fine), (3) two exception bins (No Building, No Unit), and (4) one cart per building for dispatch. This gives separation at the four failure points: shelving, staging, dispatch, and handoff.
How do we handle lockers when multiple buildings share the same locker wall?
Treat lockers as a spoke endpoint: assign locker banks (or ranges) to specific buildings and label the bank with the building code. If lockers must be shared, reserve time windows by building (wave slots) and require a quick pre-load check: count items by building before loading, then load only that building in the slot.
What should we do with mis-sorted packages discovered on delivery (already on the wrong cart or at the wrong lobby)?
Do not “drop anyway.” Use a simple recovery loop: bring it back to the hub or a clearly labeled “Return to Hub” pouch on the cart, scan/log it as misroute, then re-stage into the correct building lane on return. This creates a consistent correction path and prevents cross-building disputes caused by convenience drops.
How can we reduce exceptions caused by missing unit numbers without slowing receiving?
Use a two-speed rule: spend up to 60 seconds checking the directory/tenant list for an exact match; if not resolved, place in the exception bin and continue the line. Batch research exceptions at set times (e.g., 11:00 and 15:00) so receiving stays fast while exceptions still clear the same day.
What is a simple audit routine to catch drift after the first few weeks?
Do a 10-minute daily sweep: pick 5 items from each building shelf and confirm building code on label matches shelf section; check each staging lane for mixed-building items; verify exception bins are not leaking into shelves. Track only counts (no blame): mis-shelved, mixed-lane, unresolved exceptions older than 48 hours.
Requested CTA
Tell me what CTA you want here (for example: “Book a demo,” “Get the checklist,” or “Talk to an expert”) and where it should link. I will tailor the CTA to TrackNest and this article’s hub-and-spoke routing playbook without inventing capabilities or outcomes.
What changes when the hub-and-spoke routing rules do the work
Cross-building misdelivery drops when your operation stops treating “where should this go?” as a judgment call and starts treating it as a controlled route. The hub-and-spoke approach makes building ownership explicit, makes shelving errors visibly wrong (because the location code itself carries the building), prevents mixing by separating staging zones by dispatch waves, and keeps unknowns from polluting everything else through clearly labeled exception buckets.
If you want to start small, pilot the system on two buildings that generate the most disputes (or the most volume). Create building codes, label a limited set of shelves with the new location format, designate one staging lane per building for one dispatch wave, and stand up two or three exception buckets for missing identifiers. Run it for a week, review what went to exceptions and why, then expand the same standards to the rest of the spokes.
Sustainability comes from simple compliance checks, not constant supervision. A short “right before it leaves the hub” checklist—building confirmed, location code matches building, staged in the correct wave zone, and a clean handoff—keeps the workflow from drifting back into ad hoc sorting. When the codes, zones, and scan prompts align, the mailroom stops being a source of cross-building arguments and becomes a reliable routing hub.