
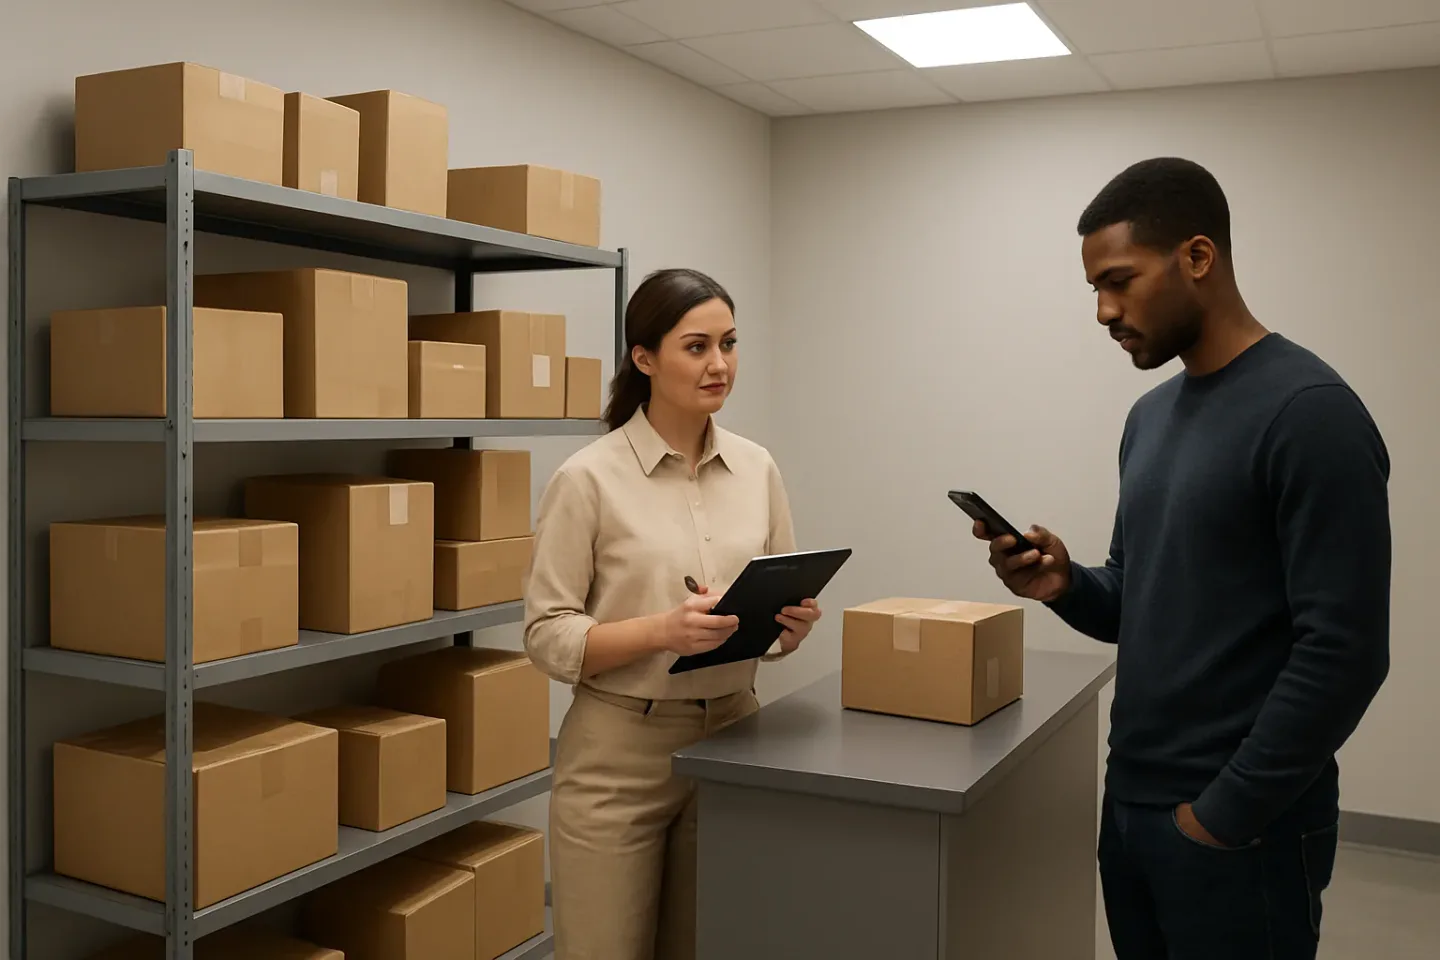
Resident Communication That Prevents ‘Missing Package’ Tickets: A 6-Message Library Tied to Specific Failure Modes
Most “missing package” tickets are not actually about a missing package. They’re about a mismatch between what happened in your workflow (carrier label issues, batch check-in, overflow moves, locker deliveries, front-desk handoffs) and what residents assume happened (“it says delivered, so it must be ready on the shelf”). When those two stories collide, your team spends time re-checking shelves, replaying handoffs, and answering the same question in slightly different ways.
This article gives you a small, reusable set of apartment package room resident messaging templates that prevent disputes before they start—by mapping each message to a specific operational failure mode. Instead of generic package pickup reminders that residents learn to ignore, you’ll use “when to send” rules that only trigger messages when a known risk is present (like premature notifications during rush hour, mislabels, or a lockers vs. room mismatch).
The goal is simple: fewer missing-package tickets, less back-and-forth, and clearer resident expectations for package rooms—without sounding defensive. Each template is designed to (1) state what you know in a neutral way, (2) tell the resident exactly what to do next, and (3) give a clean escalation path when the issue is truly unresolved.

Why ‘Missing Package’ Tickets Happen: 5 Failure Modes Behind Most Disputes
Most “missing package” tickets are not theft and not resident error. They are a mismatch between what the resident assumes happened (it arrived, it’s on the shelf, it should be searchable) and what actually happened in the workflow (it arrived but wasn’t shelved yet, it was labeled wrong, it was routed to lockers, or it changed hands internally).
The fastest way to reduce back-and-forth is to diagnose the likely failure mode first, then use a message that fits that reality. Generic “please check again” notes often escalate disputes because they don’t explain the operational gap. Use the map below to identify what probably happened and what proof points your team should look for before responding.
- Use this section as a triage checklist: identify the failure mode, verify the two or three telltale signs, then send the matching resident message (instead of a general reminder).
- Each failure mode has an operational cause, a resident-facing symptom, and a small internal verification step that prevents unnecessary follow-ups.
- If you can’t confirm a failure mode quickly, don’t guess in writing—ask for the minimum missing details (carrier, tracking number, delivery date/time, unit name/number) and route it to the right internal check (locker portal, front desk log, shelf zone scan, etc.).
Failure mode 1: Mislabel or wrong unit on the carrier label (or QR label)
What it is: The package arrived on-site, but the label points to the wrong unit, wrong building, or an incomplete resident name. This can happen from resident autofill errors, carrier relabeling, marketplace formatting, or a QR label being applied to the wrong box during busy check-in.
Why it creates “missing package” tickets: The resident is sure it’s theirs (tracking says delivered), but staff can’t match it to the unit, so it gets staged in “unknown,” set aside for research, or checked in under the wrong unit. The resident looks in the package room and doesn’t see it.
Telltale signs to look for: (1) Tracking shows delivered to your address, but the label name/unit doesn’t match any current resident record. (2) Multiple packages with similar names (Smith/Smyth) or missing unit numbers. (3) A QR label is present but the printed carrier label is for a different resident/unit. (4) The package is sitting in an “exceptions/unknown” area or logged as “unassigned.”
Failure mode 2: Premature notification (scan-in before shelved, batch check-in, rush hour)
What it is: A resident receives a pickup notification before the package is physically findable in the room. Common causes include scanning at the front desk before transport to the package room, batch check-in of a cartload, or a rush-hour “scan now, shelve later” workflow.
Why it creates “missing package” tickets: Residents act on the first message. They arrive quickly (often within minutes), don’t find it, and open a ticket while the package is still in a cart, still at the front desk, or waiting to be sorted into shelf zones.
Telltale signs to look for: (1) The ticket arrives within 0–60 minutes of the notification. (2) The package shows as received/checked in but has no shelf location, zone, or handoff note. (3) Staff recall a recent delivery surge or a cart staged behind the desk. (4) The package is found later the same day after shelving catches up.
Failure mode 3: Shared household pickups (roommates, partners, caregivers) creating confusion
What it is: Someone else retrieves the package—sometimes correctly (authorized roommate/partner), sometimes informally (a friend with a key, a caregiver), and sometimes by accident (similar unit numbers or a quick grab during a busy pickup window). Even when it’s legitimate, the recipient may not communicate it back to the primary resident.
Why it creates “missing package” tickets: The resident believes no one has picked it up, because they personally didn’t. If your workflow allows alternate pickup (or if residents share access codes/keys), the package can leave the room without the resident’s awareness.
Telltale signs to look for: (1) The package is logged as picked up, but the resident claims they did not pick it up. (2) Multiple adult names on the lease/unit, or frequent “can my partner pick up” questions. (3) The package disappears soon after the first pickup window (after work hours) rather than immediately after delivery. (4) There’s a sign-in log, camera view, or handoff note showing a different name than the ticket submitter.
Failure mode 4: Locker vs. package room mismatch (carrier used lockers; staff checked into room, or vice versa)
What it is: A package is delivered into lockers but the resident goes to the package room (or the reverse). This often happens when carriers choose whichever option is available (lockers, front desk, package room), or when overflow shifts deliveries temporarily. It can also happen when a carrier marks “locker delivery” even if the parcel was left elsewhere, creating confusion.
Why it creates “missing package” tickets: The resident searches in the wrong place, and your team answers from the wrong system. If you have both lockers and a room, “delivered” is not specific enough to indicate location.
Telltale signs to look for: (1) Carrier tracking mentions “locker,” “parcel locker,” “Amazon Hub,” or includes an access code. (2) Your locker system shows a deposit event around the same time the carrier marked delivered. (3) The package room has no record or no physical match, but lockers show an uncollected parcel for that unit. (4) Residents report “I never got a locker code” (often a misdirected email/phone number issue or a locker deposit under the wrong recipient name).
Failure mode 5: Handoff gap at the front desk (left with concierge, moved during overflow, reshelved)
What it is: The package arrived and was handled correctly at first, but there’s a gap during internal handoff or relocation—left with concierge for later shelving, moved to overflow storage, relocated to cold storage/oversize, or reshelved when the room gets crowded. Any move without a consistent note/location update creates a “now you see it, now you don’t” problem.
Why it creates “missing package” tickets: Staff and residents are searching different “last known locations.” Residents assume the package room shelf is the source of truth; your team may remember it being behind the desk, in overflow, or on an oversize rack that isn’t obvious to residents.
Telltale signs to look for: (1) A delivery day with overflow, maintenance work, inspections, or a staffing shift change. (2) Packages temporarily staged behind the desk or in a back room. (3) Oversize items (TVs, furniture, bulk boxes) that get moved for safety. (4) The package was found later in a nonstandard location (cold storage, oversize corner, manager’s office) or after a reorganization sweep.
The Messaging Rules: ‘When to Send’ Triggers That Prevent Spam (and Reduce Back-and-Forth)
Most resident frustration comes from timing, not tone. If your apartment package room resident messaging templates fire too early, too often, or without a clear “what to do next,” residents stop reading and tickets go up. The goal is fewer, higher-signal messages tied to specific workflow moments—especially the moments where a “missing package” assumption is most likely.
Use the rules below as send logic. They’re designed to support missing package prevention by aligning delivery confirmation communication with what actually happened operationally (checked in vs. shelved, locker deposit vs. package room staging, front desk handoff vs. resident pickup).
Rule set: Event-based triggers (check-in, shelf placement, locker deposit, handoff)
Send messages only when an operational event changes what the resident can do next. If there’s no new action a resident can take, don’t message—log it internally and wait for the next event.
Recommended event triggers and what each one should say:
1) Carrier shows “Delivered” but you have no on-site record (no scan, no front desk log). Trigger: delivery confirmation appears (email from carrier, resident report, or carrier portal), but package is not in your intake flow. Message purpose: set expectations and request the one piece of evidence you need (tracking number + delivery photo). This prevents a prolonged back-and-forth and anchors the timeline clearly without sounding defensive (critical for delivery confirmation communication). 2) Package is checked in (scan/QR label created) but not yet placed on a shelf. Trigger: intake scan complete; shelf location not assigned. Message purpose: prevent premature “ready for pickup” assumptions during rush hours or batch check-in. 3) Shelf placement is confirmed (zone/rack assigned). Trigger: shelf location assigned or package physically placed in a named zone. Message purpose: this is your true “ready” moment; it’s also the best moment for a short pickup instruction. 4) Locker deposit confirmed. Trigger: locker system event indicates compartment number/code sent. Message purpose: stop residents from searching the package room; include locker-specific pickup steps and a reminder that staff cannot see locker codes. 5) Front desk / concierge handoff logged. Trigger: package was accepted at the front desk or temporarily staged elsewhere, and a handoff note exists (name, time, location). Message purpose: direct the resident to the right pickup point and reduce “I went to the package room and it’s not there” tickets. 6) Package moved (overflow to alternate shelving). Trigger: reshelved to overflow, cold storage, oversize area, or behind-desk holding. Message purpose: only send if the move affects resident pickup behavior (different door, different hours, staff assist required).
Rule set: Time-based triggers (X hours after arrival; end-of-day catch-up)
Time-based messaging should exist to close gaps when events happen faster than your ability to process them (or when residents tend to check first and ask questions second). Use time triggers to prevent confusion, not to nag.
Practical timing rules (adjust to your building hours and delivery patterns):
A) “Processing window” message (only if you send arrival notices). Trigger: a package is scanned in but not shelved after a defined window. Common starting point: 60–120 minutes during peak delivery, 30–60 minutes off-peak. Purpose: tells residents it’s on-site but not yet pickup-ready, which reduces walk-ins and “missing package” tickets caused by premature notification. B) End-of-day catch-up message. Trigger: end of business day, packages remain in “received/unchecked location” status (e.g., scanned but no shelf zone, or left at front desk for later shelving). Purpose: sets expectations overnight so residents don’t assume mishandling. Keep it short and factual. C) Pickup reminder (targeted, not daily). Trigger: package sits unclaimed beyond a reasonable threshold for your property (often 48–72 hours). Purpose: package pickup reminders that reduce room congestion and mis-shelving risk. Use a single reminder first; a second reminder only for longer dwell times or per policy. D) Weekend/holiday hold notice (only when it changes access). Trigger: package arrives outside staffed hours and residents cannot access the holding area. Purpose: prevents “it says delivered but office is closed” tickets by clarifying the next pickup opportunity.
Rule set: Volume-based triggers (peak delivery windows; overflow days)
High volume is when your communication can either prevent problems or create them. The rule: when volume increases uncertainty, message once with a defined window—don’t send multiple micro-updates.
Use volume triggers like these:
1) Peak window banner (one message, timeboxed). Trigger: known peak deliveries (e.g., weekdays 2–6 pm) or known carrier batch drops. Purpose: sets resident expectations for package rooms: “deliveries may take up to X hours to be processed.” Send no more than once per day during peaks, and only when you’re actually running behind. 2) Overflow day notice (only when location changes). Trigger: you activate overflow shelving, behind-desk staging, or a secondary room. Purpose: reduces misdirected searches and accusations of lost items by telling residents where oversize/overflow will be placed and whether staff assistance is required. 3) Intake throttling rule. Trigger: backlog exceeds your staffing capacity (e.g., more than N packages waiting unshelved). Action: pause “ready for pickup” notifications until shelf placement is confirmed. Internally, prioritize shelf-confirmed notifications over “received” notifications to avoid confusing residents.
Rule set: Exception triggers (carrier photo shows wrong building; damaged label; unreadable unit)
Exceptions are where missing package prevention is won or lost. Message quickly when the resident can help resolve the exception, and be explicit about what you need so you don’t create a multi-email thread.
Recommended exception triggers:
A) Carrier photo indicates a different building/door. Trigger: delivery photo shows signage, door style, or hallway that doesn’t match your property; or the photo is clearly not your package room/locker area. Message purpose: request the tracking number and photo (if you don’t already have it) and advise the resident to open a carrier claim while you check on-site logs. B) Damaged or incomplete label. Trigger: label torn, barcode unreadable, unit number missing, or name doesn’t match any directory entry. Message purpose: ask the resident to confirm unit number and name as shown on the order; optionally request the last 4 digits of the tracking number. C) Unreadable unit on QR label or intake tag. Trigger: staff-applied QR label is smudged/placed over key info; or the package is tagged without a unit. Message purpose: don’t message all residents—message only the likely matches (same last name/unit pattern) or wait until you can confirm with the carrier manifest if available. D) Multiple packages with similar names/units. Trigger: two deliveries for similar resident names (e.g., A. Smith vs. Alex Smith) or two units share a surname. Message purpose: send a confirmation request before releasing; this prevents later “someone picked up my package” disputes. E) High-risk items (perishable/medical). Trigger: items marked perishable, refrigerated, or time-sensitive when your process includes cold storage or special handling. Message purpose: a single high-priority pickup instruction with the exact pickup path (where, hours, who to ask).
A simple ‘stop conditions’ checklist (when not to send)
The fastest way to increase tickets is to message when you don’t have enough certainty, or when the message won’t change behavior. Use this stop list before sending any template—especially broadcast reminders.
Do not send if any of the following are true:
1) No actionable next step. If the resident can’t do anything different after reading it, wait until you can provide a location, code, time window, or requested info. 2) You’re about to send an update within the next hour anyway. Combine updates into one message tied to the next event (typically shelf placement). 3) The message would contradict another system’s notification. Example: locker system already sent a code—don’t also send a “pick up in package room” note. Resolve the mismatch first. 4) It’s a guess, not a fact. Avoid messages like “It may have been picked up” without a logged handoff or pickup record. That phrasing escalates disputes. 5) It’s building-wide but only affects a small subset. Target by event (overflow move, damaged label, locker deposit) rather than blasting all residents. 6) The resident has an open ticket on the same tracking number. Keep communication in one thread/channel to prevent conflicting instructions. 7) Quiet hours. If your property avoids non-urgent texts/emails after a certain time, queue the message for morning unless it’s time-sensitive (perishable/medical). 8) You haven’t checked the two fastest internal sources first: intake log (scan/QR record) and the “moved/overflow” note. A 30-second check often eliminates unnecessary messaging entirely.

6 Resident Messaging Templates (Each Tied to a Specific Failure Mode)
Below is a ready-to-use library of apartment package room resident messaging templates mapped to common “missing package” failure modes. Each template includes (1) a neutral status statement, (2) a specific resident action, and (3) a clear escalation path—so you can reduce missing package prevention back-and-forth without sounding defensive.
Use these as text/email/app messages. Keep the tone consistent across your team: calm, specific, and focused on the next step. Add your building details (hours, location, ID policy, locker provider) in the bracketed fields.
- Tip for consistency: Pick one sender name (e.g., “Front Desk” or “Package Team”) so residents recognize official delivery confirmation communication.
- Keep message length short enough to read on a lock screen; put any “what we need from you” as a short checklist.
- Avoid sending multiple templates at once—choose the one that matches the most likely failure mode based on your workflow signals (scan time, shelf time, locker deposit notice, handoff log).
Message 1: ‘We received it, still being shelved’ (premature notification prevention)
Failure mode this prevents: A resident gets an arrival notice (or carrier “delivered” ping) before the package is actually shelved/accessible—common during rush hour or batch check-in.
When to send: Only when you have a confirmed on-site receipt/scan but the package is not yet placed in its final location (e.g., awaiting shelf placement, sorting, or QR-label application).
Template: Status-in-progress (anti-ticket) message
Hi [Resident First Name] — we have your package on-site and it’s currently being processed/shelved in the package room.
Please wait for the “Ready for pickup” message before coming down.
If you don’t receive a ready notice by [time window, e.g., 90 minutes / end of day], reply with:
– Carrier (USPS/UPS/FedEx/Amazon)
– Tracking number (last 6 is fine)
– Addressee name and unit
Thanks for your patience—this helps us avoid false “missing package” alerts during peak deliveries.
Message 2: ‘Label mismatch—please confirm unit name/number’ (mislabel / wrong unit)
Failure mode this addresses: The carrier label (or QR label) doesn’t match a unit, has a wrong unit number, missing last name, or is unreadable. These are the highest-friction disputes because the resident assumes the package was “lost,” but the building can’t confidently assign it.
When to send: Only when you’re holding a package you cannot confidently match to a resident record, or when the unit on the label conflicts with your resident roster.
Template: Label clarification request (fast resolution)
Hi [Resident First Name] — we have a package that may be yours, but the shipping label doesn’t clearly match a current resident/unit.
What we can see on the label:
– Name: [as printed]
– Unit: [as printed / missing]
– Carrier: [carrier]
Please reply with one of the following so we can check it in correctly:
1) Your full name and unit exactly as it appears on your delivery address, or
2) The tracking number (last 6 digits is okay)
Once confirmed, we’ll send a pickup-ready notice. If we don’t hear back by [X days], we’ll keep it in our unidentified area and recheck before returning to sender per building policy.
Message 3: ‘Picked up by someone on your account’ (shared household pickups)
Failure mode this addresses: Roommates, partners, caregivers, or authorized friends pick up packages, and the intended recipient later reports it missing. These are common “false missing” tickets that become disputes unless you communicate neutrally and offer a simple verification path.
When to send: Only when your log shows a completed pickup tied to the unit (name on file, signature, key fob entry, ID check, or pickup PIN), and the resident is asking where the package is.
Template: Shared pickup clarification (non-accusatory)
Hi [Resident First Name] — our records show this package was picked up from the package room on [date] at [time].
It was collected under the unit’s pickup access (e.g., [name recorded / fob entry / pickup PIN used]). If you share pickup access with roommates/household members, it may have been collected on your behalf.
Next steps:
1) Please check with anyone who has pickup access for your unit.
2) If you still can’t locate it, reply with the tracking number and addressee name. We’ll verify the pickup record and double-check the package room for any reshelving errors.
If you’d like, we can also update who is authorized to pick up for your unit (so future package pickup reminders and logs are clearer).
Message 4: ‘Delivered to lockers, not the package room’ (lockers vs. room)
Failure mode this addresses: Residents assume everything goes to the package room, but some carriers deposit into lockers (or mark “locker” in tracking). Or staff checks in for the room while the carrier used lockers, creating a mismatch that reads like a missing package.
When to send: When carrier tracking indicates locker delivery, or you receive a locker-provider deposit event, but the resident is looking in the package room (or vice versa).
Template: Location correction (locker vs. room)
Hi [Resident First Name] — this delivery is showing as placed in the lockers (not the package room).
What to do:
– Check for a locker access message from [locker system/provider] sent to the email/phone on your lease.
– If you didn’t receive a locker code, reply with the tracking number and the best email/phone for access messages.
If you’ve already checked the lockers and still can’t retrieve it, tell us:
– The locker bank location you tried (e.g., “Lobby lockers”)
– Any error message shown
We’ll help confirm whether it was deposited in lockers or needs to be located/relabeled.
Message 5: ‘Overflow/relocation notice’ (handoff gap, reshelving, temporary staging)
Failure mode this addresses: Packages get moved due to overflow, front-desk handoff, maintenance, or end-of-day reshelving. Residents come down based on an earlier expectation and can’t find it where they usually look—leading to “it disappeared” tickets.
When to send: Only on overflow days or when you have a known relocation event (temporary staging, reshelving, special hold area). This is a high-impact missing package prevention message if used sparingly.
Template: Temporary location change (clear and calm)
Hi [Resident First Name] — due to high delivery volume, some packages are being temporarily staged outside the usual shelves today.
If you’re picking up a delivery checked in on [date], please look/ask for it in:
– [Temporary area name residents can recognize, e.g., “Front Desk hold shelf” / “Overflow Rack C”]
If you don’t see it within [X minutes] of looking, please reply with:
– Tracking number
– Addressee name + unit
– Approx. delivery time (if known)
We’ll check the overflow log and confirm the exact location before you make a second trip.
Message 6: ‘Delivery marked delivered, not received on-site’ (delivery confirmation communication and next steps)
Failure mode this addresses: The carrier marks a package “delivered,” but it was not received by the building (wrong building, wrong door, vehicle scan error, or delivered outside staffed hours without access). Residents often assume the package room lost it, but the most productive next step is verifying the delivery proof and timing.
When to send: When a resident reports missing and your internal logs show no receipt/scan/handoff for that tracking number—and carrier tracking shows “delivered.”
Template: Delivered-by-carrier but not in our logs (actionable next steps)
Hi [Resident First Name] — we checked today’s package room/front desk logs and we do not show this tracking number as received on-site.
Carrier tracking currently shows: Delivered on [date] at [time].
Next steps (so we can help quickly):
1) Please send us a screenshot of the carrier’s delivery details (including the delivery location notes/photo if available).
2) Confirm the full delivery address used (building number + unit).
What we’ll do:
– Recheck our intake area and any overflow/hold locations for the next [time window, e.g., 24 hours] in case it arrives late or was misrouted internally.
If the carrier photo/location indicates another building or an incorrect address, the fastest resolution is typically opening a carrier claim/request for GPS/photo verification. We can provide a written confirmation that it was not logged into our package system if needed.
How to Personalize Without Increasing Disputes: The 3-Layer Template Method
The fastest way to create more “missing package” arguments is to personalize messages with extra commentary (“we looked everywhere,” “the driver always does this,” “you must have…”). The goal is the opposite: adapt your apartment package room resident messaging templates to your building’s realities (hours, access rules, QR-label workflow, lockers vs. room) while keeping the language neutral, consistent, and action-oriented.
The 3-layer method keeps every message tight and predictable. Residents get (1) what you know, (2) what to do next, and (3) exactly when and how to escalate—without you sounding defensive or implying blame. Property teams get fewer back-and-forth replies because each message already answers the next two questions a resident will ask.
- Use the same structure in every message so residents recognize the pattern and trust the process.
- Personalize only the operational facts that change by building: hours, access instructions, locker vendor wording, QR-label steps, shelf-zone names, and your response window.
- Keep “accountability language” consistent: document what was observed, avoid assumptions, and name the next verification step.
Layer 1: Neutral status statement (what we know)
Start with a short, verifiable status based on your workflow events (carrier marked delivered, desk handoff logged, QR label applied, shelved in zone, locker deposit, etc.). This is the “delivery confirmation communication” piece: it should read like a timestamped update, not a debate.
Best practice: write this line so it would still be accurate if you had to forward it internally to a colleague who has never seen the situation.
Layer 2: Specific resident action (what to do next)
Give one clear action that matches the failure mode and your access rules. This prevents generic “package pickup reminders” that feel like nagging and instead creates a targeted next step (check lockers first, confirm unit/name spelling, ask a household member, wait until a shelving window ends).
Keep it single-step whenever possible. If you need two steps, make them sequential and conditional (do A; if not found, do B).
Layer 3: Clear escalation path (what to send us, and when)
Close with a simple escalation rule that reduces repeat inquiries: what info you need, where to send it, and when you will act next. This is where you quietly enforce consistency without sounding rigid.
Good escalation language is time- and evidence-based: it references a window (“after 2 hours,” “by end of day,” “next business morning”) and requests specific artifacts (carrier tracking number, delivery photo, unit/name on label). This supports missing package prevention by turning a fuzzy complaint into a searchable, solvable case.
Phrases to avoid (sounds accusatory) vs. phrases to use (sets resident expectations for package rooms)
Small wording changes can prevent disputes. Avoid phrases that imply fault or certainty when you only have partial information. Use language that acknowledges what the resident sees, states what your team can verify, and guides the next check. This helps set resident expectations for package rooms without sounding defensive.
Operational Add-Ons That Make the Templates Work (Lightweight, Not a Tech Overhaul)
The best apartment package room resident messaging templates reduce tickets only when they match what actually happens on-site. These operational add-ons make your six messages “true by default” by tightening handoffs, labeling, and findability—without adding a new system or creating extra steps residents will ignore.
Think of this as the small layer of process that prevents the most common mismatch: residents assume a package is instantly retrievable and perfectly traceable, while your workflow may include staging, overflow moves, shared staff coverage, and carrier quirks. The goal is simple: fewer ambiguous moments where anyone can honestly say, “I don’t know where it went.”
Front-desk/package-room handoff checklist (2 minutes, high impact)
Use a single, repeatable handoff routine whenever a package changes hands (carrier to desk, desk to package room, package room to overflow). This closes the “handoff gap” failure mode and supports missing package prevention because your message templates can reference a consistent trail.
Two-minute checklist (print it, laminate it, or keep it as a shared note):
1) Confirm identity of the item: carrier name (if visible), package type (box/polybag/envelope), and any readable part of the unit/resident name. If unreadable, flag as exception immediately (don’t “guess and shelve”).
2) Apply or verify the QR label (if your workflow uses one): place it in the same spot every time (see QR section below).
3) Record the first location: Package Room + zone (example: “Room / B2 Oversize”), or “Front Desk Holding” if it cannot be shelved yet.
4) Note any exception: damaged label, multiple labels, looks opened, wrong building on carrier label.
5) If moved later (overflow, reshelf): record the new location and time. One line is enough: “Moved 3:40 pm to Overflow C1.”
6) End-of-shift sweep: items still at Front Desk Holding get either (a) shelved with a location, or (b) flagged for next-day exception handling. Avoid leaving “in limbo.”
Shelf zone naming that residents can understand (A/B racks, cold storage, oversize)
Most “missing” packages are actually “hard to find quickly.” If your zones are only meaningful to staff (“Back left, third rack”), residents will self-search, miss it, and open a ticket. Simple zones make delivery confirmation communication more credible and reduce back-and-forth.
How to name zones so residents can follow them:
– Use big, visible letters/numbers and plain-language categories.
– Keep the number of zones small (typically 6–10 total) so the message stays readable.
– Make zones stable; don’t rename them seasonally or by staff preference.
A practical zone set that works in many buildings:
– A1, A2: Standard shelves (small/medium)
– B1: Oversize (large boxes)
– B2: Heavy (50+ lbs or “team lift”)
– C1: Cold storage (if applicable; include access rule)
– D1: Envelopes (mailers, padded envelopes)
– E1: Overflow/temporary (use sparingly; see overflow notice template)
Operational tip: Put the zone name on the door-side sign and on each rack end-cap. If residents can’t see it from the entrance, it’s not a zone—it’s a staff-only reference.
QR-label consistency: where it goes and who applies it
Inconsistent QR-label placement creates the most avoidable disputes: staff can’t quickly match the scanned item to the physical package, or multiple labels end up on one box after reshelving. Pick one standard and enforce it so your templates don’t have to do extra explaining.
Decide three things and write them into your workflow:
1) Who applies the QR label: the person who performs check-in (not “whoever has time”). This keeps accountability clear.
2) Where the QR label goes: choose one placement that survives handling and stacking.
– Recommended default: top-right of the largest flat surface (usually the top of the box), not over seams or carrier barcodes.
– For polybags: near the shipping label but not covering recipient name/unit.
– For envelopes: upper-right front, away from the seal.
3) What to do when there’s already a label: never stack new QR labels on top of old ones. If re-checking in, place the new QR label adjacent and mark the old one with a quick “VOID” line so scanning doesn’t hit the wrong code.
A simple quality check that prevents future “mislabel” confusion:
– Before shelving, glance at: unit number + resident last name (or first initial) + QR label is visible.
– If any of those are missing or unreadable, treat it as an exception item (separate bin) and trigger the “Label mismatch—please confirm” message rather than shelving it into a zone where it will be impossible to prove chain-of-custody later.
Package pickup reminders: timing that nudges without nagging
Package pickup reminders can reduce clutter and speed up retrieval—but only if they’re timed to real friction points and not sent as generic blasts. Over-messaging trains residents to ignore you, which directly undermines missing package prevention.
Use a light, rules-based reminder cadence that aligns with capacity, not curiosity:
– Trigger only for items still on-site after a defined window (example: 48–72 hours), not for every delivery.
– Trigger more aggressively during known pinch points (holiday weeks, major move-in weekends, expected carrier surges).
– Stop immediately when the item is marked picked up (no “one more reminder” the next day).
Recommended reminder pattern (adjust to your building’s reality):
– Reminder 1 (gentle): 48 hours after check-in, only if the package room is at/near capacity or you’re entering a peak period.
– Reminder 2 (firm but neutral): 5–7 days after check-in, only for items that are physically confirmed still in the room.
– Optional final notice: when approaching your stated holding policy threshold (avoid threats; focus on next steps and contact channel).
Make reminders more useful by including the findability cue residents actually need:
– Confirm the retrieval method (package room vs lockers vs front desk holding)
– Include the shelf zone if your workflow supports it (example: “Currently shelved in B1 Oversize”)
– Include pickup hours/access notes in one line (not a paragraph)
A simple ‘missing package’ intake form (what info to request)
When a resident reports a missing package, your first reply should reduce guessing. A consistent intake form cuts resolution time and prevents repeat inquiries by collecting the details that map to your failure modes (mislabel, premature notification, shared pickup, locker vs room, handoff move). Keep it short enough that residents will actually answer.
Ask for exactly what your team can use:
– Carrier and tracking number
– Delivery date/time shown by the carrier
– “Delivered to” detail from the carrier (locker, front desk/concierge, mailroom, parcel room)
– A screenshot of the carrier delivery confirmation (including any photo)
– Recipient name and unit number as shown on the label (not just what it should be)
– Whether anyone else in the household could have picked it up (roommate/partner/caregiver)
– Package description: size/color, and whether it came in manufacturer packaging (helps quick visual search)
– Any special notes: signature required, alcohol/temperature-sensitive, multiple boxes under one tracking number
Optional field that saves time for your team:
– “Best contact method for quick resolution today” (so you can clarify label details or locker codes without a long email chain).
Operational note: Only request information you’ll use. If your process does not capture shelf zone or handoff notes, don’t ask residents to provide details that imply you have that level of traceability. Align the form with reality, then improve reality over time.
Frequently Asked Questions
How often should we send package pickup reminders without irritating residents?
Use a cap and a clock. A practical baseline is: one reminder at 48–72 hours after check-in (only if the package is still on-site), and one final reminder 24 hours before any stated return-to-sender/space-management threshold you enforce.
Keep reminders conditional, not broadcast:
– Send only if the package is still scanned as on-site and unclaimed.
– Skip if a resident has picked up any package in the last 24 hours (they are already engaged).
– Skip during known access outages (lock malfunction, closed office) to avoid “I tried” disputes.
This approach reduces “Where is it?” tickets without training residents to ignore daily nudges.
What details should we include in delivery confirmation communication without creating liability?
Stick to verifiable, operational facts and avoid conclusions. Good details to include:
– Your on-site status: “Not checked into the package room/front desk system” or “Checked in at [time] to [area].”
– The carrier’s key data: carrier name, tracking number, and the carrier’s “Delivered” timestamp (as reported).
– The next resident step: ask for a carrier delivery photo or “proof of delivery” if available.
– Your escalation step: when you will re-check shelves/overflow, and what information you need to continue.
Avoid statements like “The carrier must have delivered it to the wrong address” or “We do not accept responsibility.” Instead, use neutral language: “We don’t have a matching on-site intake scan yet. Next, we’ll check overflow and ask you to share any carrier photo.”
How can we handle shared household pickups (roommates, partners, caregivers) without sounding accusatory?
Treat it as a normal, common scenario and give residents a quick way to confirm. Practical steps:
– Use language like “picked up by someone authorized on your account” instead of “someone else took it.”
– Include the pickup timestamp and pickup method (front desk handoff, package room log, locker code use) if you have it.
– Provide a simple confirmation path: “Reply YES if a household member picked it up; if not, reply NO and we’ll start a trace.”
If your process allows it, offer an optional “household pickup note” setting (e.g., listing common authorized names) to reduce repeat confusion without requiring extra staffing.
If we suspect a mislabel or wrong-unit label, what’s the fastest resident-friendly way to resolve it?
Ask for one piece of evidence and one confirmation—then act. A streamlined approach:
– Request a photo or screenshot of the carrier label or tracking details (especially the name/unit line).
– Ask the resident to confirm how their unit appears on the order (unit format, building letter, last name spelling).
– Tell them exactly what you’ll do next: “We’ll check nearby-unit shelves and any similar names/units and update you by [time].”
This prevents the back-and-forth where staff search blindly and residents assume negligence. It also reduces “missing package” tickets caused by address formatting errors (e.g., 1203 vs. 1230).
What should we do when lockers and package room workflows overlap and residents aren’t sure where to go?
Make “where to pick up” unambiguous at the moment of notification, and only send the locker-vs-room message when you have a clear indicator.
Operationally practical indicators:
– Locker deposit event/code issued: message “Delivered to lockers” with locker location guidance.
– On-site intake scan/shelving event: message “Ready in package room” with shelf zone or pickup procedure.
– Carrier tracking says “Delivered to Parcel Locker” but you have no intake scan: send a single clarification message with the resident’s next step (check for locker code email/text; if none, share tracking screenshot).
Avoid generic “Your package is ready” wording that forces residents into a scavenger hunt and generates avoidable tickets.
What information should our team request on a ‘missing package’ intake form to resolve tickets faster?
A short intake form reduces follow-ups when a package can’t be found immediately. Request:
– Tracking number and carrier
– Delivery date/time shown by the carrier
– Any carrier delivery photo or map pin (screenshot is fine)
– Recipient name and unit number as shown on the order
– Package description (size, vendor, any distinctive markings)
– Whether anyone in the household may have retrieved it, and approximate pickup time if known
On your side, add two internal fields: “last known on-site status” (not received / received-not-shelved / shelved / overflow / handed off) and “next action due time.” This keeps accountability clear without turning the conversation defensive.

Requested CTA
No CTA was provided for this article. Share your preferred call-to-action text and destination URL, and I’ll format it to match the tone and placement used in the series (for example: “Download the 6-message library,” “Standardize your package-room workflow,” or “Reduce support volume this month”).
Provide CTA details
Clear, Failure-Mode-Specific Messaging Beats “More Reminders”
Missing package prevention isn’t about sending more messages—it’s about sending the right message when a specific failure mode is likely. When your communication matches the real operational moment (still being shelved, label mismatch, shared pickup, locker delivery, overflow move, or “delivered” but not received on-site), residents stop guessing—and your team stops reopening the same ticket three times.
To roll this out without disruption, start small. Pick the top two failure modes you see most often (for example: premature notification during peak delivery windows and shared household pickups). Implement the matching templates plus the “when to send” triggers and stop conditions so you’re not spamming residents. Then review your missing-package tickets monthly: note which template resolved the issue fastest, which wording caused replies, and what workflow step needs a tighter handoff or checklist.
Over time, these delivery confirmation communication patterns become a quiet layer of accountability: residents know what to expect, your team knows what to check next, and the “missing package” category shrinks into the few cases that truly require investigation.