

Multi-Carrier Label Chaos Starts With One Small Problem: Everyone Names Locations Differently
In a fast-growing package room, the fastest way to lose control is also the most common: someone “fixes” a confusing shelf name in the moment. A new hire writes “Back Wall” on a sticky note. A float calls a rack “Amazon.” A renovation shifts shelving two feet, and suddenly “Row 2” no longer means what it used to. Multiply that by multiple carriers, peak-hour pressure, and constant handoffs between front desk and back-of-house, and retrieval consistency breaks first—long before anyone notices the system itself has drifted.
A future-proof package room location naming convention is not a labeling project you finish once. It is an operational standard that holds up when turnover happens, when you add a new rack, when you temporarily stage overflow storage, and when you reconfigure the room without time for a full retrain. The goal is simple: a location code should mean the same thing to every staff member, on every shift, even after the layout changes.
This article gives you a durable schema built around a stable, human-readable structure: Zone–Aisle–Bay–Level. You will also get rules for temporary overflow that do not poison your permanent system, plus controlled renumbering guidance to prevent the failure mode that ruins most shelf labeling system rollouts: ad hoc renames that break retrieval history and accountability at handoff. By the end, you will have mailroom location codes you can train in minutes, audit quickly, and keep consistent through growth and change.

Why location names fail in fast-changing package rooms (and what “future-proof” actually means)
Fast-moving package rooms break down in the same predictable way: the work is real-time, the volume spikes without warning, and the room gets rearranged to cope. Under that pressure, people do what works in the moment—rename shelves in their own words, invent shortcuts, or rely on “everyone knows where that is.” The result is a package room location naming convention that exists in fragments: a few official labels, a few tribal names, and a few carrier-specific reference points.
paragraphs
A future-proof naming convention is not about having nicer labels. It is an operational standard that keeps retrieval consistent when three things change at once: people (turnover, float staff, new hires), space (renovations, new racks, removed cages), and process (different carrier drop patterns, after-hours intake, peak season overflow storage). Future-proof means the code logic stays stable even when the physical room is not.
The hidden cost: retrieval inconsistency, mis-shelves, and accountability gaps at handoff
When location names drift, the first symptom is retrieval inconsistency: two staff members look at the same tracking entry and walk to different places. That inconsistency creates operational problems that compound quickly in multi-carrier environments:
– Mis-shelves that look like missing packages (until someone does a full sweep)
– Rework at the front desk: “check the other shelf” turns into multiple trips and longer resident wait times
– Broken handoff accountability: a package can be “put away” without a verifiable, shared location
– Training drag: new hires learn the loudest person’s naming habits instead of a standard
– Layout-change amnesia: once a shelf moves, old notes and habits become wrong overnight
In practice, these issues show up as avoidable friction: QR-label scans that don’t match what’s physically on the shelf, residents being asked to come back later, and end-of-day searches that should never be necessary if the shelf labeling system is consistent.
Future-proof criteria: stable logic, readable at a glance, scalable, easy to audit
A future-proof package room location naming convention has to work for real people on a busy day—not just look tidy on a map. Use these criteria to evaluate whether your mailroom location codes will survive turnover and reconfiguration:
– Stable logic: the same code rules apply everywhere, so staff can deduce a location without being told
– Anchored to the room, not the moment: names reference fixed “chunks” of space (not whatever is currently stored there)
– Readable at a glance: short, consistent segments that are easy to speak and hard to misread on a label or clipboard
– Scalable: you can add new shelves, racks, or cages without renaming existing locations
– Easy to audit: a supervisor can walk the room and verify labels in minutes (and spot drift immediately)
– Carrier-agnostic: the code works whether the item came from UPS, FedEx, USPS, Amazon, a courier, or a tenant drop-off
If your system requires experienced staff to interpret it (“oh, Row 2 used to be Row 3”), it is not future-proof—it is a memory test. The goal is operational standardization: anyone assigned to the room can put away and retrieve correctly using the same logic, even during overflow storage periods.
What not to do: carrier-based names, vague nicknames, and “Row 1/2” without anchors
Most failing systems have one of these patterns. They feel efficient at first, then collapse as soon as the room or staff changes:
– Carrier-based labels (e.g., “FedEx shelf,” “USPS rack”): carriers change drop spots, volumes shift, and packages get sorted by size/priority instead of carrier. The name becomes false, and staff start reinterpreting it differently.
– Vague nicknames (e.g., “back shelf,” “blue rack,” “by the door”): these depend on personal perspective. When racks move, when lighting changes, or when a temporary cage appears, the nickname no longer points to a single, unambiguous location.
– “Row 1 / Row 2” without anchors: numbering only works if there is a permanent reference point and a consistent direction of travel. Without a defined start (for example, “Row 1 starts at the entry door and increments clockwise”), staff will renumber in their heads and labels will drift.
– Item-type naming (e.g., “Oversize,” “Perishables,” “Returns” as primary locations): categories change daily. These are useful as process flags, but unstable as physical location names.
– One-off exceptions (“just put this on the floor by the lockers”): exceptions become policy when volume spikes. If overflow is not named and time-bounded, it poisons your permanent system.
If you recognize any of these, the fix is not more reminders. It is a location code structure that removes interpretation—so the right shelf is the right shelf even when the room is reconfigured and the team is new.
The core schema: Zone–Aisle–Bay–Level (Z-A-B-L) as your package room location naming convention
A future-proof package room location naming convention needs to work the same way whether a package is logged by a full-time mailroom lead, a front-desk floater, or a carrier doing an after-hours drop. The simplest schema that stays stable as layouts shift is Zone–Aisle–Bay–Level (Z-A-B-L): a short code that describes where something is in the room using consistent physical anchors.
paragraphs
In practice, Z-A-B-L becomes the shared language for shelf labeling system decisions, mailroom location codes in your logs, and QR labels on shelves. Each segment has a single meaning and a rule for what counts, so staff do not invent new names when they are busy.
- Recommended code pattern: Z##-A##-B##-L## (example: Z01-A02-B05-L03)
- Use the same structure everywhere: labels, intake logs, handoff notes, and exception sheets
- Treat it as a physical address: each segment narrows the search area in the same order every time
Definitions: Zone vs. Aisle vs. Bay vs. Level (and what counts as each)
Define each segment based on what does not change often. If your teams can point to it without debating, it is a good candidate. If it depends on what carriers are doing or what a particular staff member calls it, it is not.
Zone (Z): The largest stable area. Zones should map to fixed architecture or clear room partitions: “Package Room North Wall,” “Cage Area,” “Locker Bank,” or “Receiving Vestibule.” If you have multiple rooms, each room is typically its own Zone or a separate Zone group. Zones should not be based on carrier names (UPS, FedEx) or package type (Amazon) because those change by volume and staffing.
Aisle (A): A walkable path or face of storage within a Zone. In wall shelving, the “aisle” may be the wall run itself. In gondolas, each side can be its own aisle if staff work from both sides. If your shelving creates multiple parallel runs you walk between, each run is a distinct Aisle number within that Zone. The goal: when someone hears the Aisle, they know which direction to walk without guessing or asking a coworker for translation.
Format rules: separators, padding, allowed characters, and avoiding ambiguous letters/numbers
Your format rules are what make the code easy to train and hard to corrupt. The number one cause of drift is “close enough” naming that slowly becomes incompatible across shifts.
Separators: Use a single separator consistently. A hyphen between segments is simple to read and speak: Z01-A02-B05-L03. Avoid slashes or spaces that get dropped in handwriting or some logging tools.
Padding: Use two digits for each numeric segment (01, 02, 03). Padding keeps labels aligned, prevents sorting issues (A2 vs A10), and makes it easier to spot a missing digit at a glance. If you truly need more than 99 aisles or bays in a Zone, expand only that segment to three digits, but keep it consistent within the site (for example, B001).
Human-first readability: how to say a code out loud and how to place QR labels
A good code can be spoken clearly at the front desk, written quickly on an exception log, and scanned from the correct standing position in the room.
How to speak it: Say the segment letter and the two-digit number. Example: Z01-A02-B05-L03 is spoken as “Z-one, A-two, B-five, L-three.” If you use radios or noisy lobbies, consider saying “zero one” for clarity (“Z-zero-one”) and standardize that in your SOP so everyone matches.
What should be on the label: Print both the human-readable code and a scannable QR that resolves to the exact same location code. Do not print extra nicknames on the main label (those tend to become the real system). If you want internal reminders, put them on a smaller secondary sticker nearby (for example, “Heavy items only”) but keep the location identity clean.
Examples for common layouts: wall shelving, gondolas, cages, lockers, and oversize floor spots
The schema works as long as you apply the same physical logic consistently. Below are practical ways to interpret Z-A-B-L across typical package-room setups.
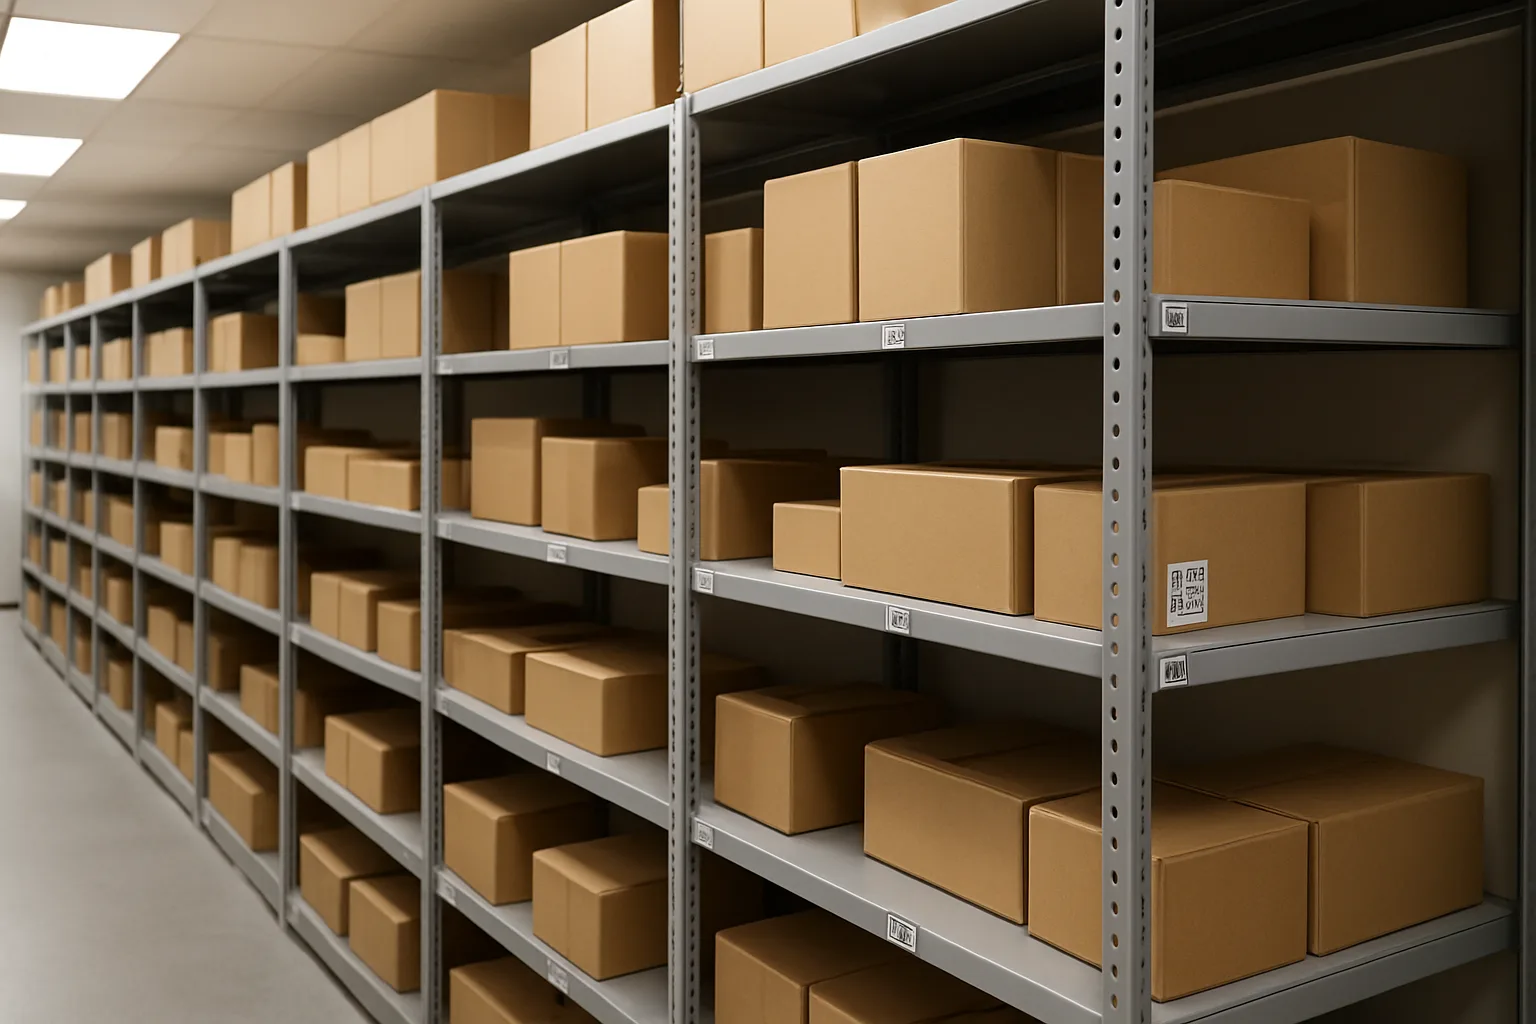
Wall shelving: Z01 = Main Package Room. A01 = North Wall Shelving. Bays count left-to-right as you face the wall (B01, B02, B03…). Levels count bottom-to-top (L01 = floor or lowest shelf, then upward). Example: Z01-A01-B04-L02.
Gondolas (double-sided): Z01 = Main Package Room. Each gondola side is a separate Aisle so staff do not flip a mental coin. Example: A03 = Gondola 2, Side A (label the endcap); A04 = Gondola 2, Side B. Bays run along the gondola length; levels run bottom-to-top. Example: Z01-A03-B06-L01 for the lowest shelf on the sixth bay of that side.
How to implement a shelf labeling system without disruption (mapping, labeling, and cutover)
A package room rollout fails when it is treated like an arts-and-crafts labeling day instead of a controlled operational change. The goal is continuity: packages that were findable yesterday must still be findable today, even while you are installing a new shelf labeling system.
The safest approach is to treat implementation like a mini cutover: document how the room is actually used, assign mailroom location codes that anticipate growth, label in a consistent way (including QR-label placement), then run a short dual-label period so nothing gets lost in translation. Below is a step-by-step plan that on-site teams can execute in an active, multi-carrier environment.
- Deliverable at the end of this rollout: a readable location map, durable labels on every pick point, and a cutover process that prevents “mystery shelves.”
- Operating rule during rollout: no one invents new location names on the fly. If a location needs a code, it goes through the same rules as the rest.
Step 1: Create a simple location map that matches how people walk the room
Your map should reflect the path a front-desk or package-room team member takes during intake and retrieval, not an architectural drawing. If staff naturally enter, turn right, and work clockwise, your map should follow that logic. This prevents the most common failure mode: a technically correct map that no one uses under pressure.
Start with a quick walk-through and capture only what matters for finding a package: entry points, major shelf runs, cages, lockers, oversize floor spots, and any choke points where carriers tend to drop.
Practical method: print a blank page, sketch the room in 5 minutes, then do a second pass and label each shelf run or fixture with a temporary sticky note (for example, Zone 1 wall, Zone 2 gondolas). The sticky notes are not your final naming convention; they are waypoints to align everyone on what counts as a distinct location group.
Step 2: Assign codes with growth in mind (leave gaps, reserve levels, plan for new aisles)
Once the fixtures are mapped, assign codes in the order people navigate. This is not about perfect numerical sequence; it is about predictable expansion without renaming. Your package room location naming convention should allow you to add capacity later without shifting every existing location.
Use these growth-friendly rules when assigning mailroom location codes:
1) Leave numeric gaps so you can insert new aisles or bays later (for example, assign aisles as 10, 20, 30 instead of 01, 02, 03). If you add a new aisle between 10 and 20 later, it can become 15 without disturbing anything else.
2) Reserve “future” levels on each shelf run even if they are empty today. If a shelf currently has three usable levels but might become four after a renovation, decide now how Level 04 would be labeled.
3) Keep oversize and floor positions explicit rather than ad hoc. If a common overflow corner exists even on normal days, give it a permanent, named spot (for example, an oversize bay within a Zone) so staff do not start inventing “by the door” notes.
4) Do not encode tenant/client names, carrier names, or temporary guidance into the code itself. Codes should describe the physical pick location only; everything else changes too often and breaks retrieval consistency.
5) Decide your “granularity” once. For small rooms, a Bay might be a single shelf section; for larger shelving, a Bay might be a 4-foot segment with multiple package positions. Whatever you choose, apply it consistently so the code always points to a single, unambiguous place to stand and look.
Step 3: Label placement standards: eye-level, endcaps, bay markers, and QR-label conventions
Labels fail when they are hard to see, inconsistent, or placed where packages cover them. Standardize placement so anyone (including float staff) can orient within seconds. Treat label placement like safety signage: predictable and redundant.
Recommended placement standards for a shelf labeling system:
– Endcap or entry marker: At the start of each aisle or shelf run, place a large “you are here” identifier (Zone and Aisle) at eye level where people naturally approach.
– Bay marker: Place Bay labels on the vertical uprights or the shelf frame edge, not on the shelf surface where boxes scrape them off.
– Level marker: If levels are frequently confused, mark Level numbers on the upright at each Bay (small but consistent), especially when shelves are adjustable.
– Avoid occlusion: Put the primary scannable/QR label on a surface that is unlikely to be blocked by packages. A common approach is the front-facing upright at about chest height.
– Redundancy: For long runs, repeat the Aisle identifier periodically (for example, every few bays) so someone standing mid-run can confirm they are in the right place without walking back to the endcap.
– Durability: Use materials and adhesives that survive dust, cleaning, and friction. If you expect frequent reconfiguration, use label holders or sleeves so you can swap inserts without reprinting everything.
QR-label conventions (operationally realistic and easy to train):
– One QR per pick point: The QR should represent exactly one location code (not an entire shelf run). This makes scan-to-confirm reliable.
– Print the human-readable code next to the QR in large text. People should not need a scanner to verify a location.
– Keep a consistent “quiet zone” around the QR so it scans quickly and is not crowded by other text.
– If you use color, use it only as a helper (for example, Zones by color). Never make color the only differentiator; it does not photocopy well and is unreliable for color-blind staff.
Front-desk practicality tip: place a small reference card at the intake station showing a few example codes and how to interpret them (Zone–Aisle–Bay–Level). This reduces questions during peak multi-carrier intake.
Step 4: Cutover plan: dual-label period, exception log, and end-of-day reconciliation
Cutover is where most teams lose track of packages. The fix is simple: run a short, controlled dual-label period and make exceptions visible. The goal is that any package placed during the transition can be found by either the old mental map or the new code.
A low-disruption cutover plan that works while the room is live:
1) Prepare: Print all labels and stage them in install order. Assign one person to be the “location owner” for the day so decisions are consistent.
2) Install by zone: Label one Zone at a time and complete it fully (endcap, bays, levels, QR labels) before moving to the next. Partial labeling invites ad hoc names.
3) Dual-label period (short and deliberate): For a defined window (for example, 3 to 7 operating days), keep old identifiers visible but subordinate. If shelves previously had informal names or numbers, keep a small “formerly known as” note on the endcap only, not on every bay. This prevents staff from continuing to use the old system indefinitely.
4) Exception log: Keep a simple paper or shared note at the intake station titled “Location exceptions.” Use it only for issues that block accurate placement, such as:
– Label missing or damaged
– Bay physically blocked
– Shelf moved mid-day
– QR not scanning
For each exception, record: date/time, package identifier (whatever your site uses), attempted location code, where it was actually placed, and who made the call.
5) End-of-day reconciliation: Spend 10 to 15 minutes at close doing a sweep of the day’s exceptions and any “temporary piles.” Fix the root issue immediately (replace a label, unblock a bay, correct a misapplied code) so the exception does not become the new normal.
6) Freeze and remove legacy cues: After the dual-label period ends, remove old names and outdated signage. Leaving old labels “just in case” guarantees drift back to improvisation.
Two role-based checklists to keep the cutover clean:
– Front desk / intake checklist:
– Use only the new location codes when logging where an item is placed.
– If you cannot find a labeled pick point within 30 seconds, place the item in the designated problem-resolution spot and log an exception (do not invent a shelf name).
– Confirm that the label you are using is visible and scannable before you walk away.
– Package-room / runner checklist:
– During retrieval, read the full code out loud (Zone–Aisle–Bay–Level) before you start searching.
– If the code brings you to the right aisle but not the right bay, stop and check for a missing bay marker rather than “guessing the shelf.”
– At end of shift, replace any damaged labels and clear the problem-resolution spot using the exception log.
When the cutover is complete, the biggest success signal is boring consistency: staff stop asking “what do we call this shelf,” carriers stop creating drop piles, and retrieval relies on the same stable code logic regardless of who is on shift.
Rules for temporary overflow storage that don’t poison your permanent system
Overflow storage is where a solid package room location naming convention usually breaks. Under pressure, teams start inventing shelf names (“holiday wall,” “UPS pile,” “by the fan”), and those ad hoc references leak into daily habits. The fix is to treat overflow as a controlled, time-bounded extension of your Zone–Aisle–Bay–Level schema, not a separate, informal world.
paragraphs
Your goal is simple: anyone can walk in mid-shift, scan or read a code, and find the package without knowing why overflow exists that week. That requires three things: (1) a clear overflow taxonomy, (2) a dedicated code pattern that never collides with permanent locations, and (3) hard operational rules that force overflow to empty back into the main system.
Overflow taxonomy: short-term staging vs. temporary shelving vs. long-term annex space
Not all overflow is the same, and mixing types is a common failure mode. Define these categories in your SOP so staff and float coverage use the same mental model:
1) Short-term staging (minutes to a few hours): A controlled “in-process” buffer while intake is being sorted. Example: carrier drop is heavy and the front desk is batching scans before shelving. Staging should never become a retrieval location for residents unless you explicitly allow it with tight rules.
2) Temporary shelving (same day to a few days): Extra racks, tables, or a cordoned aisle used during peak volume. This is the typical holiday surge case. These locations must be fully coded and scannable, not “temporary pile #2.” Every package stored here gets an overflow location code immediately (not later).
Overflow code pattern: dedicated Zone(s) and clear start/end dates (e.g., ZO for overflow)
Make overflow a first-class Zone in your shelf labeling system so it is obvious, searchable, and auditable. Two practical patterns work well; pick one and standardize it:
Pattern A: Dedicated overflow Zone prefix
– Use ZO as the Zone for overflow. Keep the same Aisle–Bay–Level structure so staff do not learn a new grammar. Example: ZO-A01-B03-L02 (Overflow, Aisle 1, Bay 3, Level 2). This keeps overflow codes visually distinct from permanent zones like ZA, ZB, etc., and prevents accidental reuse of permanent codes on temporary racks.
Business rules: maximum dwell time, daily sweep, and escalation triggers
Overflow only stays healthy if you treat it like an exception that must self-correct. Build rules that are easy to enforce during a busy shift:
Maximum dwell time rules
– Short-term staging: must clear by end of shift (or a fixed cut-off like 6:00 pm). If something is still staged at cut-off, it must be assigned a real (permanent or overflow) location code immediately. No overnight “staging.”
Physical controls: colored labels, cones/tape, and “no-drop” lines for carriers
Codes alone are not enough under load. Use physical controls that make the right behavior the easy behavior, especially for multi-carrier intake where different drivers default to different drop habits:
Color and material standards
– Use a distinct label color for overflow Zone labels (for example, bright yellow for ZO) so staff can spot overflow racks instantly from the doorway. Keep formatting identical to permanent labels (same font size, same QR placement) so scanning behavior stays consistent.
Examples: holiday surge, renovation week, elevator outage, and after-hours carrier drop
Use these as templates and adapt the exact spaces in your building. The point is to show how overflow stays coded, time-bounded, and reversible without staff improvising names.
Holiday surge (temporary shelving racks added in the room)
– Setup: Add two rolling racks along the east wall and designate them as overflow aisle A01 and A02 within Zone ZO. Label endcaps clearly: ZO-A01 (rack 1), ZO-A02 (rack 2). Label bays/levels on the rack uprights.
Renumbering and renovations: how to change the room without breaking retrieval history
Renovations, new lockers, a moved intake table, or a “temporary” extra rack that becomes permanent are exactly when a package room location naming convention gets broken. The failure pattern is consistent: someone relabels a shelf to match what feels intuitive that day, old handoff notes become unusable, and retrieval turns into tribal knowledge. The fix is to treat location codes like an operational standard with controlled changes, not a one-time labeling project.
The goal during any reconfiguration is continuity: a staff member (or temp) should be able to find a package using yesterday’s code, even if the room is mid-change. That means clear rules for when you change codes, how you add capacity without churn, and how you communicate transitions so mailroom location codes remain trustworthy. નીચે are practical controls that work in live, busy package rooms. See the lists and examples and adapt them to your exact layout.
Use these rules whether you are using a Zone–Aisle–Bay–Level format today or planning to migrate to it. The key is to avoid ad hoc renaming and instead make changes in a way that preserves retrieval history and accountability at handoff.
- Core principle: location codes are identifiers, not descriptions. Once a code is in use, treat it like an address that should not change casually.
- Default change strategy: add capacity by inserting new codes (using reserved gaps or suffixes) instead of renaming existing ones.
- When forced to renumber, do it as a controlled migration: define a version, publish a crosswalk, and set a sunset date for old codes.
- During construction, use temporary Zones and explicit blocked-location markers so people know what is usable right now.
- Communicate changes like you would a safety update: who is impacted, what changes, when it starts, and how to handle exceptions.
The golden rule: never rename a location for convenience—only for structural change
Renaming for convenience is the fastest way to destroy retrieval consistency. “Convenience” renames happen when a shelf starts holding different types of items, someone wants the numbers to ‘make sense,’ or a new lead prefers a different direction of numbering. Those are not valid reasons. A valid reason is structural: the physical storage unit moved, the aisle orientation changed, or bays/levels no longer exist in the same place.
To keep your shelf labeling system stable, define what counts as structural change in writing. Then enforce a simple decision rule: if a package placed yesterday using code ZA-02-B05-L3 would still be physically reachable by that code today, you do not rename it—regardless of what’s stored there.
Practical examples of acceptable vs. unacceptable renames: Acceptable: demolition removes an entire rack; aisles flip direction because the door relocates; a cage is split into two separate cages with different entrances. Unacceptable: “This shelf is now oversize only,” “FedEx usually drops here,” “Row numbers are backwards,” or “We want Aisle numbers to start at the front desk now.”
Add-before-renumber: using spare bays/levels and suffix rules to avoid churn
The safest way to accommodate growth is to add without changing existing codes. Build in slack on purpose: leave gaps in aisle and bay numbering (for example, B01, B03, B05) or reserve an entire ‘future’ aisle number. When you add a new rack later, you can assign an unused number without touching any existing labels or training.
If you did not leave gaps (common in fast launches), you can still avoid renumbering by using controlled suffix rules. Suffixes must be standardized and limited so they do not become messy. Use them only when inserting between two existing physical positions is unavoidable.
Suggested suffix rules (choose one pattern and stick to it):
– Bay insert: B05A, B05B (use letters only as suffixes, never as primary bay IDs)
– Level insert: L2A, L2B (if you add a half-shelf or splitter)
– Micro-location on a large shelf: a sub-bay marker like “Left/Right” encoded as B05-L2-R (only if your process truly needs that granularity)
Operational guardrails:
– Cap suffix depth (for example, never beyond B05C). If you need more than that, you likely need a planned renumber.
– Do not let staff invent suffixes on the fly. New suffixes are created by the location owner only (see governance in your SOP).
– Place a small physical marker at the exact boundary that defines the suffix (divider, tape line, or shelf stop), so retrieval does not depend on memory.
If you must renumber: versioning, crosswalk tables, and a sunset date for old codes
Sometimes renumbering is unavoidable: you combine two aisles into one, reverse traffic flow permanently, or replace wall shelving with lockers. If old codes would point to the wrong physical place, you must migrate—carefully.
A controlled renumber has three required parts:
1) Versioning: declare the new scheme as a named version (for example, “Location Codes v2, effective Monday”). People should be able to reference which scheme a note used.
2) Crosswalk table: a simple mapping from old code to new code (Old: ZA-01-B04-L2 → New: ZB-01-B02-L1). Keep it accessible at the front desk and in the package room. If you use QR labels for scanning, keep both labels active during the transition.
3) Sunset date: specify when old codes stop being valid and what happens to exceptions after that date.
A practical migration sequence that avoids lost packages:
– Week 0 (planning): finalize the new map and crosswalk; preprint labels; decide which areas change vs. remain.
– Day 1 (dual-label start): place new labels next to old labels. Do not remove old labels yet. Train staff to record or scan the new code but to accept old codes during retrieval.
– Daily during dual-label: run an exception log for any package found in a location that does not match the recorded code. Fix the physical label issue or the process issue immediately.
– Sunset day: remove (or cover) old labels in one sweep, update reference posters, and archive the crosswalk as “historical.”
Important: never have two different physical locations sharing the same code at the same time. If you reuse codes, wait until after the sunset date and after you have cleared any packages and logs that rely on the old meaning.
During construction: temporary Zones, blocked locations, and signage standards
Construction is when operational standardization matters most: noise, rerouted paths, and partial access make it easy for staff to start improvising. The solution is to formalize temporary reality instead of pretending the permanent map still applies.
Use temporary Zones for any storage that is outside the normal flow or created for the project. Keep them clearly separate from permanent Zones so overflow storage does not contaminate your long-term naming system. Examples: ZT (temporary) for a week-long staging rack in the hallway; ZC (construction) for a contractor-approved corner used for secured holding; ZR (receiving) for a relocated intake table area. Pick the codes once and post them prominently.
Blocked locations should be treated as unusable inventory, not “kind of available.” Apply a physical block marker and a process block:
– Physical: a large “BLOCKED” sign plus barrier tape across the bay, not just a small note.
– Process: remove blocked locations from the active pick list/checklist and instruct staff and carriers: do not place packages there under any circumstances.
Signage standards that prevent drift:
– One sign per affected entrance: “Current intake route” and “Where carriers drop today.”
– One sign per aisle endcap: “Aisle open/closed” and the temporary walking direction if it changed.
– One reference sheet at the front desk: temporary Zones list + any blocked areas + exception handling steps.
If you accept after-hours carrier drop, add a single, unambiguous “no-drop line” on the floor (tape) that shows where packages may be left without blocking egress or ending up in an untracked pile. Tie that drop spot to a defined temporary Zone so staff can log and sweep it reliably.
Communication plan: what to tell carriers, front desk, and float staff
A rename or renovation fails operationally when only one person understands it. Your communication plan should assume turnover, split shifts, and carrier variability. Keep it short, concrete, and repeated in the places people actually look.
Carriers: you do not need them to learn your full code system, but you do need consistent drop behavior. Provide a single instruction: “All packages to Intake Table (Zone ZR). Do not place items on shelves.” If shelves are accessible to carriers, put “Staff Only” signage and physically block off aisles when practical.
Front desk / receiving team: they need the ‘what to do right now’ view. Provide:
– Effective date/time of the change
– Where intake goes today (Zone)
– Whether to record old codes, new codes, or both (during dual-label)
– How to handle a package whose label scans to an old location (use crosswalk; if not found, follow exception checklist)
Float staff and new hires: they need a 60-second orientation that works without context:
– Show the posted map (current version)
– Explain temporary Zones (if any)
– Demonstrate one retrieval: read code aloud, walk to Zone, find Aisle, identify Bay, then Level
– Point to the exception log clipboard or shared checklist and require entries for any mismatch
Finally, assign a single owner for location changes during the project (even if it is just the shift lead). That owner is the only person authorized to create, retire, or modify codes. Everyone else escalates requests instead of improvising—this is the simplest way to prevent ad hoc renaming from returning the day the room gets busy.

Training, audits, and governance: keeping mailroom location codes consistent through turnover
A package room location naming convention only stays “future-proof” if it’s treated like an operational standard, not a one-time labeling project. Turnover, float coverage, peak-volume shortcuts, and well-meaning “quick fixes” are what break retrieval consistency—so the fix is lightweight governance plus a simple rhythm of training and audits.
The goal is not bureaucracy. The goal is preventing the most common failure mode: someone renames a shelf ad hoc (“put it on the FedEx rack” / “top shelf by the door”) and now half the team can’t find packages, handoffs become arguments, and overflow becomes permanent.
- Make one person accountable for location codes (not for every package).
- Train location code literacy the same way you train chain-of-custody: short, repeated drills.
- Audit for drift weekly so you catch “new nicknames” before they become “how we do it.”
- Control changes to the shelf labeling system with an owner, a request path, and a cutover rule.
- Track error types (not vanity numbers) so you know where the naming convention is being ignored or misunderstood.
One-page SOP: the minimum documentation every team needs
Keep the SOP to one page so people actually use it at the front desk and in the package room. It should explain the logic of the code and the rules for creating, using, and changing locations—without turning into a policy manual.
Minimum contents to include in the SOP (print it and store it where drivers and staff can see it, plus a digital copy for onboarding):
1) The code format and meaning (Zone–Aisle–Bay–Level), with 3–5 examples from your room (including an oversize spot and an overflow example if you use overflow storage). 2) “How to put away” steps: scan/record package, confirm the physical label matches the code you’re selecting, place package, then do a quick visual check that the bay matches. 3) “How to retrieve” steps: read the code out loud, walk the route, confirm Zone and Aisle first, then Bay, then Level before touching packages. 4) Prohibited behaviors: no nicknames, no carrier-based names, no “temporary” relabeling with marker, no writing locations on sticky notes that aren’t real codes. 5) What to do when a label is missing or damaged: use the exception process (temporary hold area + log) rather than inventing a new location name. 6) Who can approve new mailroom location codes and how to request them.
New-hire micro-training: 10-minute walkthrough + retrieval drills
Turnover breaks systems when training is informal (“you’ll pick it up”). Instead, run a consistent 10-minute micro-training that every new starter, temp, and cross-trained front-desk associate completes before they solo package intake or retrieval.
A practical micro-training flow that works in a real package room:
Walkthrough (5 minutes): Start at the room entrance and physically point to the Zone marker, then an Aisle marker, then a Bay marker, then Levels. Have the trainee read two codes off labels and explain what each segment means. Emphasize the habit: confirm Zone and Aisle before scanning shelves for Bay/Level. Show what “good” looks like: a QR label placed at the same spot on every bay marker so eyes and hands learn the pattern. Show what “bad” looks like: handwritten shelf names, mismatched labels, and carrier piles with no code.
Retrieval drills (5 minutes): Give the trainee three location codes and have them (a) repeat the code back out loud, (b) walk directly to the spot, (c) point to the exact label, and (d) describe where the package would sit (e.g., “Zone B, Aisle 02, Bay 07, Level 03”). One drill should include an edge case (oversize floor spot, cage, or a locked area) so they learn to trust the schema even when the storage type changes.
If you rotate coverage (front desk, concierge, security, maintenance), repeat the drills whenever someone hasn’t worked the package room in 30 days. It’s faster than fixing a pattern of mis-shelves.
Weekly audit routine: spot-checks, mis-shelf log, and label maintenance checklist
Audits prevent drift. They don’t need to be punitive or time-consuming; they need to be consistent. A 15–20 minute weekly routine is enough to catch the early signs of chaos: new nicknames, missing bay labels, and overflow quietly becoming permanent.
A simple weekly audit routine:
Spot-check: Pick a small sample of locations across different Zones and storage types (shelving, cages, lockers, oversize). For each, verify: the physical bay label is present and readable; the Level labels are consistent; and packages stored there match the recorded code (if you use QR-label scanning, scan the location label itself to confirm it resolves to the intended code). Look specifically for “shadow locations” like “on the cart,” “by the printer,” or “on the floor” that aren’t formal overflow storage.
Mis-shelf log: Capture issues in a shared log with three fields that are easy to fill out during a busy shift: what was found (package identifier), where it was expected, where it actually was. Add a short “reason” tag (label missing, couldn’t find bay, overflow used, new staff, carrier drop pile, blocked aisle). The tags matter more than a long narrative.
Label maintenance checklist: During the audit, replace or reattach any label that is peeling, obscured, or placed inconsistently. Standardize the physical placement (same corner, same height) so retrieval becomes muscle memory. Confirm Zone and Aisle markers are visible from the main walking path—if those anchors aren’t obvious, staff will revert to nicknames under pressure.
Change control: single owner, request form, and approval rules
The fastest way to break a shelf labeling system is to let everyone “fix” it. The fastest way to keep it stable is to appoint a single owner for location codes. This does not need to be a manager; it needs to be someone present and detail-oriented (often the package room lead, front-desk lead, or facilities coordinator).
Set up lightweight change control so the naming convention survives well-meaning improvisation:
Single owner: One person (with a backup) is the only one authorized to create, retire, or rename locations. Everyone else can request changes but cannot publish new codes.
Request form (keep it short): Date, requested action (add/retire/rename), reason (new shelving, renovation, overflow plan, safety), affected area (Zone/Aisle), proposed code(s), and requested effective date. If you use QR labels, include a field for “labels needed” so printing doesn’t get skipped.
Approval rules: Add-only is preferred; renaming requires a structural reason (new aisle built, wall removed, permanent reorientation). Temporary overflow must use the overflow pattern you’ve defined rather than inventing new permanent codes. Retiring a location requires a “last package cleared” check so you don’t orphan items.
Cutover rule: When a code changes, set a cutover date and a brief dual-reference period where signage and internal notes show both codes (e.g., “Old ZB-A02-B07-L03 now ZB-A03-B01-L03”) so old habits don’t cause retrieval failures. After the sunset date, remove the old references so the team isn’t maintaining two languages forever.
Most importantly: treat handwritten labels as an exception condition, not a solution. If someone adds tape and marker, the owner replaces it with a real code label or blocks the location until it’s properly defined.
Metrics to watch without inventing numbers: types of errors and where they cluster
You don’t need elaborate reporting to know whether mailroom location codes are working. Watch for patterns in the kinds of mistakes happening and where they occur; that tells you whether the issue is training, signage, room flow, or overflow behavior.
Practical “metrics” to track as categories (in a simple weekly note or spreadsheet):
Error types: mis-shelf (wrong bay/level), wrong Zone (anchor confusion), missing/illegible label, package left in non-location area (cart, desk, floor), overflow used without proper overflow code, retrieval delay due to unclear code, and handoff dispute (“it wasn’t there”).
Where they cluster: specific Zones (often the ones farthest from the entrance), specific Aisles (tight aisles with poor sightlines), specific Levels (top/bottom shelves people avoid), and any area near the door where carriers tend to drop.
Root-cause tags that lead to action: “new hire,” “layout changed,” “labels moved,” “blocked path,” “after-hours drop,” “oversize,” “room at capacity.” Each tag should map to an action (retrain, improve signage, adjust walking path, formalize overflow storage, or change physical controls like cones/tape).
If the same cluster repeats for two consecutive weeks, treat it as a system issue, not a people issue: fix anchors (Zone/Aisle markers), simplify the path, or re-balance storage so the schema is easier to follow during a rush. That’s how a package room location naming convention stays stable even as the room evolves.
Frequently Asked Questions
What is a good format for a package room location naming convention if we need something staff can learn fast?
Use a fixed, positional code that describes where something is, not what it is. A durable option is Zone–Aisle–Bay–Level (Z-A-B-L).
A practical format:
– Z##-A##-B##-L## (all two digits)
– Example: Z01-A03-B07-L02
Why this works:
– It reads left-to-right as you walk the room.
– It stays consistent even when carriers change, staffing rotates, or your package mix shifts.
– It is easy to speak (“Z one, A three, B seven, L two”) and easy to print on shelf labels and QR labels.
Avoid formats like “FedEx wall” or “Row 1” unless Row 1 is anchored to a permanent reference. Names tied to carriers, people, or nicknames tend to break during turnover and layout tweaks.
How do we handle overflow storage without turning “temporary” areas into permanent chaos?
Treat overflow as a separate, explicitly time-bounded set of locations with its own Zone(s), and never “borrow” permanent codes for overflow piles.
A simple overflow pattern:
– Reserve one or more overflow Zones: ZO (Overflow) or Z98/Z99 if you only allow numbers.
– Keep the same structure: ZO-A01-B01-L01, even if it is floor-staged.
Operational rules that keep overflow clean:
– Define maximum dwell time (for example: “overflow must clear by end of day” or “within 24 hours” — pick one your team can enforce).
– Run a daily overflow sweep: verify each item in overflow has a scan, a location code, and a planned move-back time.
– Set escalation triggers: if overflow exceeds the taped boundary or hits a second Zone, notify the on-site lead and activate a surge plan.
Physical controls that prevent ad hoc naming:
– Use colored shelf labels/QR labels for overflow (same code format, different color).
– Mark boundaries with tape/cones and post “No-drop beyond this line” signs for carrier handoff points.
– If after-hours drops are common, designate a single after-hours intake spot with its own overflow code so staff are not guessing in the morning.
We keep rearranging shelves. When should we add new locations versus renumber everything?
Default to add-before-renumber. Renumbering destroys retrieval consistency because old notes, handoff logs, and staff memory stop matching the room.
Use this decision rule:
– Add locations when: you are inserting a shelf section, adding levels, adding a temporary gondola, or splitting a bay into two.
– Renumber only when: the physical anchors change so much that the original map no longer matches how people navigate (e.g., wall shelving removed and aisles reversed).
Low-churn ways to “add” without renumbering:
– Leave gaps when you first assign codes (e.g., Bay numbers 01, 03, 05… so you can insert 02, 04 later).
– Reserve levels (e.g., do not use L05/L06 at launch so you can add shelves).
– If you must subdivide a bay, use a controlled suffix rule your team agrees on (for example, split B07 into B07A and B07B), but only if your tools and labels support it and you document it.
If renumbering is unavoidable, run a controlled migration:
– Create a crosswalk table (Old Code -> New Code).
– Set a sunset date when old codes stop being used.
– Dual-label during the transition (print both codes on the label) and require scans to use the new code after the cutoff.
What are practical QR-label placement rules so scanning works during busy intake and pickup?
QR labels fail when they are hard to see, easy to peel, or placed where hands/boxes block them. Standardize placement so anyone can scan quickly without “label hunting.”
Placement standards that work in real package rooms:
– Put a large Zone marker at each entry/decision point (where someone chooses left/right).
– Put aisle markers at aisle ends (“endcaps”), readable from 10–15 feet.
– Put bay labels at the front edge of the shelf upright, not on the shelf deck where boxes cover it.
– Put level labels on the vertical supports aligned with the shelf, so “Level” is unambiguous.
QR conventions:
– One QR per discrete location code (don’t reuse one QR for an entire wall).
– Print the human-readable code above the QR so staff can verify without scanning.
– Choose a consistent height: roughly chest/eye level for bay markers; avoid knee height except for bottom levels where necessary.
– Protect labels in high-contact areas with clear covers or laminated stickers.
Busy-shift tip:
– Put an “intake scan point” sign at the carrier drop zone: “Scan package -> Scan location (Z-A-B-L) -> Place.” This reduces the common error of placing first and guessing later.
How do we keep mailroom location codes consistent when we have turnover, float staff, and multiple shifts?
Make the naming convention an operational standard with light governance, not a one-time labeling project.
A workable minimum governance model:
– Single owner: one role (e.g., site lead or facilities/mailroom lead) is the only person allowed to create/retire location codes.
– Simple change request: anyone can request a new location, but changes require approval and a map update.
– One-page SOP: includes code format, how to label, how overflow works, and what to do when a label is missing.
Training that sticks (without long classroom time):
– 10-minute walkthrough: explain Z-A-B-L using the actual room. Have the trainee physically point to a Zone, Aisle, Bay, Level.
– Retrieval drill: give three sample codes and ask the trainee to retrieve from each; then reverse it (place a package and call out the code).
– “No ad hoc renames” rule: if a label is missing or confusing, staff log it; they do not invent a nickname.
Audit cadence:
– Weekly spot-check: pick 10 random scanned packages and confirm the physical location matches the stored code.
– Mis-shelf log categories to watch: missing label, wrong bay, wrong level, overflow used incorrectly, and “couldn’t find” events.
– Label maintenance: replace damaged QR labels immediately and re-check the map after any shelf move.
How should we name floor spots, cages, lockers, or odd spaces that don’t look like normal shelving?
Still use the same Z-A-B-L structure; just define what counts as Aisle/Bay/Level for that fixture type so staff do not improvise.
Examples:
– Lockers: Zone = locker bank area; Aisle = bank number; Bay = locker column; Level = locker row.
Example: Z02-A01-B04-L03.
– Cages: Zone = cage area; Aisle = cage row; Bay = cage number; Level = shelf level inside the cage (or “L01” for floor).
Example: Z03-A00-B02-L01 (use A00 if there is no aisle concept, but document it).
– Oversize floor spots: Zone = oversize area; Aisle = lane; Bay = marked floor position; Level = always L01.
Example: Z04-A02-B06-L01.
Key rule: if staff can stand in two different places and both feel like “the same spot,” it is not a valid location. Paint/tape and signage should make each bay boundary obvious, and each boundary should map to exactly one code.

Ready to Stop Ad Hoc Shelf Renaming From Breaking Retrieval?
Standardize your package room location naming convention in a way new hires can learn fast and your team can maintain through overflow, turnover, and reconfigurations. Put the Zone–Aisle–Bay–Level schema into a one-page SOP, label consistently, and add simple governance so the system stays intact.
Create Your Location Code Standard
Make Location Codes an Operational Standard, Not a Memory Game
A package room stays reliable when the location system stays boring. The Zone–Aisle–Bay–Level schema works because it is stable, speakable, and scalable: people can read it at a glance, say it out loud without confusion, and extend it without inventing new “names.” That stability is what protects you from the real enemy of findability—well-intended improvisation during rush periods, staff changes, and reconfigurations.
To keep your package room location naming convention resilient, treat it like any other operational standardization effort: define the format rules, label consistently, and run a controlled cutover so nothing gets lost mid-transition. Then protect the system with two guardrails that most teams skip: (1) overflow storage rules that are time-bounded and clearly separated from permanent locations, and (2) change control for renovations and renumbering so old references do not become useless overnight.
A practical next step your on-site team can execute in a week is: Day 1 map the room the way people walk it; Day 2 assign Z-A-B-L codes with growth gaps; Day 3 print and place labels (including QR labels if you use them) with consistent placement; Day 4 run a dual-label period and keep an exception log; Day 5 reconcile and finalize; then keep it healthy with a weekly spot-audit, a mis-shelf log, and one owner who approves any new location creation. When your location codes stop changing ad hoc, packages stop “disappearing”—even when everything else is changing around you.