
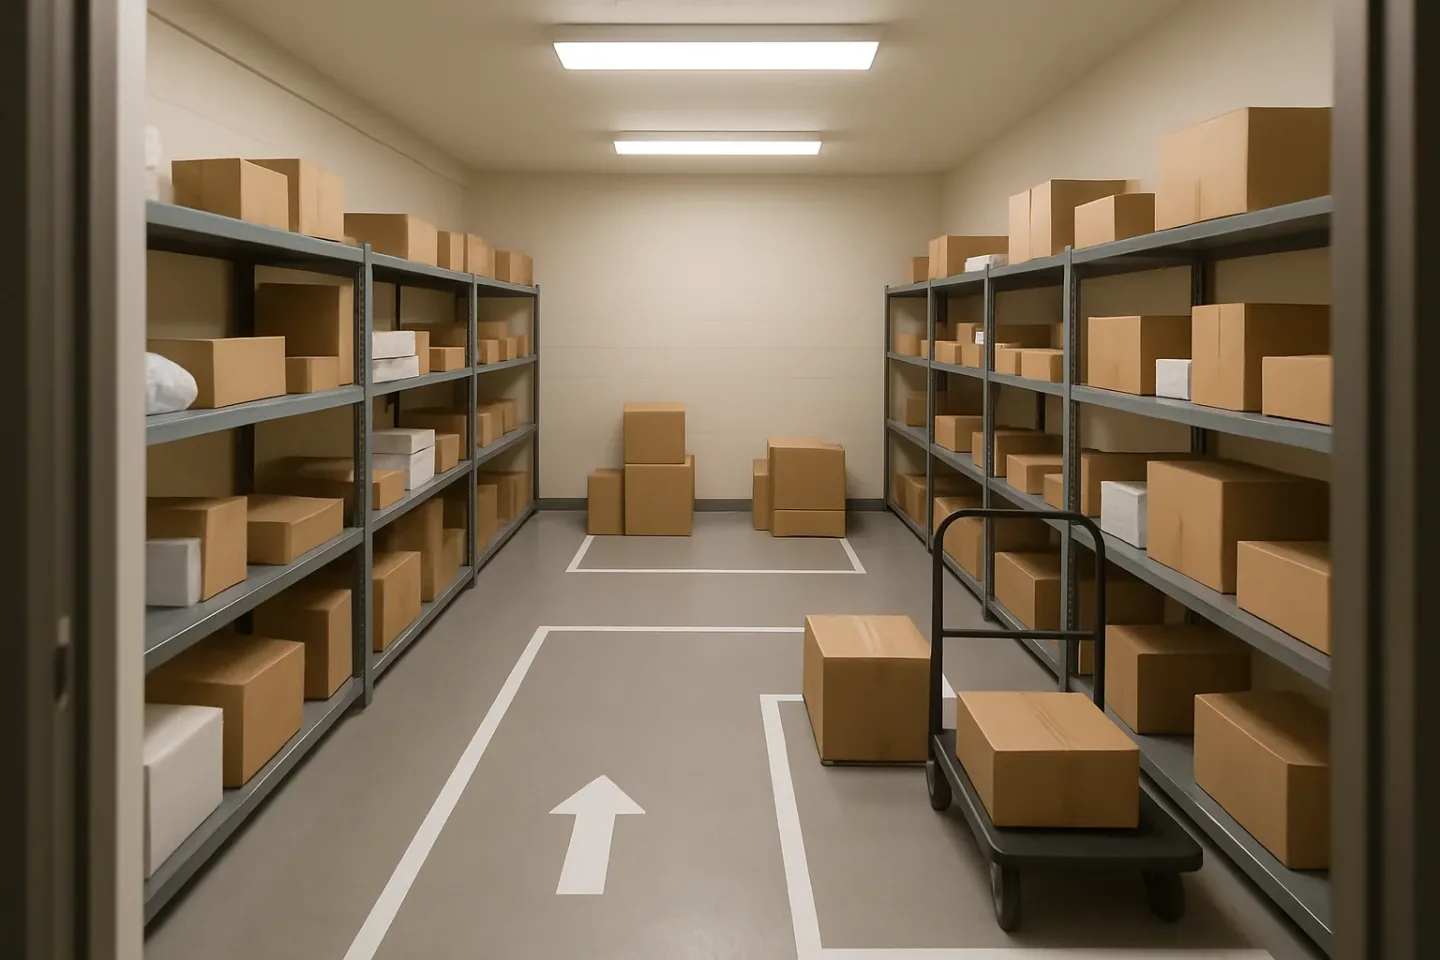
A Package Room Is a Mini-Warehouse (Even If It Does Not Look Like One)
If you cannot remodel your package room, you can still make it faster, safer, and easier to run by treating it like a small warehouse. The goal is not perfection. It is flow: where eyes go first, where hands naturally reach, and where carts need to move without stopping. When the room is legible in seconds and exceptions are contained, search time drops, mis-shelving falls, and boxes stop getting crushed by “temporary” stacks that turn permanent.
This article gives seven low-cost package room organization ideas that require no construction: tape lines, zone signs, package staging zones, better label signage for package rooms, cart parking, an oversize corral to support preventing package damage stacking, plus a return shelf and a “problem child” bin to isolate exceptions. Each change is tied to an outcome you can measure with simple before-and-after tracking, so you can prove improvement (and keep it from drifting back).
Before you touch the layout, set a baseline you can repeat weekly. Pick a short window (for example, one afternoon peak), then sample a small set of real work: time 15 resident retrievals and 15 intakes. For each, capture: 1) search seconds from door-open to hand-on-package, 2) touches (how many times a package is moved before it reaches its final spot), 3) mis-shelves (found in the wrong zone or wrong shelf), and 4) damage events (crushed corners, torn labels, “do not stack” violations, or re-bagging). These are practical metrics building teams can collect with a phone stopwatch and a simple tally sheet.
As you walk the room, write down friction in plain language: Where do staff pause and scan? Where do residents stop and ask? Where do carts stall or block the path? That is your real layout, not the one on paper. The seven changes ahead are designed to remove those pauses and collisions using cheap physical cues and predictable “homes” for packages and tools—classic mailroom layout improvements that work even with limited space and rotating staff.
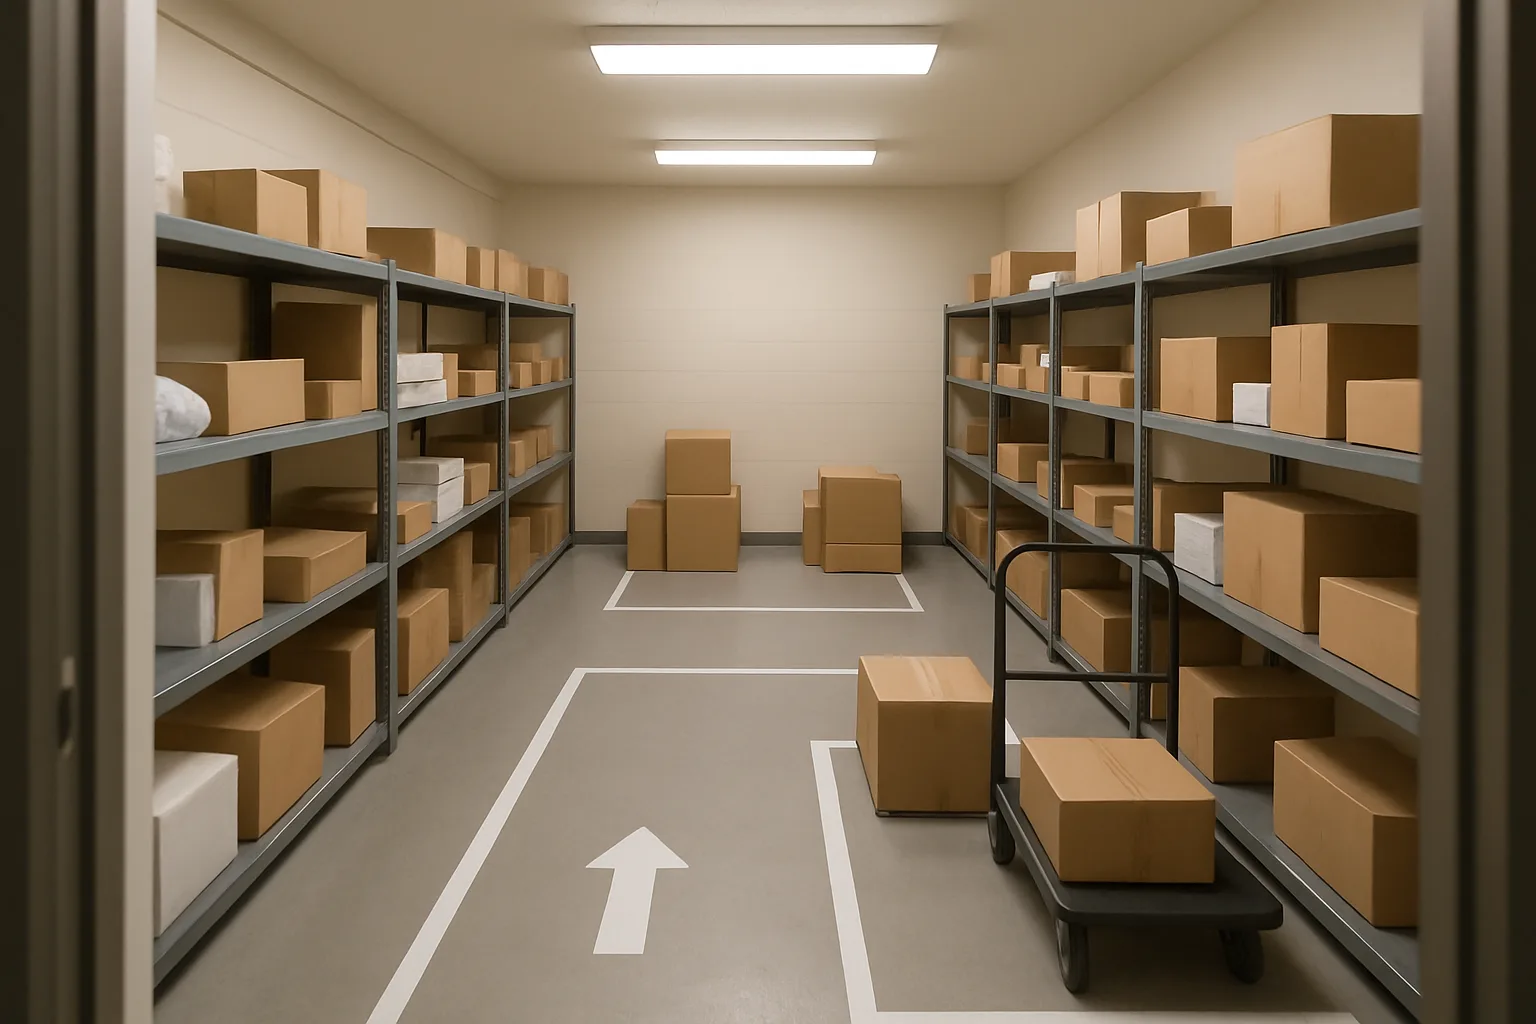
Baseline First: A 20-Minute ‘Time-and-Touch’ Audit (So You Can Prove the Gains)
Before you try new package room organization ideas, capture a quick baseline so you can prove what improved (and what did not). You do not need consultants, stopwatches, or new software—just a phone timer, a pen, and one sheet of paper.
This mini-audit is designed to spotlight the specific friction that a no-construction layout tweak can fix: wasted search time, extra re-handling, mis-shelving, and damage from bad stacking or awkward moves. Run it once, make one or two changes, then run it again the same way.
- What you need: phone timer, clipboard/paper, one marker, and 20 minutes during a normal (not “perfect”) shift
- What you do: sample 15 retrievals and 15 intakes, record four simple metrics, and jot one reason when something goes sideways
- What you get: a baseline you can compare against after mailroom layout improvements (zones, signage, cart parking, oversize rules, exception bins)
Define the four metrics that matter (search seconds, touches, mis-shelf rate, damage events)
Keep the metrics painfully simple. If the team cannot measure it in real time, it will not get measured.
1) Search seconds (retrieval): Start the timer when the staff member enters the package room (or turns from the counter into the room). Stop when their hand first touches the correct package. This isolates the “find it” problem from the “handoff” problem.
2) Touches (intake and retrieval): Count how many times a package is handled before it reaches its next stable state. For intake, count from carrier drop to final shelf/zone placement. For retrieval, count from first touch to leaving the room with the package. Touches go up when layout forces reshuffling, double-stacking, or moving other people’s items to get to the right one—this is where preventing package damage stacking usually starts to fail in practice (because boxes get moved and re-moved). If counting every touch feels too hard, count “extra touches” only: any touch beyond the one required to place it and the one required to retrieve it (everything else is waste).
3) Mis-shelf rate: When a retrieval takes longer than it should, the root cause is often “not where it belongs.” Mark a mis-shelf when (a) the package is found in a different zone/shelf than the label/signage indicates, or (b) it was placed in a lookalike spot (wrong stack, wrong bay, wrong letter range). Do not argue about blame—just count it.
4) Damage events: Count visible, newly noticed damage that affects handoff: crushed corners, torn label that blocks ID, leaking/unstable package, or an item that had to be re-packed or re-bagged to be handled safely. Note whether the damage looks like stacking pressure, a cart collision, or a “fell while moving other boxes.” Even a small number here matters because damage creates exceptions, which create more touches and more search time.
Quick sampling method: 15 retrievals + 15 intakes across different staff
The goal is a sample that represents your real operation: different employees, different times, and different package types (small envelopes to oversize). A small sample done consistently beats a big sample done once.
How to run it (20 minutes):
Pick a normal window (not the quietest hour, not the one time everything is perfect). If you have multiple shifts, run the same audit once per shift over a week rather than trying to do it all at once.
Do 15 retrieval observations: Stand out of the way. For each resident pickup, record search seconds and whether a mis-shelf occurred. Add a quick note if there is a stall (“asked coworker,” “had to move 6 boxes,” “label not visible,” “zone unclear”).
Do 15 intake observations: Watch packages go from carrier drop to final placement. Record touches (or extra touches), and note any damage event discovered or created during handling. If you use QR labels or a scan step at intake, treat scanning as separate from touches; you are measuring the physical handling and movement, not the data entry time.
Spread observations across people: If three team members share the work, try to capture at least a few observations per person. Layout problems often show up as “new staff take longer,” and you want that signal.
Map the flow in plain terms: where eyes go, where hands go, where carts stall
Think like a small warehouse: the layout either supports fast, repeatable motion—or it forces hesitation and rework. Your flow map does not need to be pretty; it needs to reveal where the room stops making sense.
On one sheet of paper, draw a rough top-down sketch: entry door, counter/handoff point, carrier drop spot, main shelving runs, lockers (if any), and any “always in the way” items (trash can, returns pile, dolly, cleaning supplies). Then mark three things:
Where eyes go: Put an X where staff typically stop and visually scan. If people regularly stop in the same spot and swivel their head, it’s a sign your label signage for package rooms is not doing enough (or sightlines are blocked). Note if labels face inward, stacks hide labels, or the first view into the room is a wall of identical boxes.
Where hands go: Circle the areas where people repeatedly pick up packages that are not the target package. These are your high re-handle zones and usually correlate with mixed sizes, deep stacks, and “temporary” piles that became permanent.
Where carts stall: Draw arrows for the cart path (even if you only use a hand truck). Mark any pinch point where two people cannot pass, where a cart blocks scanning, or where someone must back up to turn around. Cart stalls often cause damage (bumped corners) and create “I’ll just put it here for now” placements that turn into mis-shelves.
Tip: If you cannot explain the room to a new employee in one sentence (“Small today packages on left, oversize corral in back, returns shelf by door”), your flow map will show why.
Create a simple scorecard to revisit weekly
Turn your observations into a scorecard you can repeat in 10 minutes every week. The point is not perfect precision; it is consistent measurement so you can tell whether your changes worked.
Use a single page with these fields (copy it into a notebook or shared ops binder):
Scorecard fields to track:
Retrieval: average search seconds (15 samples), worst search seconds (single worst), mis-shelves found (count), “asked for help” incidents (count)
Intake: average extra touches (15 samples), time to clear carrier drop to ‘put away’ (rough total minutes for the observed batch), damage events noticed (count)
Exceptions: number of items that could not be shelved correctly at intake (missing unit, unreadable label, duplicate names)
Notes: top 3 causes of delay in plain words (for example: “no zone headers,” “oversize mixed into regular shelves,” “cart parked in aisle”)
Owner + next action: one physical fix to test before next week (for example: tape a staging zone, move cart home base, add a ‘You are here’ sign).
Operator-ready definitions so everyone measures the same way:
Search seconds ends at first touch of the correct package.
Extra touch is any handling beyond what is required to place/retrieve the package.
Mis-shelf is “not where signage says it should be,” not “someone made a mistake.”
Damage event is any newly noticed condition that complicates safe handoff or identification.
After you implement a change, re-run the same 15-and-15 sample at the same time of day if possible. If your search seconds drop but damage events rise, your new flow might be faster but rougher on packages—use that to adjust your package staging zones, stacking rules, or cart path before you scale the change.
Change #1–#3: Make the Room Legible in 3 Seconds (Zones, Sightlines, and Signage)
Most “package room organization ideas” fail because they assume people will remember rules. A better approach is to make the room readable at a glance—like a small warehouse. The goal is that a new staff member (or a resident picking up) can answer three questions in about three seconds: Where do I walk, where does this package go, and where do I look next?
These first three mailroom layout improvements reduce cognitive load first (eyes), then reduce wasted motion (feet), then reduce mis-shelves (hands). They are intentionally low-cost and reversible: tape, signs, and simple zone definitions that match how your building actually behaves on busy days.
- Principle to keep you honest: You are not “organizing shelves.” You are organizing decisions. Every unclear decision creates a pause, a detour, or a mis-shelf.
- Aim for one dominant path (like an aisle in a warehouse), then branch into zones. If you have multiple crisscross paths, you will have collisions, re-handling, and lost time.
- If residents enter the room, design for two user types: staff (fast sorting and retrieval) and residents (fast self-navigation without touching other packages).
#1 Tape-and-arrow floor lines that match the actual walking path (not the ideal one)
Floor tape is the fastest way to change behavior without training. The mistake is drawing a “perfect” path that nobody uses. Instead, watch two peak periods (carrier drop and pickup rush) and tape the path people already take—then clean it up so it is safer and more direct.
Set up one main “travel lane” from the door to the primary staging shelves, wide enough for your largest cart to pass a person. From that lane, use short taped spurs into each zone. Add arrows so the flow is obvious even when the room is full. The tape is not decoration; it is a physical cue for where carts move and where feet should not linger.
Practical layout moves that work in small rooms: tape a “no-stop” box in front of the door swing; tape a cart turning pocket so carts do not pivot in the middle of the lane; tape “do not place packages here” rectangles in the spots where parcels always creep onto the floor (usually corners and the first open space inside the door). If a spot is repeatedly tempting, label it as forbidden and give that temptation a better alternative (a real zone, described below).
#2 Package staging zones by pickup behavior: ‘Today’, ‘Overflow’, ‘Locker/QR labeled’, ‘Carrier drop’
When everything is “sorted by unit,” staff still waste time because the room does not reflect pickup behavior. Create package staging zones that mirror how packages arrive, how they are processed, and how they leave the room. This is one of the highest-impact mailroom layout improvements because it reduces decision points during intake and narrows the search area during retrieval.
A simple four-zone model works in most buildings and avoids construction:
Zone 1: Today. This is the high-turn area for the next 24–48 hours of pickups. Place it closest to the entrance and to your scan/check-in point. “Today” should be easy to reach and easy to browse without touching stacks. Use shelving if you have it; if not, use tables or wire racks you can move. The rule: nothing stays here past the cutoff you choose (for example, two business days). When “Today” is clean, retrieval is fast because staff check one place first for most requests, and residents are less likely to rummage across the whole room if self-pickup is allowed.
Zone 2: Overflow. Overflow is not “where things go when we are busy.” It is a defined, labeled zone for volume spikes. Put it near (but not inside) the main travel lane. Keep it physically separate so it cannot silently swallow mis-shelves. Overflow should have a simple relocation rule: either it gets pulled back into “Today” during a daily reset, or it gets sorted deeper by unit/alpha once it hits a certain size.
Zone 3: Locker/QR labeled. If you use QR labels or any system that depends on scanning/verification, give it a home. This zone should be adjacent to the scanning station so the staff workflow becomes: check-in, label/scan, place. Separating it prevents “half-processed” packages from mixing with fully logged packages. Make the boundary obvious with tape and a large header sign. If residents self-pick with verification, position this zone so they can approach it without crossing the intake path.
Zone 4: Carrier drop. Carriers will place items where it is easiest for them. Give them the easiest correct spot. Mark a large, unmistakable drop rectangle on the floor, add a sign at eye level, and keep it clear. This contains the mess to one place so staff can clear it in batches without stepping over packages or accidentally stacking heavy boxes on fragile ones. The carrier drop zone should be the first stop from the door and should not require carriers to walk through the room to find it.
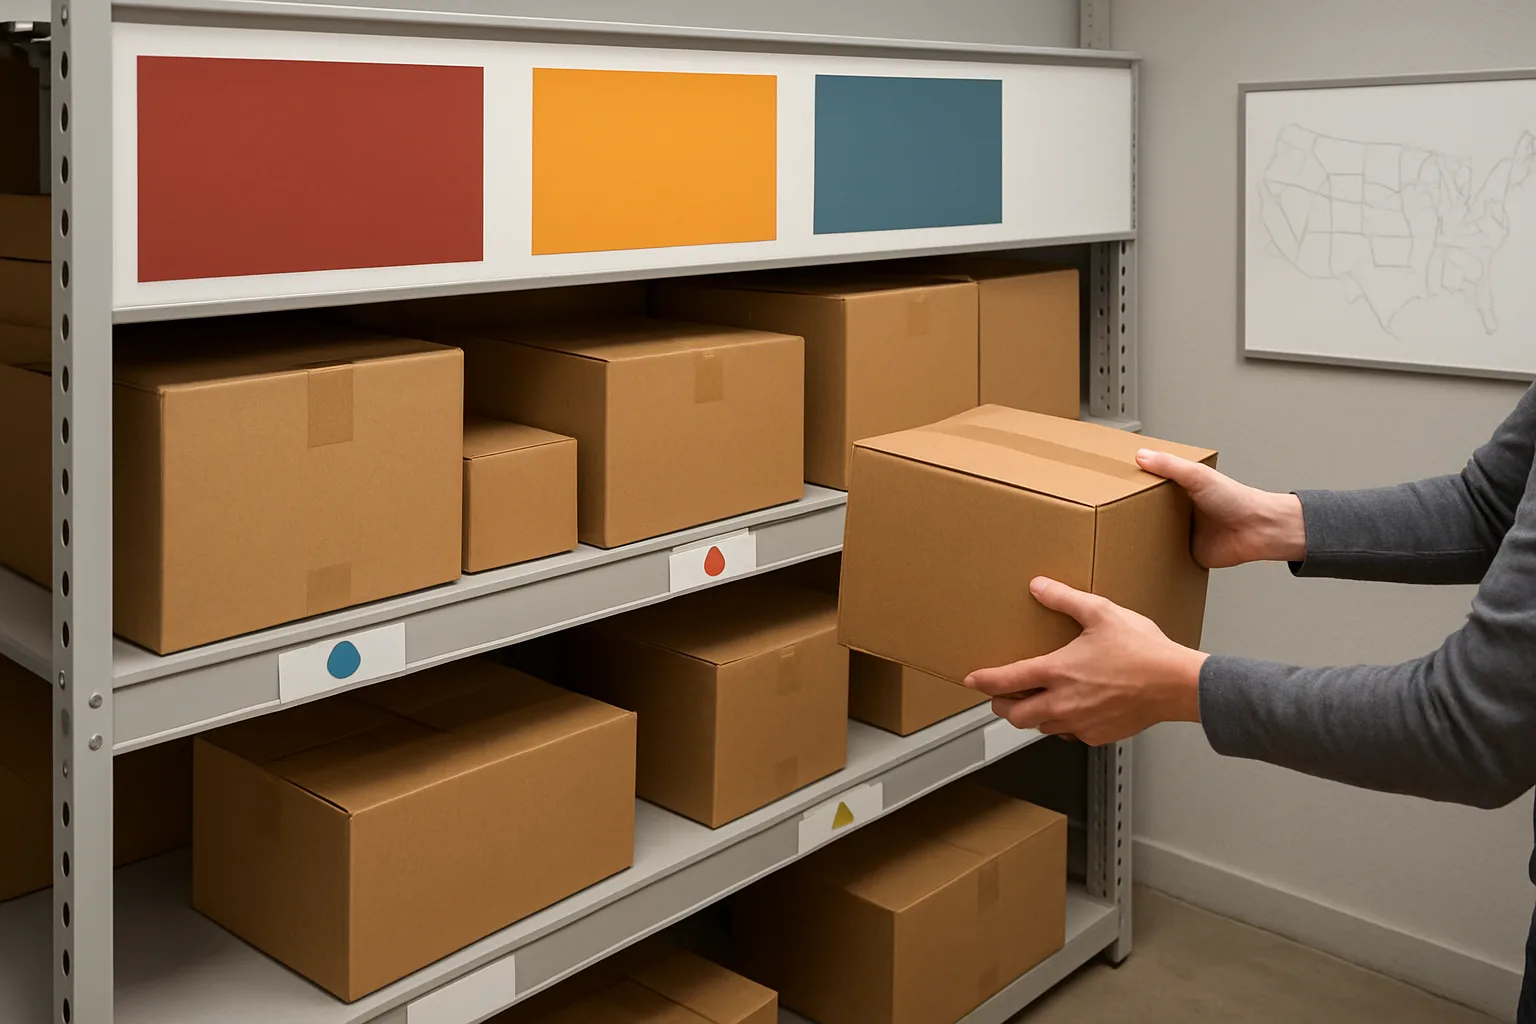
#3 Label signage for package rooms: big-zone headers + shelf-edge cues + ‘you are here’ map
Tape creates the lanes and zone boundaries; signage makes the system self-explaining. Good label signage for package rooms is redundant on purpose: people should get the same answer from across the room (big header), from two steps away (shelf-edge cue), and from the doorway (map). This reduces “Where do I put this?” questions and prevents well-intended mis-shelves.
Start with big-zone headers: large text, high contrast, one concept per sign. Avoid clever names. Use the words staff already say out loud: Today, Overflow, Locker/QR Labeled, Carrier Drop. Place each header at the natural stopping point where someone decides what to do next (the moment before they set a package down).
Next add shelf-edge cues: smaller labels that help with within-zone ordering. For example, in Today you might use simple alpha blocks (A–F, G–L, M–R, S–Z) or building/floor groupings if that matches how your retrieval requests come in. The key is consistency: the shelf-edge cue must match the mental model staff uses to search. If residents are allowed in the room, choose a scheme residents can follow without training (alpha is usually easier than floorplan logic). Keep cues at hand/eye level where someone naturally scans while holding a box, not above their head or below knee height where it gets ignored.
Finally, add a ‘you are here’ map at the entry. Keep it simple: a rectangle for the room, big blocks for each zone, and an arrow showing the main travel lane. Do not include every shelf. The map is not a blueprint; it is a decision aid that reduces wandering. If you have separate entry/exit doors, show directional arrows so traffic flows one way during peak pickup times.
Two practical signage rules that prevent drift: (1) Use the same terms everywhere (if the sign says Overflow, your checklist and staff instructions should also say Overflow). (2) Make signs easy to replace. If a sign looks “temporary,” it gets ignored. If it looks “permanent,” people follow it. Laminated paper in a rigid sleeve or plastic sign holders usually strikes the right balance without spending much.
Before/after metrics to track: average retrieval time, mis-shelves per day, ‘asking for help’ incidents
These three changes are designed to cut wasted seconds caused by hesitation and wandering. Track outcomes with a lightweight scorecard so you can prove the gains and catch backsliding early. You do not need perfect data—just consistent sampling before and after.
Average retrieval time: Measure from the moment staff start searching (or enter the room) to the moment the correct package is in hand. Sample across different times of day and different staff. Expect the biggest improvement when zones are clear enough that staff can skip entire areas rather than scanning every shelf.
Mis-shelves per day: Define “mis-shelf” as any package found outside its intended zone or shelf-edge cue group (including items left in the travel lane or on the floor). Count during a daily reset or closing sweep. Tape boundaries and zone headers usually reduce the “I will just set this here” placements that create tomorrow’s search problems.
‘Asking for help’ incidents: Count how often staff or residents need to ask, “Where is Overflow?” “Where do carriers drop?” or “Where would unit 12B be?” A simple tick mark on a clipboard at the desk works. When your package staging zones and label signage for package rooms are working, these questions drop because the room answers them visually.
Quick interpretation guide: If retrieval time improves but mis-shelves stay high, your zone headers are working but shelf-edge cues are unclear or too granular. If mis-shelves improve but retrieval time does not, your main travel lane and sightlines may be blocked (packages encroaching on the path, or zones arranged in a way that forces extra walking). If asking-for-help stays high, your signs are either not visible at the decision points or your terminology does not match how people talk in the moment.
Change #4–#5: Reduce Re-Handling With ‘Where Carts Live’ and ‘Where Oversize Goes’
If your package room feels busy but not productive, the culprit is usually re-handling: items get moved multiple times because carts park wherever there is space and oversize parcels have no defined home. These two mailroom layout improvements are cheap, fast, and immediately measurable. They also reinforce better package staging zones by keeping travel lanes clear and protecting the parcels most likely to be damaged.
Think of this as a warehouse rule: carts should move on purpose, and oversize should never force smaller boxes into unstable stacks. When you define where carts live and where oversize goes, you cut unnecessary touches, shorten “clear the drop” time, and reduce damage from crushing, tipping, and dragging. These are straightforward package room organization ideas that require no construction—just clear boundaries and consistent habits.
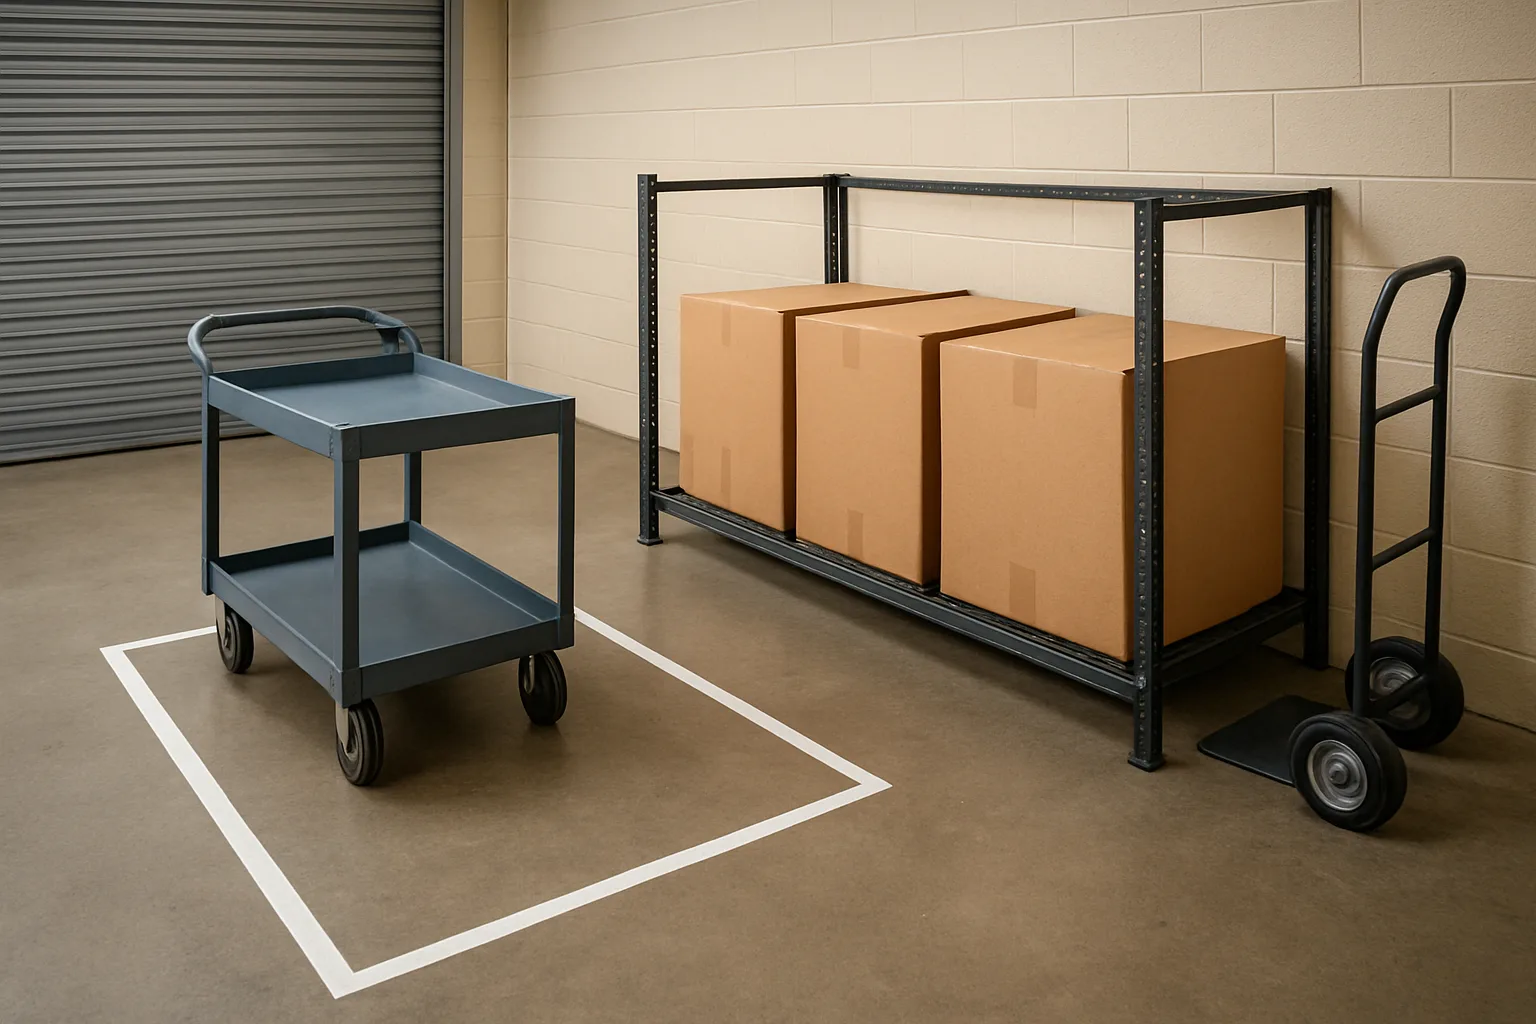
#4 Cart parking that does not block scanning or walking lanes (and always returns to home)
Goal: eliminate cart-related bottlenecks so staff are not rerouting around parked carts, blocking the scanning table, or abandoning carts in the middle of the room. A cart without a home becomes clutter. A cart with a home becomes a tool.
What to change physically (low-cost, no construction):
1) Create 1–2 clearly marked “Cart Home” rectangles on the floor using durable tape. Each rectangle should fit the cart footprint plus a little space for hands to grab the handle. Place these in the least valuable real estate: against a wall, near the door but outside the main travel lane, and not in front of shelves or package staging zones used for intake/sorting/pickup. If you have multiple carts (intake cart, pickup cart, oversize dolly), give each a labeled home (Cart A, Cart B) so staff do not swap and abandon them unpredictably.
2) Mark your “No Park” zones with tape or simple floor labels: in front of the scanning station, directly inside the carrier drop area, and in the narrowest pinch-point aisle. The point is not to be strict for its own sake—it is to protect the lanes where people and packages must pass repeatedly.
3) Add a visual cue that works at a glance: a sign at eye level that says “Carts Return to Home After Each Run” and a floor arrow pointing to the cart home. This pairs well with label signage for package rooms because it reduces decision-making during peak volume.
4) Set a single rule that prevents drift: “If your hands leave the cart, the cart goes home.” This is easier to enforce than complex rules about “when” a cart may be left somewhere.
Practical layout examples:
– Front-desk building: put the cart home just outside the package room door (still inside staff-only space) so staff can load quickly without blocking the scanning table.
– Tight room with one main aisle: put cart home at the aisle endcap rather than mid-aisle. Mid-aisle parking forces every retrieval into a detour.
– Two-door room (carrier door + staff door): put cart home near the staff door to reduce the chance carriers use it as a dumping surface or block it with new deliveries.
How this reduces re-handling:
– Staff stop “temporarily” parking carts in the middle, which prevents packages being set down twice (once to move the cart, again to reload).
– Clear lanes mean fewer accidental bumps and fewer packages sliding off carts or shelves.
– Predictable cart location reduces time spent searching for equipment during rushes.
Common failure modes (and quick fixes):
– Cart home gets used as overflow staging. Fix by shrinking the cart home footprint to cart-only and adding a separate taped overflow box (even a small one) so staff have a legal place to put true overflow.
– The cart home is too far from where carts are used. Fix by moving it. The “correct” home is the one staff actually uses without thinking.
– Too many cart types create confusion. Fix by labeling the handles (Intake, Pickup, Oversize) and matching the floor labels.
Outcome linkage you can measure:
– Fewer touches per package (because fewer interruptions and resets).
– Faster time to clear the carrier drop (because carts are available and lanes stay open).
– Fewer damage notes caused by collisions, tipping, or dragging around obstacles.
#5 Oversize corral with a ‘do not stack’ rule to support preventing package damage stacking
Goal: keep large/heavy/awkward parcels from becoming the “gravity problem” that crushes small boxes, blocks aisles, and forces constant shuffling. Oversize is where good rooms go bad because it tends to land wherever there is temporary floor space, which is rarely stable or safe.
What to change physically (low-cost, no construction):
1) Establish an oversize corral: a clearly taped zone on the floor dedicated to items that are heavy, long, fragile, or too big for shelves. Give it a name that matches staff language (Oversize, Bulky, Large/Heavy). The corral should be close enough to the carrier drop that staff can place items without dragging them across the room, but far enough from the main travel lane that it does not turn into a choke point.
2) Post a simple rule at eye level: “Oversize: Do Not Stack.” This is the heart of preventing package damage stacking. Stacking makes retrieval slower (more re-handles) and increases crushed corners, torn labels, and slip-and-fall risk from unstable piles.
3) Add a quick classification cue so staff decide in one second:
– If it is heavier than you would comfortably lift with one hand, it goes to Oversize.
– If it will stick out past the shelf edge, it goes to Oversize.
– If it is marked fragile or the box is soft-sided, it goes to Oversize.
These are ergonomic rules: they protect hands, backs, and box integrity.
4) Create “lanes” inside the corral with tape if volume is high:
– Lane A: Today’s oversize pickup
– Lane B: Older oversize (yesterday/backlog)
This prevents the classic problem where a new bulky item gets placed in front of an older one, forcing re-handling later.
5) Protect labels from scuffing: put a small sign by the corral that reads “Place label facing aisle.” When labels face down or toward the wall, staff end up rotating heavy items (extra touches) or dragging them out to identify them.
Practical layout examples:
– If residents pick up at a counter: keep the oversize corral near the pickup path so staff do not have to maneuver large parcels through a narrow shelf maze.
– If your room has a dead corner: use that corner for oversize, but keep a taped “handle lane” (a narrow buffer) so staff can grip and turn packages without scraping walls.
– If carriers dump directly onto the floor: position the oversize corral as the first right/left turn from the door so staff can redirect bulky items immediately before smaller parcels start stacking around them.
How this reduces re-handling and damage:
– Oversize stops migrating across the room, so staff are not repeatedly “making space” as more deliveries arrive.
– A no-stack rule removes the need to unpile items to reach the correct one, cutting touches and search time.
– Keeping bulky items off shelves reduces shelf-edge crushing and prevents smaller packages from being wedged under heavier boxes.
Common failure modes (and quick fixes):
– Oversize corral becomes a general overflow zone. Fix by enforcing the one-second classification cue and adding a separate taped Overflow zone elsewhere for regular boxes.
– Staff stack anyway during peaks. Fix by sizing the corral larger than you think you need on heavy delivery days, and by adding a second temporary oversize corral during known peak periods.
– Labels get torn on the floor. Fix by using a clean mat or cardboard sheets inside the corral if your floor is rough; keep it simple and replace as needed.
Outcome linkage you can measure:
– Fewer damage notes related to crushed corners, punctures, and torn labels.
– Fewer touches per oversize package (because you are not unstacking or rotating repeatedly).
– Shorter time to clear the carrier drop during heavy deliveries (bulky items get “parked” correctly on first touch).
Before/after metrics to track: touches per package, time to clear carrier drop, damage notes
To prove these changes worked, track the same small set of metrics for one week before and one week after. Keep it simple and consistent so different staff can record it the same way.
Metrics (and how to capture them fast):
1) Touches per package (sampled): For 15 intakes, tally how many times the package is physically handled before it reaches its final spot (including “move it out of the way” touches). Do the same for 15 retrievals. Your goal is fewer “unplanned” touches caused by blocked lanes, missing carts, or stacked oversize.
2) Time to clear the carrier drop: Start a timer when deliveries hit the drop area; stop when the drop area is clear and walkable. Track this once per day at a consistent time (or for each carrier event if you have multiple). Cart homes and an oversize corral should reduce this noticeably even when volume is high.
3) Damage notes (count, not guesses): Log each time staff notices a crushed box, torn label, puncture, or leaking package during intake or retrieval. Note the likely cause when it is obvious (stacked oversize, cart collision, dragged label side). You are not trying to assign blame—just identify preventable patterns.
Optional quick add-on if you already track exceptions: note how many “cannot find” events happen during pickup for oversize items specifically. Oversize is often where claimed-missing starts because items are placed inconsistently or hidden behind stacks.
What “good” looks like:
– Carts are in their home locations when not actively in use, and lanes stay clear throughout the day.
– Oversize is identifiable from the door in one glance, with labels facing out and no unstable piles.
– Staff can clear the carrier drop without stopping to move carts or rearrange bulky items.
If you are already using QR labels or a simple accountability log, these physical cues make the process faster: staff scan once, place once, and retrieve once—because the room’s flow supports the handoff instead of fighting it.
Change #6–#7: Contain Exceptions So They Don’t Poison the Whole System (Returns + Problem Bin)
Most package rooms fall apart because of exceptions, not volume. A handful of oddballs—returns waiting on action, boxes with torn labels, duplicates names, partial deliveries—get set down “for later,” then migrate. That is how mis-shelves happen, how staff lose trust in the room, and how residents end up claiming items as missing even when they are physically there.
Treat exceptions like hazmat in a small warehouse: they need a dedicated, highly visible home and a simple rule for what happens next. The goal is to keep normal packages flowing through your package staging zones while isolating anything that requires decision-making.
Below are two low-cost package room organization ideas that consistently reduce search time and claimed-missing incidents without remodeling: a Return shelf and a Problem Child bin. They work best when the physical cues (labels, tape, bin color) are paired with a lightweight accountability routine at intake and pickup.
- Materials (low cost): 1 small shelving unit or one clearly marked shelf section; 1–2 stacking bins or a lidded tote; bright tape; thick marker; pre-printed tags or blank index cards; clipboard or small notebook for an exception log; optional: a battery LED puck light aimed at the exception area.
- Placement rule (ergonomics): put exceptions where eyes naturally land (near the entrance or scanning/labeling point), but outside the main walking lane so they do not become a dumping ground.
- Capacity rule (flow): cap each exception container. When it is full, the room stops accepting new exceptions until the bin is processed (forces resolution instead of accumulation).
#6 Return shelf with a simple 3-step rule: tag, date, next action
Returns are a predictable exception, so they deserve a predictable location. The cheapest mailroom layout improvements often start here because returns create “mystery piles” that look like incoming inventory. A dedicated return shelf prevents normal packages from being re-handled, moved out of the way, or accidentally given to the wrong person.
Set up one shelf (or one clearly bounded section) labeled RETURNS. If you can, use a different color cue than your normal zone signage (for example, red tape border around the shelf edge) so staff never confuse it with pickup inventory.
Use a 3-step rule that is impossible to skip: Tag, Date, Next action. The physical tag is the control—if it is not tagged, it is not allowed on the Return shelf.
Return shelf setup: make the next action visible from 6 feet away
Divide the shelf into three micro-zones using tape and a big header on each zone. Keep the words short so they are readable at a glance:
Micro-zone 1: Awaiting label (resident or staff needs to provide a label)
Micro-zone 2: Carrier pickup scheduled (ready to go; do not open)
The 3-step rule (print it and tape it above the shelf)
1) Tag: attach a simple return tag with: unit, resident name, date/time, and who accepted it. If your operation uses QR labels for package accountability, place the QR label on the return tag (not directly on the box if it might be reused), so the item can be referenced later without relying on a fading carrier label.
2) Date: write the date in large numbers on the tag and face the tag outward. Older dates should be visible without touching the package.
3) Next action: circle one: Resident action needed / Staff action needed / Carrier pickup. Add the next step in 3–5 words (example: “Need Amazon QR,” “Print UPS label,” “Pickup Wed 3pm”).
Handling rules that prevent the return shelf from becoming a second package room
Do not stack returns. Stacking is where preventing package damage stacking matters most: return boxes often contain fragile items and get crushed when treated like overflow. Use one layer per shelf whenever possible. If you must stack, set a height limit (example: no more than 2 boxes high) and never stack on soft mailers.
No anonymous returns. If a resident drops a box without a name/unit, it goes straight to the Problem Child bin (below), not the Return shelf.
Aging trigger: anything on the Return shelf past your chosen limit (commonly 3–7 days, based on policy) gets escalated using your exception log. The key is consistency: the shelf is not storage, it is a short runway to resolution.
#7 ‘Problem child’ bin: unlabeled, torn labels, access issues, duplicate names, partial deliveries
Every room needs a single, unmistakable place for packages that cannot be shelved confidently. If staff have to think “Where should I put this?” it will end up in the nearest open spot—right where it will be forgotten or mis-shelved.
Create one bin or tote with a bold header: PROBLEM CHILD (or EXCEPTIONS). Use a bright color or striped tape so it is visually distinct from your normal package staging zones. Position it at the intake/scan point so the decision happens immediately, not after the package has already been moved around the room.
This bin is not a junk drawer. It is a controlled queue of items that require follow-up. The win is that your main shelves stay clean and searchable, and staff always know where to look first when a resident says, “It says delivered, but I cannot find it.”
What goes in the Problem Child bin (define it so staff do not guess)
Put only items that cannot be reliably assigned or safely shelved, such as:
Unlabeled or incomplete label (no unit, no last name, illegible writing)
Torn label or barcode that will not scan or is half missing
Duplicate names or multiple residents with same last name where unit is unclear
Access issues (signature required, restricted delivery notes, locker code missing)
Partial deliveries (box 1 of 2 arrived; the other is missing) or a shipment that arrived damaged/opened and needs documentation before release
Problem Child handling rules (keeps it from poisoning the rest of the system)
One-touch rule: if it is a problem, it goes directly into the bin on first contact—do not place it on a shelf “temporarily.”
Face-out rule: the best available identifying surface faces outward. If nothing is readable, attach a temporary tag immediately.
Daily emptying target: the bin should trend toward empty at the end of each day (or each shift), not grow until it becomes a project. If you cannot empty it daily, set a strict maximum count (example: no more than 10 items) and escalate once exceeded.
How to pair physical cues with accountability: QR label placement, handoff checklist, exception log
Physical changes work when they are backed by a tiny process that is easier to follow than to ignore. You do not need new software to do this well; you need consistent cues and a record that lets the next staff member pick up where the last one left off.
QR label placement: If you use QR labels in your building workflow, place the QR on the temporary tag for exceptions (returns and problem items). That keeps the identifier consistent even if the carrier label is torn, and it prevents staff from sticking labels randomly on corners where they are hard to scan later. The rule should be: QR goes on the most visible face, upper right, always.
Handoff checklist (30 seconds at shift change): (1) Count items on Return shelf and Problem Child bin, (2) identify the oldest dated item in each, (3) confirm the next action for those oldest items is assigned to a person (initials on the tag). This prevents “everyone thought someone else handled it.”
Exception log (paper or shared note) that actually gets used
Keep the log physically attached to the exception area (clipboard hung on a hook, or notebook in a labeled tray). Each line should be fast to write:
Date/time; Exception type (Return / Problem); What it is (carrier + short description); Identifying info (unit/name if known); Next action; Owner initials; Resolved date.
The log is not bureaucracy; it is what lets you answer, with confidence, whether an item is (a) still on-site, (b) waiting on resident action, or (c) escalated. That directly reduces claimed-missing disputes because you can locate exceptions without searching every shelf.
Before/after metrics to track: claimed-missing rate, exceptions aging, time-to-resolution
To prove these changes worked, track the outcomes that exceptions typically distort. Use a simple weekly snapshot—no fancy dashboards required.
Claimed-missing rate: Count the number of resident claims of missing packages per week, and note how many were later found on-site. After implementing a Return shelf and Problem Child bin, your target outcome is fewer “found later” incidents because exceptions are always in one place.
Exceptions aging: Once per day (or shift), record the oldest date visible on the Return shelf and in the Problem Child bin. The number you want to push down is “oldest item age.” If the oldest exception is consistently multiple days old, you have a resolution bottleneck (usually missing owner assignment or unclear policy).
Time-to-resolution: For a small sample (for example, 10 exceptions), record how long it took from intake to resolution (return shipped/picked up, label fixed and shelved, delivery issue clarified). Even a simple median time (middle value) is enough to compare week-over-week.
Search time impact (quick check): During your regular retrieval sampling, note whether any retrieval required checking exceptions. When exceptions are contained, staff should find the answer faster: either the package is in the right zone, or it is clearly flagged in exceptions with a next step. The measurable outcome is fewer multi-location searches and fewer second trips back into the room.
Put It in Order: A Budget Rollout Plan + Weekly Reset Checklist
You do not need a remodel to get measurable mailroom layout improvements. You do need sequence: do the changes that make the room readable first, then lock in flow (carts and oversize), then contain exceptions (returns and problem bin). This section gives you a rollout plan that fits real staffing, plus a weekly reset checklist so your package staging zones and signage do not drift over time.
Use your own baseline from the time-and-touch audit to define success. The goal is not to chase someone else’s number; it is to prove that your package room organization ideas are cutting search seconds, touches, mis-shelves, and damage events in your building—week over week, even during peak volume and staff turnover.
- Rule of thumb for prioritization: anything that makes the room legible (where eyes go) comes before anything that optimizes movement (where carts go), which comes before exception handling (where oddballs go).
- Standardize the physical changes with simple “homes”: every cart has a marked parking box, every oversize item has a corral, every return has a shelf slot, every exception goes to the same bin—no improvisation required.
- Track before/after with the same sampling method and the same times of day (for example: mid-morning intake and late-afternoon pickup). Consistency beats volume.
90-minute rollout (tape + signs) vs half-day rollout (zones + cart + oversize + exceptions)
If you have only a short window between carrier drops and resident pickup rush, start with the two changes that instantly reduce search time: floor tape/arrow guidance and clear zone signage. Then schedule a half-day to assign space for staging zones, cart parking, oversize, returns, and the “problem child” bin (the stuff that otherwise creates claimed-missing and re-work).
Plan the rollout like a mini-warehouse re-slot: do it when the room is at its lowest volume, and keep one staff member “on intake” so deliveries do not pile up in the hallway while you are taping and labeling.
90-minute rollout (best for same-day impact) should include: walk-path tape lines and arrows that match the real route; big zone headers visible from the doorway; and shelf-edge cues for the most-used shelves. The goal is that a new temp can walk in and know where to put their hands without asking a question.
Half-day rollout (best for touch reduction and damage reduction) should include: finalize package staging zones; mark cart parking; build an oversize corral with a simple “do not stack” rule to support preventing package damage stacking; and set up a return shelf plus a clearly labeled “problem child” bin. Walk the full flow with an empty cart and confirm you can move from carrier drop to scan to put-away to pickup without backtracking.
Practical sequencing inside the half-day window:
1) Clear and sweep the floor, then tape walking lanes and cart turning space first. Tape is easiest when the floor is clean and dry.
2) Place and label staging zones (Today/Overflow/Carrier Drop/etc.) before you move any shelves or tables. You want the zones to dictate placement, not the other way around. This is the core of package staging zones done well: they reflect behavior (how packages arrive and leave), not your wish for perfect symmetry in the room layout improvements checklist.
3) Mark cart parking “homes” next, so carts stop living in aisles and against shelving where they crush corners and block sightlines.
4) Define the oversize corral last, using whatever space is left that does not pinch your lane. Oversize should be easy to spot and hard to stack on.
5) Finish by installing the return shelf and the exception bin near the staff work area (not deep in storage). If exceptions are out of sight, they will age and become disputes.
Before you declare victory, run a 5-minute “door test”: stand at the door and answer three questions without stepping in: Where do I drop carrier deliveries? Where do I put a newly scanned package for today pickup? Where do oversize items go? If those answers are not obvious, adjust signage size or placement. That is the fastest way to validate label signage for package rooms.
What to buy for under a small budget: tape types, sign materials, shelf-edge labels, lighting add-ons
You can do most of this with basic supplies. Keep choices simple and repeatable so replacements are easy when tape peels or signs get torn.
For tape: use one color for walking lanes/arrows, a second color for “no park” boundaries, and a third (optional) for zone boxes (such as cart parking and oversize). Matte gaffer-style tape tends to be easier to remove cleanly than some glossy options; heavy-duty floor marking tape holds up better in high traffic. Whatever you choose, standardize colors and keep a roll in the mailroom supply bin so staff can repair peeling corners immediately.
For signs: prioritize big, high-contrast zone headers that are readable from 10–15 feet, plus smaller shelf-edge cues right where hands reach. A simple rule: big signs answer “where am I,” small labels answer “where does this go.” Print on thick paper, place in plastic sleeves, and attach with removable adhesive or magnetic holders if you have metal shelving. Use consistent wording across zones, shelf edges, and your “you are here” mini-map so there are no synonyms to interpret under pressure (for example: do not mix ‘Oversize,’ ‘Large,’ and ‘Big Boxes’). Pick one term and stick to it across all label signage for package rooms so mis-shelves drop.
For shelf-edge labels: use wide labels with a clear left-to-right or top-to-bottom order that matches how staff scan visually. If residents are sorted by unit range, make the ranges big and unambiguous (for example: 101–120). If they are sorted by last name, keep the A–F, G–L, etc. breaks consistent across shelves and do not change them without updating every sign.
For lighting add-ons: if the room is dim or shadowy, you can often improve legibility with plug-in LED light bars or clamp lights aimed at label faces and the main sorting surface. Lighting is not a “nice to have” when you are trying to cut search seconds; it reduces read errors that become mis-shelves. Choose neutral-white bulbs so label contrast is high. Tape a note near the switch: “Lights on during intake and pickup.”
Low-cost extras that pay off in flow: a simple wall hook or strap for a handheld scanner; a dedicated marker and a roll of “Exception” stickers for the problem bin; and a small clipboard for the weekly reset checklist (kept in the same place every week).
Weekly reset: re-tape hotspots, clear staging zones, audit signage, refresh return/problem bins
Your layout will decay unless you schedule a reset. The reset is not deep cleaning; it is a short, repeatable routine that keeps the physical system aligned with how the room actually gets used. Run it at the same time each week (for example, late afternoon before the next day’s peak deliveries). Assign an owner, but make it runnable by any trained staff member so it survives time off and turnover.
Weekly reset checklist (15–25 minutes):
Walking lanes and tape lines: re-press lifting edges; replace any torn arrows; re-tape the two most-worn corners (usually the doorway turn and the scanning table approach). Confirm cart lanes are not shrinking due to “temporary” stacks that became permanent. This keeps carts moving and prevents bottlenecks that cause rushed handling and damage.
Package staging zones: empty the ‘Today’ zone at end of day or define what remains acceptable. If overflow is creeping into lanes, either expand overflow boundaries (with tape) or tighten intake rules so overflow triggers a deliberate action, not a slow sprawl. This is the most common failure mode for package staging zones: they become general storage.
Label signage for package rooms: do a 60-second readability check from the doorway and from the scanning spot. Replace any sign that is bent, faded, or blocked by stacked parcels. Confirm shelf-edge labels still match the actual sorting method (unit ranges, floors, names, or QR-labeled groupings). If you changed the process, change the labels the same day—never “later.”
Cart parking: every cart returns to its taped parking box at shift end. If carts are consistently left elsewhere, the parking location is wrong (too far, blocks a task, or conflicts with carrier drop). Move the taped box rather than fighting behavior.
Oversize corral: clear the floor of any items that migrated into lanes. Re-post the ‘do not stack’ reminder if crushed corners or dented packages showed up in your damage notes. If oversize is frequently over capacity, your corral is undersized; expand its footprint by taking space from low-value storage rather than letting oversize spill into walk paths.
Returns + problem child bin: remove anything older than your defined threshold and take the next action (contact resident, contact carrier, re-label, escalate). Refresh supplies (exception stickers, marker, zip bags for torn labels). The goal is to prevent exceptions from aging into claimed-missing disputes.
One quick accountability habit that keeps the reset from becoming “just tidying”: count and write down three numbers during the reset: how many items in returns, how many in the problem bin, and how many packages are sitting outside defined zones. These are early warning signals that your flow is breaking.
Operator-ready targets: what ‘good’ looks like in measurable thresholds
Targets should be tied to your baseline and your staffing reality. The most useful targets are simple, observable, and directly connected to the seven physical interventions. Use them as pass/fail checks during the weekly reset rather than aspirational goals that nobody can verify.
Here are practical “good” definitions you can adopt and adjust after two weeks of data:
Search time: set a target reduction from your baseline (for example, “reduce average retrieval by 20% from week 1 baseline” or “reduce the slowest 5 retrievals by 30 seconds”). Focusing on the slowest cases often reveals signage and zone clarity problems faster than averages do. This links directly to package room organization ideas like better zone headers and shelf-edge cues.
Touches per package (re-handling): target fewer re-touches in the first hour after carrier drop (for example, “most packages are handled once from intake to shelf”). If you are frequently touching the same parcel twice, it usually means zones are unclear, overflow is spilling, or carts have no home and become temporary tables.
Mis-shelf rate: define a simple weekly threshold based on your own reality (for example, “no more than X confirmed mis-shelves per week,” where X starts as your baseline minus a small improvement). Track confirmed mis-shelves, not resident complaints alone. Mis-shelves are what label signage for package rooms and zone legibility are meant to reduce.
Damage events: track observable damage at handoff (crushed corners, punctures, visibly deformed boxes) and note if the package was found in oversize, overflow, or a lane. Set a target like “zero stacked oversize inside the corral” and “no packages stored in walking lanes,” because these are controllable and directly related to preventing package damage stacking.
Exceptions aging: decide a maximum age for items in returns and the problem bin (based on your building policy). Then set a target like “nothing in the problem bin older than the max age” and “returns shelf cleared to zero at least once per week.” This is the fastest way to reduce claimed-missing risk from silent exceptions.
Zone integrity: set a weekly “zone spill” threshold (for example, “no more than five packages outside defined zones at reset time”). Zone spill is a leading indicator that your mailroom layout improvements are slipping.
Finally, document the targets on a one-page scorecard and keep it physically in the room (clipboard at the scanning station). When staffing changes, the room still teaches the process: clear zones, clear labels, clear cart homes, and clear exception containment. That is how low-cost physical changes keep producing measurable results without ongoing supervision.
Frequently Asked Questions
What are the fastest ‘package room organization ideas’ you can do in under an hour (no new shelves, no contractor)?
If you need quick wins, focus on legibility and fewer wrong turns:
1) A single “main aisle” tape line from door to back wall, plus arrows that match the real walking path.
2) Two large zone signs only: “Pickup Ready” and “Exceptions.” You can split into more zones later, but two zones instantly reduces mis-shelves.
3) A cart “home base” box taped on the floor so carts stop blocking the scan/label spot.
4) One oversize corner sign: “OVERSIZE: DO NOT STACK.”
Track the impact with two numbers for the next 3 days: (a) average retrieval seconds (time from resident name/unit request to parcel in hand), and (b) mis-shelves found during daily tidy-up. Even without a full redesign, these four changes typically show improvement because they reduce searching and re-walking.
How do you measure ‘search time’ and ‘touches’ without buying software or running a big study?
Use a lightweight, repeatable sampling method that building operators can run with a phone timer and a clipboard:
Search seconds (retrieval time)
– Start timer when the staff member begins looking (not when the resident starts talking).
– Stop when the correct package is in hand.
– Sample 15 retrievals over 2–3 shifts.
Touches per package (handling)
– Count each time a package is lifted, slid, or moved to access another package.
– Include “move aside to see label,” “restack,” and “move to cart.”
– Sample 15 intakes and 15 retrievals.
Keep it consistent: same definition, small sample, repeat weekly. You are not chasing perfect accuracy; you are proving directionally that mailroom layout improvements are cutting re-handling and search time.
What’s the simplest way to set up package staging zones without making the room feel complicated?
Keep staging zones based on pickup behavior (how items leave), not on how carriers arrive. A simple, low-confusion set of package staging zones is:
– Today / Ready for Pickup: the primary area residents should be served from first.
– Overflow: only when Today is full; should be physically farther so staff feel the cost of using it.
– Locker/QR Labeled (if used): items already labeled and ready for the final handoff step.
– Carrier Drop: a small “incoming” pad where items land before being sorted into Today/Overflow.
Two rules prevent chaos:
1) Nothing stays in Carrier Drop after the intake block (for example, after the next 30 minutes).
2) Overflow never becomes a junk drawer; it gets a daily sweep back into Today as space opens.
Measure: time to clear Carrier Drop after each delivery, and how often staff must leave the Today zone to retrieve an item (a proxy for layout efficiency).
What size and style of label signage for package rooms actually works (and what fails)?
What works is signage that can be read from where decisions happen: the doorway, the scan station, and the aisle intersections.
Practical signage stack:
– Big zone headers: large text, high contrast, placed above eye level at the zone entrance.
– Shelf-edge cues: short codes (A, B, C… or 1–10) that help staff navigate without reading every label.
– A “You are here” mini-map: a simple sketch showing zones and the main aisle, posted at the entry.
Common failures:
– Too many categories (staff stop using them).
– Signs placed where boxes block them.
– Long wording (“Packages awaiting resident collection”) instead of action labels (“Pickup Ready”).
Track: “asking for help” incidents (how often staff have to ask another staff member where something goes) and mis-shelf counts found during the end-of-day reset.
How do you prevent package damage stacking when you can’t buy new racks or ban oversize deliveries?
Use a physical oversize corral and a stacking rule that is visible and enforceable.
Low-cost setup:
– Pick a corner or wall run and mark it as OVERSIZE with floor tape.
– Add a “Do Not Stack” sign at eye level where someone would be tempted to pile boxes.
– Define a maximum stack height for non-fragile items (for example, “no higher than waist”) and keep fragile items single-layer.
Add one habit: oversize items get placed with the label facing outward so they can be found without turning or sliding.
Track two metrics:
– Damage notes (count of parcels logged as crushed/torn on arrival or discovered during retrieval).
– Extra touches caused by oversize (how often staff move an oversize item just to reach something else). If those touches drop, damage tends to drop too.
What should go in a ‘problem child’ bin, and how do you keep it from turning into a graveyard?
A “problem child” bin is for exceptions that break the normal flow and create claimed-missing risk if they’re scattered.
Put in the bin:
– Missing or torn labels (can’t reliably match to a unit).
– Conflicting names (duplicate last names without unit info).
– Partial deliveries (box 1 of 2 arrived).
– Access issues (signature required, restricted item, carrier note).
– Visible damage needing documentation.
Keep it from becoming a graveyard with a three-part control:
1) A date tag on every item (even a sticky note).
2) A next action (call resident, email carrier, reprint QR label, return-to-sender steps).
3) A daily “aging” check: anything older than a set threshold (for example, 48–72 hours) gets escalated.
Track: exceptions aging (oldest item in the bin) and time-to-resolution (from first set aside to resolved). When the bin is managed, you typically see fewer claimed-missing items because exceptions are visible and owned instead of hidden in random shelves.
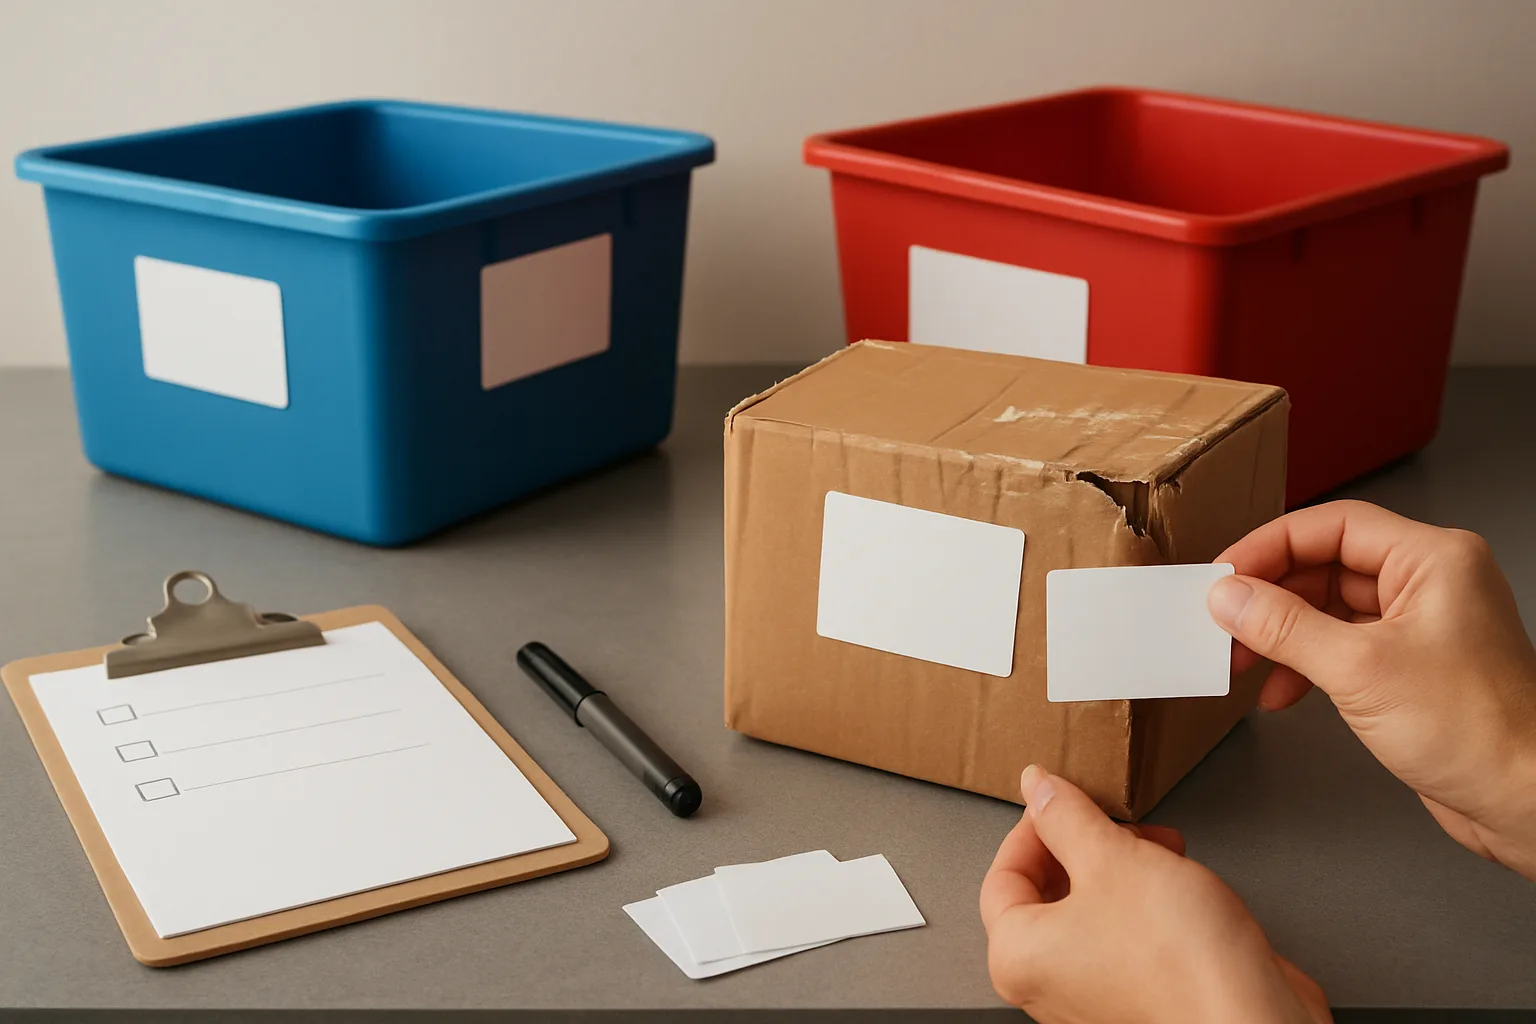
Want a Simple Package-Room Scorecard and Weekly Reset Checklist?
If you are standardizing your package-room flow and accountability, TrackNest can help you reinforce the layout with consistent handoff habits (intake, staging, pickup) and a repeatable checklist your team can follow across shifts. Use the same baseline metrics from this article, then compare before and after as you implement each physical change.
Small Physical Cues Create Big Operational Wins (If You Track and Reset)
A budget package-room upgrade is less about buying equipment and more about reducing decisions. When tape lines define the path, signs tell you the zone in one glance, package staging zones separate “fresh drop” from “ready to shelve,” and carts and oversize have permanent homes, you eliminate the two things that cause most chaos: wandering and re-handling. Add a return shelf and a clearly labeled problem bin, and exceptions stop contaminating the whole system with mystery piles and “I will deal with it later” stacks.
The fastest way to make these changes stick is to roll them out in priority order, then use the same simple scorecard every week: average retrieval seconds, touches per package, mis-shelves per day, and damage notes. Pair the physical layout with a short weekly reset (clear staging, restore cart parking, audit oversize, empty returns/problem areas). Consistency matters more than the perfect layout because staffing shifts and peak delivery days will test whatever you build.
If you only do one thing this month, make the room legible in three seconds. If you do two, add a place for oversize and a place for exceptions. Those moves alone reduce searching, reduce collisions, and reduce the “temporary stack” behavior that drives claimed-missing items and damaged parcels—without construction, without special tools, and without changing your floor plan.