
Package Room Holiday Surge Plan: Temporary Micro‑Processes That Turn Peak Weeks Into Predictable Work
Peak weeks don’t usually break because your team suddenly forgot how to run the package room. They break because the normal flow was designed for normal days. When holiday deliveries stack up, when a rain day turns every box into a slippery liability, or when Amazon peak weeks hit back‑to‑back, the same space and the same carts have to absorb a completely different rhythm—more handoffs, more crowding, more exceptions, and less time between carrier drops and resident pickups.
If you’re preparing for peak package volume apartment conditions without budget for permanent construction or additional staffing, the fastest win is not a “big change.” It’s a set of reversible micro‑process swaps: pop‑up staging zones that appear with tape and signs, timeboxed batch logging that prevents endless stop‑and‑start intake, overflow labeling conventions that keep temporary storage findable, and pickup appointment windows that smooth the rush without turning residents away.
This package room holiday surge plan is built around one idea: you should be able to activate surge mode in minutes, run it for a defined window, and deactivate it just as cleanly. The tactics are designed for real constraints—one cart (or none), a shared lobby you cannot block, soggy cardboard that won’t hold labels, and mixed shifts where accountability can disappear between handoffs. Instead of hoping peak passes quickly, you’ll use temporary package intake procedures and mailroom surge workflows that keep packages moving, keep the desk sane, and keep residents informed—without making “surge rules” your new everyday mess.
Define Your Activation Triggers (So Micro-Processes Don’t Become Permanent Chaos)
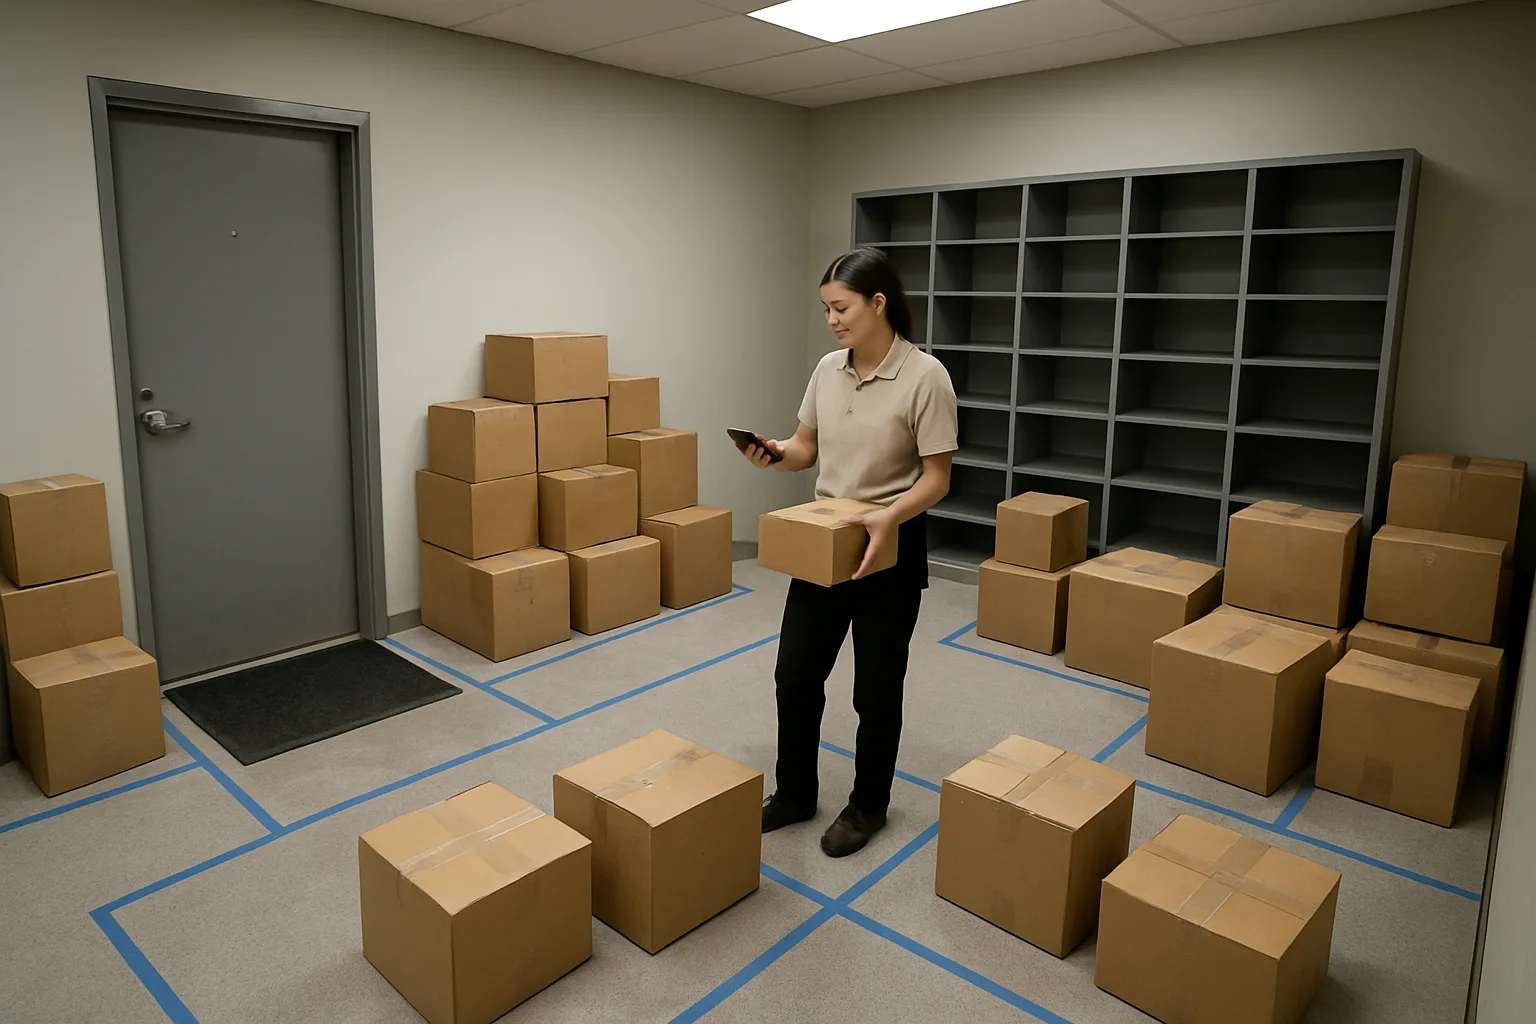
A package room holiday surge plan works only if “surge mode” is a deliberate switch, not a vague feeling. The goal is to make temporary package intake procedures and mailroom surge workflows easy to turn on when conditions demand it—and just as easy to turn off—using signals you can see on-site (no dashboards, no new tools).
Use three trigger types (volume, space, friction) and pick the smallest set of micro-process swaps that actually relieve today’s constraint: limited carts, wet boxes, shared lobbies, and tight storage. Then assign one person to call the switch and run a 2-minute ritual so every shift makes the same decision the same way.
- Three trigger types to watch (pick 1–2 per building):
- 1) Volume triggers: how fast items are arriving vs getting logged/shelved. Examples: carriers still dropping while yesterday’s items remain unlogged; more than one cart’s worth waiting; multiple “where’s my package” interruptions during intake.
- 2) Space triggers: usable floor/shelf space, not total room size. Examples: walkway narrows to less than one-person width; you can’t open the package-room door fully; overflow begins creeping into lobby/shared hall.
- 3) Friction triggers: anything that makes the process sticky. Examples: repeated unit/label confusion; wet boxes causing re-bagging/relocation; residents lining up and blocking intake; handoffs between shifts without clear staging labels.
- Simple thresholds that work in real buildings (adjust once, then keep stable):
- Small room (closet-sized, minimal shelving): activate surge mode when any 1 threshold hits: waiting pile reaches a taped “intake line” on the floor; only one clear walking path remains; more than 10 minutes behind logging.
- Medium room (dedicated room, some shelving): activate when any 2 thresholds hit: one full cart waiting plus loose items on floor; a shelf section is fully packed and overflow begins; resident pickups interrupt intake 3+ times in 15 minutes.
- Large room (multiple shelves/rows): activate when any 2 thresholds hit: two separate piles form (you’ve lost a single source of truth); a staging zone exceeds its marked max boundary; exceptions (damaged/unknown unit/oversize) exceed one tote/stack.
- Rain-day modifier (wet boxes, slippery floors): lower thresholds by one step. If boxes are wet or dripping, trigger surge mode as soon as you need a “dry line” or re-bag station—don’t wait for volume to overwhelm you.
- Amazon/holiday peak-week modifier: pre-activate for known carrier arrival windows (e.g., first big drop of the day). If your building reliably has peak package volume apartment weeks, schedule surge mode in blocks rather than “waiting to feel busy.”
- Assign a surge captain (one person per shift): typically the front desk lead, concierge lead, or whoever owns the package room keys and can enforce boundaries. The surge captain’s job is not to do all the work—it’s to make the call, announce the swap, and keep it from drifting.
- Run a 2-minute decision ritual (do it at shift start, and whenever conditions change):
- Minute 0–1: Walk the room and answer three yes/no questions: Are we behind on logging? Is any path blocked or at risk? Are interruptions slowing intake?
- Minute 1–2: If triggers are met, announce: “Surge mode on: we’re using [space swap], [intake swap], [pickup swap] for the next [60/90] minutes.” If not met, announce: “Normal mode stays.”
- Deactivation rules (define them upfront so you actually revert):
- Deactivation signal should be the opposite of your triggers for a full block of time (example: 30 minutes). Example criteria: intake buffer zone is below the taped max line; all walkways are clear; logging is caught up to within one carrier drop; exceptions are contained and labeled.
- Who calls it: the surge captain calls “surge mode off” after verifying deactivation criteria. If there’s a shift change, the outgoing surge captain must hand the decision to the incoming captain explicitly (no silent drift).
- Avoid the trap: do not “keep one surge habit forever.” If a micro-process needs to become permanent, document it separately as a policy change—don’t let it live as an unofficial workaround.
- Create a one-page surge card (the cheat sheet everyone uses):
- What it includes: your three triggers + thresholds; the exact micro-process swaps to activate; the roles (who logs, who stages, who handles pickups); the deactivation criteria; and one escalation line (who to call if space runs out).
- Where it lives: printed and clipped inside the package room door and at the front desk; plus a shared digital copy in your ops notes so new staff can find it.
- How it’s used at the desk: during the 2-minute ritual, the surge captain reads the card out loud and points to the active swaps. This prevents “everyone doing their own version” under pressure.
Three trigger types: volume, space, and friction
Pick triggers that match what actually breaks first in your building. Volume is about backlog (incoming faster than processing). Space is about safe, usable pathways and bounded staging—not total square footage. Friction is about repeated slowdowns like wet boxes, unclear unit numbers, or constant resident interruptions that make normal flow collapse.
Most teams do best by choosing one primary trigger (usually space) and one secondary trigger (volume or friction). That keeps surge mode rare, intentional, and easier to explain to residents and teammates.
Simple thresholds that work in real buildings (examples for small/medium/large rooms)
Define thresholds you can see without measuring tools: a taped floor line, a “max stack height” rule, a single cart capacity, or a time-based backlog like “more than 10 minutes behind logging.” Once set, don’t change them week-to-week; adjust only after a peak-week debrief.
If your constraints are extreme (one cart, shared lobby, no shelving), use earlier triggers. It is better to activate micro-process swaps sooner than to wait until you’re forced into uncontrolled piles.
Assign a “surge captain” and a 2-minute decision ritual
Surge mode needs a single caller so it is consistent across shifts. The surge captain makes the activation/deactivation call, communicates it clearly, and enforces boundaries like no-block walkways and labeled overflow.
The ritual is short on purpose: a quick walk, three yes/no checks, then a clear announcement of which temporary workflows are active and for how long. Timeboxing prevents “temporary” from becoming the new normal.
Deactivation rules: what ‘back to normal’ looks like and who calls it
Without deactivation rules, every surge workflow becomes permanent clutter. Define what “normal” looks like in observable terms: clear paths, staging below marked limits, backlog within a reasonable window, and exceptions contained and labeled.
Make deactivation an explicit call by the surge captain, not a slow fade. If a shift ends mid-surge, require a verbal handoff that states whether surge mode stays on and why.
A one-page surge card: where it lives and how it’s used at the desk
The surge card is your on-the-ground operating system for peaks. It should fit on one page and tell staff exactly when to switch, what to switch to, and when to switch back.
Keep it physically where decisions happen (front desk and package room door). During peaks, teams will not hunt through binders—this card must be visible, readable, and used as a script in the moment.
Pop-Up Staging Zones: Temporary Space Without Construction
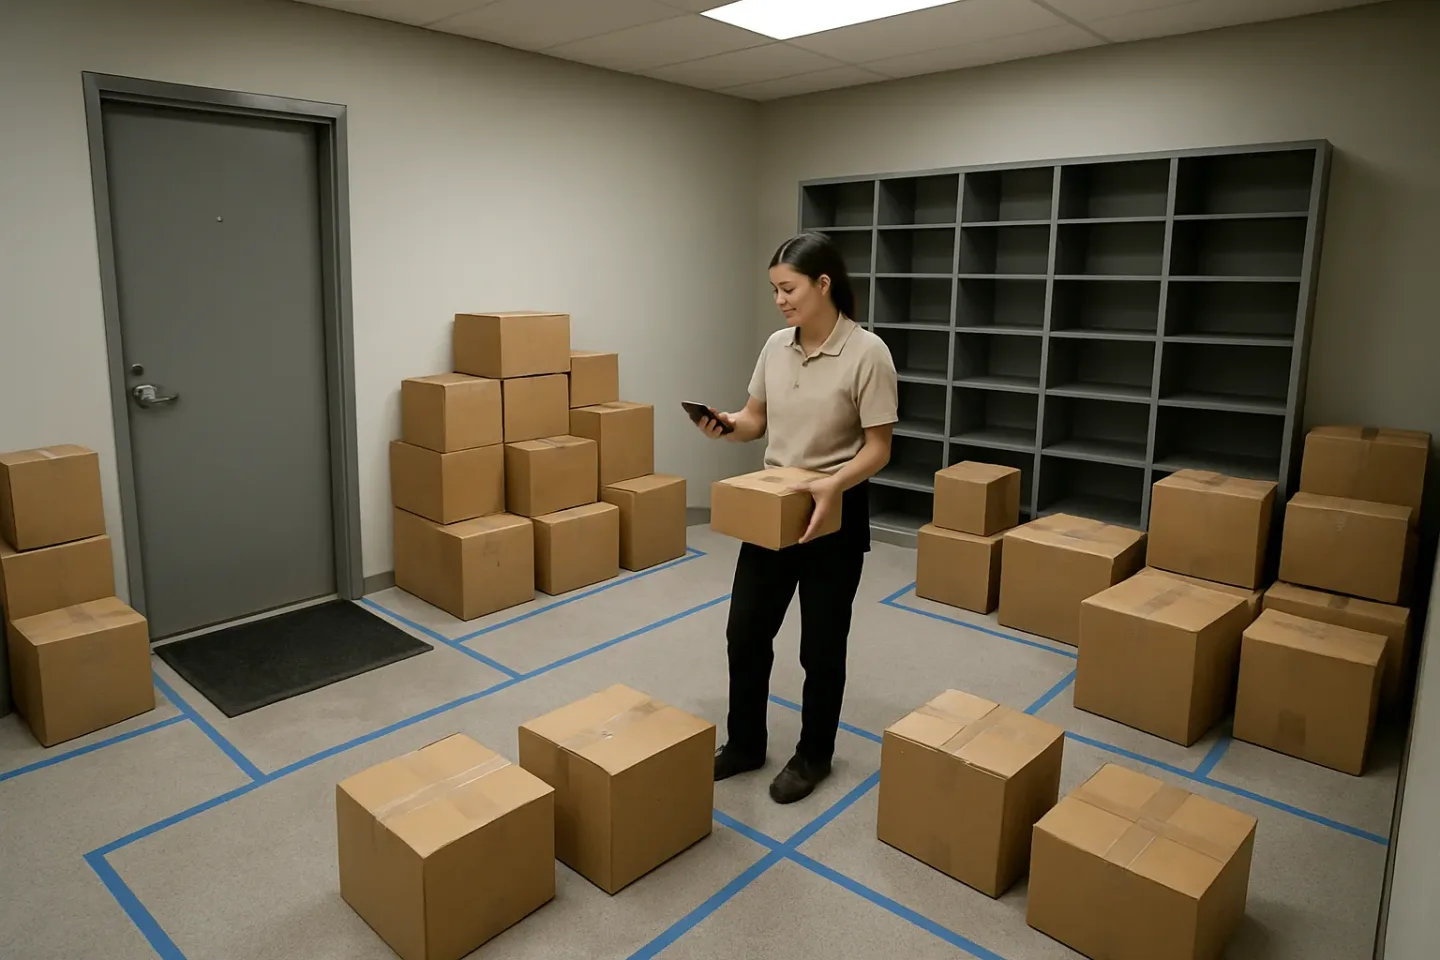
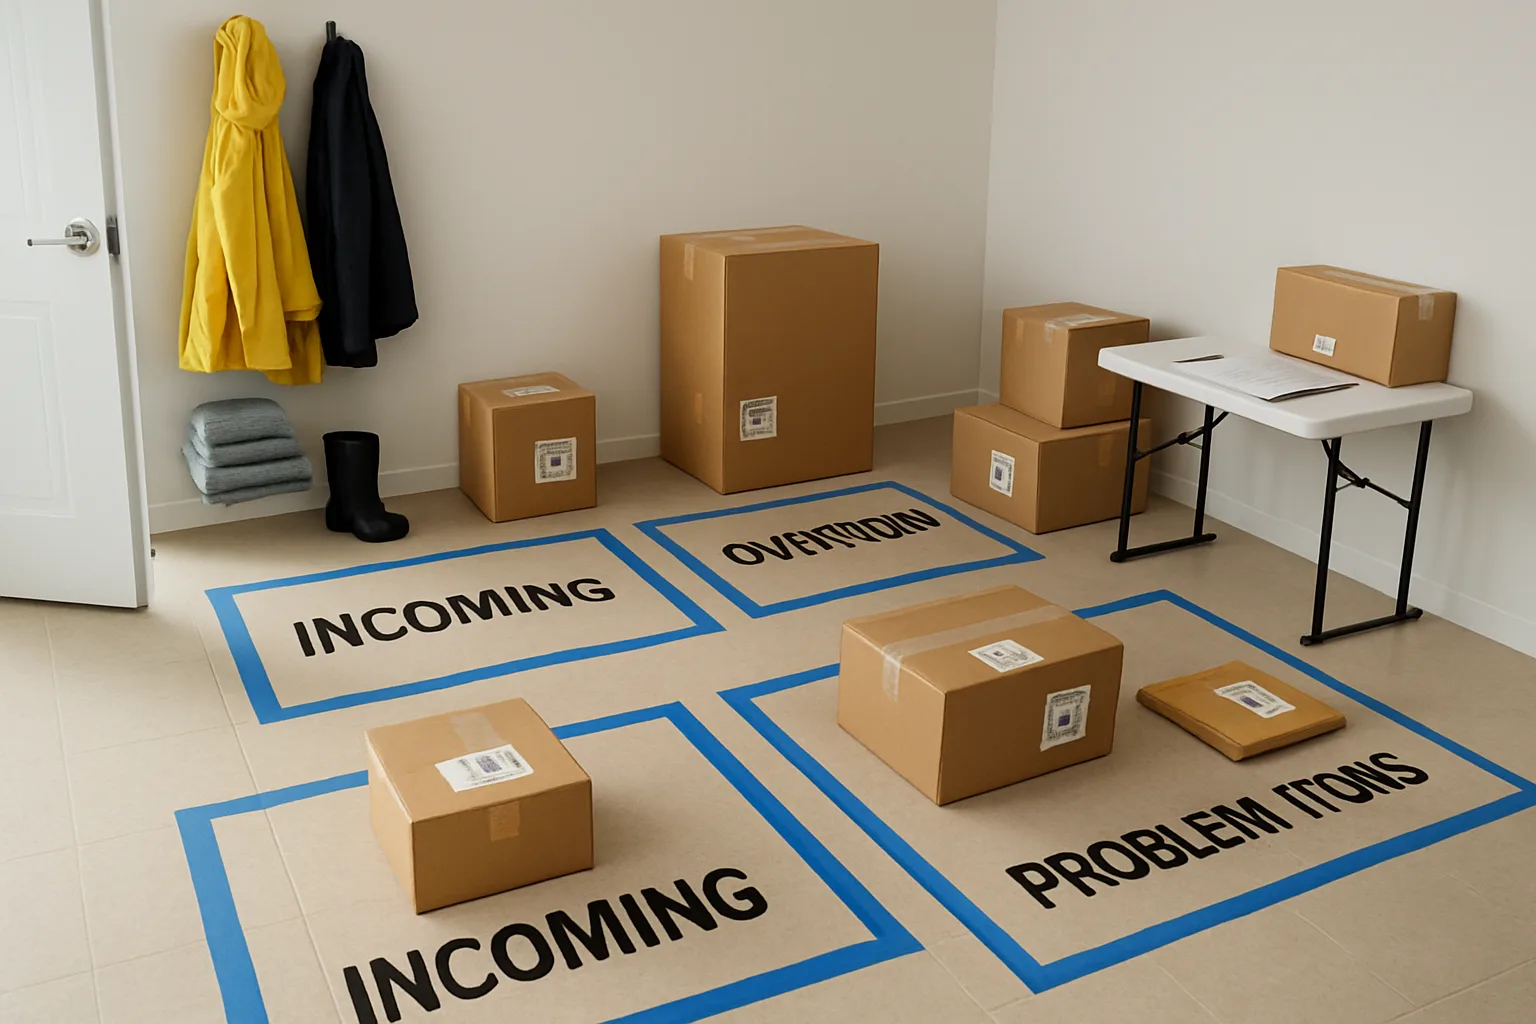
During peak package volume apartment weeks, the failure point is often not staff—it is space. When shelves fill, carts get trapped, and the lobby becomes a bottleneck, you need temporary staging that creates flow without moving furniture or building anything. Pop-up staging zones are reversible “micro-process” swaps: you tape a footprint, post a simple sign, and follow a few rules so items keep moving and nothing becomes a permanent pile.
The goal is to create just enough structure to (1) absorb carrier drop-offs fast, (2) keep resident pickup safe and predictable, and (3) preserve a clear path for accessibility and fire egress. These layouts work best when they are paired with clear activation rules in your package room holiday surge plan and removed as soon as the spike passes. They are designed for real constraints: limited carts, wet boxes, shared lobbies, and multiple handoffs across shifts.
- Use “zones,” not “stacks”: every temporary pile needs a name, a boundary, and a rule for how it exits the zone.
- Keep the lobby usable: the staging zone should protect the main path, not compete with it.
- Make it reversible: tape footprints, paper signs, and a quick reset plan beat any setup that takes an hour to undo.
Choose the right zone type: intake buffer, ready-for-pickup wall, exception corner
Pick one primary zone and one safety-valve zone. Too many zones slow the team and confuse handoffs. In most buildings, two zones plus an “exceptions” corner is enough.
Intake buffer (for carrier unload speed): This is where items land immediately when the door will not stop opening. The rule is simple: items may dwell here briefly, then they must move to shelves or overflow once the rush clears. Use it when you have multiple carrier arrivals back-to-back or the shelves are temporarily blocked by resident pickups.
Ready-for-pickup wall (for resident speed): This is a short-lifespan area for today’s highest-turn items—typically small/medium parcels. The “wall” is not a permanent shelf; it is a marked section where the team places items that are already logged and can be handed out quickly. Use it when pickup traffic is heavy and you need faster retrieval than deep shelves allow. Keep it small so it does not become a second storage room that never gets cleared out by end of day or end of shift (choose one and enforce it).
Example: “Ready Wall = all logged items received today for units 1–3 floors only” or “Ready Wall = small items only.” This prevents drift and hunting during rushes while still being easy to deactivate afterward as part of your temporary package intake procedures and overall mailroom surge workflows.
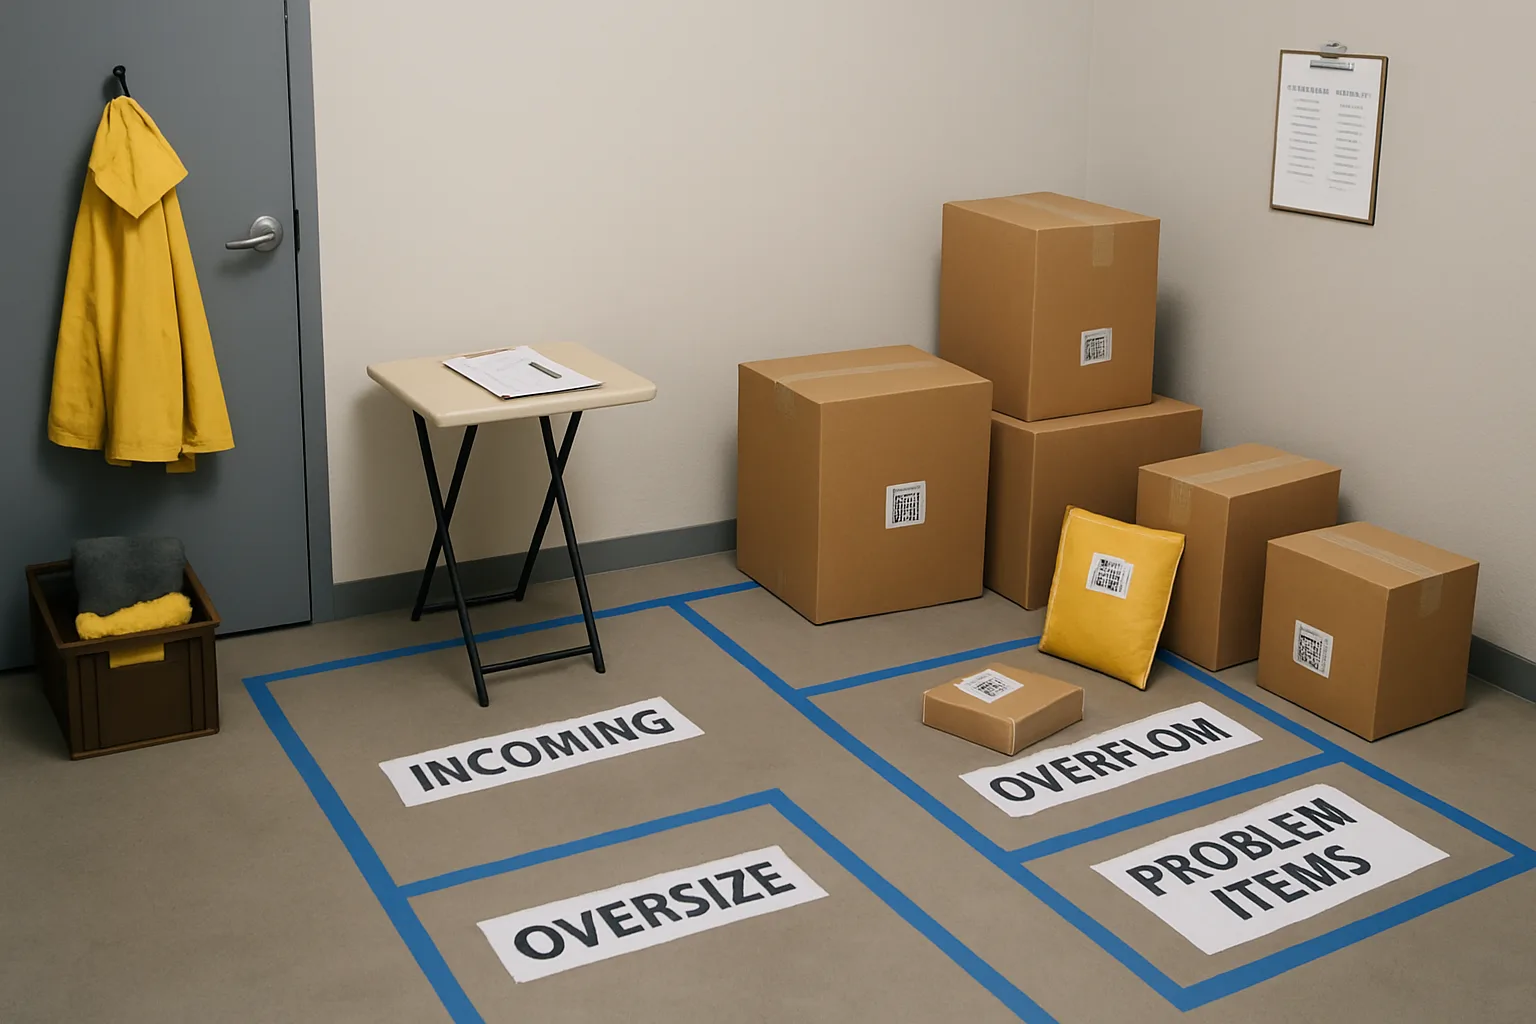
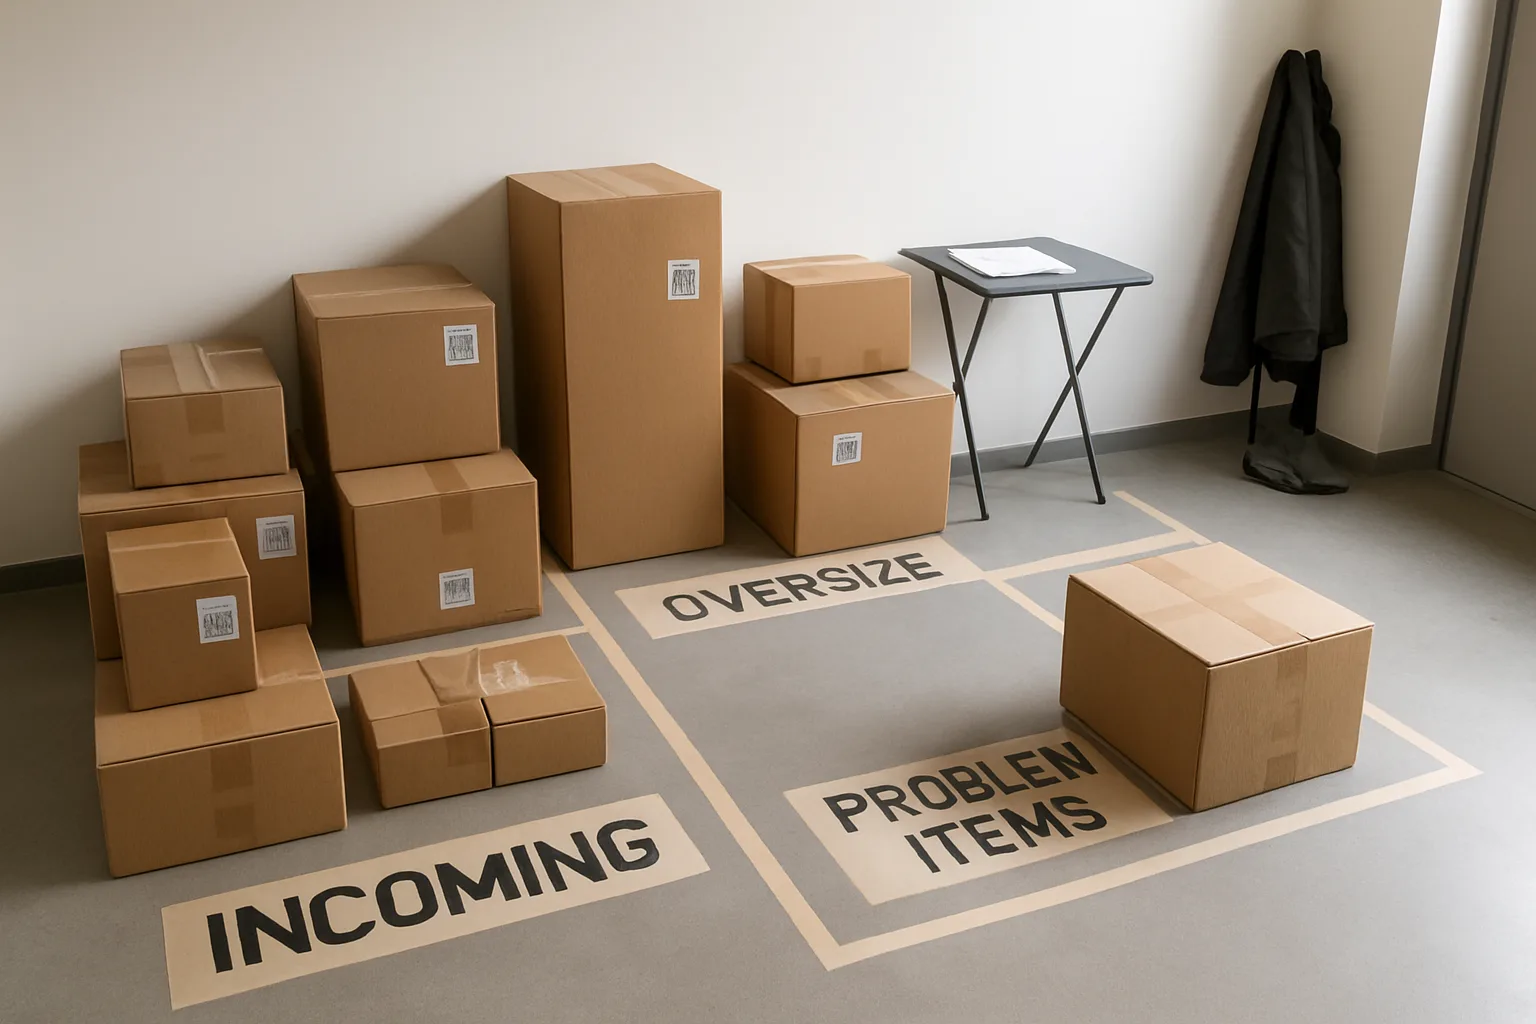
Exception corner (for anything that breaks flow): This is a clearly marked spot for “cannot place yet” items: damaged packages, unclear unit, missing name, oversize that blocks the aisle, wet/leaking boxes, or anything that needs a supervisor call. The exception corner protects the main flow by preventing these packages from being re-touched repeatedly. The rule: nothing in exceptions moves without a decision (relabel, contact carrier, move to oversize, or return). Keep a short note method nearby (paper + pen) so the next shift knows why it is there.
Tape-and-signage layout patterns (L-shape, horseshoe, one-way lane)
Use painter’s tape (or any removable tape your building permits), plus a printed sheet or clear handwriting on paper. The tape creates boundaries; the sign creates behavior. Keep signs short and operational, not policy-heavy: “INTAKE BUFFER — DO NOT PICK UP,” “READY FOR PICKUP — LOGGED ONLY,” “EXCEPTIONS — SEE DESK.”
L-shape (best for tight corners): Tape an L footprint against two walls. This preserves a central walkway and naturally limits how far piles can spread. Use the long side for intake buffer and the short side for exceptions, or vice versa. Add a “STOP LINE” at the end of the L so packages do not creep into the hallway.
Horseshoe (best when you need a working bay): Tape a U around a working area so staff can stand inside the horseshoe to scan, label, and route items without turning their back to the doorway. The open end faces the intake door. The rule is “nothing crosses into the middle unless staff are actively processing it.” This reduces accidental resident self-service during busy moments and keeps the work surface clear for controlled handoffs between teammates or shifts in your mailroom surge workflows.
One-way lane (best for shared lobbies): If the package area sits inside a lobby or shared corridor, define a single-direction lane with tape arrows: intake arrives at Point A, packages move along the lane to Point B (shelves/overflow), pickup occurs at a designated counter spot. You do not need stanchions; the tape and a “ONE LINE STARTS HERE” sign do most of the work. Put the pickup “start” away from the door so carriers can enter and exit without squeezing past residents.
Practical signage set (minimum):
– INTAKE BUFFER — STAFF ONLY
– READY WALL — LOGGED ONLY
– EXCEPTIONS — DO NOT MOVE
– KEEP CLEAR — NO PACKAGES PAST THIS LINE
If you only have time for one sign, prioritize “KEEP CLEAR — NO PACKAGES PAST THIS LINE” at the edge of the walkway. That single boundary prevents the slow creep that turns a neat zone into a blocked egress.
Wet-weather variant: ‘dry line’ staging for rain days and soggy boxes
Rain days introduce a different constraint: wet cardboard fails, labels peel, and water transfers to floors, rugs, and other parcels. The micro-process swap is a “dry line”—a taped boundary that separates “wet-risk” from “dry storage,” plus a rule for what can cross it.
How to run a dry line:
– Tape a straight line at the entry point to the package area (or just inside the package room door).
– On the “wet” side: place only newly arrived items that may be damp. Keep them off carpet when possible.
– On the “dry” side: keep shelves, ready wall, and any stacked overflow that must remain intact.
Handling soggy or dripping boxes:
– Do not stack wet boxes under dry ones. Wet goes alone or on the bottom in a designated wet-only stack.
– If a label is damp, avoid putting tape directly over a wet barcode/QR area; it can smear and become unreadable. Instead, place a fresh label on a dry surface area of the package, or bag the label area if your building has spare clear bags. If you do not, separate the package into the exception corner until it can be relabeled.
– Put “WET — HANDLE LAST” on a paper note for the stack. This reduces repeated handling during the rush and keeps the rest of the zone moving.
Floor safety is part of staging: a dry line only works if you also keep the walkway clear so staff are not stepping around puddles while carrying boxes. If the floor is slick, shrink the zone rather than letting it sprawl into traffic.
Cart constraints: how to run when you have one cart (or none)
Most buildings do not have enough carts during peak weeks, and shared carts disappear. Pop-up staging should assume “one cart” as the default and “zero carts” as a frequent reality.
One-cart method (turn the cart into a shuttle, not storage):
– Cart is for movement only, not a parking lot. Do not let it sit full in the middle of the room.
– Define two drop points: “INTAKE BUFFER” and “SHELVES/OVERFLOW.” The cart runs between them on a timer (for example, every 10 minutes during active arrivals).
– When the cart returns empty, it is “available.” When it is full, it must move. This prevents the common failure mode where the only cart becomes a static pile.
Zero-cart method (use micro-batches and short carries):
– Shrink the intake buffer footprint so it cannot grow faster than you can clear it.
– Process in small, repeatable armloads: take 5–10 parcels at a time from intake buffer to shelves/overflow, then return immediately.
– Protect the ready-for-pickup wall from becoming a second intake buffer. Without a cart, it is tempting to dump there. Make the rule: ready wall is only for items already logged and assigned a zone.
If residents are picking up while carriers are dropping, separate “human paths”: keep carrier intake on one side of the room and resident pickup on the other. Even without carts, separating the paths reduces collisions and rework, and it helps the desk maintain accountability during temporary package intake procedures.
Rules that prevent drift: max dwell time, stack limits, and ‘no-block’ boundaries
Pop-up zones fail when they slowly become the new normal. The fix is to write three rules on the sign itself and enforce them consistently across shifts. These rules are the difference between a helpful surge swap and permanent chaos.
Max dwell time (forces clearing): Set a simple time limit for the intake buffer and ready wall. Examples:
– Intake buffer: “Max dwell = 30 minutes” (or “clear by end of carrier wave”)
– Ready wall: “Clear by end of shift” or “clear by 6 pm”
The exact time matters less than having one that triggers action. When the time limit is visible, any team member can call it without debate.
Stack limits (prevents hidden damage and lost items): Create a stacking cap that reflects your typical box quality and space. Examples:
– Small parcels: stack no higher than shoulder height
– Medium boxes: max 3 high
– Heavy/fragile: no stacking
Use the exception corner for anything that cannot follow the stack rule. This also reduces crushed boxes and label damage during peak package volume apartment weeks, especially after rain exposure or when carriers drop heavier-than-usual loads.
‘No-block’ boundaries (protects egress and shared spaces): Set a hard line that packages never cross. Tape it, label it, and treat crossing the line as an immediate reset task, not something you fix later. Good no-block boundaries include:
– Door swing radius (entry door must fully open)
– Elevator lobby line (keep the call buttons accessible)
– Accessibility path (clear width for mobility devices)
– Fire equipment access (extinguishers/panels)
A practical enforcement trick: put the no-block tape in a contrasting color (or double-tape it). When a package touches the line, it is visually obvious and easy for anyone to correct on sight.
Drift control micro-check (60 seconds): At the top of every hour during surge mode, do a quick scan:
– Is anything past the no-block line?
– Is the intake buffer over its dwell time?
– Is the exception corner growing without decisions?
If any answer is yes, pause new organizing and do a “clear the choke point” reset for 3–5 minutes. That short reset prevents the end-of-day disaster where everything is technically “somewhere,” but nothing is findable.
When implemented with clear boundaries and short rules, pop-up staging zones become a reliable part of a package room holiday surge plan: easy to switch on, easy to run, and easy to remove when normal operations return.
Timeboxed Batch Logging and Sorting: Fast Intake When the Door Won’t Stop Opening
During peak package volume apartment weeks, the package room breaks down less from the number of deliveries and more from constant interruptions. Carriers arrive back-to-back, residents show up mid-intake, and the front desk gets pulled into unrelated requests. Timeboxed batch logging is a temporary package intake procedure that keeps flow moving by separating “capture” from “perfect placement,” while still preserving accountability.
paragraphs
Think of this as a micro-process swap: you are not changing your standards long-term. You are switching to a repeatable rhythm for a fixed window (for example, 2–4 hours during the afternoon delivery rush), then reverting to normal once volume and traffic settle.
Two-mode intake: ‘scan-and-shelve later’ vs ‘scan-to-zone now’
Run surge intake in one of two modes based on space and interruption level. Both modes work with a package room holiday surge plan because they are easy to start and stop, and they do not require permanent layout changes.
Mode A: scan-and-shelve later. Use this when the door will not stop opening (resident pickups, multiple carriers, lobby sharing constraints). You prioritize getting every package identified, tagged to a temporary holding area, and out of the carrier’s way. Placement into final shelves happens in a later batch when foot traffic slows.
Mode B: scan-to-zone now. Use this when you have a clear staging map (even if temporary) and enough room to place items directly into a labeled zone without blocking egress. This reduces later re-handling but demands a calmer intake lane and fewer interruptions.
15-minute batch cycles: what happens at minute 0, 5, 10, 15
The key is a short, repeating timer that the whole team can feel. Fifteen minutes is long enough to make progress and short enough to prevent a half-finished pile from becoming a mystery stack.
Minute 0 (reset and declare the batch): Clear the intake surface. Confirm which mode you are running (scan-and-shelve later or scan-to-zone now). Start a visible timer. Place a simple “Intake in progress, please queue for pickup” sign if your lobby is shared.
Minute 5 (capture fast, don’t perfect): Focus on getting packages identified and associated with a location. If you use TrackNest scanning, scan each item and assign it to the current batch location (for example, Intake Buffer A or Overflow Zone B). If you are writing a backup log, record carrier, unit, last name, and a temporary zone code. Do not stop to re-stack or reorganize beyond safety (no blocked paths, no unstable towers). If a resident arrives, they wait for the batch break unless it is a quick, safe retrieval that will not derail the timer (see pickup rules in your surge card).
15-minute batch cycles (continued): minute 10 and minute 15
Minute 10 (quick sort to reduce later pain): Do a light sort by the most useful cut for your building. Common options are floor bands (1–5, 6–10, 11+), pickup window priority (today vs later), or size class (small/standard/oversize). This is not “put everything away.” It is “make the next step easier.” If you are in scan-to-zone now mode, minute 10 is when you correct obvious misplacements and move any items that landed in the wrong zone.
Minute 15 (close the batch): Stop intake briefly. Do a 60–90 second sweep: confirm nothing is unscanned in the batch area, confirm temporary zone labels are visible, and clear the lane. Then either start the next 15-minute cycle or switch to a 5-minute pickup window if a line has formed. The value is predictability: residents and staff learn that service alternates, rather than being chaotic and constantly interrupted.
Role split for a 2-person team (and a 1-person fallback)
Two-person surge intake works best when you prevent both people from doing the same task halfway. Assign roles per batch, and switch roles every 2–4 cycles to reduce errors and fatigue.
Two-person pattern: Scanner and Mover. The Scanner stays planted at the intake surface, captures each package, and applies the temporary location (zone code). The Mover moves items to the correct temporary zone, maintains safe stacks, and keeps walkways and doors clear. The Mover also handles quick resident pickups during the planned batch breaks, so the Scanner can keep the log clean.
One-person fallback: Capture-first, move-second. For the first 10 minutes, the person only scans/logs and places packages into a single intake buffer area in a consistent orientation (labels facing out when possible). For the last 5 minutes, they push items to zones or shelves as time allows. If interrupted, they resume at the next package rather than re-checking the whole pile. Consistency is what prevents lost items, not perfection.
Exception handling during batches: damaged, oversized, unclear unit, no access
Surge weeks produce more exceptions, and exceptions are what sabotage timeboxes if they are handled ad hoc. Treat exceptions as their own micro-lane so the batch rhythm stays intact.
Damaged or wet packages: Do not send them into normal stacks. Place them in a designated exception spot (for example, Exception Corner) with a brief note: date/time received and visible issue (torn corner, soaked bottom). If your building policy requires photos or manager notification, defer that to the batch break rather than stopping the intake line.
Oversized or cannot stack: Move immediately to an oversize boundary area that will not block exits, doors, or ADA paths. Log it with an oversize marker and its exact temporary location (for example, OS-1 by the east wall). During surge, oversized items should never be parked “temporarily” in the pickup lane because they become permanent obstacles within minutes.
Exception handling (continued): unclear unit, no access, and carrier edge cases
Unclear unit or missing recipient info: Log as “Needs Research” and place in the exception spot with the tracking number visible. Do not spend five minutes guessing. The goal is to keep the batch moving while ensuring the item can be found later for resolution.
No access deliveries (carriers leaving items outside the room): Bring them in only if doing so is safe and allowed. Then log them as received with a clear note that they arrived outside the controlled area. Place them in the intake buffer until you can confirm they belong to the building and are not misdelivered.
Carrier edge cases (multiple labels, partial deliveries, returns): Pick a consistent rule: log what is physically present, one package at a time. If a resident disputes later, your log and location code matter more than how fast you tried to reconcile a carrier manifest during the rush.
End-of-shift reconciliation checklist that’s realistic during peak package volume apartment weeks
Batching only works if the shift ends with a controlled handoff. This is a short checklist designed for peak conditions, not an ideal world. It keeps the next shift from inheriting anonymous piles.
End-of-shift reconciliation (10–15 minutes):
1) Clear the intake buffer: Anything still in the intake buffer must either be moved to a labeled zone or flagged as exception. The intake surface should be empty or intentionally staged for the next known carrier drop with a label that says so (for example, “Hold for 7pm carrier”).
2) Count-check by zone: Do a quick “does this look right” sweep. You are not counting every item; you are verifying that each zone has a visible label and that stacks are stable and not blocking paths.
3) Close exceptions: Ensure each exception item has a reason code (damaged, oversize, needs research, no access) and a location that can be described in one sentence.
4) Leave a 30-second handoff note: What zones are most full, what is pending (for example, “Needs Research pile has 6 items”), and what the next shift should do first.
5) Reset to normal if possible: If volume is down, do one final mini-batch to place the highest-risk items (exceptions and oversize) into their proper long-term spots. If volume is still up, keep surge mode active and make that explicit in the handoff note.
Overflow Labeling Conventions: Make Temporary Storage Findable
Overflow is where packages go to disappear. During peak package volume apartment weeks, you end up using nonstandard surfaces and rooms: a slice of lobby wall, a leasing-office corner, a back hallway, an empty amenity room. The fix is not more shelving; it is a tiny, consistent labeling convention that makes temporary storage searchable for any staff member on any shift.
paragraphs
Your package room holiday surge plan should define one overflow convention that is quick enough to use when you are slammed, but strict enough that the next person can find items without opening every box pile. Keep it reversible: tape, paper, marker, and (if you use them) QR labels that can be removed when surge mode ends.
- Design rule: label the location, not just the package. When overflow moves, a location label saves more time than a prettier package tag.
- Design rule: one convention across all overflow areas. If you have three different systems, you have no system.
- Design rule: every package in overflow must have a findable address within 10 seconds (by reading the label or scanning).
The minimum viable convention: zone code + shelf/stack + timestamp
Use a short location code that can be written in one motion and spoken over the phone. The goal is to create a consistent address format that works even when your overflow is a folding table and two floor stacks.
Minimum viable address format: Zone code – Position – Time placed. Keep it simple and repeatable across shifts.
How to set it up (in 5 minutes)
1) Assign 2–5 zone codes for overflow areas you actually use during surges. Examples: LOB-A (lobby wall left), LOB-B (lobby wall right), AMEN (amenity room), OFC (leasing office corner), HALL (back hallway).
2) In each zone, create positions that match the surface. Examples:
– Table: T1, T2, T3 sections left-to-right (use tape to divide).
– Shelves: S1-S5 top-to-bottom or left-to-right.
– Floor stacks: P1, P2, P3 (each stack is its own position).
– Carts (if used as overflow): C1, C2 and treat each as a zone position, not a moving mystery cart.
What staff write on the package (or log)
When a package is placed into overflow, record or mark:
– Location address: for example, LOB-A – P2
– Time placed: 14:10 (or 2:10p)
Optional add-on if you need it: initials of the placer (helps with accountability without slowing intake).
If you do not want to write directly on boxes, put the location address on a small piece of tape on the box (or on a paper tag tucked under clear tape). Keep handwriting large enough to read at arm’s length.
Guardrails that prevent the system from collapsing
– One package, one address. Never write “lobby” or “overflow” by itself.
– No unaddressed piles. If a carrier drop creates an instant pile, the first action is to assign it a zone and position label before anything is moved.
– Timestamp matters. During surge, items will be relocated. The timestamp helps you detect old items and triggers quick audits (for example, anything older than 48 hours gets checked for unit clarity or delivery issues).
QR-label strategy for overflow: when to print, where to place, what to avoid on wet boxes
If your workflow includes QR labels, overflow is exactly when they help most because location changes are frequent and handoffs are messy. The goal is to attach a scannable identity to the package and separately label the overflow location so the two can be linked quickly.
When to print (do not print everything)
Use QR labels selectively during peaks so you do not create a printing bottleneck. Practical triggers:
– Print QR labels for items going into any nonstandard area (amenity room, office corner, hallway).
– Print QR labels for high-risk items: refrigerated/medications, signature-required, high-value looking boxes, or anything without a clear unit.
– Skip printing QR labels for obvious, low-risk items staying within the standard shelving system (unless your normal process requires it).
Where to place QR labels so they survive handling
– Place on a clean, dry surface whenever possible, ideally a flat side panel near the top third of the box.
– If the box is damp, place the label on a strip of packing tape first (tape acts as a moisture barrier), then tape the whole label down with a second strip along the edges.
– For poly mailers, place on the flattest area and reinforce with clear tape so corners do not curl.
– Avoid seams, folds, and corners where the label will crumple or tear when stacked.
What to avoid on wet boxes (rain days, snow melt, condensation)
– Do not stick labels to visibly wet cardboard. They will fall off later and create a ghost package. Dry the spot with a paper towel or use tape-as-a-base.
– Do not place labels on the bottom face where puddles form, or on areas that will be dragged on the floor.
– Do not rely on marker ink on wet cardboard for the location address; put the address on tape or a paper tag instead.
Linking package identity to overflow location quickly
Use a two-step micro-process that fits surge conditions:
1) Apply/scan the package QR label (identity).
2) Immediately capture the overflow location address (LOB-A – P2) in the same motion (write it on the label/tape or record it in your log).
The key is immediacy. If you plan to “remember the location and add it later,” it will not happen during peak.
Color cues without new supplies (paper, tape, marker)
You can create fast visual sorting with supplies you already have, without buying special bins or stickers. The goal is to help staff aim packages into the right area at speed and to help runners find items without reading every label.
Low-budget color system options
Pick one method and use it consistently. Examples:
– Colored paper signs for zones: white printer paper with thick marker borders (blue border for LOB-A, green for AMEN, red for EXC/Exceptions). Tape the sign at eye level above the zone.
– Tape color as a zone cue: one strip of colored tape on the floor edge or on the table edge, matching the zone code on the sign.
– Marker color for special handling: black marker for standard, red marker for DO NOT STACK, blue marker for OVERSIZE. (If you only have one marker, use big letter codes instead: DNS, OS.)
Make the color do one job (not five)
Color is not for detailed information. Use it for exactly one decision at a glance, such as:
– Where it belongs (zone).
or
– How it must be handled (do not stack / fragile / oversize).
If you mix meanings (zone plus priority plus carrier), staff will ignore it under pressure. Keep it single-purpose.
Oversize and ‘cannot stack’ rules that keep paths clear
Overflow often fails because oversize items become trip hazards and block access to everything else. A surge-ready convention needs two rules: where oversize goes, and how non-stackable items are marked and oriented.
Oversize placement rules (simple and enforceable)
– Create one oversize strip per zone: a single line along a wall or behind a tape boundary. Mark it with a sign: OVERSIZE ONLY.
– Store oversize packages with labels facing outward, parallel to the wall (like books on a shelf) when possible, so staff can scan/read without pulling items out.
– No oversize in walkways, in front of doors, or in front of panel access (electrical, fire equipment). If it violates safety, it is not a storage spot, even for five minutes.
Cannot stack rules
Define a standard mark and a standard orientation:
– Mark: write DNS (do not stack) on tape placed on the top face, visible from above.
– Orientation: place DNS items at the edge of the zone (front row) so nobody is tempted to build a tower above them.
– Cap: if a zone has more than X DNS items (pick a number your room can handle, often 5–10), activate a second overflow zone or move to an amenity room. Too many DNS items is a space trigger, not a staffing problem.
Keep paths clear with a ‘no-block boundary’
Tape a boundary line on the floor (or define an imaginary one if you cannot tape):
– 36 inches (or one big step) of clearance in front of shelves and doors.
– A straight line for the resident path from entry to counter/pickup point.
Labeling is only useful if people can physically reach the labeled items.
Handoff notes for mixed teams: what the next shift must know in 30 seconds
Surge weeks often involve mixed coverage: leasing staff, concierge, maintenance, temporary help, rotating weekend staff. Your labeling convention must include a handoff script that fits on a sticky note or a whiteboard and can be delivered in under 30 seconds.
The 30-second handoff template (say it, then point)
1) Surge mode status: “We are in overflow mode until 6pm (or until the floor stacks drop below two).”
2) Active zones and meanings: “Overflow zones are LOB-A (blue) and AMEN (green). Exceptions are in EXC (red).”
3) Location format: “Every package has an address like AMEN – T2 – 14:10. If it does not, label it before moving on.”
4) Oversize and DNS rule: “Oversize goes along the wall strip; DNS is front row only.”
5) One current risk: “Watch for wet boxes at the dry line; label on tape, not cardboard.”
What to write where (so it survives shift changes)
– Put the zone codes and color meanings on one sheet taped inside the package room door (or behind the front desk).
– Put a quick sketch map of overflow zones on the same sheet (boxes and arrows are enough).
– If you use a logbook, add one line at shift change: “Active zones: LOB-A, AMEN. Oldest timestamp observed: 10:30.” This creates a lightweight aging check without counting every item.
Pickup Appointment Windows and Traffic Control: Reduce Crowding Without Turning Residents Away
During peak package volume apartment weeks, pickup demand can exceed the physical constraints of the lobby and package room long before your team runs out of effort. A package room holiday surge plan should treat pickup like a controlled release valve: you are not denying access, you are shaping when and how people arrive so the room stays searchable, walkable, and accountable.
paragraphs
The goal of these micro-processes is simple: reduce the number of simultaneous pickups, keep a single predictable queue, and shorten each handoff. Everything below is temporary, reversible, and designed to work with shared lobbies, limited counter space, and mixed staffing (concierge, maintenance help, or a relief person who does not know the room).
Window types: building-wide blocks vs floor-based vs carrier-driven days
Pick one windowing method that matches how residents already behave. Keep it light-touch: windows are guidance plus a queue rule, not a rigid appointment system. You can run this with paper signs, a simple desk script, and consistent enforcement.
Option A: Building-wide blocks (simplest to explain). Use two or three daily pickup blocks during surges, e.g., 12–2 and 5–7 on weekdays, 11–1 on weekends. Outside the blocks, allow true exceptions only (perishable, medical, verified travel). This prevents a constant drip of interruptions while your team is still receiving and sorting.
Option B: Floor-based windows (best for high-rises with predictable elevator peaks). Assign floors to pickup blocks to spread arrivals: Floors 2–10 from 4–5, 11–20 from 5–6, 21–30 from 6–7. This reduces lobby stacking and avoids the ‘everyone comes at 6’ problem. Keep one catch-up window for anyone who missed their slot (e.g., last 30 minutes). If you cannot enforce by floor, use alphabetical last-name ranges as a fallback (A–H, I–P, Q–Z). Never do both at once; pick one rule residents can remember in a sentence or two.
Option C: Carrier-driven days (best when one carrier dominates volume). During Amazon peak weeks or local courier surges, set ‘heavy carrier’ pickup windows on the same day the bulk arrives. Example: if Amazon tends to land between 2–4, set the primary pickup block for that carrier at 5–7 and message it as ‘Today’s Amazon pickup window is 5–7; other carriers follow normal pickup.’ This prevents residents from showing up immediately after a delivery dump, when items are least findable and most likely to be in temporary overflow zones.
Trigger to activate: You are receiving steady deliveries and the pickup queue begins to compete with intake space (people waiting in the same corridor you need for carts) or you cannot locate items within a reasonable time because the room is mid-sort. Deactivate: when intake is caught up and the line stays at a manageable length for an entire shift (set a building-specific standard, such as ‘no more than 3 parties waiting’).
Lobby-safe queue design: one line, one counter, one ‘runner’ pattern
A surge pickup workflow succeeds or fails on one decision: where people stand while you search. If residents drift into the package room, they block shelves, create privacy issues, and make mis-handoffs more likely. During surge mode, physically design the pickup flow so residents never enter the search area.
Micro-process layout (works with no new equipment):
– One line: Mark a single queue with tape arrows or a simple ‘Line starts here’ sign. Do not allow multiple ‘informal’ lines that turn into arguments.
– One counter (or one stand point): Designate one interaction spot for identity confirmation and questions. If there is no counter, use a floor mark. The rule is: only the next party steps to the spot; everyone else stays behind the line mark.
– One runner: One staff member (or a rotating role) is the only person who enters the package room/overflow areas to retrieve items. The other staff member stays at the counter to validate details, maintain the queue, and complete the handoff. This prevents the common failure mode where both staff disappear into the room and the lobby becomes unmanaged.
If you have a one-person shift: keep the resident at the counter spot while you retrieve, and use a verbal boundary: ‘Please stay at the mark while I grab it; I will bring it out.’ It feels strict, but it is faster and safer than having people trail you to shelves.
Wet-weather add-on: if rain is bringing in wet boxes, keep the queue and counter on the driest side of the lobby and set a clear ‘dry line’ boundary. The runner works the wet side; the handoff happens on the dry side to reduce slips and ruined labels. Keep a towel or paper on the counter spot to avoid placing wet packages on resident documents or phones.
Queue rule that prevents debates: if the line reaches a certain point (e.g., the door, elevator bank, or fire egress), you switch to ‘window-only pickup’ for the remainder of the hour and post the sign immediately. That is your pressure-release mechanism that keeps shared space usable.
Fast lookup micro-process: confirm unit, confirm last name, confirm zone
When you are using temporary package intake procedures and overflow zones, the fastest way to reduce line time is to standardize what you confirm and in what order. Do it the same way every time so relief staff can follow it and residents learn what to say.
Use a three-confirmation script (15 seconds when done consistently):
1) Confirm unit: ‘What unit number?’ (Do this first because it narrows your search and helps catch ‘wrong building’ situations early.)
2) Confirm last name: ‘Last name on the package?’ (Carrier labels and resident profiles do not always match; this catches partners, roommates, and maiden names.)
3) Confirm zone: ‘Your items are in Zone B / Overflow C / Locker wall.’ (Zone is how you keep the runner fast and prevent wandering.)
Operational rules that keep it tight during mailroom surge workflows:
– One question at a time. When staff ask for unit and name at once, residents answer only one and you repeat yourself.
– Do not start searching until you have both unit and last name. Searching on partial info causes the runner to touch too many packages, increases mis-shelves, and lengthens the line for everyone.
– If your building uses QR-labels or a TrackNest scan flow, treat the scan result as the ‘zone’ confirmation. If the label is wet or unreadable, fall back to a manual zone designation (e.g., ‘Overflow C, Stack 3’) and add a quick note for later cleanup rather than stopping the line.
If the resident is picking up multiple packages: retrieve one trip per resident whenever possible. The counter person should ask, ‘Anything else expected today?’ If yes, the runner collects all items for that resident in one pass, then completes a single handoff. This reduces room entries, which is the hidden time cost during peak weeks.
Resident messaging templates (short, specific, enforceable)
Surge messaging fails when it sounds optional or vague. Keep it short, time-bound, and tied to safety and speed. Post the message where residents actually look: lobby entry, elevator screens/boards, and at the pickup counter. Use the same wording across channels so staff do not have to improvise.
Template 1: Activate pickup windows
– ‘Peak pickup hours this week: 5–7 pm weekdays, 11 am–1 pm weekends. Outside these hours, pickup is limited to time-sensitive items (medical/perishable). Thank you for keeping the lobby clear.’
Template 2: One-line queue and no-entry rule
– ‘For faster service: please form one line and stay at the marked spot. Staff will retrieve packages; residents may not enter the package room during peak.’
Template 3: Floor-based (or name-range) windows
– ‘Today’s pickup windows: Floors 2–10 (4–5), 11–20 (5–6), 21–30 (6–7). Missed your window? Catch-up pickup is 7–7:30.’
Template 4: Carrier-driven day
– ‘Amazon deliveries are being processed now. To avoid wait time, Amazon pickup window is 5–7 pm today.’
Template 5: Rain day / wet box handling
– ‘Rain-day processing: wet packages are staged for drying/label protection. Please allow extra time and use the pickup line; staff will bring items out.’
Staff script to keep enforcement consistent (say it the same way each time):
– ‘We are in surge mode to keep the lobby safe and packages accurate. Please join the line; I will help you at the counter spot and bring your items out.’
What to do when someone refuses the flow: escalation steps that keep the line moving
Surge mode breaks down when one interaction consumes five minutes and the line stalls. Your package room holiday surge plan should include a calm, repeatable escalation path that protects service without turning a disagreement into a lobby incident.
Use a three-step escalation that prioritizes momentum:
Step 1: Restate the rule and the reason, once.
– ‘During peak, residents cannot enter the package room. It keeps pathways clear and prevents mis-handoffs. I will retrieve it for you.’
Step 2: Offer a bounded alternative that does not derail the line.
– ‘If you prefer, you can return during the pickup window at 5 pm, or I can place your item at will-call for the next block.’
– For urgent exceptions: ‘If it is medical or perishable, tell me now and I will prioritize it next.’ (Do not debate what qualifies at the counter; take the claim, move to retrieval, and note it for follow-up if needed.)
Step 3: Park the issue and keep serving others.
– ‘I can help the next person while you decide. Please step to the side of the line start so we do not block traffic.’
If the person attempts to enter the room or becomes disruptive: use your building’s existing escalation (security, manager on duty) without adding new policy. The key micro-process is that the counter person does not abandon the queue. If you are solo, pause retrieval and call for support first; the line moving is not worth an uncontrolled back-room situation.
After the incident: make a quick note for the next shift (who, what happened, whether packages were released) so the team stays consistent. Consistency is what makes these temporary procedures feel fair, which reduces repeat conflicts across the surge period.
Your Reversible Package Room Holiday Surge Plan: Pick 3 Swaps and Rehearse Them
A workable package room holiday surge plan is not a big redesign. It is a small set of reversible micro-process swaps you can turn on with clear triggers, run for a fixed window, and shut off cleanly. The goal is predictable flow during peak package volume apartment weeks without turning surge mode into your new normal.
Pick fewer things than you want. Three swaps is usually the sweet spot: easy to brief, easy to enforce, and easy to unwind. Write them on a one-page surge card and treat it like a temporary operating mode, not a new policy.
- Menu selection method: choose 1 space swap, 1 intake swap, 1 pickup swap; do not activate more than 4 total at once.
- Default surge window: run in 2–4 hour blocks (or one shift), then decide to extend or revert at a scheduled check-in.
- Assign a surge captain each shift (named person) who calls activate/deactivate and keeps boundaries enforced.
- Use plain-language names for swaps so anyone can run them: Intake Buffer Zone, 15-Minute Batch Intake, Overflow Labels, Pickup Windows.
The ‘menu’ selection method: choose one space swap, one intake swap, one pickup swap
Pick swaps based on your most common failure point, not what sounds best. If your room clogs first, start with space. If logging falls behind, start with intake. If the lobby crowds and interrupts intake, start with pickup traffic control.
Example sets you can copy:
Set A (space-limited building): Pop-up intake buffer + Scan-to-zone now (15-minute batches) + Pickup appointment windows (two blocks per day). Set B (wet-weather building): Dry line staging + Scan-and-shelve later (batch logging) + One-line/one-runner pickup pattern. Set C (shared lobby, low tolerance for clutter): Ready-for-pickup wall with strict no-block boundaries + Overflow labeling convention + Floor-based pickup windows.
A 10-minute pre-peak walkthrough checklist (tape, signs, labels, cart plan)
Do this once per day during predictable peaks (or before the first carrier wave). Keep it to 10 minutes so it actually happens.
Walkthrough checklist: 1) Clear your activation surfaces (floor area you will tape off, wall you will stage against). 2) Confirm supplies: painter’s tape or masking tape, marker, blank paper for signs, a small stack of sticky notes, and whatever you use for QR-labels. 3) Pre-write three signs you can deploy fast: Intake Buffer, Overflow Zone Codes, Pickup Line Starts Here. 4) Decide your cart plan: if you have one cart, it is intake-only until the last carrier drop; if you have none, designate a hand-carry route and a single drop point to avoid scattering. 5) Pre-assign roles for the first hour (even if you are solo): Intake, Runner, Exception handler (can be the same person, but the hat changes by timebox). 6) Identify two ‘no-block’ boundaries (e.g., fire door, elevator bank) and tape them as off-limits.
Day-of execution: the exact moments to activate (carrier arrival, first pileup, rain onset)
Activation should be tied to observable moments so the team does not debate it mid-chaos. Use three common triggers that happen in real buildings: carrier arrival, first pileup, and weather shift.
Carrier arrival trigger: when the first high-volume carrier shows up (or when you expect back-to-back drop-offs), activate your space swap first (staging zones and boundaries), then your intake swap (batch cycle), then your pickup swap (queue rules).
First pileup trigger: when packages start touching the floor outside your taped intake buffer, stop ‘normal’ logging and switch immediately to the surge intake mode you chose (timeboxed batches). This prevents half-logged piles that no one wants to reconcile later.
Deactivation and reset: cleaning, returns-to-shelves, and policy rollback
Deactivation is part of the plan, not an afterthought. If you do not define the reset, surge mode drifts into permanent clutter and residents lose trust.
Deactivation rules: 1) Call it at a scheduled check-in (end of batch block, end of shift, or after the last carrier wave). 2) Stop adding new items to overflow zones first; route new intake back to standard shelves. 3) Drain the buffer: move staged items into normal locations in one focused push (timebox it, even 20–30 minutes). 4) Remove temporary signs that change resident behavior (pickup windows, queue starts) once you are back to normal flow. 5) Clean and safety check: clear walk paths, discard wet cardboard, confirm ‘no-block’ boundaries are open, and return carts to their home position.
Policy rollback: explicitly state what returns to normal (pickup anytime, standard logging cadence, standard storage rules). If you do not say it, different shifts will keep different versions of surge mode.
After-action notes: what to record in TrackNest ops docs for next peak
Your next peak gets easier if you capture only what matters. Keep after-action notes short enough to do in five minutes at shift end.
Record these items: 1) Which three swaps you used and whether you activated all of them. 2) Your triggers: what actually caused activation (carrier wave, rain onset, lobby crowding) and what you used to deactivate. 3) Layout notes: what staging pattern worked (L-shape, horseshoe, one-way lane) and what blocked paths. 4) Labeling notes: which zone codes were used and any confusion points (e.g., overflow areas that looked too similar). 5) Exceptions: how many ‘problem’ items you saw (damaged, unclear unit, oversized) and where they got stuck in the process. 6) One change for next time: a single tweak to make the swaps faster to deploy (pre-taped corners, pre-printed zone codes, a dedicated dry-line mat, or a clearer runner route).
Store the surge card and notes where the team actually looks: front desk binder, package room clipboard, and the shared TrackNest ops doc. The goal is that the next shift can run the same package room holiday surge plan with minimal handholding.
Frequently Asked Questions
How do we set activation triggers when carrier arrival times and volume are unpredictable?
Use triggers tied to what you can see and measure in the moment, not what you hope the day will be.
Try a two-layer trigger:
1) Early warning (get ready): when the first carrier drop creates more than one “row” of packages on the floor OR when the lobby traffic starts forcing residents to walk around packages.
2) Go-time (switch to surge mode): when any one of these happens:
– You cannot clear the intake surface (desk/table) within 10 minutes.
– One full cartload is waiting and there is no second cart available.
– The “ready for pickup” area becomes visually mixed with unlogged items.
Make it resilient to unpredictability by adding a time trigger:
– If it’s after your busiest typical delivery window (for many buildings, late morning through early afternoon) and you are still in surge mode, do a 2-minute decision: either extend surge mode for one more fixed block (example: 60 minutes) or switch to recovery mode (log + re-shelve + reset).
This prevents the most common failure: staying in an improvised setup all day because no one formally called the next step.
What’s a realistic “surge kit” we can prep with almost no budget?
Build a small, repeatable kit that lives in (or near) the package room. Keep it simple so it gets used.
Minimum surge kit:
– Painter’s tape (for lines and boundaries that remove cleanly)
– Thick marker (for zone codes and quick notes)
– Blank paper or half-sheets (for temporary signs and zone labels)
– Clipboards or a single “surge card” laminated sheet (one-page instructions)
– A few large trash bags and paper towels (wet box season and lobby cleanup)
– Box cutter and spare pens
Nice-to-have if you already have access (no new spend required):
– A spare folding table (intake buffer)
– A lightweight mat or cardboard sheets to create a “dry line” for rainy days
The key is not supplies; it’s consistency. If the same tape colors and the same zone codes appear every peak week, everyone finds items faster—even with rotating staff.
How do we prevent mistakes when we temporarily store packages outside the normal room (shared lobby, back hallway, leasing office)?
When you expand storage, your biggest risk is “unfindable inventory.” Control that risk with three rules:
Rule 1: Only overflow into pre-approved zones.
– Decide 1–3 overflow spots in advance (example: Overflow A: leasing office corner; Overflow B: back hallway against east wall; Overflow C: behind package room door).
– If a spot is not on the list, it cannot become storage, even under pressure.
Rule 2: Every overflow item gets a location code that is visible from 6 feet away.
– Minimum viable code: Zone + stack position + time block.
– Example: OA-3-2PM (Overflow A, stack 3, logged during 2PM batch).
Rule 3: Overflow never becomes “resident self-serve.”
– Keep overflow behind the counter/door or controlled by a runner.
– If residents can browse overflow, the line slows and accountability drops.
If you do nothing else, do this: standardize overflow zones and enforce that each package has a visible zone code before it leaves the intake area.
What do we do with wet, damaged, or leaking packages during rain days so they don’t contaminate everything else?
Treat wet-weather handling as a separate micro-process with a clear physical boundary.
Practical approach:
– Create a “dry line” on entry: a taped boundary where anything visibly wet stops.
– Use a designated “wet table” or a plastic-lined corner (trash bag lining works).
– Do not stack wet cardboard on other packages; wet boxes collapse and smear labels.
Decision rules (simple and defensible):
– If label is readable: keep the package, mark it as “wet exterior,” and stage it in the wet zone until pickup.
– If label is unreadable: move to exceptions immediately and try to identify using any secondary markings (carrier sticker, partial address). Do not guess the unit.
– If actively leaking or contaminated: isolate in a bag, keep it away from foot traffic, and follow your property’s safety/escalation policy (typically notify management and document).
Make pickup safer:
– When handing a wet or damaged parcel to a resident, do a quick confirmation of name and unit, and note the condition at handoff so there is no ambiguity later.
How can we keep the pickup line moving when residents show up without ID, don’t know the name on the package, or insist on browsing?
During peaks, “lookup friction” is what turns a manageable surge into a lobby jam. Use a firm, consistent script and a fallback path that doesn’t stop the line.
Fast rule set:
– Required to retrieve: unit number + last name (or the name on the label).
– If they don’t have it: step out of line, find the info (lease document, email notification, texting roommate), then rejoin.
Anti-browsing standard:
– No browsing the shelves during surge windows. Staff retrieves.
Escalation steps that protect flow:
1) Repeat the rule once, calmly: “I can help as soon as I have unit and last name.”
2) Offer the workaround: “Please step aside to gather it, and I’ll take the next person.”
3) If they refuse and block the line: call the pre-set escalation contact (manager or security) while continuing to serve the next resident.
The goal is not to ‘win’ the interaction; it’s to keep service fair and continuous for everyone else in line.
What should we document after the peak so next time our package room holiday surge plan is easier to execute?
Keep the documentation lightweight and operational—something a new team member can run without guessing.
Capture these five items (one page is enough):
– Triggers that actually worked: what you saw that told you to switch into surge mode (and when you switched back).
– The three micro-process swaps you used: space setup, intake method, pickup control. Note what you stopped doing temporarily.
– Zone map: a quick sketch of the pop-up staging layout and overflow zones, with the exact zone codes.
– Exceptions log pattern: the top three exception types you saw (example: unclear unit, oversize, wet/damaged) and the handling decision you used.
– One improvement for next time: a single constraint to fix (example: “need a second folding table on rain days,” “pre-print zone signs,” or “add a 30-minute pickup window after 5 PM”).
If you store this with your front-desk checklists, your next surge is less about improvising and more about executing a known play.
CTA
Want this turned into a one‑page surge card your team can keep at the desk? Make a short list of your constraints (room size, carts, shared lobby rules, common carriers, peak days) and the top two failure points you see during surges, and we’ll map them to 3 reversible micro‑process swaps with clear activation and deactivation triggers.
Request a 1‑Page Surge Card
Turn Peak Weeks Into a Repeatable Playbook (Then Put It Away)
A reliable package room holiday surge plan isn’t a single policy. It’s a small set of micro‑process swaps you can turn on and off with clear triggers. Pick 2–4 tactics that match your constraints—one space move (pop‑up zones), one intake move (timeboxed batch logging), one findability move (overflow labels), and one demand move (pickup windows). Define what starts surge mode (volume, space, friction), who calls it, and what “back to normal” looks like so the temporary rules don’t drift into permanent confusion.
Run surge mode for a fixed window, keep the rules simple enough to follow under pressure, and end with a short reset: clear the overflow areas, reconcile exceptions, return signage and tape to a known kit location, and roll back any resident messaging that no longer applies. Capture a few notes while they’re fresh—what jammed, what worked, what you’d do earlier next time—so the next holiday, rain day, or Amazon peak week feels like execution, not improvisation.