
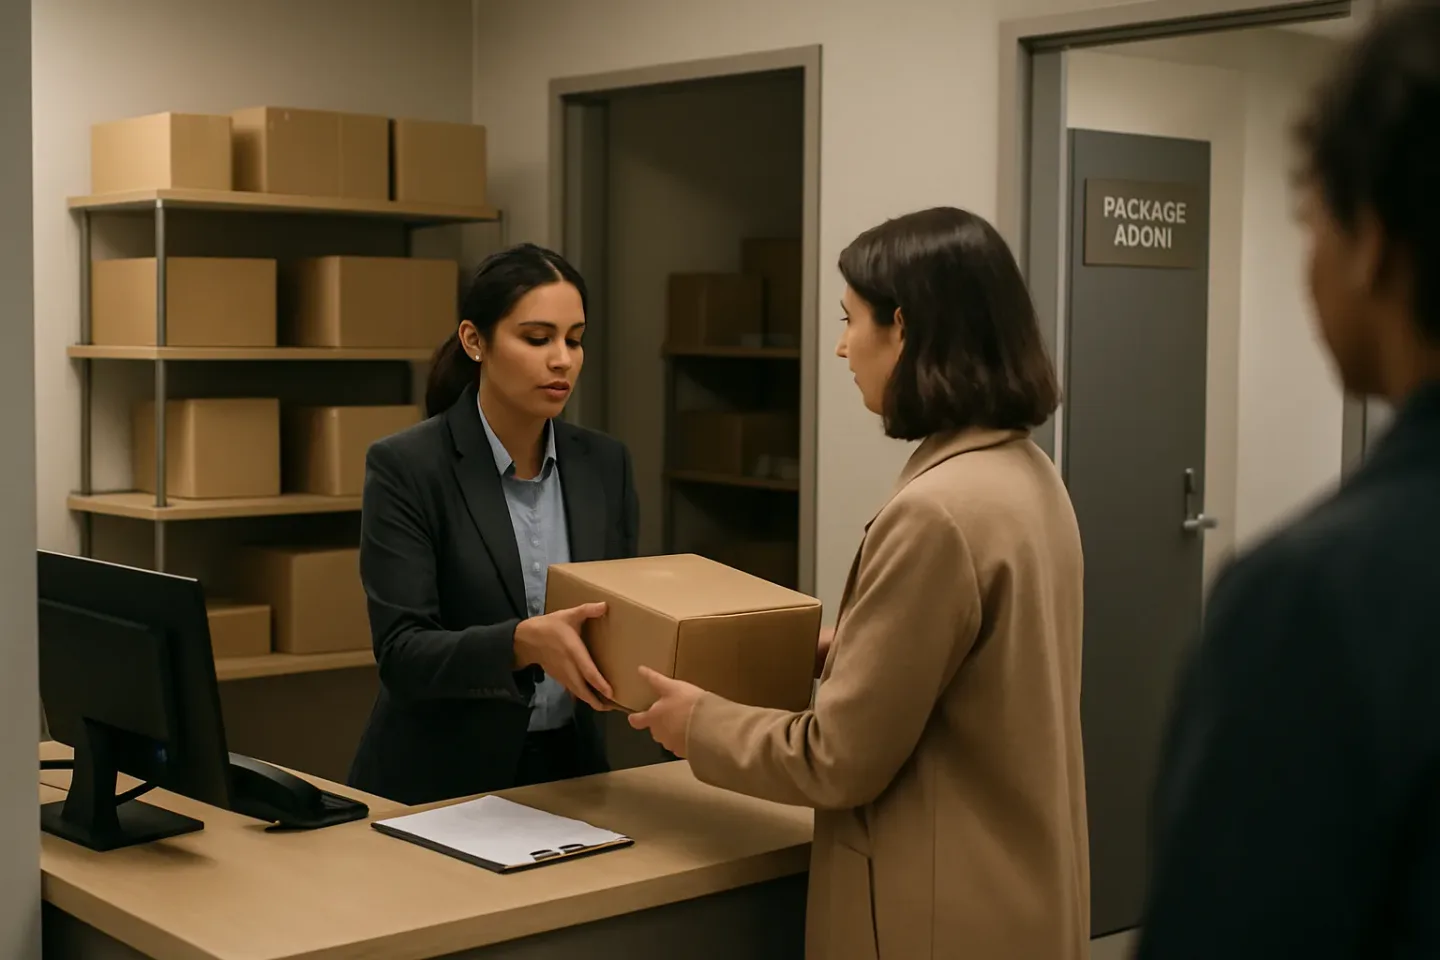
Resident Pickup Proof That Holds Up: Designing a “Good Enough” Verification Flow Without IDs, Photos, or Awkwardness
Most front desks inherit a package pickup verification apartment routine that defaults to “check ID” the moment anything feels uncertain. It is understandable, but it is also inconsistent: some staff enforce it, others waive it, and the line between “helpful” and “awkward” gets crossed fast. Meanwhile, residents want speed and dignity, and leadership wants something that holds up when a package goes missing and the question becomes, “Who actually picked it up?”
This article reframes proof of pickup as a set of repeatable, resident-friendly checks rather than a single heavy-handed rule. The goal is “good enough” verification: consistent evidence that a specific package was handed to a specific person (or authorized picker-upper) at a specific time, using a documented process that your team can run on a busy day. Done well, it strengthens package room accountability without turning every handoff into an interrogation.
You will get a tiered approach that matches verification to risk (value cues, carrier and delivery type, patterns like repeat disputes) plus a practical decision tree your team can follow at the desk. Just as important, you will get scripts and fallback steps for the situations that break rigid policies: the resident’s phone is dead, the name on the label does not match, or a roommate shows up to grab it. The result is a resident package pickup process that feels normal in the moment and credible later if you ever need to review what happened.
If you are trying to reduce “he said, she said” disputes without adding friction, start here: define what you need to prove, standardize the minimum handoff data you capture, and apply stronger checks only when the risk calls for it.
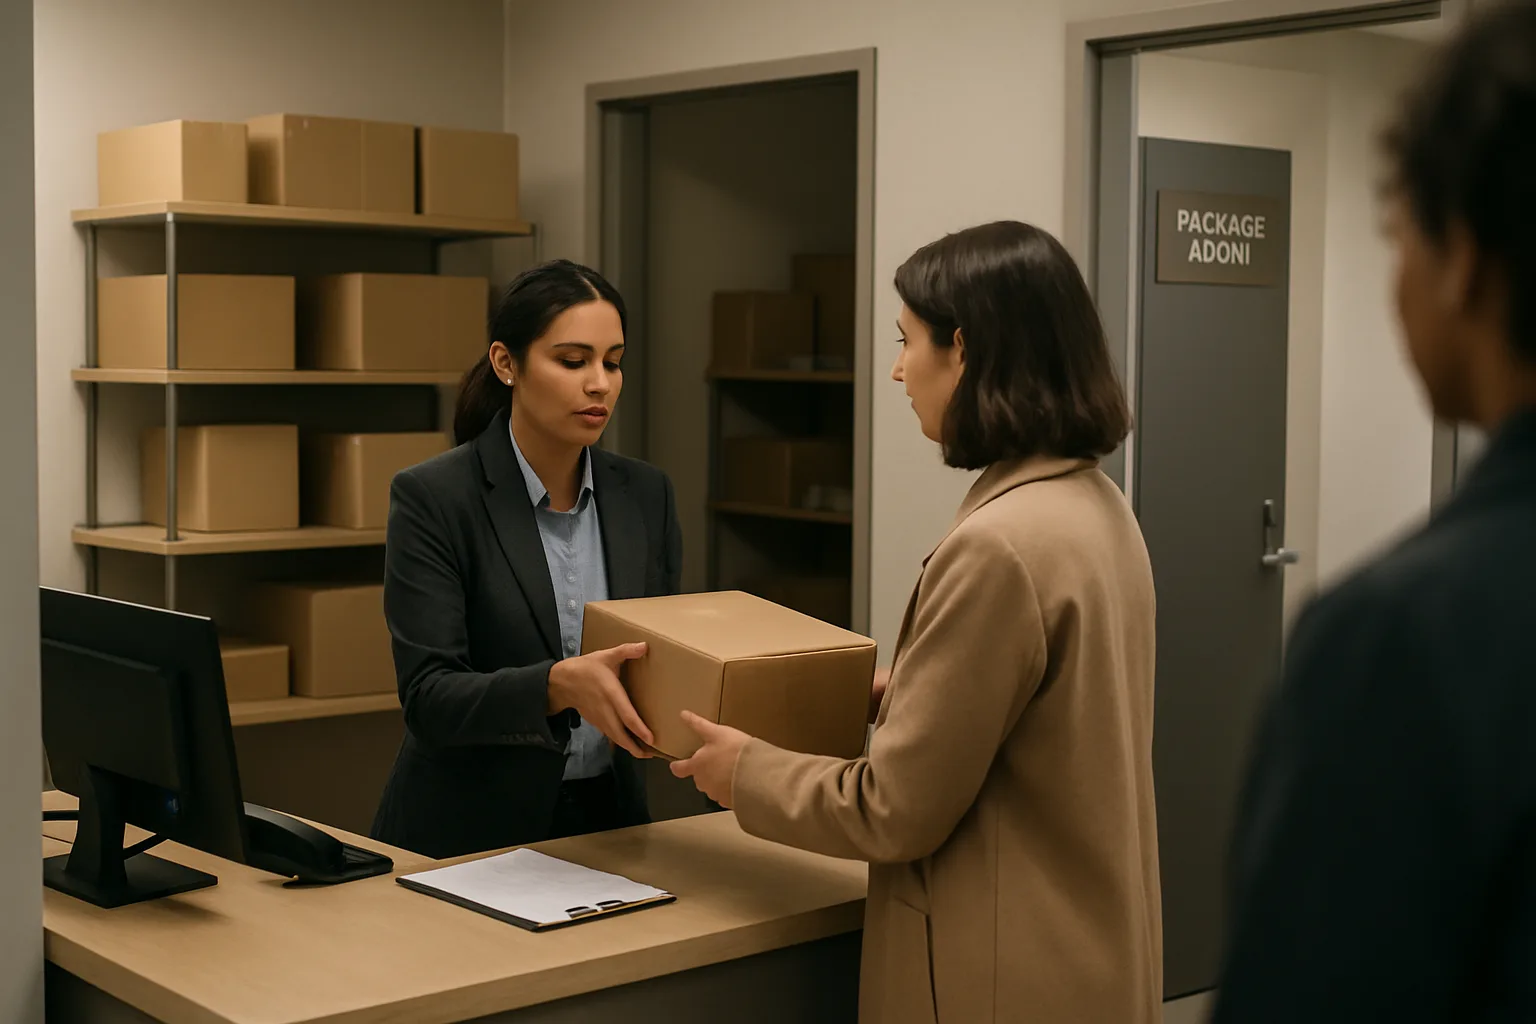
Define “Good Enough” Proof of Pickup (and What You’re Actually Proving)
In a busy lobby, “proof of pickup” is rarely about achieving courtroom-level certainty. For most buildings, the goal of a package pickup verification apartment flow is simpler: create a consistent, repeatable record that makes it reasonable to conclude the right package was released to the right person at a specific time, using the same checks every time.
The key shift is this: you are not proving identity in the absolute sense (especially if you are intentionally avoiding IDs and photos). You are proving a controlled handoff happened—by a trained staff member—using defined verification steps. When a dispute happens, that consistency is what holds up.
- A “good enough” resident package pickup process produces a clear story: who requested pickup, what was retrieved, which checks were used, who released it, and when it left the package room.
- Proof of pickup should be easy to execute during peak traffic; if it only works on slow days, it will fail when you need it most.
- The best proof is boring: standardized, predictable, and documented the same way across the team.
What counts as proof of pickup in a package room
In an apartment setting, proof of pickup is usually a bundle of small signals rather than a single “golden” credential. Without IDs or photos, you’re relying on process evidence: the package was physically located, matched to a record, and released after one or more verification checks that your building has defined as acceptable.
Think of proof of pickup as “package room accountability” evidence: it should allow a supervisor to reconstruct what happened without needing to guess or rely on memory. In a dispute, the question becomes: did staff follow the policy, and does the record show a reasonable match between resident and package at the moment of handoff? That’s the standard most properties can defend.
Why consistency beats “one-off” strictness
Residents experience inconsistency as unfairness: one day a pickup is effortless, the next day it becomes an interrogation. Teams experience it as risk: if staff improvise, your weakest handoff becomes the one that gets challenged.
A consistent package pickup verification apartment flow does two important things. First, it reduces errors (wrong unit, wrong name, wrong package) because staff aren’t reinventing the steps each time. Second, it makes disputes resolvable because you can compare the questioned handoff to your normal pattern: the same fields were captured, the same checks were used, and exceptions stand out clearly.
“One-off” strictness also creates perverse outcomes: staff may avoid enforcing a tough policy during rushes, or residents may route around the desk by sending someone else. A “good enough” standard is designed to be followed even at 6:15 pm with a line out the door.
Liability vs resident experience: where the line usually is
Front desk teams and property leadership are balancing two truths at once: you need a friction-light experience for residents, and you need enough control to defend against claims of loss, misdelivery, or unauthorized pickup.
In practice, the line usually lands here: you do not need to verify legal identity for every package, but you do need a consistent, documented basis for release. That basis should be clear enough that staff can confidently say, “I can release this once I can match you to the package using our approved options.”
This is why “good enough” works: it avoids awkwardness (no ID demands for routine pickups) while still setting a firm boundary. If the desk cannot create a reasonable match, the package does not leave the room—regardless of how confident someone sounds.
Standard data points to capture every time (handoff basics)
The fastest way to improve proof of pickup is to standardize what you capture on every handoff, no matter how low-risk the package is. You’re creating a minimum record that’s consistent across shifts and staff, so exceptions are obvious and investigations are possible.
These basics should be quick to collect and consistent in format. If your tools support scanning (for example, a QR-label or barcode on the package record), it becomes even easier to create reliable timestamps and reduce typing errors.
Tiered Verification: Match the Check to the Risk
A resident-friendly package pickup verification apartment flow works best when it is not one-size-fits-all. Most desks default to “check ID” because it feels defensible, but it creates friction, inconsistent enforcement, and awkward moments that do not scale. A tiered approach solves this by matching the verification to the risk of the handoff—so your resident package pickup process stays fast for everyday items and tighter for the packages most likely to trigger disputes.
In practice, tiers give front-desk teams two things: (1) clear minimum steps that produce proof of pickup that holds up later, and (2) permission to escalate only when the situation warrants it. The result is better package room accountability without turning every pickup into a confrontation.
- Principle: verify the handoff, not the person’s identity. Your goal is defensible proof of pickup: who received it (as a resident/authorized party), which package, when, and what checks were performed.
- Make tiers visible to staff, not residents. Residents experience a consistent tone; staff follow a consistent decision rule.
- Use “minimum viable verification” for each tier: one primary check plus one backup check, so the desk is never stuck when a phone is dead or a name is slightly off.
Risk inputs: value cues, carrier signals, delivery type, and patterns
To assign a tier quickly, teams need practical signals they can see at the desk—without opening boxes, guessing brands, or interrogating residents. Your tier triggers should be objective enough that two different staff members would make the same call most of the time.
Start with three categories of inputs and decide in advance which ones automatically bump a package up a tier. Keep the rule simple: if any high-risk input is present, move up; if multiple medium-risk inputs are present, move up. The goal is consistency, not perfect risk prediction.
Tier triggers you can use in real operations
Value cues (what you can reasonably infer):
– Declared value or insurance noted on the label (when visible).
– Signature-required shipments or “adult signature” language (even if the carrier didn’t collect a signature at delivery). (Treat these as higher risk because disputes are common.)
Carrier and service signals:
Carrier and delivery-type signals (examples)
– Overnight, two-day, “express,” or “priority” services often correlate with higher urgency and higher-value items.
– Lockers vs. open shelves: items staged in an access-controlled location can often use a lighter pickup step; items accessible to many people should use a stronger step.
– Special handling labels (fragile, temperature-sensitive) should bump risk because the resident is more likely to claim mishandling or wrong handoff.
Patterns and history (what your property already knows):
– Recent claim history tied to a unit, resident, or recurring pickup proxy.
– High volume pickups from the same unit (not inherently suspicious, but worth a tier bump during peak season when mistakes spike).
– Repeated “name doesn’t match” or “I’m picking up for someone else” scenarios from the same unit.
A simple rule that works: if it is signature-required/express, has any visible declared value cue, or is linked to recent claims, it is not Tier 1.
Tier 1 (low risk): fast, friendly, repeatable checks
Tier 1 is for routine packages where the risk of a costly dispute is low and speed matters. The objective is to produce clean proof of pickup without slowing the line or forcing ID checks. Tier 1 should cover the majority of daily pickups if your intake is organized and your staging is controlled.
Minimum viable verification at Tier 1 should be consistent and quick—think “confirm, scan, handoff,” not “prove who you are.” This tier works best when your package room is already reasonably secure (limited access, clear staging, controlled release at the desk).
Tier 1 minimum steps (example standard)
Primary check (choose one standard method for your building):
– Resident states unit number and last name; staff confirms it matches the label or the package record.
Backup check (use if there is any mismatch or uncertainty):
– Resident confirms one additional detail tied to the record (example: first name on the package record, or the carrier + delivery date). Avoid using sensitive personal data.
Proof of pickup capture:
– Scan package label (QR/barcode) or mark the package as picked up in your log.
– Record: who picked up (name stated), unit, date/time, and staff initials.
What Tier 1 avoids:
– No ID requests by default.
– No photos.
– No “read me the tracking number” requirements (often unreliable and slows the line).
Tier 2 (medium risk): added confirmation without escalation
Tier 2 covers situations where the cost of a mistake is higher or where errors are more likely, but you still want to avoid making the interaction feel accusatory. The key difference from Tier 1 is that Tier 2 uses two-factor confirmation from the options you already have at the desk—without drifting into personal ID checks.
Tier 2 is also where you intentionally tighten the “proof of pickup” trail. If a dispute happens later, you can show a repeatable, reasonable set of checks were completed every time, which strengthens package room accountability without changing the resident experience into something heavy-handed.
Tier 2 minimum steps (example standard)
Primary check:
– Unit + last name must match label/record.
Second check (required):
– One of the following, selected by the resident (keep it resident-friendly):
– Show the pickup notification (email/app message) with matching carrier or delivery date.
– Confirm the package description visible in the record (example: carrier + size category + arrival date).
– Confirm an authorization note on file (if your property uses them).
Proof of pickup capture:
– Scan label (QR/barcode) and capture who picked up (name stated) + unit.
– Note which second check was used (example: “notification shown” or “confirmed carrier+date”).
When Tier 2 is triggered:
– Express services, signature-required language, recent claim history, large/oddly shaped items, or any situation where staff had to “guess” which package to hand over.
What Tier 2 avoids:
– Still no default ID checks.
– No subjective judgment like “they seem nervous.” Stick to the tier rule.
Tier 3 (high risk): stronger controls and manager involvement
Tier 3 is for high-consequence handoffs: the packages most likely to generate serious disputes or tempt misuse. If you do not use IDs, photos, or signatures, Tier 3 should compensate by tightening control of the handoff moment and requiring a higher standard of matching information and approval.
A helpful way to frame Tier 3 internally: “If we release this incorrectly, are we prepared to defend the decision in writing?” If the answer is no, Tier 3 requires a pause and a defined escalation path rather than an argument at the counter.
Tier 3 minimum steps (example standard)
Primary check:
– Exact match required on unit + recipient last name (as shown on label/record). If it does not match, do not release at the desk.
Second check (required, stronger):
– Resident must provide two independent confirmations (for example):
– Show the pickup notification (or shipment confirmation) AND
– Confirm a detail from the package record (carrier + delivery date + package count, if multiple).
Controlled handoff:
– Staff retrieves the package (do not allow self-serve retrieval for Tier 3 items).
– If your operation supports it, require a second staff member or manager “release approval” (quick initial or checkbox) during peak dispute periods.
Proof of pickup capture:
– Scan label (QR/barcode).
– Record: who picked up (name stated), unit, the two confirmations used, date/time, staff initials, and approver initials (if used).
When Tier 3 is triggered:
– Repeated prior claims tied to the unit/resident, “signature required” language, unusually high-value cues, or any pickup by a non-resident proxy where authorization is unclear.
What Tier 3 avoids:
– It should not turn into an argument. Tier 3’s main feature is a calm “pause and verify” step with a clear fallback (manager review, contact resident of record, return at a specified time).
How to apply tiers when value is unknown
Most desks do not have reliable package value information. That is normal. The solution is to tier based on what you can observe and what you can control, then use escalation rules that are simple enough to apply consistently.
Use this approach when value is unknown:
– Default most pickups to Tier 1, but automatically bump to Tier 2 for any of the following: express service language, signature-required wording, large parcels, or multi-package pickups for the same unit.
– Reserve Tier 3 for repeat-claim units, unclear proxy pickups, or any time the label/record does not cleanly match the person presenting.
A practical “unknown value” rule staff can remember:
– If it matches cleanly, Tier 1.
– If it is time-sensitive/special-handling or there’s mild uncertainty, Tier 2.
– If it does not match or the consequences feel high (based on defined triggers), Tier 3 and pause.
This keeps the resident package pickup process moving while still producing defensible proof of pickup and stronger package room accountability when it matters.

The Decision Tree: A Resident-Friendly Resident Package Pickup Process
A strong package pickup verification apartment flow is less about catching people out and more about creating a consistent handoff moment that you can explain later. The goal is a resident package pickup process that’s quick for honest residents, hard to game for bad actors, and easy for staff to repeat under pressure.
Use the decision tree below as your default. It’s designed for environments where you’re not relying on IDs, photos, or “prove it” vibes—while still producing proof of pickup that holds up when a package is disputed.
- Design principle: Verify before you touch the package. Once a package is in-hand, it’s harder to pause the release without friction.
- Design principle: One primary check plus one backup check is usually “good enough” proof of pickup—when done consistently.
- Design principle: Separate “finding” from “releasing.” Staff can help locate a package, but release happens only after verification is satisfied.
Baseline flow (works for most pickups)
Use this as the standard scriptable flow for most interactions—whether you’re at a front desk window or controlling access to a package room.
Decision tree (plain-language steps):
1) Start the request: Ask for unit number + name (or name + unit). Example prompt: “What’s the unit and last name you’re picking up for?”
2) Locate the package record: Confirm there is at least one package logged for that unit/name (or match to tracking label if you use QR-label/barcodes).
3) Choose verification: Apply one primary verification option, then confirm one backup option if needed (or if the pickup feels “off”).
4) Confirm package details out loud: State what you’re handing over (carrier + count + label name/unit). Example: “I have two packages for 1207, last name Patel—one UPS, one Amazon.”
5) Release and document the handoff: Mark picked up with timestamp and staff initials/identifier; note which verification method(s) were used.
6) Close the loop: “All set—thanks. If anything looks off once you open it, let us know right away.”
Verification options menu: choose one primary + one backup
Give staff a menu so they aren’t improvising. Standardize on approved options, and require staff to select at least one primary method before release. When you need extra confidence, add one backup method rather than escalating to awkward demands.
Primary verification options (pick one):
– Unit + resident name matches the package record and label; resident answers a “known-to-tenant” prompt (see below).
– Resident presents package pickup notification on their device (email/app notice) that matches unit/name and shows a recent delivery.
– Resident scans the QR-label/barcode associated with that package record (if your workflow supports scanning at handoff).
Backup verification options (pick one if needed):
– Confirm contact method on file by having the resident state the phone/email ending (e.g., “last two digits of the phone number on your lease profile”). Staff verifies in the system without the resident showing the full number.
– Ask a neutral “account check” question that doesn’t feel like interrogation (examples below).
– Send a one-time confirmation message to the resident’s contact on file (text/email) and have them read back the code (when your systems allow it).
– If the resident is known to staff: staff recognition plus one objective confirmation (unit + package count/carrier).
Examples of resident-friendly “known-to-tenant” prompts (use sparingly, rotate options):
– “Can you confirm the unit number and the last name on the lease?”
– “What’s the building name or floor you’re on?” (useful in multi-building sites)
– “About how many packages are you expecting today?”
– “What carrier are you here for—Amazon, UPS, FedEx, USPS?”
Guardrails so this doesn’t become inconsistent:
– Don’t use sensitive prompts (SSN, DOB, full phone number).
– Don’t ask questions that neighbors can easily overhear if you’re in a public lobby.
– Don’t vary the rules by who is asking—vary them by the risk tier your site uses (but keep this flow constant).
Front-desk scripts that don’t sound accusatory
The words matter. You’re aiming for calm, procedural language that frames verification as standard practice for everyone. These scripts keep the interaction friendly while still producing package room accountability.
Opening and framing (sets expectations):
– “Absolutely—quick verification and I’ll get you on your way. What unit and last name?”
– “We do the same quick check for every pickup so we can document the handoff.”
If the resident only gives a first name or “it’s for me”:
– “Thanks—what unit and last name should it be under?”
If there are multiple packages on file for that unit:
– “I’m showing a few items for your unit. Do you know how many you’re picking up today?”
– “I have two deliveries logged. Are you expecting both?”
If you need a backup check without escalating:
– “To make sure I release this to the right person, can you confirm the phone number ending we have on file?”
– “One more quick confirmation: which carrier are you here for?”
Closing the handoff (clear end of custody):
– “Here are the two packages for 1207. I’m marking them picked up now—thanks.”
– “All set. If anything looks mislabeled, bring it back right away and we’ll document it.”
When to pause the handoff: the “no match, no release” rule
Friendly doesn’t mean flexible on the wrong things. Your staff needs permission to pause without arguing. A simple rule keeps the desk consistent: if you can’t match the person to the package record with your approved checks, you do not release.
Use the “no match, no release” pause points below. Staff should stop the handoff and move to a structured next step rather than negotiating in the moment.
No match, no release triggers:
– The unit number or last name doesn’t match the label/record and the resident can’t provide a reasonable explanation (or you can’t verify it).
– The resident refuses all verification options offered (primary and backup).
– The resident wants to take a package that is logged under a different unit/name with no authorization pathway.
– The package is flagged in your workflow (high-risk tier, prior disputes on the unit, signature-required delivery noted, or management hold).
What staff should say when pausing (firm, non-accusatory):
– “I can’t release this one yet because the name/unit doesn’t match what we have logged. Let’s take one minute to confirm the record so it goes to the right home.”
– “I’m not able to hand it over without one of our verification options. If your phone is dead, we can use an alternate check or you can come back when you have access.”
Structured next steps (pick one):
– Offer the backup verification menu.
– Ask the resident to return with their device/notification.
– If appropriate at your property, involve a manager for a same-day exception (and document it).
– If the resident believes the package was logged wrong: start a mis-log workflow (do not release based on guesswork).
What to record for accountability after the handoff
Proof of pickup is only as strong as what you record consistently. The documentation should be fast, repeatable, and tied to the exact package(s) released. This is where package room accountability comes from—clear custody transfer with basic supporting context.
Minimum handoff record (capture every time):
– Date/time of release (auto-time stamp is best).
– Staff identifier (initials or user login).
– Package identifier(s): tracking number, QR-label/barcode ID, or internal package log entry.
– Unit number and resident last name as recorded.
– Package count released (e.g., “2 items”).
– Verification method used (choose from a short dropdown/list: “notification shown,” “QR scan,” “account check,” “staff recognition + backup,” etc.).
Recommended add-ons (when applicable):
– Exception flag + short note (one line, objective): “Name mismatch—verified via phone ending on file,” or “Roommate pickup—authorized on file.”
– Partial pickup notes: “Released 1 of 3; 2 remain staged.”
– Mis-handoff prevention note if there was confusion: “Two similar labels; verified carrier + tracking last 4.”
How to keep it fast at the desk:
– Use standardized verification labels (no free-text essays).
– Keep exception notes to one sentence, factual only.
– If scanning is part of your workflow, scan at the release moment (not earlier) so the scan itself becomes part of the proof of pickup chain.
Fallback Scenarios Without Awkwardness: Dead Phones, Name Mismatches, Roommates
Even the best package pickup verification apartment flow breaks down in predictable, human ways: a dead phone, a label that doesn’t match a current name, or a partner picking up on the way home. The goal in these moments is not to “win” the interaction. It’s to keep the resident package pickup process moving while still creating proof of pickup that will hold up later: clear checks performed, clear handoff, and clear documentation of any exception.
Treat fallbacks as pre-approved pathways (not improvisation). When your team uses the same two or three alternatives every time, residents experience it as fairness—not suspicion—and your package room accountability improves because exceptions are consistent and reviewable.
- Exception principle: pick one primary verification method and one backup; if neither works, pause release and escalate rather than inventing a third method on the spot.
- Documentation principle: when you use a fallback, record what failed (e.g., “phone dead”) and what you used instead (e.g., “unit knowledge + roster match + signature”).
- Handoff principle: no package leaves the controlled area until the verification step is complete and recorded (even if you’re trying to be helpful).
Phone dead or no access to notifications: safe alternatives
This is the most common “I can’t show you” moment. Your job is to offer a calm, non-technical alternative that still creates usable proof of pickup.
Use a two-step backup that doesn’t rely on ID or photos: something they know plus something you can match in your records. Keep it quick and consistent. Avoid asking for sensitive personal data; you’re verifying residency and entitlement to the package, not identity for banking.
Suggested backup options (choose one primary + one backup for your policy): 1) Unit-based verification: resident states unit number and a second unit-specific detail you already have on the package roster (e.g., last name on the lease roster, or the name the package is logged under). 2) Roster match: you confirm their name (or claimed name) appears in the property’s resident roster for that unit. 3) Package knowledge check: resident can accurately describe the carrier + approximate delivery date + sender/retailer (no need for order numbers). 4) Call-back option: if the desk is busy or uncertain, offer to hold the package while they charge their phone and return; this is often the smoothest outcome for low urgency.
Name doesn’t match the label: maiden names, nicknames, subleases
Mismatch doesn’t automatically mean fraud—it usually means life happened. What matters is that your process handles it the same way every time, and that you don’t “fix” the mismatch by guessing.
Start by clarifying what you’re matching: the name on the package label, the name in your package log, and the name in your resident roster. When any two match, you can often proceed (depending on your tier), but you should still document the reason for the mismatch so future pickups are smoother.
Common mismatch types and clean responses: 1) Maiden names / legal name changes: confirm the resident roster shows either the old or new name for the unit; if not, treat it as an exception and ask them to update roster info before next pickup. 2) Nicknames: ask, “What name is it under?” then verify against the package label/log; do not accept “It’s mine” without a match to something you can record. 3) Subleases / new move-ins: if the resident is not yet on the roster, pause release unless your leadership has a documented interim policy (e.g., move-in letter on file). 4) Room number mistakes: if they claim a different unit than what’s logged, do not “override” at the desk; verify the unit in the log and re-check staging first to prevent wrong handoff errors.
Roommate/partner picking up: authorized pickup pathways
This scenario is where many buildings unintentionally create liability: staff “recognize” someone and release a package without a recorded authorization trail. The resident experience can stay friendly if you offer a standard authorization pathway that residents can rely on.
Pick one authorized pickup method that’s easy to explain and repeat. The simplest resident-friendly rule is: anyone listed on the lease/roster for the unit can pick up any package addressed to that unit, unless the addressee opts out. If your building prefers addressee-only pickup for higher-risk items, make that the exception tier rather than the default for every box.
Practical, non-awkward scripts and steps: 1) If both are on the roster: “No problem—since you’re listed for Unit 1204, you can pick up packages for the unit. I’ll log you as the pickup person.” 2) If the pickup person is not on the roster: “I can’t release it without an authorization we can record. If the addressee can message/call in now, we can use that as approval; otherwise we’ll hold it.” 3) If the addressee is present on speakerphone: confirm the package label name + unit, ask for a simple approval phrase (“I authorize Alex to pick up my package today”), then log who approved and the time. Don’t negotiate beyond the script—consistency protects everyone.
Third-party helpers (dog walker, caregiver): how to allow or deny cleanly
Third-party pickups are high-friction unless you make the rule simple. Many disputes start with “The resident told me it was fine.” Your process needs verifiable authorization, not hearsay.
If your property allows third-party pickup at all, require pre-authorization that your team can see quickly at the moment of handoff. Keep it lightweight: a note on the unit record, a recurring “authorized pickup person” entry, or a one-time authorization logged by staff based on a call from the resident. If you can’t verify authorization in your system or log, the answer is a calm no.
Suggested allow/deny framework: 1) Allow if: the helper is pre-listed for that unit (with an expiry date if appropriate), and you can match the package to that unit in your log. 2) Allow one-time if: resident calls the desk from a number on file (or confirms unit-specific details) and provides the helper’s name; you log the authorization. 3) Deny if: authorization is only verbal via the helper; the helper won’t provide their name; the unit or addressee doesn’t match; or the package is in a higher-risk tier where third-party pickup is disallowed. The resident-friendly phrasing is: “We can absolutely hold it, but we can’t release without recorded authorization—this protects you as much as us.”
What to do when a resident is upset: de-escalation + firm boundaries
When someone is frustrated, your verification flow should get simpler, not more complex. The goal is to reduce perceived accusation while keeping the “no match, no release” boundary intact.
Use a three-part pattern: acknowledge, offer options, set the boundary. Keep your voice neutral, avoid blaming the resident, and avoid policy debates at the counter. If you need to escalate, do it as a service recovery step (“Let me get my manager so we can resolve this correctly”) rather than as enforcement.
Scripts that tend to work (choose and train them verbatim): 1) Acknowledge: “I hear you—this is inconvenient.” 2) Options: “Here are two quick ways we can verify without an ID: we can match you to the unit roster, or you can have the addressee call in to authorize pickup.” 3) Boundary: “If we can’t match it, we have to hold the package. I can keep it secure and you can pick it up as soon as we have one of those confirmations.” Then document the interaction as an exception if it involved a refusal, raised voices, or a threatened complaint—those are the situations where proof of pickup and proof of non-release both matter.
Operational Controls That Improve Package Room Accountability (Without Slowing the Line)
A strong package pickup verification apartment flow is only as credible as the operations behind it. When disputes happen, the question is rarely “Did the desk try?”—it’s “Can you reconstruct the handoff confidently and consistently?” The goal here is package room accountability that’s fast in the moment and defensible later: clear labeling, predictable staging, quick logs, and a tight exception habit that doesn’t turn every pickup into an interrogation.
These controls are designed to support a resident package pickup process where proof of pickup is built from repeatable actions (scan, locate, confirm, handoff, record), not from IDs, photos, or awkward confrontations.
- Design for speed: every control should reduce searching, reduce mis-handoffs, or make disputes easier to resolve.
- Treat exceptions as a separate workflow (with lightweight documentation), not something handled ad hoc at the counter.
- Make the “last touch” unmistakable: one clear moment where the package changes custody and the system reflects it.
QR-label or barcode scanning habits that support proof of pickup
Scanning is the simplest, most repeatable backbone of proof of pickup—when it’s done the same way every time. The operational win isn’t the technology itself; it’s the habit: scan at intake, scan at handoff, and avoid any “I’ll mark it later” gaps.
If you use QR labels or barcodes on packages, standardize two non-negotiables: (1) the package is not handed over until it has been positively matched in the system (via scan or an equivalent lookup), and (2) the pickup event is recorded immediately at the handoff point (not after the resident leaves). That consistency is what makes your package pickup verification apartment process hold up under resident disputes or carrier claims.
Staging by unit/building zones to reduce “wrong handoff” errors
Most desk headaches come from two problems: time lost searching and packages released to the wrong person because the team grabbed from the wrong stack. Staging solves both by turning “finding” into a quick, repeatable motion.
Use a zone approach that fits your layout and volume: by building, by floor band (1–5, 6–10, etc.), or by a simple unit-number range. The point is not perfect optimization—it’s reducing the probability of a wrong handoff when the line is long.
Operational tips that keep it fast and accurate: keep overflow rules simple (one overflow shelf per zone), keep the “to-be-shelved” intake area separate from the “ready for pickup” area, and don’t allow unlabeled or unzoned piles to build up. When staging is predictable, your staff can maintain proof of pickup without slowing down because they are not improvising under pressure.
Exception log: what to capture and who reviews it
An exception log is where package room accountability becomes real. It’s not a punishment tool; it’s a memory tool for the moments your standard resident package pickup process can’t cleanly apply (dead phone, name mismatch, roommate pickup, missing label, partial damage, etc.). Without it, the only record is a verbal story—which is exactly what falls apart during a dispute.
Keep the exception log lightweight so teams will actually use it. Capture only what you’d want if you had to answer a complaint later the same day. A practical “minimum fields” set is: date/time, staff initials, unit, package identifier (tracking last 4 or internal code), reason for exception (pick from a short list), verification method used (what you checked), and disposition (released/held/returned). Add a short notes line only when needed.
Assign ownership: one supervisor (or designated lead) should review exceptions on a set cadence (daily in high volume buildings, weekly in lower volume). The review is to spot patterns (repeat exceptions by the same unit, repeated carrier issues, recurring name mismatches) and tighten training—not to second-guess every call at the desk.
Daily/weekly spot checks that don’t feel punitive
Spot checks are how leadership confirms the proof of pickup standard is happening without hovering over the team. Done poorly, they feel like “gotcha” audits. Done well, they reduce rework and protect staff because expectations are clear and consistent.
Keep spot checks small, fast, and routine. A daily check might be 5 random packages received today: confirm they’re labeled correctly, staged in the right zone, and visible in the system. A weekly check might be 10 random pickups: confirm pickup events are recorded with the expected data points (who/when/which checks were performed), and that exceptions have a corresponding entry when applicable.
Two guardrails make these checks supportive rather than punitive: (1) share findings as process fixes (“We need a clearer overflow rule for Zone C”), not personal criticism, and (2) close the loop quickly—update the checklist, adjust the staging map, or tighten the short list of exception reasons. This is how a package pickup verification apartment workflow stays “good enough” even as volume spikes or staffing changes.
Training and calibration: keeping the team consistent
The biggest risk to package room accountability is inconsistency across shifts. Residents learn which staff member is “strict” and which one is “easy,” and your proof of pickup becomes uneven. Calibration prevents that by making the resident package pickup process feel the same no matter who is at the desk.
Keep training practical: teach the baseline flow, the tiered verification behaviors your property chose, and the exact moment of “no match, no release.” Then run short role-plays of the top scenarios your team actually sees: roommate pickup, label name mismatch, resident without phone, and a resident who is frustrated.
A simple calibration rhythm works well: 10 minutes per week, one scenario, one script, one reminder of what to record. Document the current “house standard” in a one-page desk checklist so new hires don’t improvise. When the team is aligned on what they check and what they record, proof of pickup is not a debate—it’s a routine.
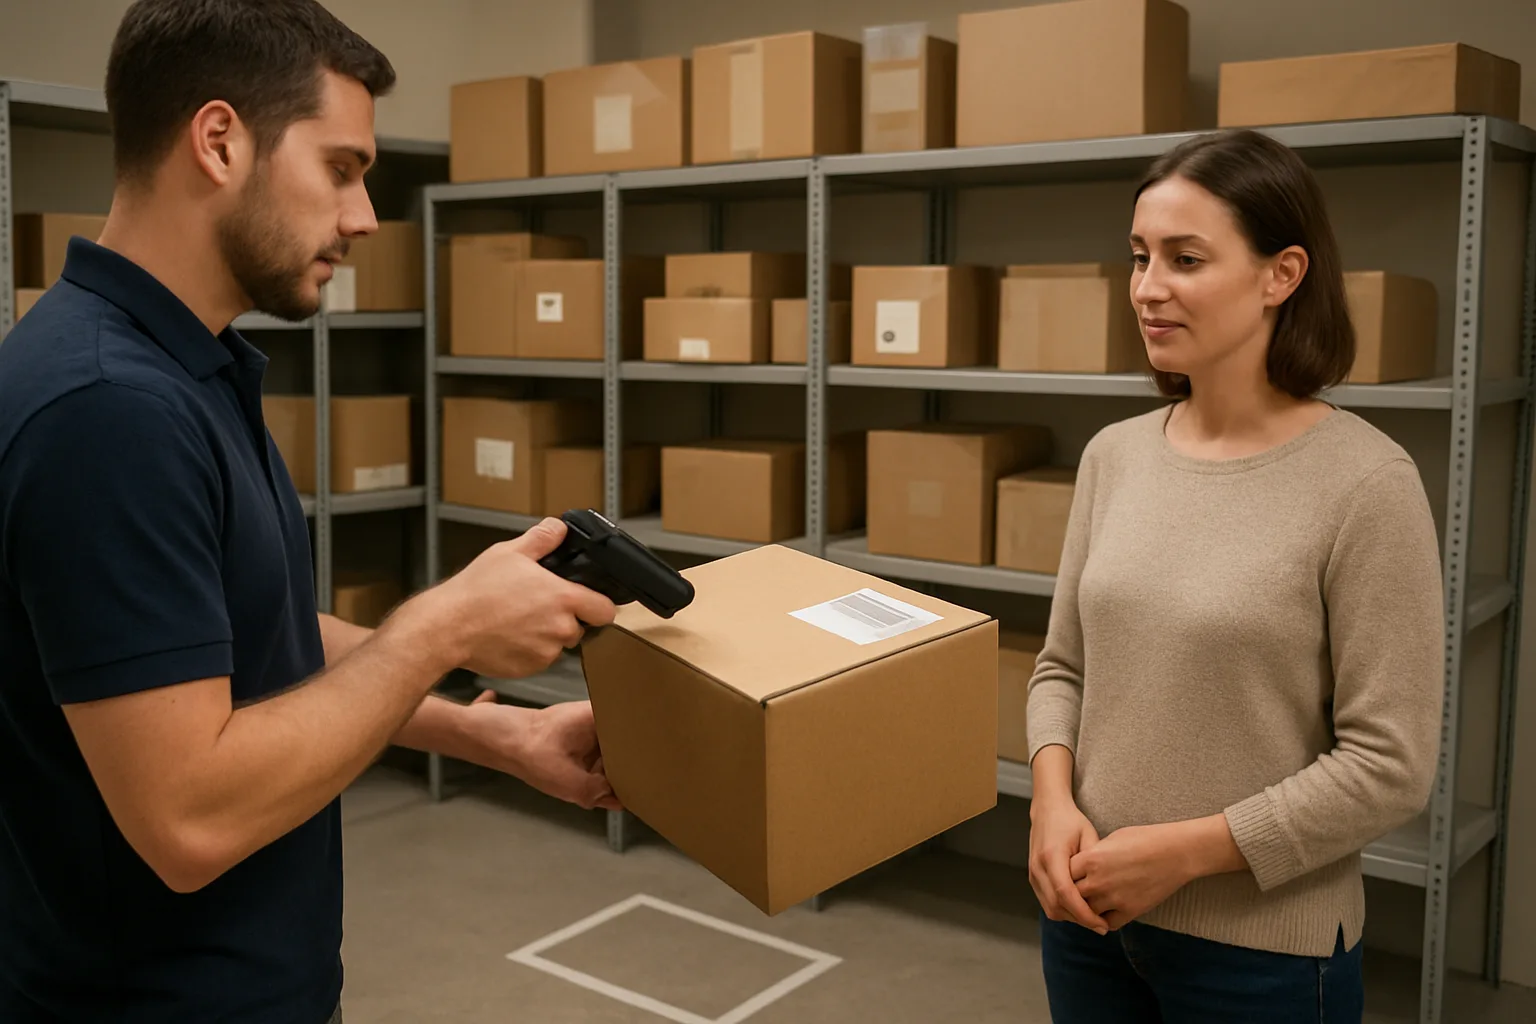
Rollout Plan: Set Policy, Train Scripts, and Iterate in Two Weeks
A resident-friendly package pickup verification apartment flow only works if it is consistent across shifts. The goal of a two-week rollout is not perfection; it is a repeatable resident package pickup process that creates reliable proof of pickup, minimizes exceptions, and strengthens package room accountability without slowing your desk to a crawl.
Treat this like a small operational change: define the tiers, train the scripts, run it for a short pilot window, then tighten what is unclear. Keep the first version simple enough that new hires can follow it and strong enough that a disputed handoff has a clear paper trail.
- Two-week rollout mindset: start with “good enough,” measure friction points, adjust the tier rules—not the staff’s mood or memory.
- Set a single non-negotiable: if verification fails for the tier, the package is not released. The team can escalate, but they cannot “make an exception” without documenting it.
- Write down what counts as proof of pickup for each tier so every shift produces comparable records.
One-page policy residents can understand (without legalese)
Keep the resident-facing policy short, predictable, and framed around fairness and safety. Avoid “we suspect theft” language. Instead: “To make sure packages go to the right home, we confirm pickup using a few quick checks.”
Make it explicit that your process does not require IDs or photos for standard pickups, but that some deliveries require extra confirmation based on risk (carrier requirements, delivery type, past issues, or high-value indicators). That transparency prevents the front desk from having to justify the policy in the moment.
Include three things on the one-pager: what residents should bring, what happens if they cannot verify, and how authorized pickups work (roommates/partners).
Staff training: role-play the top 5 scenarios
Train to the decision points, not to a script memorization contest. The fastest way to consistent proof of pickup is short role-play drills where staff practice staying friendly while still collecting the right checks and documenting exceptions.
Run 30–45 minutes of role-play with a supervisor or lead. Have each person play both the resident and the staff member. The trainer should score only two things: did the staff member follow the tier requirement, and did they record the handoff properly (including exceptions).
Top scenarios to role-play (and what “done right” looks like):
1) Standard pickup, name matches: verify Tier 1 checks quickly, scan/log the package, hand off.
2) Phone dead: use the approved offline alternative for that tier, document why.
3) Name mismatch (nickname/maiden name/sublease): confirm unit + secondary check, record the mismatch note.
4) Roommate pickup: use authorized pathway; if not authorized, pause release and offer next steps.
5) Resident upset about verification: de-escalate, restate policy, offer escalation path without releasing the package until verification is satisfied.
Measuring success without vanity metrics: dispute rate, rework, exceptions
Avoid measuring “packages processed per hour” as your main signal. Speed matters, but the purpose of package pickup verification apartment workflows is to reduce disputes and rework while preserving resident experience.
Use a small set of operational measures that connect directly to proof of pickup quality:
– Dispute rate: number of “I didn’t receive it” claims after marked pickup.
– Rework rate: packages that must be re-located, re-staged, or corrected due to mis-handoff.
– Exception volume: how often staff cannot complete the tier verification and must document an alternative.
– Exception quality: how often exception notes are missing key details (who, what check was used, why normal verification failed).
– Time-to-resolution on disputes: how quickly your team can reconstruct the handoff steps from the record.
Review these weekly during the pilot. The objective is to see exceptions decrease as residents learn what to bring and staff become consistent—without pushing staff into “just release it” behavior.
How to adjust tiers after incidents or seasonal volume spikes
Tier rules should be stable enough that residents and staff can predict them, but flexible enough to respond to real changes in risk. Adjust inputs and escalation points—not the core handoff basics.
After an incident (e.g., a disputed high-value pickup), resist the urge to raise verification for every package. Instead, update one of the following:
– Reclassify specific delivery types: e.g., signature-required carrier packages always Tier 3.
– Add a short-term “watch list” by unit only after repeated issues, with a defined end date.
– Tighten documentation requirements for exceptions (e.g., require a supervisor note on Tier 3 exceptions).
During peak seasons, the risk is not only theft; it is mis-handoff due to volume. If lines get long, simplify without weakening proof of pickup:
– Keep Tier 1 fast but consistent (one primary check + scan/log every time).
– Add a dedicated “handoff spot” where the package is scanned and confirmed before leaving the desk.
– If staffing allows, split roles: one person retrieves/stages, one person verifies and completes the handoff record.
Communication to residents: signage and expectation-setting
Resident cooperation improves when expectations are set before they reach the desk. Use simple, consistent messaging in three places: package room/desk signage, resident portal or email, and move-in materials.
Signage should be short and action-oriented. Examples of resident-friendly lines:
– “Picking up a package? Please have your unit number and pickup notification ready.”
– “Roommate pickup: add them as an authorized pickup in advance to avoid delays.”
– “Some deliveries require an extra confirmation step for safety.”
Make sure staff can point to the policy without sounding defensive: “We follow the same verification steps for everyone. It keeps handoffs accurate and helps us resolve issues fast.” That line supports package room accountability while protecting the resident experience.
Frequently Asked Questions
Should we require a signed pickup log if we already scan a QR label or barcode?
If scanning is reliable and tied to a specific package record, a separate signature is often redundant. Use signatures selectively—typically for high-risk tiers or exception releases.
A practical approach:
– Tier 1: Scan out + capture the pickup method used (e.g., “asked unit + last name”). No signature.
– Tier 2: Scan out + one extra confirmation (backup option) + optional initials on a quick log.
– Tier 3: Scan out + stronger confirmation + signature (or manager release note).
If you do use signatures, keep it simple: date/time, unit, package count, initials/signature, staff initials. Don’t turn it into a slow form that creates a line and encourages staff to skip it.
What’s the cleanest way to handle residents who want “my friend will grab it” as a one-off?
Decide whether your building allows one-off authorized pickup at all. If you allow it, make it consistent and traceable.
A resident-friendly method that avoids IDs and photos:
– Require the resident to pre-authorize with a short message through your normal channel (resident portal message, email on file, or a recorded call note).
– Authorization must include: resident name + unit, authorized person’s name, and either a pickup window (e.g., “today 3–6”) or specific package identifier (carrier + last 4 of tracking).
– At pickup, the friend provides: resident unit + resident last name + their own name (must match authorization).
– Log the exception: “Released to authorized pickup: [Name]. Authorization received via [channel] at [time]. Staff initials.”
If the resident can’t pre-authorize, treat it as a “no match, no release” situation and offer a safe alternative (hold until resident can confirm).
How do we verify pickup when multiple packages are under one unit and the resident only wants one?
This is where “proof of pickup” can break down if the handoff isn’t explicit. The fix is a count-and-confirm habit.
Operationally:
– Before leaving the storage area, confirm the number of items you’re bringing for that unit.
– At the counter, say the count out loud: “I have three items for 1208. You’re taking all three today?”
– If they only want one, ask them to point to which one (by carrier, size, or visible label cue) and scan out only that item.
– Record the partial pickup as normal and keep the remaining packages staged in the correct zone.
If your system allows notes, add: “Resident took 1 of 3; remaining held.” This reduces later disputes like “you said I picked up everything.”
What do we do when a resident refuses any verification because it feels insulting?
Keep it calm, keep it consistent, and make it about process—not suspicion.
A firm, non-accusatory script:
– “Totally understand. We use the same pickup steps for everyone so we can document the handoff if a package is ever disputed.”
– “I can release it as soon as we confirm one of these: unit number plus last name, or a code from your pickup notice, or a quick confirmation of the delivery details.”
If they still refuse:
– Don’t escalate into an argument. Pause the handoff.
– Offer an alternative: “If you’d like, we can hold it and you can come back with your pickup notice, or we can have a manager assist.”
– Log the interaction as an exception attempt (without editorializing): date/time, package identifier, what verification was offered, outcome.
Consistency is your protection. If staff make exceptions under pressure, your process stops holding up when a real dispute happens.
How long should we keep exception logs, and who should review them?
Keep exception notes long enough to cover your most common dispute window and operational review cycle. A practical standard is to retain exception logs for the same period you retain package pickup records, then archive or purge per your property’s record-retention policy.
Make review lightweight:
– Reviewer: front desk lead, assistant manager, or whoever owns package operations.
– Cadence: weekly quick scan (10–15 minutes) plus a deeper look after any incident.
– Look for patterns: repeated “phone dead” claims, frequent third-party pickups for the same unit, or staff consistently skipping the backup verification.
The goal isn’t to punish—it’s to calibrate tiers, tighten scripts, and identify training gaps before they become claims.
How do we prevent staff from “verification drift” during rushes without making the process rigid?
Design the flow so the fastest path is still compliant.
Three practical tactics:
– Use a default script that naturally collects verification in one sentence: “Unit and last name?” while the staff member is pulling up the record or walking to the staging area.
– Require one primary verification plus one backup only for higher tiers, so Tier 1 stays quick and doesn’t get skipped.
– Add a simple end-of-handoff habit: scan out, say the count, then “All set—thanks.” That verbal close helps staff remember the documentation step.
Then reinforce with short calibration:
– 5-minute shift huddles: “This week we’re focusing on count-and-confirm and logging exceptions.”
– Spot checks: one supervisor observes two pickups per shift, just to ensure the steps are happening.
When the process is easy to do right, it’s less likely to be abandoned when the line forms.

CTA
Want a verification flow your team can follow under pressure? Build a one-page decision tree for your desk, define Tier 1–3 checks, and standardize what gets recorded at handoff so proof of pickup is consistent and easy to defend.
Create your decision tree
A “Good Enough” Proof of Pickup Standard Is Really a Consistency Standard
When packages go missing, the real problem is rarely that you did not demand enough. It is that the building cannot reliably reconstruct the handoff: which package was released, to whom, when, and under what checks. A tiered package pickup verification apartment flow solves that by making the process repeatable—lightweight for everyday pickups, stronger for higher-risk situations—so your proof of pickup is both resident-friendly and defensible.
The core idea is simple: pick a baseline flow your team can run every time, add a menu of verification options (one primary plus one backup), and define clear pause points where the answer is “no match, no release.” Then handle exceptions deliberately—dead phones, name mismatches, roommates—by using pre-approved fallback steps and documenting the exception in a consistent way. That combination is what creates real package room accountability without slowing the line or escalating tension.
Your next practical step is to choose your tiers, write a one-page policy in plain language, and run a two-week pilot with scripts and quick role-play. Review what exceptions occurred, where staff hesitated, and what residents pushed back on. Adjust the tiers and scripts based on what you learned, and you will end up with a resident package pickup process that is both smoother day-to-day and stronger when it matters.