
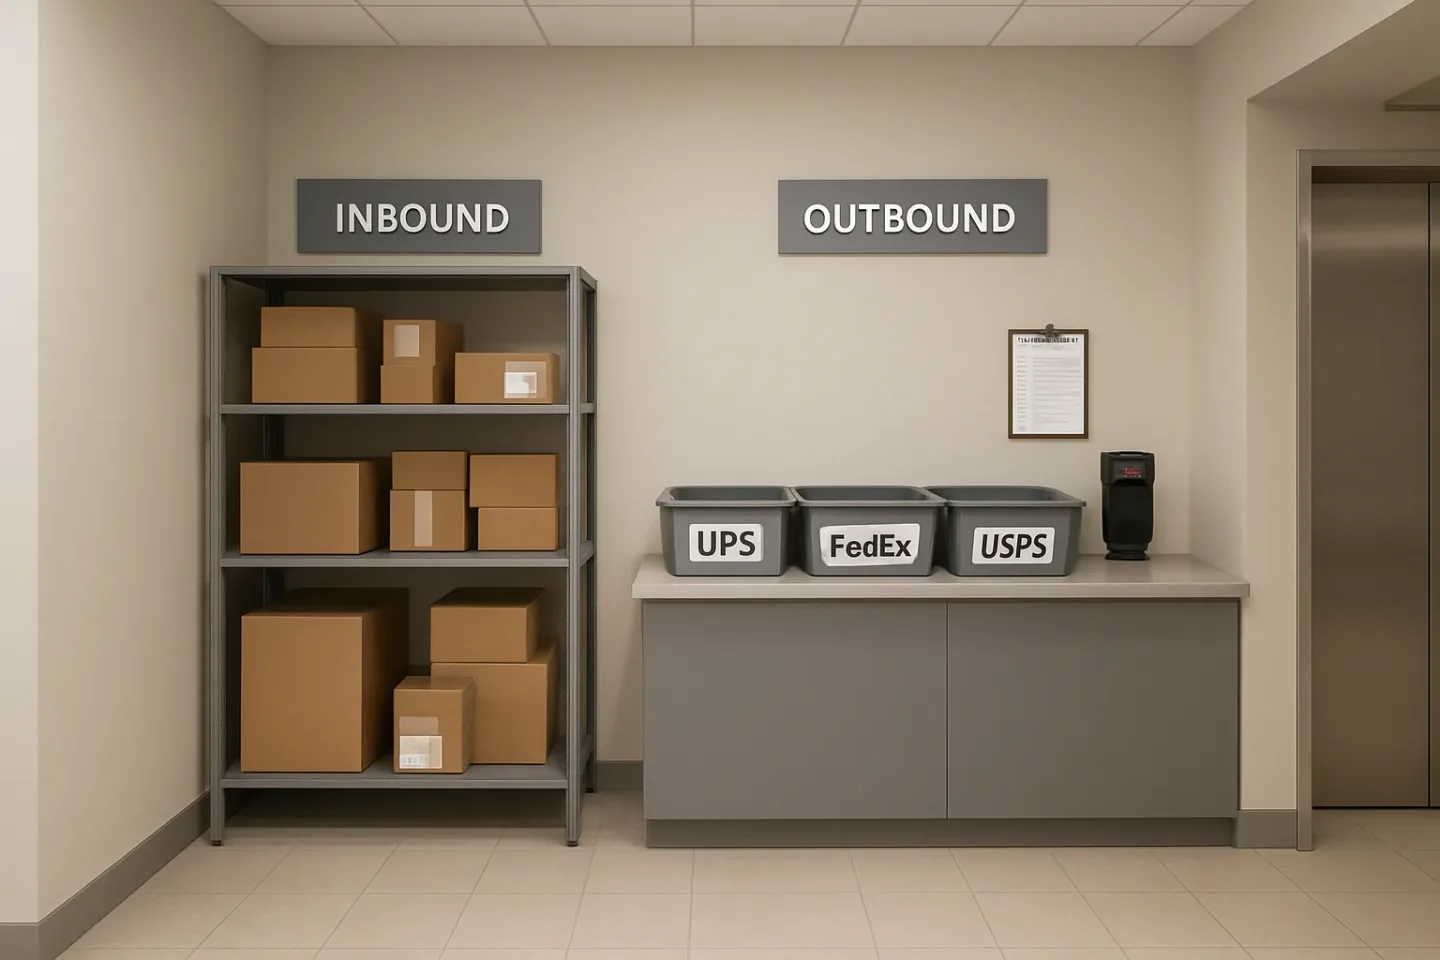
Outbound Returns Are Not “Just Another Package”
If your lobby handles both deliveries and resident drop-offs, outbound is where good intentions turn into the three most common failure modes: wrong-carrier piles, unlabeled boxes, and “I left it here” claims. The usual setup—someone leaves a box on a counter, staff moves it “somewhere,” and a carrier later decides what they will or will not take—creates exactly the kind of ambiguity that leads to mix-ups, carrier refusals, and liability headaches.
A resident-friendly apartment package return process starts with a simple shift: treat outbound as its own inventory class. That means outbound has distinct intake rules (label legibility, carrier match, pickup window eligibility), a clearly separated physical zone, and a custody record that answers the only questions that matter during a dispute: who dropped it off, what it was, when it was accepted, where it was staged, and when it left your control.
This article lays out a practical outbound package workflow you can run at a front desk without turning your team into a shipping store. You will see a fast returns desk SOP, a carrier pickup staging approach that prevents cross-contamination with inbound inventory, and specific controls to eliminate the three failure modes before they start—so residents get a predictable experience and staff stop spending time on avoidable detective work.
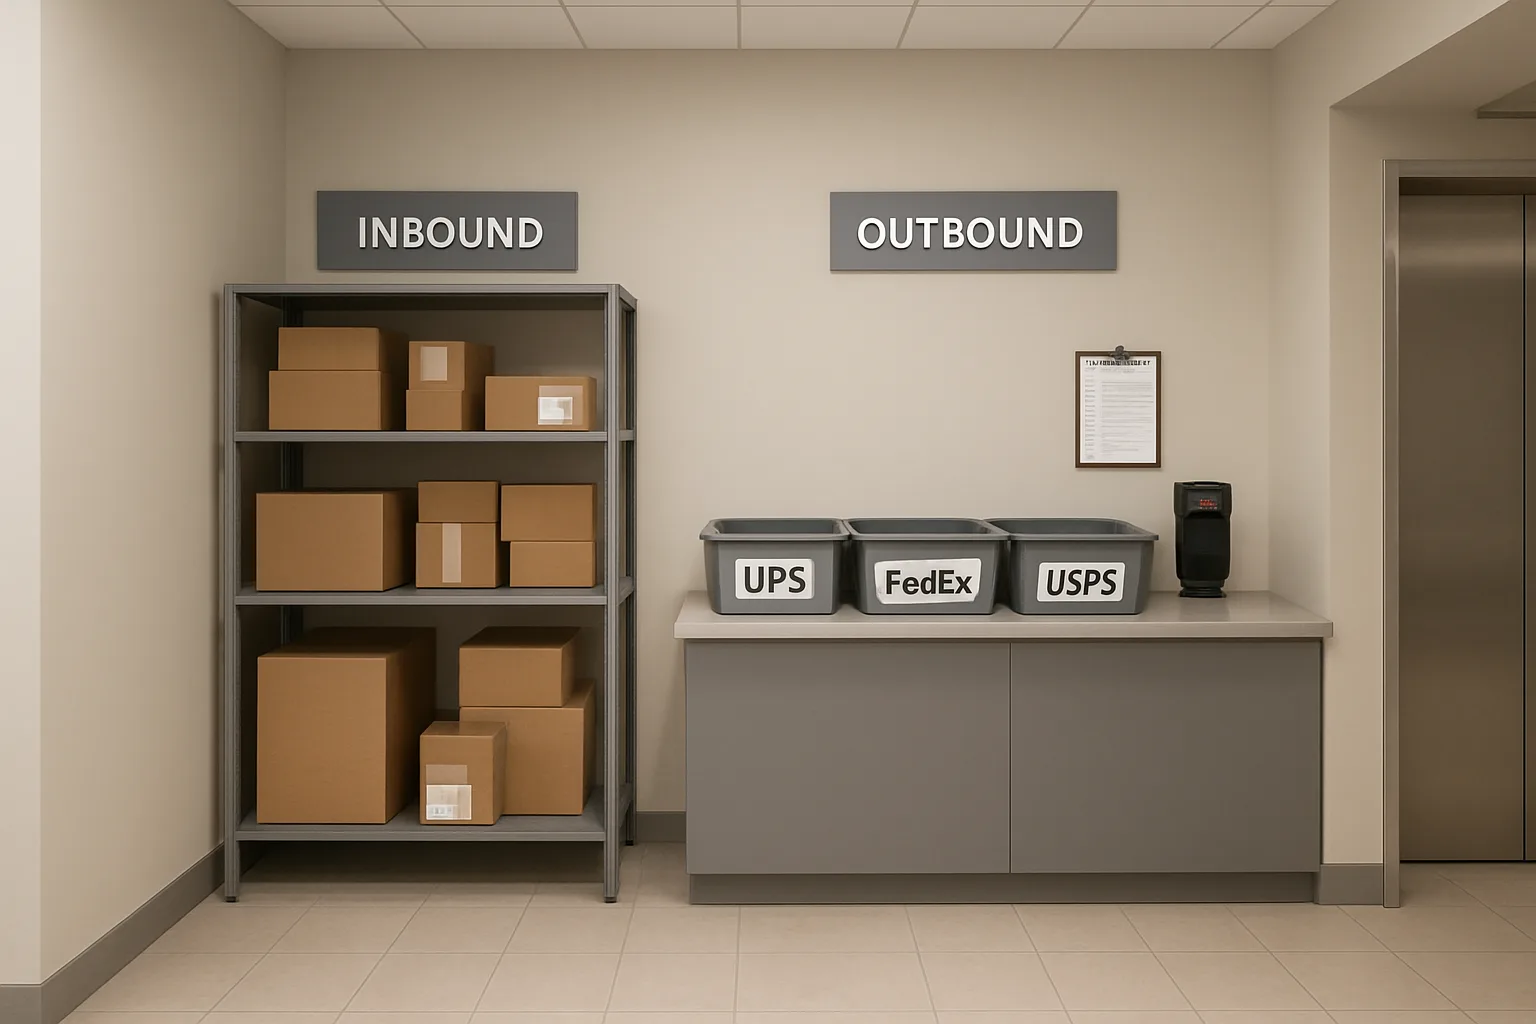
Define Outbound as Its Own Inventory Class (and Draw a Hard Line Between Inbound vs. Returns)
A resident return is not the same operational problem as an inbound delivery. Inbound packages arrive with a carrier scan trail and a predictable flow: carrier drop-off, staff intake, resident pickup. Outbound packages often arrive without any carrier handoff, may have incomplete labels, and can sit for days waiting for a pickup that may or may not happen. Treating outbound as a separate inventory class is the simplest way to keep your apartment package return process resident-friendly while protecting staff time and reducing disputes.
The goal is a hard boundary: inbound inventory is what carriers delivered to your building; outbound inventory is what residents are asking your building to hold temporarily for a carrier pickup. That boundary drives different intake rules, different data capture, different storage zones, and different time limits—so outbound never contaminates inbound shelves or creates ambiguity about who had custody, when, and under what conditions.
- Set separate rules: outbound is accepted only if it meets outbound intake criteria (label + carrier + time window), even if inbound is more flexible.
- Separate the spaces: outbound staging is physically and visually distinct from inbound storage (no shared tables, counters, or “misc” shelves).
- Separate the records: outbound items get their own log entry (or QR tag and scan log) so “I left it here” claims can be resolved quickly.
- Separate the time limits: outbound has a maximum hold window and a clear escalation path when pickup does not occur.
Why ‘just put it on the counter’ fails in apartments
The fastest way to create returns disputes is to let outbound returns drift into inbound workflows. A counter-drop system creates three predictable failure modes: (1) wrong-carrier piles form because no one is sorting at intake; (2) unlabeled or illegible boxes get mixed into everything because staff cannot validate them later; and (3) “I left it here” claims become unresolvable because there is no proof the building ever took custody.
Even well-meaning staff get trapped: once a box is on a shared surface, someone eventually moves it “to tidy up,” another person assumes it is inbound, and a resident later expects the building to prove what happened. In a busy lobby, the counter is not storage—it is a liability magnet. A dedicated outbound package workflow starts by eliminating ambiguous drop locations entirely.
Minimum data fields for outbound custody (resident, unit, carrier, timestamp, condition)
Outbound custody is fundamentally about accountability. You do not need to become a shipping store, but you do need enough detail to answer three questions later: Who dropped this off, what did staff accept, and where did it go next? Capture a minimum set of outbound fields every time you accept an item.
If you use a QR label or scan log (whether in TrackNest or a simple internal log), the point is consistency: every accepted outbound package gets a record, and every record ties to one physical package in a staging lane. When an item cannot be tied to a resident and a carrier, it should not enter the outbound inventory at all.
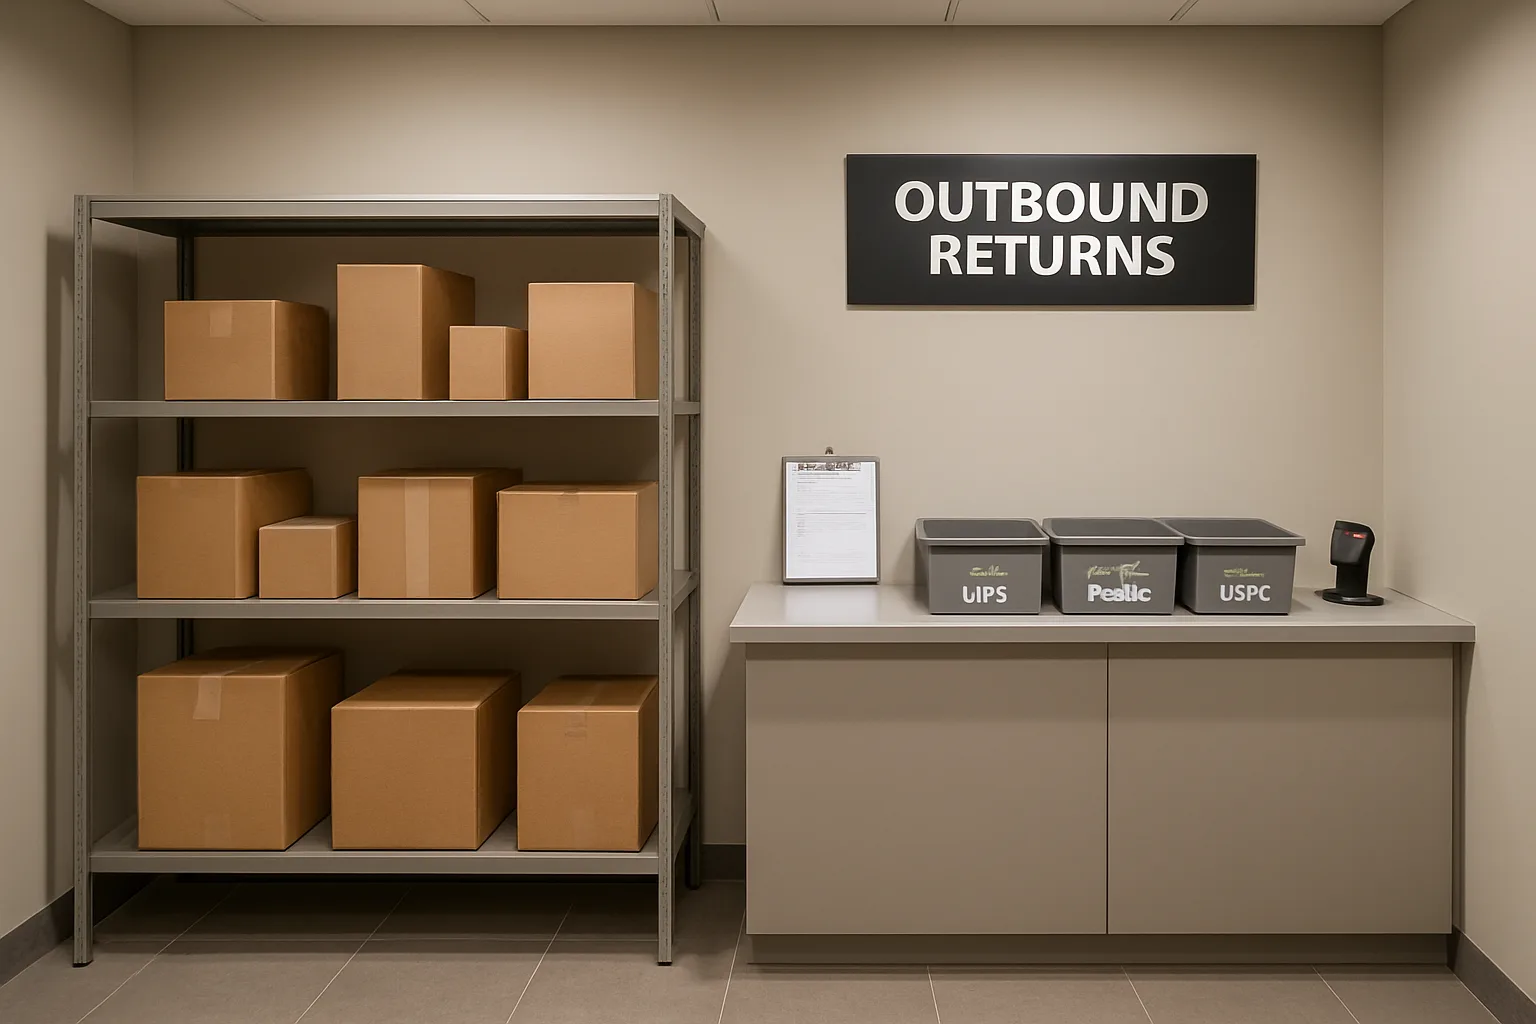
Physical zoning: separate shelves, cages, or bins that are clearly marked OUTBOUND
Outbound needs a home that is not “wherever there’s room.” Create a clearly marked OUTBOUND zone with defined lanes inside it. If space is tight, the zone can be a small set of totes, a rolling cage, or a single shelving bay—what matters is that it is distinct from inbound inventory and not accessible as an unmonitored drop spot.
Make the zoning self-explanatory so new staff and carriers do not have to guess. Clear boundaries prevent staff from “temporarily” placing outbound items on inbound shelves and prevent residents from placing boxes where they should not be. The more your physical layout reduces decision-making, the fewer mix-ups you will see.
Time-in-system rules: maximum hold windows before escalate/return-to-resident
Outbound returns should have a maximum time-in-system rule, because the longer they sit, the higher the odds of mis-sort, damage, or dispute. A maximum hold window also sets a clear expectation: the building is providing short-term staging, not long-term storage.
Pick a hold window that matches your carrier pickup reality and staffing capacity, then operationalize it with a daily closeout habit. If a package is still in outbound staging past the window, it should trigger a defined next step: notify the resident to retrieve it, move it to an exceptions/quarantine spot, or escalate to management per policy. The key is that “indefinite hold” is not an option; it quietly turns outbound into unmanaged inventory.
How to explain the policy to residents in one sentence without sounding hostile
Residents cooperate more when the rule sounds like a service standard instead of a threat. Use one sentence that states what you accept, why it matters, and what the resident gets in return (speed, accuracy, and proof of drop-off).
A resident-friendly script keeps the interaction short and consistent, and it reduces arguments when staff must refuse an item that does not meet intake criteria. It also reinforces the boundary that outbound is a separate process—so residents do not assume they can leave items anywhere and still hold the building responsible.
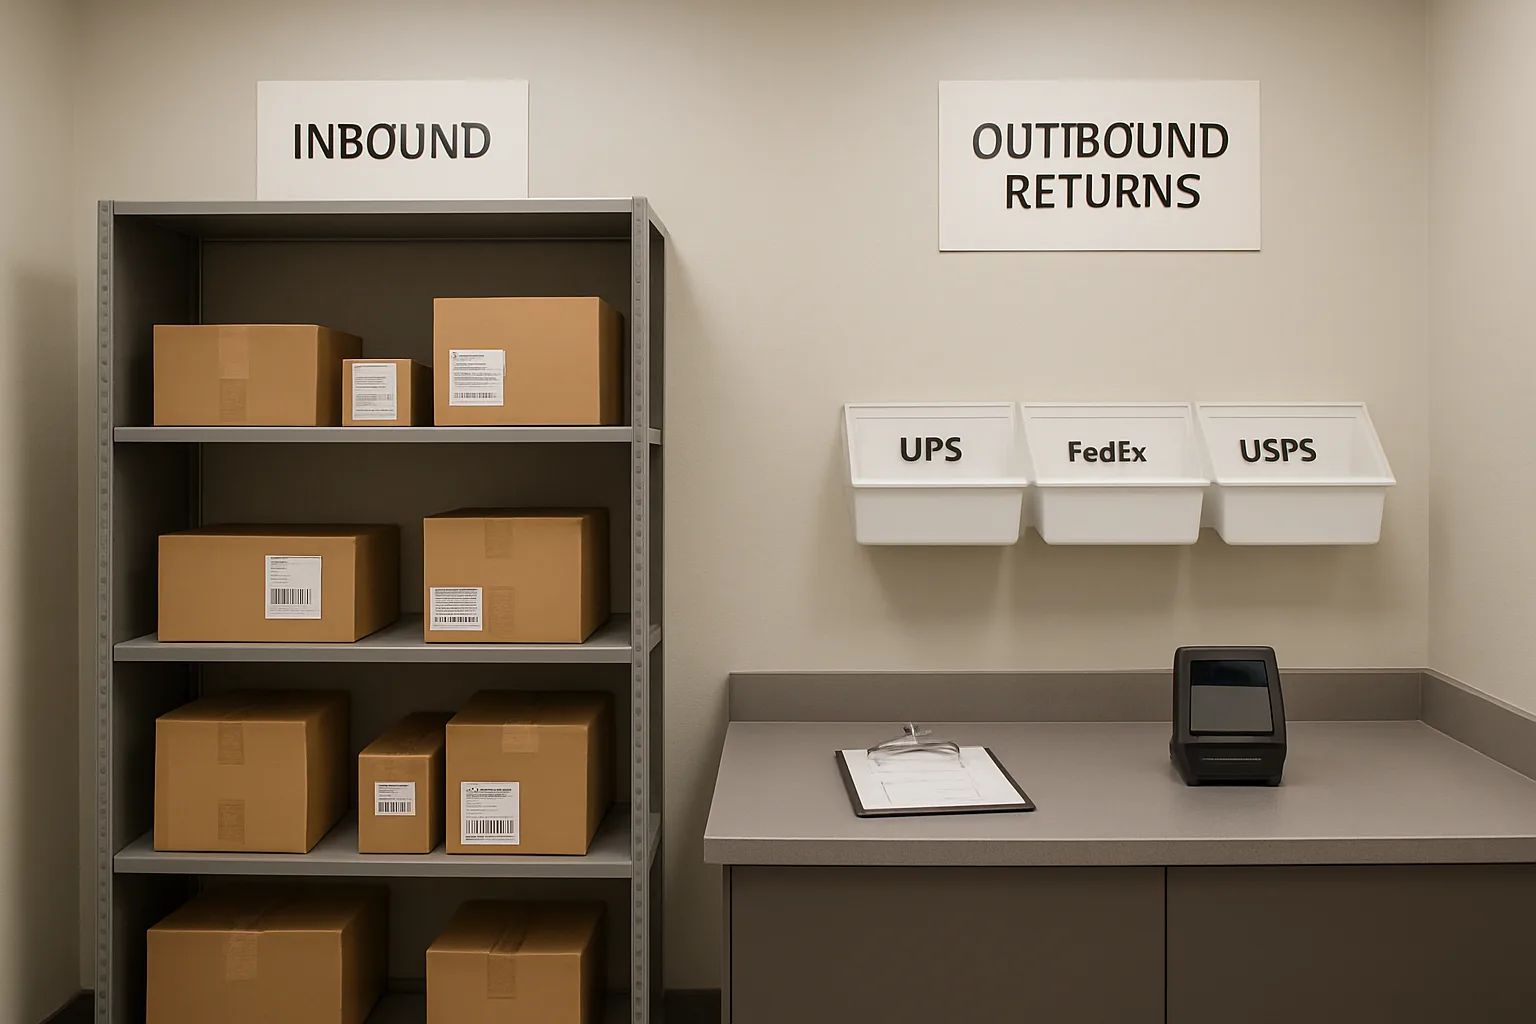
Returns Desk SOP: Intake Rules That Stop Problems Before They Enter the System
A clean apartment package return process starts with one principle: outbound only enters your custody if it meets clear, fast intake rules. This prevents two costly dynamics at the desk: staff becoming the “fix-it” station for missing labels and residents assuming that “left in the lobby” equals “accepted by the building.”
This returns desk SOP is designed to be completed in under a minute per package, with a consistent paper trail (digital or manual) that reduces returns disputes without turning the front desk into a shipping store.
- Goal of intake: verify the package is shippable today (or within your stated pickup window), identify the correct carrier lane, and create proof of custody tied to a resident and time.
- Golden rule: if it cannot be verified in under 45 seconds, it does not enter outbound inventory. It becomes a “needs resident action” item instead.
- Staff posture: friendly and consistent. You’re not rejecting the resident—you’re rejecting an un-verifiable package.
- Use the same steps every time, even for familiar residents. Consistency is what prevents “but they took it last time” arguments.
The 45-second intake script: what staff asks and what they do
Use a short script so every team member collects the same facts and performs the same checks. The objective is to confirm resident ownership/authorization, label readiness, and carrier lane—without debating the return reason or the retailer policy.
Suggested script and actions (adapt wording to your building):
1) Ask: “What unit are you in, and is this your return?” Action: confirm the resident (or authorized proxy) and capture unit number for the log. If it’s a proxy (roommate, friend, dog walker), require whatever minimal authorization your building uses (e.g., name on file, written note, or resident’s message) before accepting custody of the package. If authorization is unclear, treat it as “needs resident action.”
2) Ask: “Is the label already attached and readable?” Action: visually confirm the label is affixed and not loose-in-hand.
3) Ask: “Which carrier is this going with today?” Action: glance at the label to confirm the carrier and route to the correct staging lane.
4) Say: “I’ll accept this as outbound for (carrier) pickup. You’ll get a drop-off receipt from us.” Action: create the receipt-of-drop-off (scan log entry or QR tag) before the package leaves the counter.
5) Final action: place it directly into the correct carrier pickup staging location—never ‘behind the desk for now’ and never into inbound shelving.
Label verification checklist: legibility, scannability, complete address, return barcode present
Label verification is where most preventable failures get stopped: carrier refusal due to unreadable labels, mis-sorts into the wrong lane, and disputes when a resident later claims the package was dropped off. Staff should perform the same quick checks every time.
A practical checklist you can print and keep at the desk:
– Affixed: label is taped/adhesive-fixed to the box (not handed separately).
– Legible: recipient/return address text is readable (no smudges, tears, water damage).
– Scannable: the main barcode is intact (not folded over an edge; not covered by glossy tape glare; not heavily wrinkled).
– Complete: the destination (return) address is present; if the label is a “carrier code only” with no address and no scannable return ID, do not accept.
– Return identifier present: a return tracking barcode/ID exists (varies by retailer, but there must be something trackable).
– Box condition: box is closed and sealed; if it is open, crushed, or leaking, treat as an exception (see edge cases).
Carrier match rule: how to identify USPS vs UPS vs FedEx vs courier labels at a glance
Wrong-carrier piles start at intake, not at pickup. The carrier match rule is simple: you only stage a package in a lane if the label clearly indicates that carrier. If staff can’t confidently match it in seconds, it goes to a “carrier unclear” hold spot that requires resident action (or manager review), not into any carrier pile.
How to do quick carrier identification without becoming a label expert:
– Look for the carrier name/logo text on the label and the tracking number format (often printed near the barcode). If the carrier name is not visible, do not guess.
– Check for service references that strongly imply a carrier (for example, “Priority Mail” commonly indicates postal service). If it’s not explicit, treat as unclear.
– If a resident shows a phone screen with a QR code, that is not a carrier match by itself. You need the actual shippable label attached to the package (or a building-managed process you explicitly offer).
Operational guardrail: do not accept “mixed labels” (e.g., two different carrier labels on the same box). Require the resident to remove/cover old labels and present one clear, current label.
No-label / QR-code-only / ‘email label later’ scenarios: safe refusal options
Most desk conflicts come from residents attempting to hand over a box that is not actually ready to ship. Your refusal language should be consistent, calm, and oriented toward what the resident needs to do next. The key is to refuse custody of un-verifiable outbound so you don’t inherit liability and disputes.
Use refusal options that still feel resident-friendly:
1) No label attached: “We can’t accept outbound without a shipping label attached to the box. If you attach the label, we’ll take it during return drop-off hours.”
2) QR-code-only: “We can only accept packages that have the carrier shipping label printed and attached. A QR code is not a label. Once the label is on the box, we can take it.”
3) ‘Email label later’ or ‘I’ll bring it tomorrow’: “We can’t hold unlabeled items. Please bring it back once the label is attached.”
4) Unclear carrier: “I’m not able to confirm which carrier this label is for. Please confirm the carrier and bring it back with a clear label.”
5) Not sealed: “For safety and to avoid damage claims, we can’t accept open packages. Please seal it and bring it back.”
Make refusal frictionless by keeping a small “label station” nearby (tape and marker at minimum). But avoid taking on printing unless your building has explicitly decided to offer that service and has a defined process for it.
Receipt-of-drop-off: scan log or QR tag that ties package to a resident and time
A receipt-of-drop-off is how you eliminate ‘I left it here’ claims without arguing. The building does not need to promise shipment or delivery; it only needs to prove when custody began, what was accepted, and where it was staged.
Minimum viable receipt options (choose one that matches your current tools):
– Scan log entry: Staff creates an outbound entry capturing resident name, unit, carrier, date/time, and the tracking number from the label. The system (or manual logbook) becomes the record.
– QR tag on the box: Staff affixes a small internal QR label/tag that links the package to the resident/unit and intake timestamp in your log. This is not the shipping label; it’s your internal chain-of-custody marker.
– Paper receipt stub: If you’re fully manual, give a simple drop-off stub with date/time, unit, carrier lane, and last 4 digits of the tracking number. Keep the matching stub on file or in a binder by date.
Operational rule: the receipt happens before the box leaves the counter. If the desk is busy, prioritize logging over moving boxes; unlogged boxes are the root of most disputes.
Edge cases: multiple boxes, partial returns, hazardous/prohibited items, oversized boxes
Edge cases are where outbound processes quietly break and liability creeps in. Decide your handling rules in advance so staff does not invent policies on the fly.
Practical handling rules:
– Multiple boxes from one resident: log each package separately (each has its own tracking number and carrier). If one resident has five boxes, that is five custody records.
– Partial returns (one order split into two boxes): still log per box. Do not rely on the resident’s order number as a substitute for tracking.
– High-value items: do not attempt to appraise value; instead, apply a consistent control (e.g., require hand-to-staff intake only, not left on a counter; store in a restricted outbound spot until pickup).
– Oversized boxes: define a maximum size you can store safely. If accepted, log it and stage it in a designated oversize area that will not block egress or contaminate inbound inventory.
– Hazardous/prohibited items: if the item is leaking, emitting odor, marked hazardous, contains loose batteries, or otherwise appears unsafe, do not accept it. Use a simple safety script: “For safety reasons we can’t accept this item for outbound pickup. Please contact the carrier/retailer for the correct return method.”
– Damaged or previously opened boxes: treat as “needs resident action” unless your policy allows acceptance with a condition note. If you do accept, record the visible condition at intake (e.g., “corner crushed; label intact; box sealed”) to reduce later disputes.
Staff empowerment note: give staff permission to pause intake and escalate to a supervisor when safety or prohibited goods are involved. A fast escalation path is part of a resident-friendly workflow because it prevents inconsistent decisions at the counter.
Carrier Pickup Staging: A Building Map That Prevents Wrong-Carrier Piles and Refusals
A clean outbound package workflow depends on what happens after intake: where returns wait, how they are grouped, and how they are handed off. The goal is to create simple “lanes” so staff never has to do last-minute re-sorting, carriers can grab and go, and your apartment package return process stays auditable without turning the front desk into a shipping store.
Think of staging as a building map with rules: each outbound item has exactly one acceptable waiting place, and every lane has a cutoff, a pickup window, and a custody record. When those three elements are consistent, the most common breakdowns—wrong-carrier piles, carrier refusals, and “we never got it” disputes—shrink fast.
Staging lanes by carrier: dedicated shelves/totes and color/letter codes (no brand claims)
Create separate staging lanes by carrier type and make them unmissable. The key is to use neutral identifiers (letters, numbers, colors) so you can keep the system consistent even if carriers change routes or contractors rotate.
A practical lane setup for most buildings is three to five lanes plus a quarantine lane: Lane A, Lane B, Lane C, a Local/Courier lane, and a Not-Verified lane. What matters is that staff can decide in seconds where a package belongs based on label verification at intake—then never move it again unless something is wrong.
Make the “map” physical and repeatable: lane signs at eye level, shelf/tote labels on the front edge, and a matching floor or counter marking. If space is tight, use stacking totes with rigid lane cards rather than open piles. Open piles invite mixing.
Cutoff times and pickup windows: aligning resident drop-off hours with reality
Staging only works if you align resident drop-off expectations with actual carrier pickup behavior. Set a daily cutoff time per lane that matches when you can realistically sort, audit, and stage before pickup. If your pickup is usually mid-afternoon, your cutoff might be one hour earlier so staff can complete a quick pre-pickup audit without rushing.
Define two windows and communicate them internally:
• Resident drop-off window: when you accept outbound items for same-day pickup (and when you still accept items, but they roll to next pickup).
• Carrier pickup window: the time range you expect the carrier to arrive (even if it varies).
If a resident drops after the cutoff, the package can still be accepted, but it should be staged as “Next Pickup” within the correct lane to prevent confusion at handoff. This small rule prevents the classic problem of staff trying to “help” by adding last-minute items to a carrier’s stack after they’ve already scanned or loaded.
Chain-of-custody during handoff: what gets scanned/initialed at pickup
A resident-friendly outbound package workflow still needs a hard handoff moment. That moment should be consistent: the building either transfers custody to the carrier (with a record) or it does not.
Use a simple handoff checklist that matches your tools:
• Before pickup: lane count (number of pieces) per carrier lane.
• At pickup: carrier collects only from their lane(s); staff witnesses.
• Transfer record: one of the following, depending on your setup—(a) scan-out event per package, (b) scan a lane-level pickup code plus piece count, or (c) a pickup log where the carrier initials next to the lane count and time.
• After pickup: confirm the lane is empty (or document what remained and why).
The goal is not perfection; it’s a repeatable custody trail. If a returns dispute happens later, you can answer two questions quickly: Was it accepted by the building, and was it handed to the carrier on a specific date/time?
‘Carrier refuses the pile’ prevention: pre-pickup audits and ‘not our label’ quarantine
Carrier refusals usually happen for two reasons: the pile contains packages not meant for that carrier, or labels are not scannable/complete. Prevent both with a quick pre-pickup audit and a quarantine rule that staff can apply without debate.
Pre-pickup audit (5 minutes, same time daily):
• Walk each lane and spot-check labels for carrier match and scannability.
• Confirm every package in a lane has a verified label and a recorded resident/unit association in your log.
• Remove anything questionable into a Not-Verified (quarantine) lane rather than “hoping” the carrier will take it.
Quarantine rules that work in practice: if the carrier indicator is unclear, the label is smudged/covered, the barcode won’t scan, or the package has no label, it is not staged for pickup. It goes to Not-Verified with a note (reason code) so staff can follow up with the resident without delaying the carrier. This protects relationships: carriers learn your lanes are clean, and pickups go faster.
Oversize and high-value staging: where they go and who can access them
Oversize and high-value outbound items need their own mini-workflow because they create two risks: they block lanes (mix-ups) and they increase liability (damage or claims).
For oversize: designate a clearly marked “Oversize Outbound” spot adjacent to the lanes, but still segmented by carrier (for example, tape rectangles on the floor labeled A-Oversize, B-Oversize). This prevents staff from parking a large box in the nearest open area where it becomes an untracked “I left it here” claim.
For high-value: restrict access. Use a lockable cage or cabinet section labeled “Outbound Secure,” and require an extra step at intake (staff initials in the log, and a tamper-evident tag or a simple seal mark). During pickup, retrieve secure items only when the correct carrier is present, and record the transfer with the same scan-out/initial routine. The point is not to guarantee delivery; it’s to prove controlled custody while the item is in the building.
What to do when carriers arrive early/late or skip a day
Staging lanes reduce chaos, but you still need a plan for timing exceptions. Write these as simple rules so staff responds consistently.
If a carrier arrives early:
• Allow pickup only from fully audited lanes.
• Do not add last-minute packages that have not cleared label verification and logging.
• Anything not ready stays staged for next pickup; staff can tell residents truthfully that it missed today’s window because it arrived after the cutoff or after audit closeout.
If a carrier arrives late: keep lanes intact. Don’t “consolidate” packages onto a counter to save space—consolidation is how wrong-carrier piles happen. If you must move items, move the entire lane container/tote as a unit and keep the lane label attached.
If a carrier skips a day: trigger a same-day exception routine: (1) mark the lane as “No Pickup” with date/time, (2) secure the lane (lock or move to a controlled access area if possible), (3) notify management only if you are reaching your maximum hold window, and (4) communicate to residents with a consistent message: the building has custody and will hand off at the next carrier pickup, but timing is carrier-dependent. Keep the packages in their original lanes so the next pickup is still clean and fast.
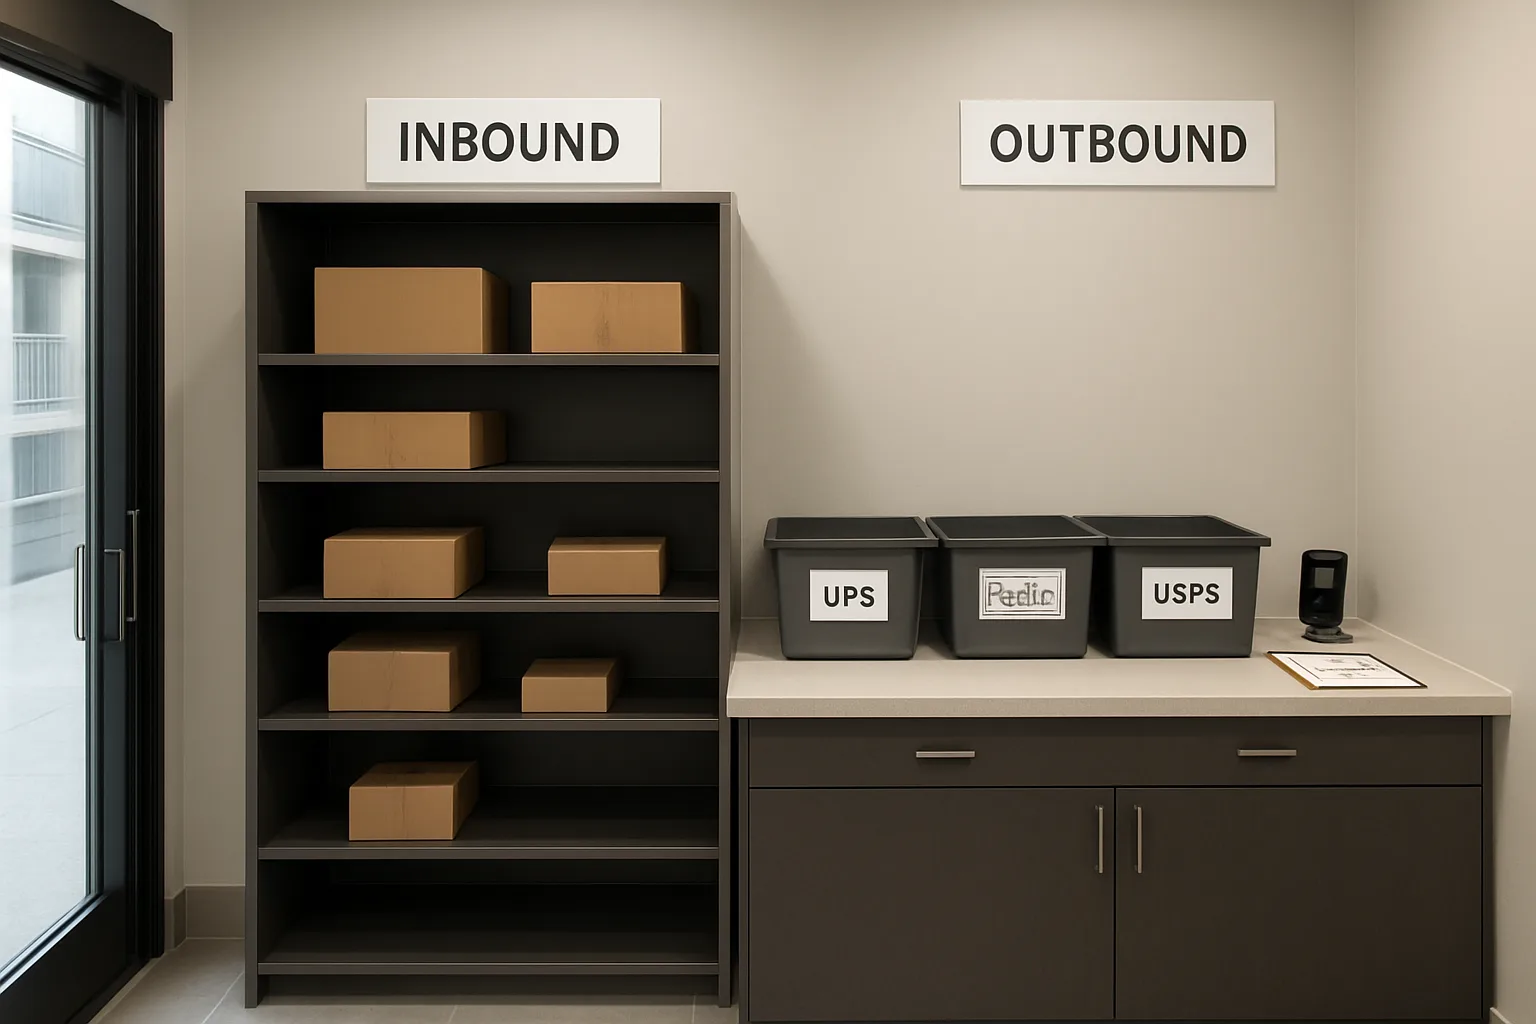
Prevent the Three Failure Modes: Controls, Examples, and Quick Fixes
Outbound returns fail in very predictable ways. The fixes are not complicated, but they must be consistent: clear intake rules, obvious physical lanes, and a custody record that is easy to produce when someone asks, “Where is my return?” Use the controls below to stop problems at the door, not at pickup time.
The goal is simple: your outbound package workflow should make the correct action the easiest action for staff, residents, and carriers—without turning the desk into a shipping store.
- Core control principle: if a package is not verifiably (1) labeled, (2) carrier-matched, and (3) logged to a resident/time, it does not enter outbound staging.
- Treat exceptions as their own mini-lane (a small quarantine bin) so they never contaminate ready-to-pickup outbound inventory.
- Use “touch it once” handling: intake scan/tag, then place directly into the correct carrier pickup staging lane—no intermediate countertop pile.
Failure mode 1: Wrong-carrier piles (cause, control, and a 2-step correction routine)
What it looks like: UPS labels sitting in the USPS area, a mixed “returns” shelf, or a counter pile that gets “sorted later.” Carriers arrive, see a mixed pile, and either refuse it or cherry-pick—either outcome creates disputes and staff time loss.
Root causes are usually behavioral, not technical: unclear lanes, staff rushing intake, residents dropping items directly into the staging area, and “we will fix it at pickup” habits.
Controls that prevent wrong-carrier piles: (1) only staff can place packages into carrier lanes, (2) lanes are unmistakably labeled (letter/number codes work well), and (3) carrier match is verified before the package crosses the line into staging.
2-step correction routine (use when you discover a mixed pile)
Step 1: Freeze and quarantine. Stop adding to the pile. Move the entire mixed pile into a clearly marked HOLD FOR SORT bin/tote (your quarantine lane). This prevents the pile from getting bigger and prevents a carrier from grabbing the wrong items while you sort.
Step 2: Sort with a fast rule and a log update. One staff member sorts by carrier label indicators (carrier name, tracking format, barcode type), places each item into its carrier pickup staging lane, and updates the outbound log status from HOLD FOR SORT to STAGED (carrier lane ID). If you cannot confidently identify the carrier in 5–10 seconds, keep it in quarantine and treat it as a label verification exception.
Quick example: stopping a wrong-carrier cascade
A resident drops three boxes on the counter and says, “These are all returns.” Staff member scans/logs each one, notices one has a USPS label and two have FedEx labels, and stages them into separate lanes immediately. Without that 10-second carrier match check, the USPS box ends up in the FedEx lane; at pickup, the FedEx driver refuses the entire lane because they cannot confirm what is theirs. One quick check prevents a full reset.
Failure mode 2: Unlabeled or illegible boxes (intake refusal language + ‘label station’ setup)
What it looks like: a box with no label, a QR-code-only confirmation on a phone, a label that is smudged or taped over the barcode, or “I’ll email you the label later.” These create two risks: carrier refusal and “I left it here” disputes (because you have no verifiable shipment ID).
The fix is a clean, resident-friendly refusal policy paired with a small on-site setup that makes it easy for residents to finish the label correctly.
Intake refusal language that stays professional
Use calm, repeatable phrasing. The objective is to set a boundary without arguing about fairness. Examples staff can use verbatim:
1) “We can accept outbound returns only when the shipping label is attached and scannable. If you can add the label now, you are welcome to use the label station.”
2) “A QR code on a phone is not a shipping label. Once you print and attach the label, we can take it and log it for pickup.”
Label station setup (minimal, practical)
You do not need to offer full-service shipping. You just need a place where residents can complete the last step correctly so your outbound inventory stays clean.
Set up a small “Finish Your Label” spot near (but not inside) the outbound staging boundary with:
– Tape (clear packing tape) and scissors or cutter (secured)n- Permanent marker for writing unit/name on an internal note if neededn- A flat surface for applying labels without wrinklesn- A simple instruction card: “Attach label flat. Do not tape over the barcode. Remove/cover old labels.”n- Optional: a trash bin for old labels and packaging slips
Label verification quick checks (10 seconds)
Before accepting a return into staging, staff should confirm:
– Label is fully attached (not loose on one edge)n- Barcode is not covered by tape glare or wrinklesn- The “to” address and carrier service are printed (not handwritten-only)n- Old labels are removed or fully covered to avoid mis-scansn- Tracking number is present and readable (even if you are not scanning it)
Failure mode 3: ‘I left it here’ claims (how to create proof of custody without arguing)
What it looks like: a resident says they dropped off a return yesterday, but there is no package in staging and no record. Or they insist the desk accepted it even though it never entered the outbound log. These situations escalate quickly because staff cannot prove what happened.
The solution is not to debate memory. It is to make custody visible at the moment of intake, every time, so the resident receives a clear confirmation that the building accepted the item under defined conditions.
Proof of custody that stays lightweight
Pick one method and make it mandatory for every accepted outbound package (no exceptions):
Option A: Scan log + resident-facing confirmation. Staff logs the drop-off (resident name/unit, timestamp, carrier, tracking number if available, and condition) and provides a simple confirmation: “You are logged in the system at 3:42 pm; it is staged in lane B.”
Option B: Desk-applied QR tag tied to the outbound log. Staff applies a small QR-label to the package (not covering the shipping label) that links the package to the resident/time record. This tag is your internal ID for audits and disputes.
Dispute-friendly scripting (keep it factual)
When a resident claims, “I left it here,” the response should be consistent and non-accusatory:
– “Let’s check the outbound log for your unit and the time you dropped it off.”n- “If it was accepted, we will have a drop-off record and the lane where it was staged.”n- “If there is no record, it likely did not enter the outbound return process. We can accept it now once the label is attached and scannable.”
This language avoids assigning blame while protecting the building from implied custody for unlogged items.
Simple visual cues that work: ‘OUTBOUND ONLY’ mats, bin cards, and counter markings
Most mix-ups start when residents (or busy staff) place items “temporarily” in the wrong place. Visual boundaries prevent that by making the process self-explanatory.
Use simple, durable cues that do not rely on brand colors or carrier logos. Aim for high contrast and plain language.
Visual cue kit (low-cost, high-impact)
– OUTBOUND ONLY mat/tape line on the floor behind the desk (staff-only zone)n- Counter marking: “DROP-OFF HERE FOR CHECK-IN” with an arrow to the intake spotn- Bin cards with big text: “LANE A,” “LANE B,” “LANE C,” plus the carrier name in smaller textn- Quarantine bin card: “HOLD FOR LABEL/CARRIER VERIFY (NOT STAGED)”n- Oversize marker: a floor box or corner sign “OVERSIZE OUTBOUND (CHECK-IN REQUIRED)”
Key rule: residents should never be able to place a package directly into a carrier pickup staging lane without staff check-in. Physical layout should enforce that.
Weekly 10-minute refresher: what to coach and what to spot-check
Outbound processes drift unless you keep them tight. A short weekly refresh prevents the slow return of counter piles, mixed lanes, and undocumented drop-offs.
Keep it to 10 minutes and focus on observable behaviors, not policy lectures.
What to coach (3 points)
1) “No label, no lane.” If the label is not attached and scannable, it does not enter staging.
2) “Touch once.” Log/tag the package, then place it directly into the correct carrier pickup staging lane—no temporary piles.
3) “Quarantine is not failure.” If anything is unclear (carrier mismatch, torn label, old label confusion), put it in HOLD FOR SORT/VERIFY immediately and resolve it deliberately.
What to spot-check (5 quick checks)
– Are there any packages on the counter not in the outbound log? (Should be zero.)n- Does each carrier lane contain only that carrier’s labels? (If not, run the 2-step correction routine.)n- Is the HOLD FOR SORT/VERIFY bin being cleared daily? (If it grows, your intake checks are slipping.)n- Are labels flat and barcodes uncovered? (If not, improve label station instructions.)n- Can staff pull a record quickly for any package in staging (resident/unit, time, lane)? (If not, tighten the logging habit.)
CTA
Implement a minimum viable outbound process this week: designate an OUTBOUND-only zone, create three carrier lanes, publish a daily drop-off cutoff, and require label verification plus a timestamped acceptance log before anything enters staging. If you want, share your current lobby layout and pickup schedule, and I can help you translate it into a one-page returns desk SOP and a staging map your team can follow consistently.
Get the Outbound SOP Checklist
A Clean Outbound Workflow Protects Inbound Inventory, Carrier Relationships, and Your Team
Outbound succeeds when it is boring: a labeled package goes to the correct lane, within the correct window, with a simple proof-of-custody record—and it leaves your building through a documented handoff. Separating returns from inbound inventory is what keeps your package room accurate, your staff out of last-minute re-sorting, and your carriers from refusing piles that do not match what they can accept.
The operational payoff is immediate: fewer wrong-carrier mix-ups, fewer “mystery boxes,” and fewer returns disputes that turn into staff-versus-resident arguments. Start with the minimum viable returns desk SOP this week: define intake rules (including safe refusal language), draw a staging map by carrier, capture a scan or log entry at acceptance, and add a daily closeout so nothing ages into liability. Once those basics are consistent, you can refine volumes, space, and staffing without ever letting outbound contaminate inbound again.