
Weekend & After-Hours Coverage Without 24/7 Staff: Build an Auditable Drop Lane
Carriers do not stop delivering just because your front desk closes. For smaller properties, student housing, and buildings with limited desk hours, the real challenge is not whether packages arrive after hours—it is whether you can prove what happened to them when no one was there to scan, sign, or immediately secure each parcel.
A workable after hours package delivery procedure is less about perfection and more about risk containment: a single, predictable drop point; a tamper-evident way to hold items; a simple driver-completed record; and a next-shift routine that reconciles everything before normal intake begins. When those parts are consistent, you can reduce loose lobby drops, limit “delivered but not received” disputes, and preserve unattended deliveries chain of custody even on weekends.
This article lays out a “sealed bag + drop log” system: numbered security bags or totes placed inside a locked container, paired with a carrier-facing log and a repeatable reconciliation checklist for the next shift. It is designed as a package drop protocol for apartments that do not staff a desk overnight—practical, low-tech, and clear enough that busy drivers will actually follow it.
H2: Decide What You Will (and Will Not) Accept After Hours
Before you add a lockbox, a tote, or a log sheet, define the rules. A sealed-bag system only reduces disputes if everyone is operating inside the same boundaries: carriers know what to do, residents know what to expect, and staff can enforce the same answer every time. Think of this as the policy layer of your after hours package delivery procedure—clear enough to follow on a weekend, strict enough to be defensible after a loss claim.
paragraphs
Write this section as a one-page building standard (and reference it in signage and resident communications). If you manage multiple small properties, standardize the core rules and only vary what the site physically can handle (space, container size, camera coverage).
- Goal of the policy: contain risk, not eliminate it. Your procedure should reduce loose-lobby drop-offs and create a consistent unattended deliveries chain of custody.
- Default principle: if it cannot be safely contained and logged, it is not eligible for after-hours acceptance.
- Make it enforceable: define eligibility, define what happens when the lane is full, and define who makes exceptions (ideally: nobody after hours).
Scope: which days/hours count as after-hours and weekends
Start by defining the time window when the unattended lane is allowed. If the rule is fuzzy, residents will assume coverage exists and carriers will improvise.
Document the exact cutover time between staffed intake and after-hours drop. Example: “After-hours begins at 6:00 PM on weekdays and all day Saturday/Sunday and holidays when the desk is closed.”
If desk hours vary by semester (common in student housing), publish a single “after-hours schedule” that is updated weekly, not ad hoc. Your weekend mailroom coverage SOP should reference the same schedule so staff can’t accidentally accept exceptions at the counter one weekend and refuse the next.
Eligibility rules: size/weight limits, perishables, alcohol, high-value items, signature-required, hazmat
Define what you will accept into the unattended lane based on what you can physically secure and what you can safely store until the next shift. Keep it simple: a short “allowed” list and a short “not allowed” list.
Tie eligibility to your secure package drop box workflow constraints: bag/tote capacity, container dimensions, and the time packages may sit unreconciled (overnight, full weekend, etc.).
Practical eligibility rules you can adopt or adapt:
Suggested eligibility rules (edit to fit your site)
Allowed after hours (typical): standard parcels that fit fully inside the approved security bag/tote and then fully inside the locked container; non-perishable items; no special handling; no signature required.
Not allowed after hours (typical): perishables and temperature-sensitive items (meal kits, groceries, flowers); alcohol, tobacco, and controlled substances; hazardous materials and anything marked ORM-D/limited quantity if your team is not trained to store it; items requiring adult signature; oversized packages that cannot be contained; high-value items when labeled as such or known (example: “laptop,” “phone”)—these should be redirected to carrier access points or delivered during staffed hours.
Size/weight: set an easy-to-enforce limit aligned to your bags and container. Example: “Must fit in a 24 x 18 in bag/tote and weigh 25 lb or less.” If you do not have a scale, use a “one-person lift” rule plus the size rule so staff can enforce it without guessing.
Risk statement and resident-facing language (simple, non-legalistic)
Residents need to understand what the building is doing and what it is not doing. Avoid legal language; use plain, operational statements that set expectations and reduce arguments at the desk.
Use language that explains the process and the trade-off: you are providing a controlled drop option, but you are not guaranteeing real-time intake or immediate availability.
Example resident-facing language you can use (adapt as needed):
– “After-hours deliveries are placed by carriers into a sealed security bag and stored in a locked container until the next business day.”
– “Packages delivered after hours are processed and made available after the desk opens and completes reconciliation.”
– “Items that require a signature, are perishable, oversized, or cannot fit in the sealed-bag system should be scheduled for delivery during desk hours or routed to a carrier access point.”
– “Tracking may show ‘delivered’ before the package is processed. Please allow time after opening for intake and sorting.”
To support an unattended deliveries chain of custody, tell residents what staff will verify first when there is an issue: the drop log entry, the bag number, and whether the seal was intact at reconciliation.
Carrier instructions: what happens if the drop lane is full or a package doesn’t fit
Carriers will take the path of least resistance. If you don’t define what to do when the system can’t accept more, they will leave items outside the container—exactly the risk you’re trying to eliminate.
Set a single, consistent instruction: “If it doesn’t fit or the lane is full, do not leave it unsecured.” Then provide an approved next step that carriers can follow quickly.
Recommended carrier instructions (keep these short for signage and driver compliance):
– If the locked container is full: do not leave packages on the floor, mailroom counter, or outside the door. Mark as “delivery attempted—no secure location” and reattempt during desk hours.
– If the package is oversized or cannot be bagged: do not leave it unsecured. Reattempt during desk hours.
– If the label is missing unit/recipient: do not guess. Reattempt during desk hours.
If your building has a known alternate (for example, a secondary secured closet only accessible to staff), do not mention it to carriers unless it is part of the controlled system. Multiple drop points break the package drop protocol for apartments and make reconciliation harder.
Escalation path: who is on-call, what triggers a lockout or suspension of after-hours drops
Even a strong procedure needs a “stop the bleeding” plan. Define when after-hours drops should be paused and who can make that call. This protects residents and keeps staff from being pressured into unsafe exceptions.
Keep escalation practical. Smaller properties often do not have true on-call maintenance for packages; that’s fine. Your policy can focus on pausing after-hours acceptance when the risk environment changes.
Common triggers to lock out or suspend after-hours drops:
– Repeated overflow (container full) that results in loose packages.
– Evidence of tampering: broken seals, forced container door, or missing bags.
– Camera outage or lighting failure at the drop point (if your design depends on it).
– Severe weather impacting access/security (door not latching, water intrusion in storage area).
Define who is contacted and what they do:
– Primary: property manager or designated supervisor.
– Backup: regional manager or security vendor (if applicable).
– Action: temporarily disable after-hours drops (signage at the lane, lockout of the container if needed), notify residents of the pause, and instruct carriers to reattempt during staffed hours.
Most importantly: define what does not trigger escalation—routine “where is my package” calls should be handled by the next-shift reconciliation process, not by ad hoc weekend exceptions.
H2: Physical Setup: Create a Controlled Unattended-Delivery Lane
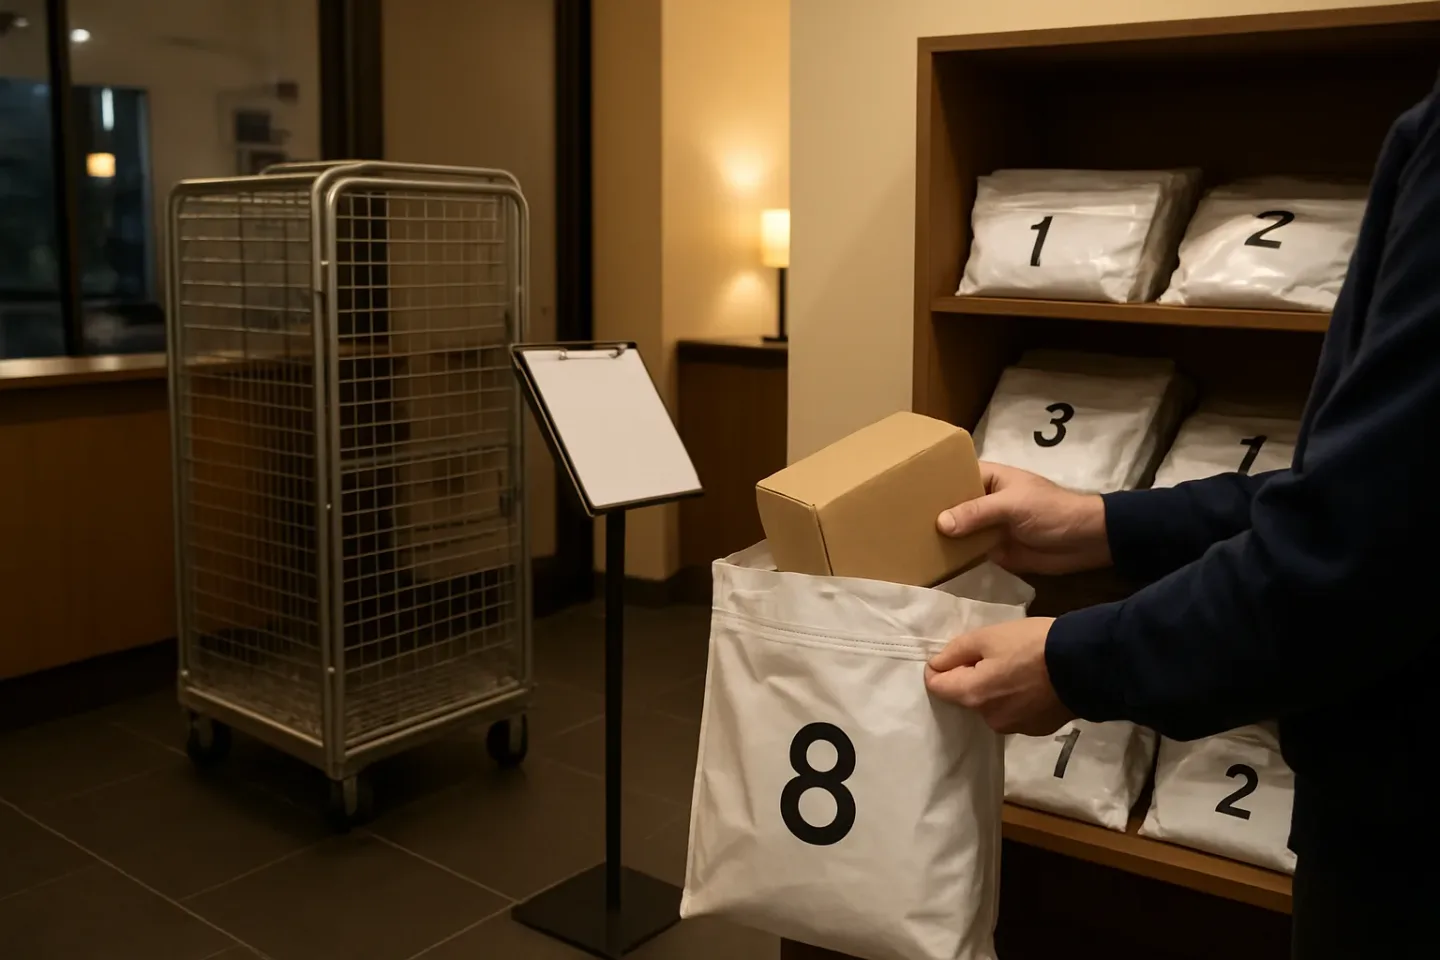
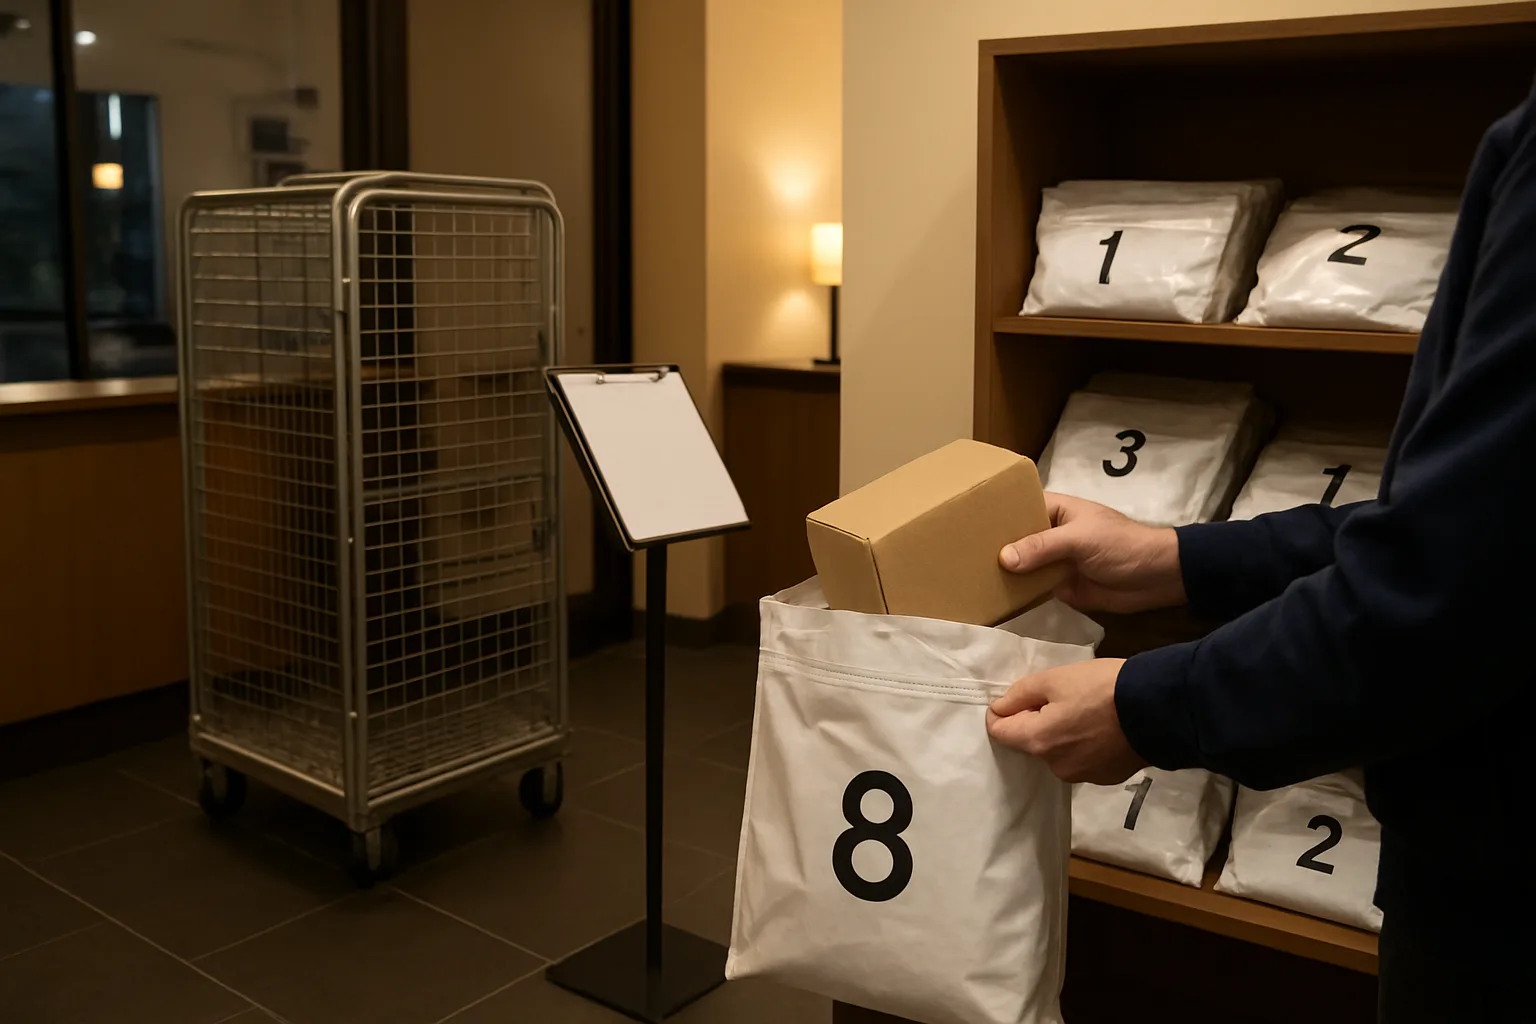
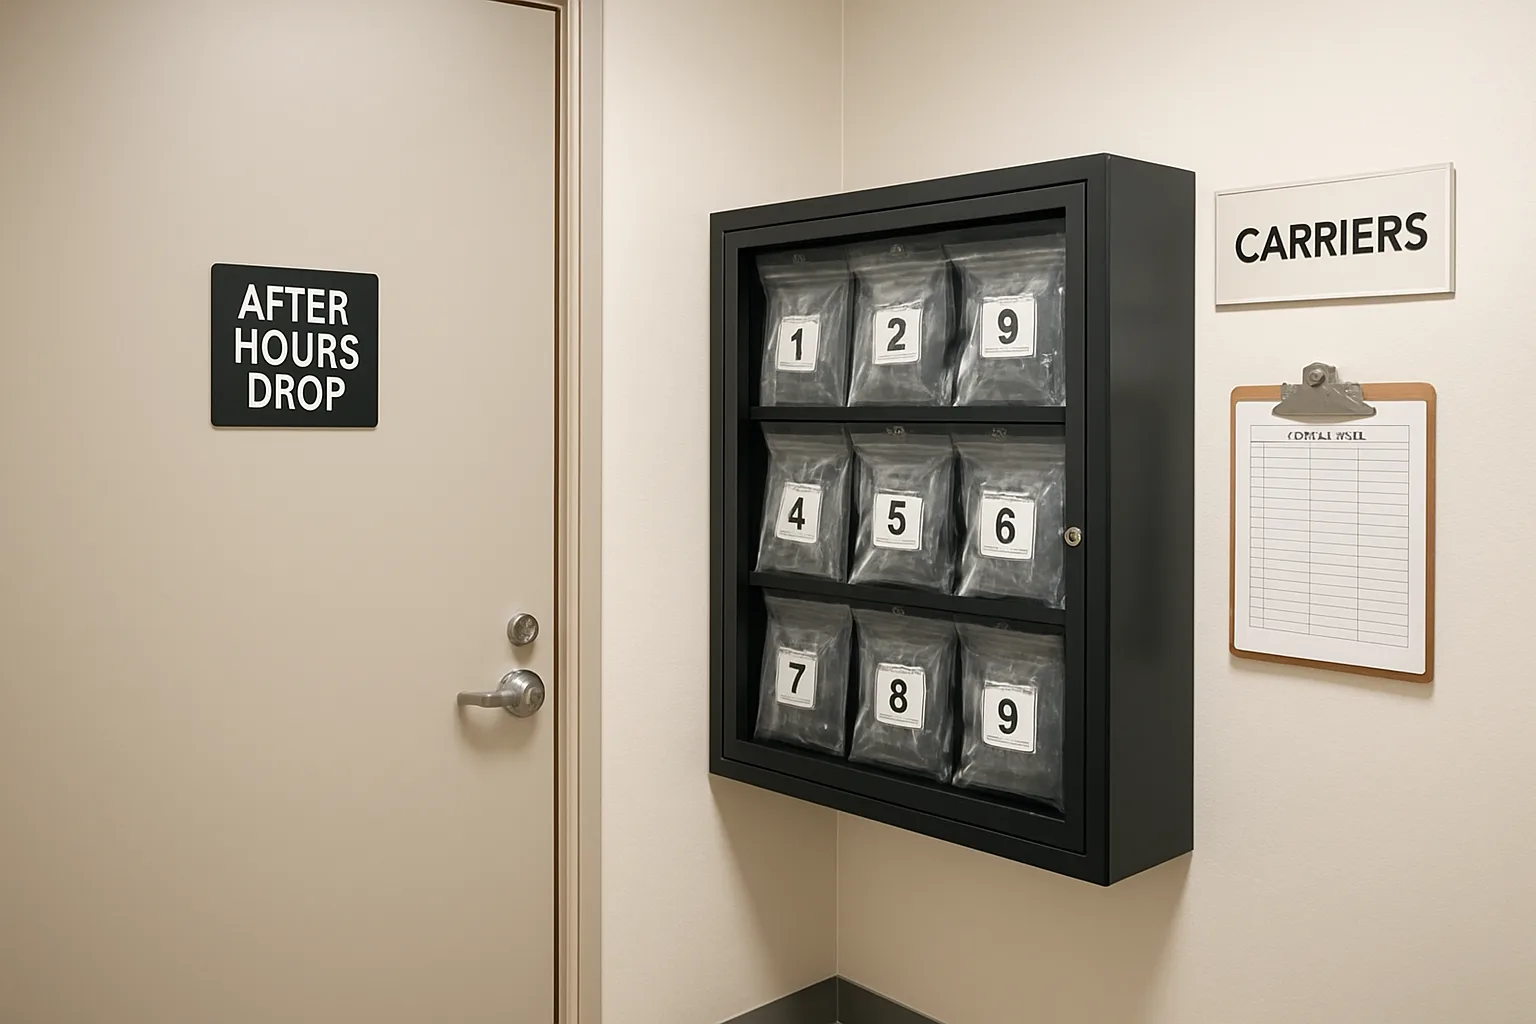
An after hours package delivery procedure only works if the physical lane is obvious, repeatable, and hard to bypass. Your goal is to give every driver the same three choices: (1) use the designated drop point, (2) seal items into a numbered bag/tote, and (3) place that sealed bag/tote into a locked container. Anything that requires improvising in a lobby (stacking on a bench, sliding boxes behind a desk, leaving items “near the mailboxes”) is where losses and disputes start.
Think of this as a secure package drop box workflow for buildings without 24/7 staff: the drop point is the “unattended receiving desk,” and the locked container is the “back room.” When designed correctly, it supports unattended deliveries chain of custody even when no one is present to scan in real time. Below is a practical setup that fits smaller properties, student housing, and limited-hour desks.
Choose the drop point: camera coverage, lighting, and a single obvious location
Pick one drop point and make it the only acceptable after-hours location. Consistency is the control. If carriers see multiple plausible spots (front desk, package room door, mailboxes, side entrance), they will choose convenience—and your process becomes unenforceable.
Use this selection checklist before you place any hardware:
– Visibility: in view of an existing camera if you have one; if not, pick the most observable area (not tucked around a corner). Avoid blind spots created by plants, columns, or decorative walls.
– Lighting: bright enough to read labels and write on a log. If the area is dim at night, relocate or add lighting before launch.
– Access control: inside the “first secure door” if possible (e.g., vestibule, controlled lobby). If carriers can’t reach it without being buzzed in, you’ll need a carrier access plan (codes or scheduled access) that you can actually support.
– One-path traffic: place it where a driver can enter, complete the drop, and exit without wandering through resident-only areas.
– Clear surface and standing room: drivers need space to set parcels down briefly while bagging and sealing. A small shelf or counter adjacent to the container reduces dropped items and rushed mistakes.
Practical tip for student housing: avoid placing the lane directly in front of leasing doors or resident traffic choke points. The best after-hours drop points are “obvious but not in the way.”
Hardware options for smaller properties: locked cabinet, rolling cage, parcel locker as ‘holding only’, or secured closet
You do not need complex equipment, but you do need a locked barrier that prevents casual access and keeps sealed items from sitting loose. Choose the simplest option that staff can empty and reset daily.
Option A: Locked cabinet (best for small volume)
– What it is: a metal storage cabinet or purpose-built lockable parcel cabinet anchored to a wall.
– Pros: small footprint, clean appearance, easy to secure.
– Watch-outs: limited capacity; choose a cabinet deep enough for common box sizes.
Option B: Rolling wire cage with a padlock (best for medium volume)
– What it is: a wire “security cage” cart that can be locked and rolled into a back room at opening.
– Pros: high capacity, easy morning retrieval (wheel it to the package room), flexible for weekend surges.
– Watch-outs: must be locked to a fixed point or placed in a controlled space so it can’t be rolled away after hours.
Option C: Parcel lockers used as holding only (best when lockers already exist)
– What it is: existing lockers treated as a temporary holding bay—drivers deposit sealed bags/totes, staff reconciles later.
– Pros: familiar to carriers, compartmentalized.
– Watch-outs: lockers can “fill” quickly; you still need overflow rules and likely a secondary locked container.
Option D: Secured closet or small room (best for buildings with a suitable footprint)
– What it is: a dedicated closet near the entrance with a solid door and commercial lock.
– Pros: large capacity, clean chain of access (only staff key/code).
– Watch-outs: ensure drivers do not gain unmonitored access beyond the closet; keep it immediately adjacent to the entry so drivers are not roaming.
Minimum standard regardless of option: the container must be lockable, hard to remove, and positioned so a driver can deposit sealed bags/totes without needing staff assistance. If the “lock” is a decorative latch or the container can be picked up and carried away, it will not support a package drop protocol for apartments under real conditions.
Supplies: numbered security bags/totes, permanent marker, pre-printed bag ID stickers, spare zip ties/seals
The supplies are what make the lane auditable. They are inexpensive, but they must be consistent and always available at the drop point (not “kept in the office”).
Core supply kit:
– Numbered tamper-evident security bags (single-use) or numbered reusable totes with tamper-evident seals
– Choose sizes that match your reality: one smaller size for padded envelopes and small cartons, and one larger size for shoe-box to medium cartons.
– If using reusable totes, keep a bag of single-use seals at the station.
– Permanent marker (thick tip) attached to the station (lanyard or tether) so it doesn’t walk away.
– Pre-printed bag ID stickers (optional but helpful)
– Use when writing on the bag is difficult (cold weather, textured material) or when you want the number visible from a distance.
– Spare seals/zip ties
– Plan for mistakes: drivers will occasionally mis-thread a seal or need to re-bag.
– “Oversize tags” (for items that can’t be bagged)
– Simple cardstock tags with fields: date/time, carrier, unit, tracking last 6–8, associated bag/tote number (so it still ties back to the drop log).
Restock rule: treat supplies like paper in a copier—if they run out, the process fails instantly. Assign a named role to check stock at close of business on Fridays (or before known high-volume weekends).
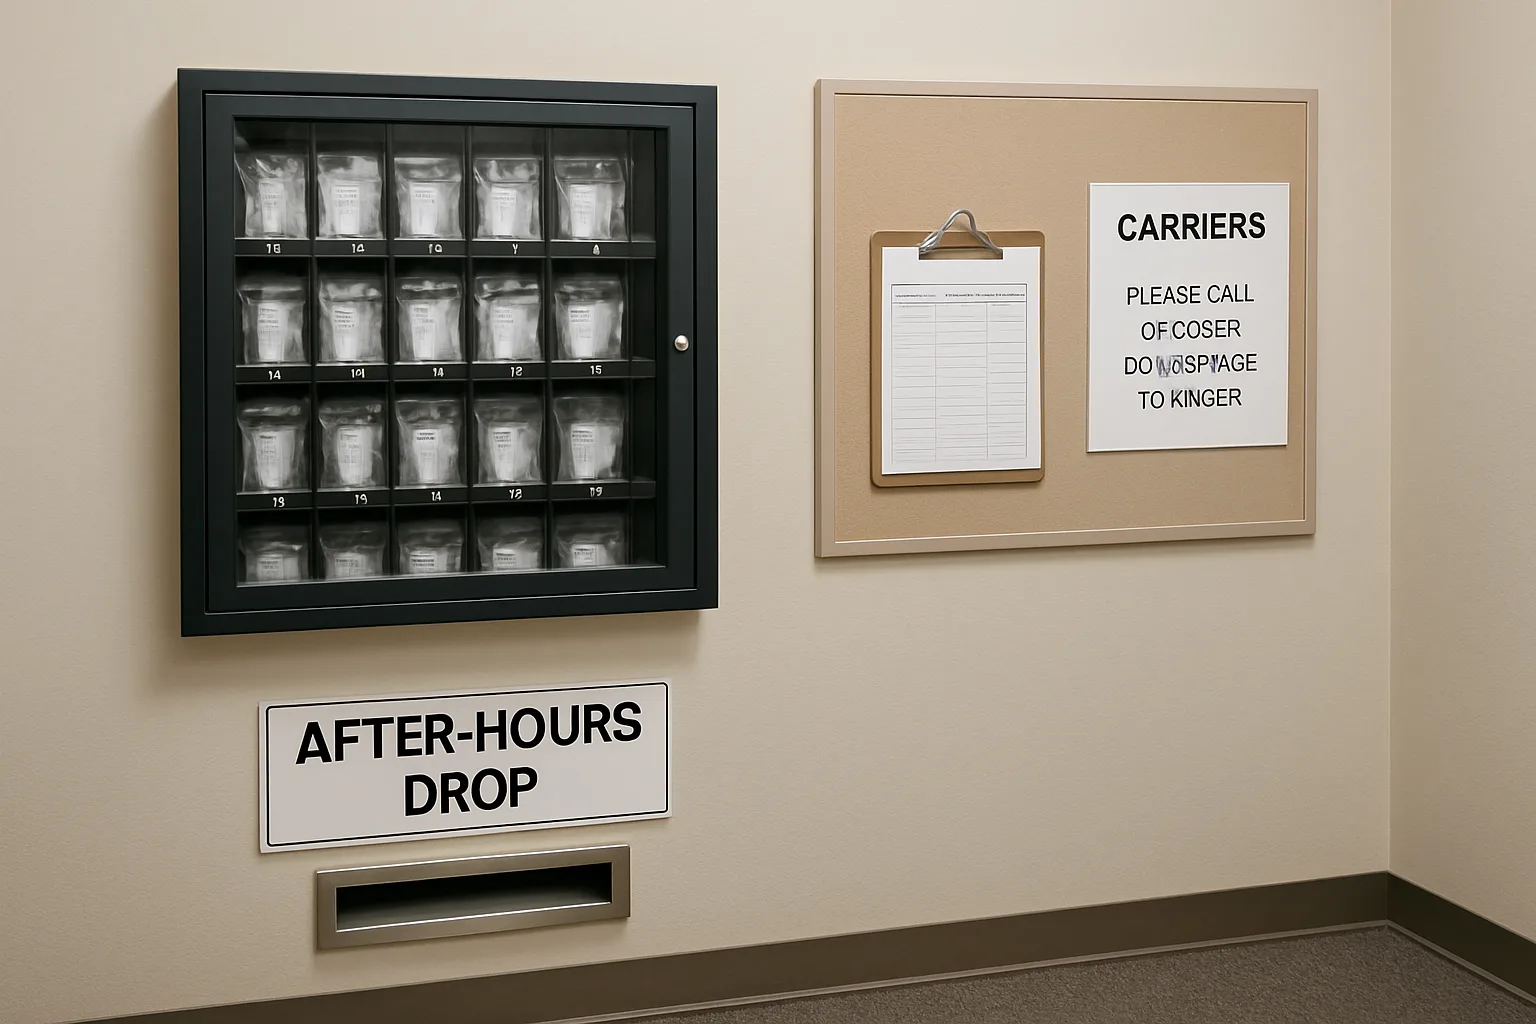
Signage that works: carrier-facing step-by-step instructions (short and visual)
Most after-hours failures happen because signage is too long, too vague, or placed where drivers don’t see it until after they’ve already left a pile on the floor. Your signage should be readable in under 10 seconds and should remove decision-making.
Place signage in three locations:
1) At eye level as the driver approaches the drop point (this prevents “I didn’t see it”).
2) Directly above the bag/seal supplies (this guides the action).
3) On the locked container door (this reinforces “nothing left outside”).
Keep the content short and action-based. Example wording you can adapt:
– After-hours deliveries only
– 1) Verify unit and name on label
– 2) Place packages for one unit into ONE numbered bag/tote
– 3) Seal bag/tote (do not leave unsealed)
– 4) Write bag/tote number on the label area (or apply bag ID sticker)
– 5) Complete one line in the Drop Log
– 6) Place sealed bag/tote inside the locked cabinet/cage
– If it doesn’t fit or the container is full: do not leave outside. Follow the “Full/Overflow” instruction.
Make it “driver-proof”:
– Use large font and high contrast.
– Avoid paragraphs and policy language.
– Use consistent terms: if you call it a “tote” on one sign and a “bag” on another, you will get inconsistent behavior.
Optional but practical: add a simple diagram showing where the supplies are, where the log is, and where the lockable container opening is. You do not need technology to make this clear; you need clarity and repetition.
Prevent overflow: ‘full’ indicator, overflow tote, and when to redirect carriers
Overflow is predictable (weekends, move-in, holidays, online shopping spikes). If you don’t plan for it, drivers will create their own overflow method—usually by leaving items outside your locked container. Your physical setup must include an explicit “full” state and a controlled next step.
Build overflow control into the lane:
– Full indicator: a simple sliding sign, flip placard, or magnetic “FULL—DO NOT LEAVE PACKAGES OUTSIDE” marker on the container.
– Overflow tote/bin inside the locked area: if your container supports it, designate an “Overflow Tote” that is still behind the lock. The point is to keep overflow controlled, not to add an unsecured pile.
– Capacity line: mark a visual fill limit (e.g., tape line inside a cage) so staff can see at a glance when you are approaching overflow risk.
Operational rules (post them for carriers and train staff on them):
– If the container is full or an item cannot be sealed/bagged, the driver must not leave it outside the container.
– Redirect options you can actually support:
– Carrier reattempt during staffed hours.
– Carrier hold at a nearby access point (carrier facility, retail pickup) if the shipper supports it.
– For certain carriers/buildings, a designated alternate drop location that is still secure (only if it’s truly controlled and consistently available).
When to temporarily suspend after-hours acceptance:
– Repeated overflow events.
– Evidence of tampering or forced access.
– Multiple “left outside container” incidents by carriers.
In those cases, the most effective action is not adding ad-hoc space—it’s tightening the lane: reset capacity expectations, re-communicate the drop protocol, and adjust the physical container size or pickup frequency so the after hours package delivery procedure remains predictable and auditable.
H2: The Carrier-Facing Drop Log: Minimum Fields That Preserve Chain of Custody
In a building without 24/7 staff, the drop log is the backbone of your after hours package delivery procedure. It is not a full receiving system; it is a fast, carrier-completed record that links three facts together: when something was left, who left it, and exactly which sealed bag or tote it went into. That link is what keeps unattended deliveries chain of custody intact until your next shift can reconcile and intake normally.
The goal is speed plus clarity. If it takes longer than a minute, drivers will skip fields or improvise. If it is too vague, you will not be able to resolve “tracking says delivered” disputes on Monday morning. The design below is intentionally simple and paper-first, but it still supports an auditable secure package drop box workflow when no one is scanning in real time.
- Design principle: make the driver do only what they can do at the door (identify the recipient and bag/tote), and make your staff do what they should do later (verify seals, reconcile counts, and intake).
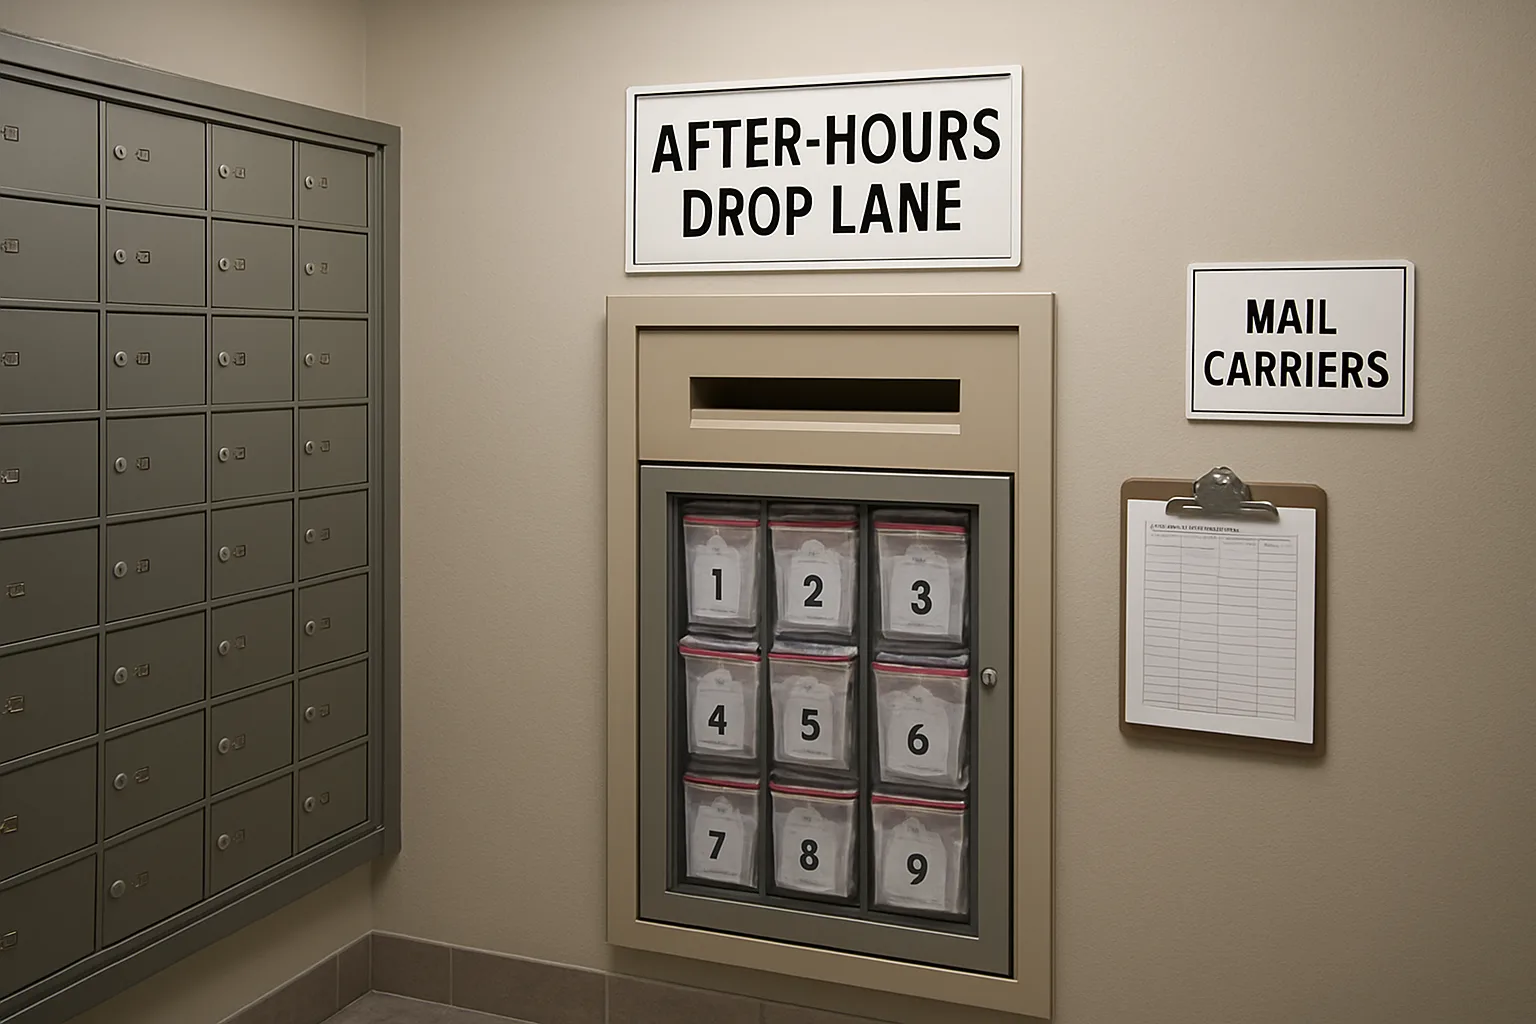
Drop log format: clipboard in a lockable sleeve, bound logbook, or weatherproof kiosk (no tech required)
Choose a format that survives real use: rain, gloves, rushed handwriting, and occasional frustration. The best option is the one that stays in place and is always available at the drop point.
Practical formats that work for smaller properties and student housing:
– Clipboard in a lockable sleeve: A clipboard attached with a short cable to the drop station, with the form inside a clear lockable sleeve (so it does not walk away). Keep two pens on tethers and store spare forms behind the sleeve or in the locked cabinet.
– Bound logbook (pre-numbered pages): Harder to lose pages, easier to audit later. Use a bold header on every page: “One entry per sealed bag/tote. No packages left outside the locked container.”
– Weatherproof kiosk (simple): A small exterior-grade box mounted at the drop point with a slot for completed sheets and a compartment for blank forms. This keeps the “current” sheet clean and creates a separate pile of completed records for the next shift.
Keep the log physically inside the controlled lane (right next to the bags/totes and the locked container), not at a side table or lobby desk. If the log is even a few steps away, drivers will drop and leave without writing.
Required fields (the ‘must-have 8’): date, time, carrier, tracking (last 6–8), unit/recipient, bag/tote number, package count, driver initials
These eight fields are the minimum viable record for a package drop protocol apartments can enforce. They are short enough for drivers, but specific enough for staff to reconcile later.
1) Date
Why it matters: Weekend and holiday backlogs blur together fast. Date anchors the record when you review it during next-shift reconciliation or a dispute days later.
2) Time (approximate is fine)
Why it matters: Helps you match entries to camera timestamps (if you have coverage) and spot patterns like repeated after-hours overflow.
3) Carrier
Why it matters: If there is a missing package or a full-lane issue, you need to know who to contact. “Carrier” can be as simple as UPS/FedEx/USPS/Amazon/Other.
4) Tracking (last 6–8 digits)
Why it matters: Drivers may not want to write a full tracking number, and handwriting errors are common. The last 6–8 digits usually allow staff to match the parcel to a label once the bag is opened. If the carrier label format does not use digits, instruct drivers to write a recognizable short segment (for example, last 6 characters).
5) Unit and/or recipient name
Why it matters: This is the “routing” field that prevents mix-ups. Require unit format exactly as your building uses it (for example, “A-214” or “214B”), not “2nd floor.” If the label lacks a unit, the driver must write the recipient name clearly.
6) Bag/tote number
Why it matters: This is the chain-of-custody link. The bag/tote number is what lets staff confirm the seal was intact and that the bag existed in the locked container before it was opened.
7) Package count (items placed into that bag/tote)
Why it matters: One resident might have multiple small parcels. Count supports later reconciliation: “Bag 014 should contain 3 items.”
8) Driver initials
Why it matters: Initials are not about blame; they deter sloppy entries and help carriers self-audit when a supervisor asks what happened on a route. Initials are also faster than a full signature.
Optional fields that help resolve disputes: signature-required flag, oversized note, photo reference (if property camera exists), exception reason codes
Optional fields are valuable when they stay optional. Add only what you will actually use during reconciliation and dispute handling.
Useful add-ons for an unattended deliveries chain of custody record:
– Signature-required flag (Y/N): If a driver marks “Y” but still used the after-hours lane, you immediately know it is an exception that needs review.
– Oversized note: A short checkbox like “Oversized” with a line for “location inside container” or “tagged item.” This supports controlled exceptions when something cannot fit in a standard bag.
– Photo reference (camera timestamp): Do not ask drivers to take photos on their personal devices. Instead, if your drop point is on camera, have a small field like “Camera: Yes” and rely on date/time for lookup.
– Exception reason codes: Keep it simple. A short list posted on the form works well:
E1 = Label missing unit
E2 = Item did not fit bag
E3 = Drop lane full
E4 = Bag/tote unavailable
E5 = Damaged package noted at drop
Exception codes help your team spot recurring failure modes (for example, “E3” every Sunday night means you need overflow controls) without adding new technology.
How to make it easy for drivers: examples of completed entries (good vs. unusable)
Drivers fill logs correctly when you remove ambiguity. Print one example line directly on the sheet, and keep the rules consistent: one entry per sealed bag/tote and no leaving parcels loose outside the locked container.
Example of a good entry (usable on the next shift):
– Date: 09/01
– Time: 19:42
– Carrier: FedEx
– Tracking (last 8): 48392017
– Unit/Recipient: B-312 / Nguyen
– Bag/Tote #: 014
– Pkg count: 2
– Driver initials: MT
(Optional) Exception code: none
Why it works: Staff can find bag 014, confirm seal, open it, expect 2 items, and match one label to the last 8 digits.
Example of an unusable entry (creates disputes):
– Date: (blank)
– Time: “night”
– Carrier: “delivery”
– Tracking: “see label”
– Unit/Recipient: “312”
– Bag/Tote #: (blank)
– Pkg count: (blank)
– Initials: (blank)
Why it fails: There is no bag link, no carrier, no time anchor for camera review, and the unit format may be wrong. This entry does not preserve chain of custody; it only proves someone wrote something.
Two practical tricks that increase compliance:
– Use checkboxes wherever possible (carrier list, optional flags) and keep only 2–3 write-in fields.
– Provide a bold instruction next to the tracking field: “Write last 6–8 digits only.”
Controls to reduce fraud or mistakes: pre-numbered lines, ‘one entry per bag’, and instructions to never leave items outside the locked container
Your log is also a control surface. A few small design choices reduce both honest mistakes and preventable disputes.
Controls that work well in a secure package drop box workflow:
– Pre-numbered log lines: Print line numbers (001, 002, 003…). This makes it obvious if a page is missing and lets staff refer to “Line 012” during reconciliation.
– One entry per sealed bag/tote: This rule is what makes reconciliation fast. If multiple packages go into one bag, the package count captures it. If packages go into multiple bags, that should produce multiple entries.
– “Stop” instruction if the lane is full: Add a bold statement on the form and signage: “If container is full or package does not fit, do not leave items outside. Follow carrier redirect instructions.” This prevents lobby piles.
– Pen control: Tether pens to the station. If drivers cannot find a pen, they will skip the log.
– Clear placement rules: On the form header, state: “Complete log entry before depositing bag/tote into the locked container.” This helps maintain sequence and reduces forgotten bag numbers.
– Staff verification prompt: Include a small staff-only column on the far right labeled “Next shift: seal intact (Y/N) + initials.” Drivers ignore it, but it standardizes reconciliation later.
Taken together, these controls keep the log quick for carriers but meaningful for your team. That is the practical difference between a generic sign-in sheet and a defensible after hours package delivery procedure.
H2: The Sealed Bag Workflow: Step-by-Step After Hours Package Delivery Procedure
This is the core of the after hours package delivery procedure: every unattended drop is contained in a numbered, tamper-evident bag or tote, tied to a single drop-log entry, and secured inside a locked holding container. The bag number becomes the temporary “receipt” that bridges the gap between the driver’s drop and the next staffed shift—without requiring real-time scanning.
To keep it realistic for carriers, the workflow has to be fast, repeatable, and unambiguous. Your signage should read like a checklist, and your supplies should be staged so a driver can complete the process in under a minute per stop.
- Operational principle: One sealed bag/tote equals one drop-log line (even if the bag contains multiple parcels for the same unit).
- Operational principle: Nothing is ever left loose in the lobby or outside the locked container—no exceptions without being logged as an exception.
- Operational principle: If a parcel can’t be secured (bagged, tagged, or caged), it’s not an after-hours eligible delivery at your building.
Carrier steps (posted at the drop point): verify unit, place items in bag/tote, seal, write bag number, log entry, deposit into locked container
Write these steps exactly as posted instructions at the drop point. Keep them short, with action verbs and no policy debate. Carriers are more likely to comply when the lane is clearly the easiest option.
Carrier workflow (recommended wording):
1) Verify unit/recipient on label. If missing or unreadable, do not leave loose—use exception process (see below). 2) Place parcel(s) for the same unit into one numbered bag/tote. 3) Seal the bag (zip tie or pull-tight seal). 4) Write the bag/tote number on the bag label area (or apply a pre-printed bag ID sticker). 5) Complete one line in the drop log for this bag/tote. 6) Place the sealed bag/tote into the locked container and close it fully.
Property steps (next shift): retrieve sealed bags, verify seal intact, reconcile to drop log, then open and sort
The next staffed shift should treat the sealed bags like a temporary chain-of-custody layer. The goal is to reconcile first, then open and sort—so you don’t lose the link between “what was dropped” and “what you found.”
Next-shift workflow (tight sequence):
1) Retrieve all sealed bags/totes from the locked container and stage them in a designated intake area (camera coverage if available). 2) Count bags and compare to the number of log lines since the last closeout. 3) For each bag: confirm the seal is intact and the bag number is legible. 4) Match each bag number to exactly one drop-log entry; mark it as “received” (initial/date/time) on the log or a reconciliation sheet. 5) Only after matching: open the bag, verify contents generally match the entry (correct unit/recipient, expected parcel count if noted), then sort into your normal intake process (shelf, bin, room, or later QR label/receiving label). 6) If anything doesn’t match, stop and document as an exception before the bag is discarded or reused.
Handling odd shapes and oversized: ‘tag and cage’ method with oversized tags tied to bag numbers
Not every delivery fits a security bag. Rather than letting oversize items become “loose lobby deliveries,” use a controlled exception method that still ties the item to a bag number and log entry.
Tag and cage method (practical approach):
– Stage a small stack of oversized tags (durable cardstock or plastic tags) plus matching pre-numbered bag ID stickers. – Driver attaches an oversized tag to the parcel (string tie or adhesive tag) and writes the same bag/tote number used on the log line. – Driver places the oversized parcel into a designated locked cage/closet area within the same drop lane (not a public hallway). – In the drop log, the driver records the bag/tote number and checks “oversized” (or writes “OS”) and “cage” to show where it was placed. – Next shift reconciles the oversized item by matching the tag number to the log line, the same way they would a sealed bag.
When a package can’t be bagged: controlled exceptions and how they are logged
Some items should not be accepted after hours. The key is to make the exception path clear so carriers don’t improvise (and so staff aren’t stuck arguing later). Exceptions should be rare, consistent, and documented.
Common controlled exceptions (and what to do):
– Signature-required: Do not drop. Mark as “attempted—signature required” per carrier procedure. If you allow exceptions, require the driver to note “SIG” on the log and place in the locked container only if your building policy explicitly permits it (many won’t). – Perishable/temperature-sensitive: Do not drop after hours. Redirect to next business day or carrier access point. – Alcohol/regulated items: Do not drop. Must be delivered to recipient with ID as required. – Unreadable/missing unit: Do not drop. If your policy permits, driver logs it as “NO UNIT” and places it in a clearly marked exceptions tote inside the locked container; otherwise it must be returned to the carrier’s route process. – Hazmat/leaking/damaged: Do not drop. Return to carrier process immediately for safety and liability reasons.
How to log exceptions so they’re actionable: The driver still completes a log line with a reason code (for example: NO UNIT, SIG, OS, FULL, DAMAGED). If the item is being held in your container (only if allowed), it must still be tied to a bag/tote number or oversized tag number. If it is not being held, the log line should clearly indicate “not left on site” so staff do not waste time searching.
Example scenario: student housing weekend surge with mixed carriers and multiple small parcels per resident
Scenario: It’s Saturday afternoon in a student housing building with desk hours Monday–Friday only. Three different carriers arrive over the weekend. Many residents are receiving multiple small parcels (clothing, supplies, textbooks).
How the sealed bag system plays out:
– Carrier A has three parcels for Unit 412 and two parcels for Unit 318. The driver places the three Unit 412 parcels into Bag 1042, seals it, logs one line for Bag 1042 with package count “3,” then repeats for Unit 318 using Bag 1043 with count “2.” Both bags go into the locked container. – Carrier B arrives later with an oversized flat box for Unit 207 that won’t fit. The driver uses the tag-and-cage method: attaches Oversized Tag 1044 to the box, logs Bag/Tag 1044 with “OS CAGE,” and places it in the locked cage area. – Carrier C has a parcel with the resident name but no unit number. Your policy says “no unit, no drop.” The driver records a log line as “NO UNIT—NOT LEFT” (or does not log it at all if your signage directs them to follow their carrier’s standard “insufficient address” process). Nothing gets left loose.
Monday morning, the first staff member on duty pulls Bags 1042 and 1043 plus Oversized Tag 1044, confirms the seals/tags match the log, initials the reconciliation, and then opens/sorts. If a resident later says “tracking shows delivered,” staff can point to the log line and bag number, and confirm whether it was received intact, flagged as an exception, or not left on site per policy. That’s the accountability advantage of a sealed-bag workflow even when no one was present at the time of delivery.
H2: Next-Shift Reconciliation Routine: Your Weekend Mailroom Coverage SOP
The sealed-bag drop lane only works if the next on-duty staff member closes the loop consistently. This is the control point that turns an unattended drop into an auditable after hours package delivery procedure: you confirm what was dropped, identify exceptions while evidence is fresh (bag seals, camera window, drop log), and convert “carrier placed items in container” into your normal package intake flow.
Treat reconciliation like a short, repeatable opening routine. The goal is not perfection; it is fast detection of mismatches and a documented path for resolving them. When disputes happen later (“tracking says delivered”), you should be able to point to one of three outcomes: matched and processed, exception logged and escalated, or not in the building system and therefore a carrier issue.
- Use one staff owner per shift for reconciliation (no “everyone touched it”).
- Do reconciliation before starting resident pickups or answering package inquiries.
- Work from the drop log and sealed bags first; do not open bags until you have matched them to log entries.
- If your building uses QR labels or a receiving label when staffed, apply them only after reconciliation to avoid masking exceptions.
- Time-box the routine: 10–15 minutes for normal volume; document when volume forces a longer run.
Start-of-shift checklist (10–15 minutes): count bags, match log lines, check seals, note exceptions
Use this checklist as your weekend mailroom coverage SOP opener. Keep a printed copy at the package room so coverage staff can follow it exactly.
1) Secure the area first: unlock the container/cage, close it behind you, and keep resident access off until reconciliation is complete.
2) Count and stage sealed bags/totes: place them in numerical order (by bag/tote number) on a table or staging cart. Quick visual: you are looking for gaps, duplicates, or unsealed bags immediately.
Start-of-shift checklist (continued)
3) Pull the drop log and mark your reconciliation window: write today’s date/time at the top of the next open space and circle the last entry from the prior staffed period (if applicable).
4) Match bags to log lines: for each sealed bag/tote, find the log entry with the same bag/tote number. Mark the line as Reconciled with your initials and the time.
5) Check seals: confirm the seal/zip tie is intact and the bag number on the seal matches the logged bag number. If you can’t verify the seal, treat as an exception (do not open yet).
Start-of-shift checklist (continued)
6) Verify “minimum completeness” before opening any bag: each matched log line should have at least date, approximate time, carrier, tracking last 6–8, unit/recipient, bag/tote number, package count, and driver initials. If not, flag it now.
7) Only after the above, open matched bags and sort: compare the number of parcels inside to the logged package count. If it matches, proceed to normal intake (label/scan/notify during staffed hours as you normally would).
8) Note exceptions immediately: write the exception on the log line (short code + initials) and start an exception note (see below). Don’t wait until later—details fade fast.
Reconciliation rules: what “matched” looks like; how to handle missing tracking digits, unreadable unit numbers, or duplicate entries
Define “matched” so every staff member makes the same call. A bag is considered matched when all of the following are true:
– Bag/tote number on the physical bag equals bag/tote number on the drop log line
– Seal is intact (or the tote is locked as designed) and shows no sign of tampering or resealing (as best as you can tell)
Reconciliation rules (continued)
– Package count in the bag equals the log’s package count (or the variance is explained as an exception)
– Each parcel has a readable recipient and unit (or is captured as an exception)
– Tracking information is present enough to reference later (at minimum last 6–8 digits or a partial + carrier)
Common reconciliation fixes (keep these consistent)
Missing tracking digits: If the log has a carrier + recipient/unit + bag number but the tracking last digits are missing or illegible, do not “guess.” Mark the line Tracking Incomplete and, when you open the bag, write the missing last 6–8 digits from the label onto the log line (initial and time).
Unreadable unit number: If the unit is smudged or missing on the parcel, check for a name match in your resident roster only after reconciliation. Mark the log line Unit Unclear and place the parcel in a clearly labeled hold area (for example, “Unit verification needed”) until you confirm.
Common reconciliation fixes (continued)
Duplicate entries: Sometimes a driver logs the same bag twice or uses two log lines for one bag. If you see duplicates, keep the first complete entry as the primary record and cross-reference the second line with “Duplicate of line X” and your initials. Do not erase or tear pages out—preserve the audit trail.
Multiple residents in one bag (not ideal but it happens): If the bag contains parcels for multiple units but the log shows a single unit, record what you found in an exception note, then either (a) re-bag per unit if your process requires it, or (b) proceed to intake with clear notes linking all parcels back to the original bag number.
Exception handling: broken seal, bag missing, package found loose, container overfilled
Exceptions are where the procedure proves its value. Handle them in a predictable order: preserve evidence, document, escalate if needed, then resume processing the rest.
Broken seal (or signs of tampering)
1) Do not open the bag immediately. Photograph the seal/bag number if your site policy allows; if not, write a detailed description in the exception note.
2) Mark the drop log line with Broken Seal, your initials, and time.
3) Separate the bag into a secured “exceptions only” area with restricted access until a supervisor or manager reviews it (same day if possible). If you must open it to prevent service disruption, do so with a second staff witness and record both names in the note.
Bag missing (log line exists, no bag found)
1) Re-check the container/cage thoroughly, including corners, behind totes, and any overflow area.
2) If not found, mark the log line Bag Not Found and note the time you discovered it.
3) Check whether the bag number was skipped (driver wrote wrong bag number) by looking for an unlogged bag in staging. If you find an extra bag, reconcile it cautiously: don’t “force match” without supporting details (carrier/time/recipient).
Package found loose (not inside a bag/tote)
1) Treat any loose item as an exception even if it looks fine. Record carrier (if visible), tracking last digits, recipient/unit, and where it was found (for example, “loose on cage floor”).
2) If your procedure allows, place the loose package into a new numbered bag, seal it, and create a new log line yourself labeled Staff Re-bagged with your initials/time (do not alter the carrier’s original entries).
Container overfilled (overflow/door won’t close)
1) First priority is restoring secure closure. If the container cannot lock, stop processing and notify the manager/on-call immediately.
2) Document what you found: estimate number of bags/totes, whether overflow tote was used, and whether any packages were left outside the secure area.
3) If there are items outside the locked container, move them into secure containment as quickly as possible, then log them as exceptions (Outside Container) with identifying details from labels.
Documentation cadence: daily closeout note, where logs are stored, retention period, and who reviews weekly
Your log is only useful if it is legible, complete, and retrievable. Create a lightweight documentation rhythm that smaller properties can actually maintain.
Daily closeout note (end of reconciliation): In a designated section of the logbook (or a separate shift sheet), write a 3–5 line summary: total bags reconciled, total parcels processed, exceptions count by type (Broken Seal, Bag Not Found, Loose, Unit Unclear), and any escalations made (who was called, when). Initial and time it.
Storage: Keep completed logs in a locked drawer or manager cabinet near the package room—not at the front counter where pages can be removed. If you use a clipboard during drops, transfer or archive pages so the active log stays clean and the old records stay protected.
Documentation cadence (continued)
Retention period: Set a clear, non-technical rule (for example, keep logs for X days). Choose a period that covers most delivery disputes in your building without creating an unmanageable archive. Whatever you choose, apply it consistently and document it in the SOP.
Weekly review: A manager (or designated lead) should review once per week: spot-check that every bag number has a corresponding reconciled log line, confirm exceptions were resolved, and look for patterns (recurring carrier non-compliance, frequent overflow, repeated unit-format issues). The output should be operational: adjust signage, supplies, or eligibility rules—not blame.
Handoff to normal intake: optional QR label/receiving label application once staffed, and how to link bag ID to later intake notes
After reconciliation, you can merge into your normal package intake flow—scanning, QR labeling, resident notifications, shelf placement—without losing the chain-of-custody created overnight.
Practical linkage rule: The bag/tote number is your bridge between unattended drop and staffed intake. When you apply a receiving label or create an entry in your package system, add a short note like “After-hours bag 0127” or “Bag 0127 line 14.” If a resident later disputes a delivery, you can trace it back to the specific bag, log line, and seal status.
If you process in batches: Keep parcels from the same after-hours bag together until they are fully entered/labelled. Only then break them apart into unit-based shelving. This prevents “orphan packages” that can’t be tied back to the drop record.
H2: Resident Communication and Expectations (So the Procedure Actually Works)
A sealed-bag drop lane reduces risk, but it only works if residents understand what “delivered” means after hours and what staff can (and cannot) do in real time. The goal of resident communication is to (1) set clear expectations about processing times, (2) prevent high-risk items from entering the unattended stream, and (3) reduce front-desk disputes by pointing everyone to the same, repeatable after hours package delivery procedure.
Use plain language. Avoid legal tones. Repeat the same rules across signage, your resident portal, and any move-in packet so carriers and residents aren’t working from different assumptions.
- Key message to repeat: After-hours deliveries are contained immediately (sealed + locked), then reconciled and processed when staff returns. Residents may see “delivered” before the package is available for pickup.
Resident notice template points: what after-hours drop means, when packages are processed, and where notifications come from
Include a short notice residents can screenshot. Keep it consistent with your package drop protocol apartments signage at the drop point.
Resident notice template points (edit to match your building):
1) What after-hours drop means: “When the office is closed, carriers place eligible packages into a numbered security bag/tote, seal it, and deposit it in a locked container. This creates an unattended deliveries chain of custody until staff returns.” 2) When packages are processed: “Packages delivered after hours are checked in and sorted the next business day when the office opens (or the next staffed shift).” 3) Where notifications come from: “Availability notices come from the office/package system after check-in. Carrier tracking messages are not the same as a pickup-ready notice.” 4) Where pickup happens: “After processing, packages are available at the normal pickup location during desk hours.” 5) What not to expect: “Staff cannot retrieve after-hours packages on demand, and we do not open the locked container between shifts except for emergencies defined by management.”
Addressing standards: unit formatting, preferred recipient name, and phone/email on carrier labels
Most “missing package” issues in after-hours workflows start as labeling issues. Give residents a single addressing standard that matches your unit database and is easy for carriers to read quickly.
Recommended standards to publish to residents:
– Use the full building address exactly as recognized by carriers (no nicknames). – Put the unit number on its own line and match your official format (examples: “Apt 203” or “Unit 203,” but not both). – Use the resident’s legal name or the name on file (avoid only-first-name, gamer tags, or club names). – Add a phone number on the shipping label whenever the retailer allows it (helps carriers resolve access issues). – For student housing: require the student’s full name plus room/bed as your system expects (example: “Unit 315-Bed B” if that is how you track recipients).
High-risk items guidance: deliver to staffed hours, use carrier access points, or require signature
Be explicit about what should not enter the secure package drop box workflow after hours. Residents often assume “sealed and locked” equals “zero risk,” but you’re managing risk, not eliminating it.
Resident-facing guidance (simple and direct):
– High-value items (phones, laptops, jewelry): choose delivery during desk hours, ship to a staffed pickup location (carrier access point/locker), or require signature. – Perishables and temperature-sensitive items: do not schedule for nights/weekends; use attended delivery windows. – Alcohol, age-restricted, and signature-required items: do not route to after-hours drop; carriers may refuse to leave these, or they may be returned. – Oversized freight (furniture/mattresses): schedule delivery appointments during staffed times; after-hours drop is not available for large items. – Medication: treat as high-value/time-sensitive; use attended delivery or pharmacy pickup options when possible.
Response timelines: how soon after opening desk hours packages are reconciled and available
Residents are less likely to flood the front desk if you publish a specific processing window. Tie the window to your reconciliation routine so you can reliably meet it.
Set and communicate a realistic timeline like:
– “Packages delivered after hours will be processed within X hours of the next office opening.” (Pick a number you can consistently hit.) – “Weekend deliveries are processed on the next staffed day.” (If you have limited Sunday hours, say so.) – “During peak weeks (move-in, finals, holidays), processing may take longer; the office will post the current turnaround time.”
What residents should do if tracking shows delivered but they don’t have it yet (and what staff will check first)
Give residents a clear “do this first” path. It reduces repeat inquiries and keeps your team focused on the right evidence (bag number, drop log entry, and reconciliation notes).
Resident instructions to publish:
1) Wait for the building’s pickup-ready notice. “Delivered” on a retailer/carrier page may mean it is sealed and secured, not yet checked in. 2) Check the timestamp on tracking. If it was after hours, it will be processed on the next staffed shift. 3) If it has been more than the stated processing window, contact the office with: carrier, tracking number (or last 6–8 digits), recipient name, and unit. 4) If the item is urgent (medicine, travel document), note that in your message so staff can prioritize the reconciliation search (within policy).
Frequently Asked Questions
What is an after hours package delivery procedure, and why use a “sealed bag + drop log” system?
An after hours package delivery procedure is the set of steps a building uses to accept deliveries when the office/front desk is closed. The “sealed bag + drop log” system creates a controlled unattended-delivery lane: carriers place packages into numbered, tamper-evident bags/totes, record a quick entry on a carrier-facing log, and deposit the sealed bag into a locked container. The next shift reconciles sealed bags to the log before opening and sorting. The goal is risk containment and clear chain-of-custody without requiring 24/7 staff or real-time scanning.
Decide What You Will (and Will Not) Accept After Hours
Before buying hardware or posting signage, set policy boundaries so your package drop protocol apartments can actually enforce.
Scope: define after-hours and weekends
– Write the exact window (example: weekdays 6:00 pm–9:00 am; weekends Fri 6:00 pm–Mon 9:00 am).
– Clarify holidays and campus breaks (student housing often has irregular desk hours).
Eligibility rules
– Allow: standard parcels that fit fully inside your approved bag/tote size and the locked container.
– Do not allow after-hours drop (route to staffed hours or carrier access points):
– Perishables/temperature-sensitive items
– Alcohol/controlled substances
– Hazmat
– Signature-required items
– High-value electronics/jewelry (define “high-value” in simple terms)
– Oversized items that cannot be contained or secured
Risk statement and resident-facing language (simple, non-legalistic)
– Use plain words, not legal threats. Example:
– “After-hours deliveries are held in a secured container and processed when the office opens. Packages are not individually received or scanned at drop time. Please allow processing time after we reopen.”
– “Items requiring a signature or special handling must be delivered during desk hours or to a carrier pickup point.”
Carrier instructions for “full” or “doesn’t fit”
– If the container is full: do not leave packages outside. Attempt redelivery next business day or route to carrier hold location.
– If it doesn’t fit: treat it as not eligible. Do not stage in lobby, hallways, or mailroom doorways.
Escalation path
– Name a role (not just a person) for on-call decisions: “Manager on duty” or “RA on-call” (student housing).
– Triggers to pause after-hours drops:
– Repeated overflow incidents
– Evidence of tampering
– Camera outage at drop point
– Multiple unidentified packages in a week
– A broken lock/container failure
Physical Setup: Create a Controlled Unattended-Delivery Lane
This is the secure package drop box workflow portion: a single, obvious drop point; a locked container; numbered tamper-evident containment; and simple instructions.
Choose the drop point
– One location only (avoid “driver choice” that scatters risk).
– Prioritize: camera coverage, good lighting, and a clear path from entrance.
– Keep it out of resident traffic lanes where casual passersby can linger.
Hardware options for smaller properties
– Locked cabinet anchored to wall/floor (best when space is tight).
– Rolling wire cage with a padlock (useful when you can wheel it into a secured closet after hours).
– A secured closet with a mail slot or pass-through (only if access control is reliable).
– Parcel locker used as “holding only” (if you already have lockers, designate a few cells for carrier drop and reconcile later).
Supplies
– Numbered security bags/totes (tamper-evident seals or zip ties with unique IDs).
– Permanent marker plus pre-printed bag ID stickers (large, easy to read).
– Spare seals/zip ties kept in a locked sleeve to reduce misuse.
– Oversized tags (bright tags with a tie-string) for items that can’t be bagged.
Signage that works (carrier-facing)
– Place at eye level at the drop point.
– Keep it short and task-based:
– “1) Put packages for one unit into one numbered bag.”
– “2) Seal the bag.”
– “3) Write bag number + unit on the bag label.”
– “4) Complete one line in the drop log.”
– “5) Deposit sealed bag into locked container. Do not leave items outside.”
Prevent overflow
– Use a visible “FULL” indicator (slider or flip sign) and train staff to set it when capacity is reached.
– Keep one overflow tote inside the locked container only (not outside).
– Define the rule: if overflow tote is full, stop accepting after-hours drops until next shift clears it.
The Carrier-Facing Drop Log: Minimum Fields That Preserve Chain of Custody
A drop log is the backbone for unattended deliveries chain of custody when there is no real-time receiving scan.
Drop log format options (no tech required)
– Bound logbook (hardest to remove pages, simplest to audit).
– Clipboard stored in a lockable sleeve mounted at the drop point.
– Weatherproof kiosk with paper forms if outdoors.
Required fields (the “must-have 8”)
1) Date
2) Time
3) Carrier (UPS/FedEx/USPS/Amazon/Other)
4) Tracking number (last 6–8 digits minimum)
5) Unit/recipient
6) Bag/tote number (unique seal ID)
7) Package count inside the bag
8) Driver initials
Optional fields that resolve disputes faster
– Signature-required? (Yes/No)
– Oversized exception? (Yes/No)
– Notes (e.g., “label smudged,” “multiple small parcels”)
– Exception reason code (simple checkboxes):
– “Doesn’t fit”
– “Container full”
– “No access”
– “Recipient unclear”
Make it easy for drivers: examples
– Good entry:
– “Sat 8/17 | 7:42 pm | FedEx | 48219371 | Unit 214 Kim | Bag 009184 | 2 pkgs | JH”
– Unusable entry:
– “Saturday | FedEx | 214 | bag | delivered” (missing time, tracking digits, bag number, count, initials)
Controls to reduce fraud/mistakes
– Pre-numbered lines (so missing lines are obvious).
– One entry per bag (avoid mixed-unit bags).
– Post instruction: never leave items outside the locked container—if it can’t be secured, it is not delivered.
The Sealed Bag Workflow: Step-by-Step After Hours Package Delivery Procedure
This is the operational heart of the system: a repeatable sequence that creates tamper evidence and a clean handoff.
Carrier steps (posted at the drop point)
1) Verify the unit/recipient on each label.
2) Place all packages for one unit into one numbered security bag/tote.
3) Seal the bag/tote using the tamper-evident seal.
4) Write the bag number and unit on the bag label (large and readable).
5) Complete one line in the drop log (use last 6–8 of tracking numbers; note package count).
6) Deposit the sealed bag into the locked container and close/lock it.
Property steps (next shift)
1) Retrieve sealed bags from the locked container.
2) Verify seals appear intact before opening anything.
3) Reconcile each sealed bag to one log entry.
4) Once reconciled, open bags and sort for normal intake.
Handling odd shapes and oversized (“tag and cage”)
– If an item can’t be bagged but can be secured:
– Attach an oversized tag that references a bag number (or an “OS” seal number).
– Place it in the locked cage/closet.
– Log it as “Oversized” with the tag/seal ID and tracking last 6–8.
When a package can’t be bagged (controlled exceptions)
– If it doesn’t fit and can’t be secured inside the locked container: treat as not accepted after hours.
– If a carrier insists on leaving it: do not create alternate staging locations. Document “Refused: not eligible after-hours” in your internal notes and notify management.
Example scenario (student housing weekend surge)
– A driver has 12 small parcels for 6 residents.
– The driver creates 6 sealed bags (one per unit), each with 1–3 parcels.
– The log has 6 lines, each tied to a unique bag number.
– Monday morning, staff counts 6 bags, matches 6 lines, checks seals, then opens and sorts with far fewer “where did my package go?” disputes because every bag has a single owner and a paper trail.
Next-Shift Reconciliation Routine: Your Weekend Mailroom Coverage SOP
A weekend mailroom coverage SOP must start with reconciliation, not sorting. You’re verifying the handoff first.
Start-of-shift checklist (10–15 minutes)
– Confirm the drop point is intact (locks, hinges, camera view, signage present).
– Pull all sealed bags/totes and count them.
– Compare count to number of log entries since last close.
– Inspect each seal for tampering.
– Initial and timestamp the “shift received” line at the bottom of the log page (or add a closeout note).
Reconciliation rules
– “Matched” means:
– One sealed bag equals one log line.
– Bag number matches.
– Unit/recipient is readable.
– Package count inside roughly matches the logged count (exact match is ideal; note differences).
– If tracking digits are missing or unreadable:
– Accept the bag only if unit + bag number are clear.
– Record “Tracking incomplete” in your internal intake notes for follow-up.
– Duplicate log entries:
– Treat as an exception until you confirm two separate bags exist.
Exception handling
– Broken seal:
– Photograph (if policy allows), isolate, notify manager, and document in an exception log.
– Bag missing but log line exists:
– Re-check container, check camera coverage timeframe, document immediately.
– Loose package found in container:
– Treat as exception; do not “just sort it.” Create an internal note: “Loose found, no bag number.”
– Container overfilled:
– Document and adjust capacity or tighten after-hours eligibility.
Documentation cadence
– Store logs in a designated binder by week/month.
– Set a retention period appropriate for disputes (many properties use several months; choose a fixed period and apply consistently).
– Weekly review by manager: look for recurring carriers who skip steps, repeated overflow, or frequent “recipient unclear” issues.
Handoff to normal intake
– Once staffed, you can apply your normal receiving method (for example, a QR receiving label) after reconciliation.
– Capture the bag number in your intake notes so you can trace a resident question back to a specific sealed-bag entry if needed.
Want a Copy-Paste SOP Version of This Workflow?
If you want to turn this into a one-page, staff-ready SOP (carrier sign text, drop log fields, and next-shift checklist), document it in TrackNest alongside your package-room rules so your team can run the same procedure every weekend and after hours.
A Controlled After-Hours Lane Beats Uncontrolled Lobby Deliveries
Weekend and after-hours delivery does not have to be a free-for-all. The goal is a consistent, auditable workflow: carriers use one obvious drop point, packages are contained in numbered tamper-evident bags or totes inside a locked holding area, the drop is recorded in a simple log, and the next staffed shift reconciles bags-to-log before opening and sorting.
When you treat the process as a secure package drop box workflow (not “leave it wherever”), you gain three things that matter in real life: a clearer chain of custody, faster exception resolution, and fewer arguments based on memory. Most importantly, you create a weekend mailroom coverage SOP your team can run the same way every time—regardless of which staff member opens the desk.
Resident expectations are the final piece. Clear communication about cutoff times, processing windows, and what cannot be accepted after hours prevents avoidable risk (perishables, signature-required items, high-value deliveries) and keeps residents from showing up at a locked desk expecting immediate access. With a predictable system and a consistent reconciliation routine, you can accept after-hours volume responsibly without pretending you have 24/7 staff.