
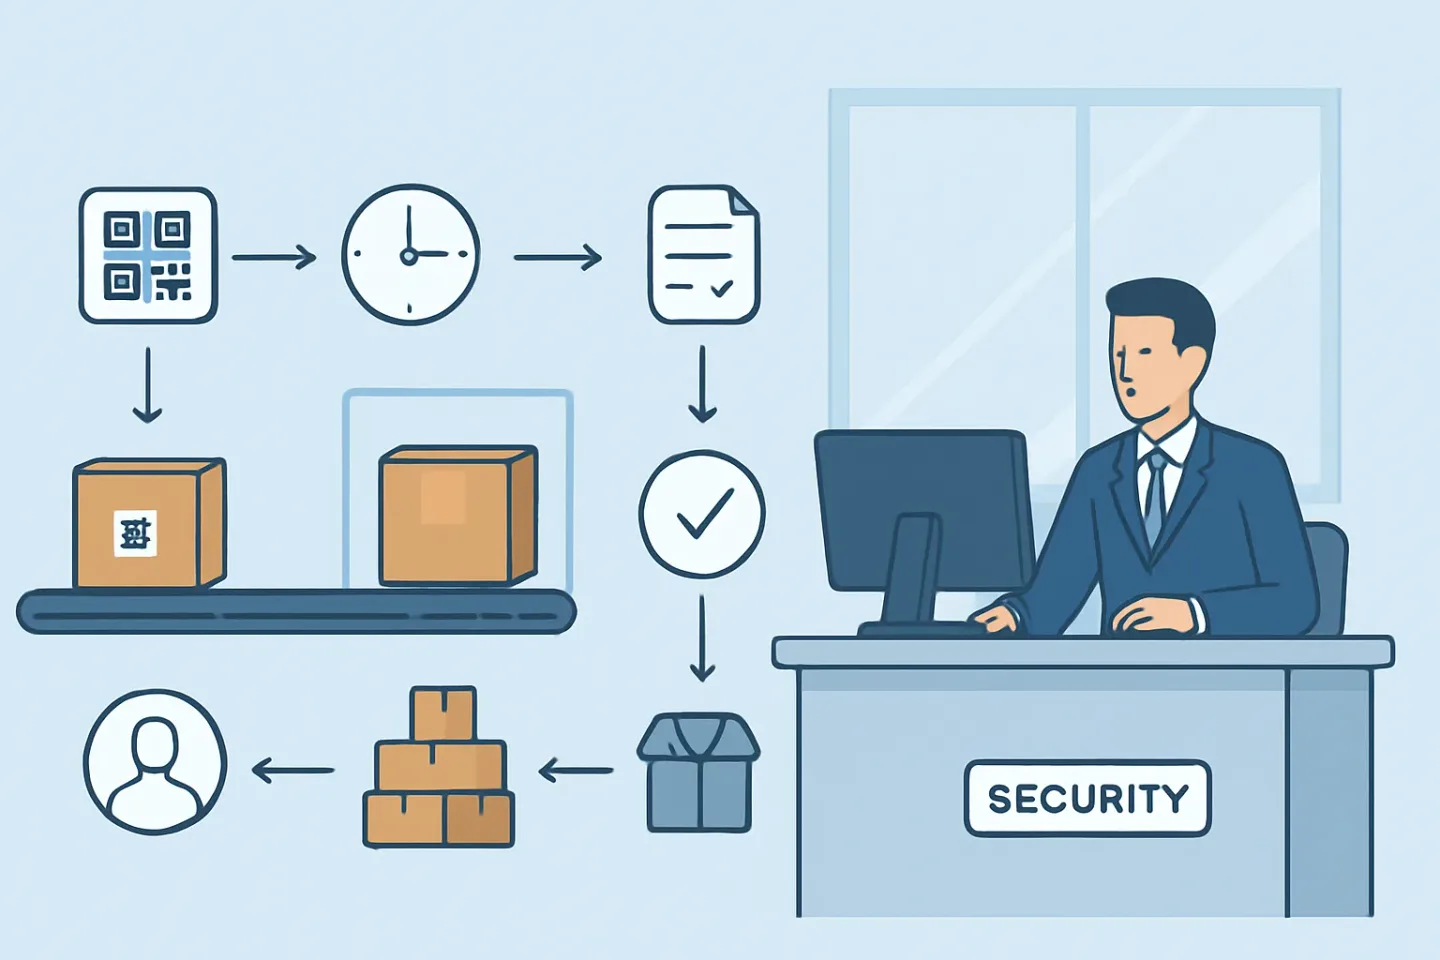
High-value deliveries at a security desk create a specific kind of risk: not just theft, but unprovable handoffs. When a tenant says “we never got it,” the question becomes: can you show a reliable package chain of custody security desk record—who accepted it, where it was stored, who accessed it, and who picked it up?
Many “mailroom” workflows focus on scanning and notifications. That’s useful, but in Class A mixed-tenant buildings—especially with shift changes, guard rotations, and variable courier quality—you need an evidentiary model: timestamps, user actions, optional ID/photo capture, exception handling, and clear boundaries with couriers and tenants.
The goal: evidentiary value without slowing down intake
A workable chain-of-custody model does two things at once:
- Reduces friction at the desk (scan, label, stash—fast).
- Increases defensibility after the fact (an audit trail that survives guard rotation).
Think of each package like an “asset” passing through controlled states. Your documentation should answer, at any time:
- What is it (carrier tracking, description, photos if needed)?
- Who handled it (guard/reception user identity)?
- When did each action occur (automatic timestamps)?
- Where was it stored (specific shelf/locker/room/desk bin)?
- Why did anything deviate (incident reason codes + notes)?
A practical chain-of-custody model for security posts
Below is a model you can run on a busy lobby desk. It’s designed to produce a front desk audit trail packages record with minimal extra steps.
State 1: Receive (acceptance at the threshold)
Required fields (fast):
- Carrier + tracking number (scan if possible)
- Tenant/company + recipient name (or “Unknown recipient” with tenant suite)
- Package type flag: Standard vs High-Value/Controlled
- Auto timestamp + staff user
Optional for high-value (adds evidentiary weight):
- Photo of label (not the contents)
- Photo of package condition (corners, seals) when damage claims are common
- Courier name or badge number when available (entered as note)
State 2: Label (your internal identity)
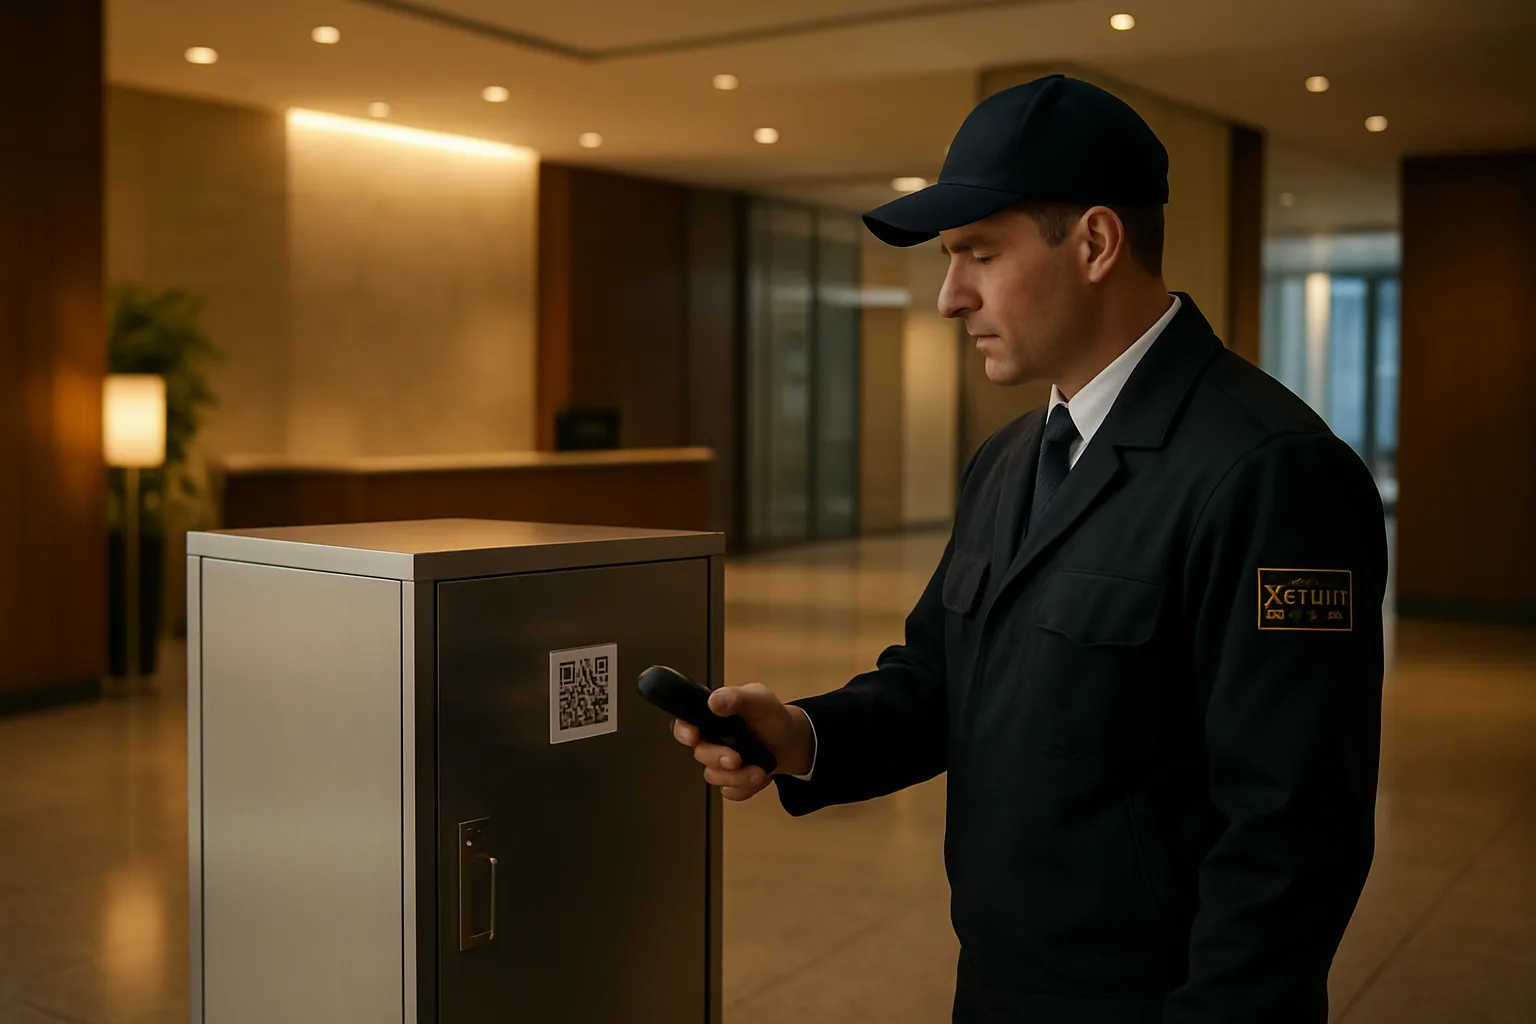
Carrier tracking numbers aren’t enough for a security desk. Labels fall off, multiple packages share tracking formats, and residents show up with partial info. Use an internal QR label that links to the custody record.
- Print/attach QR label immediately after intake.
- Place QR in a consistent location (top-right of label side) to speed scanning.
- If you can’t label (odd shape), attach a tag or place in a clear bag with QR on the bag.
State 3: Store (a location that can be audited)
“Behind the desk” is not a location. Define storage zones that map to real places:
- HV-1: high-value cabinet/locker
- REG-A: standard shelf A
- OVR: oversized corner zone
- REF: refrigerated (if applicable)
When the package is placed, scan the QR and select the zone. That single action creates a reliable package liability documentation record of “stored at X” with time and user.
State 4: Access (touch points without release)
Access events matter during guard rotations. If a package is moved (e.g., from temporary counter to HV cabinet), log it as Move rather than silently relocating. If a supervisor reviews items after hours, log Audit access. These micro-events reduce “it disappeared on second shift” ambiguity.
State 5: Release (proof of pickup)
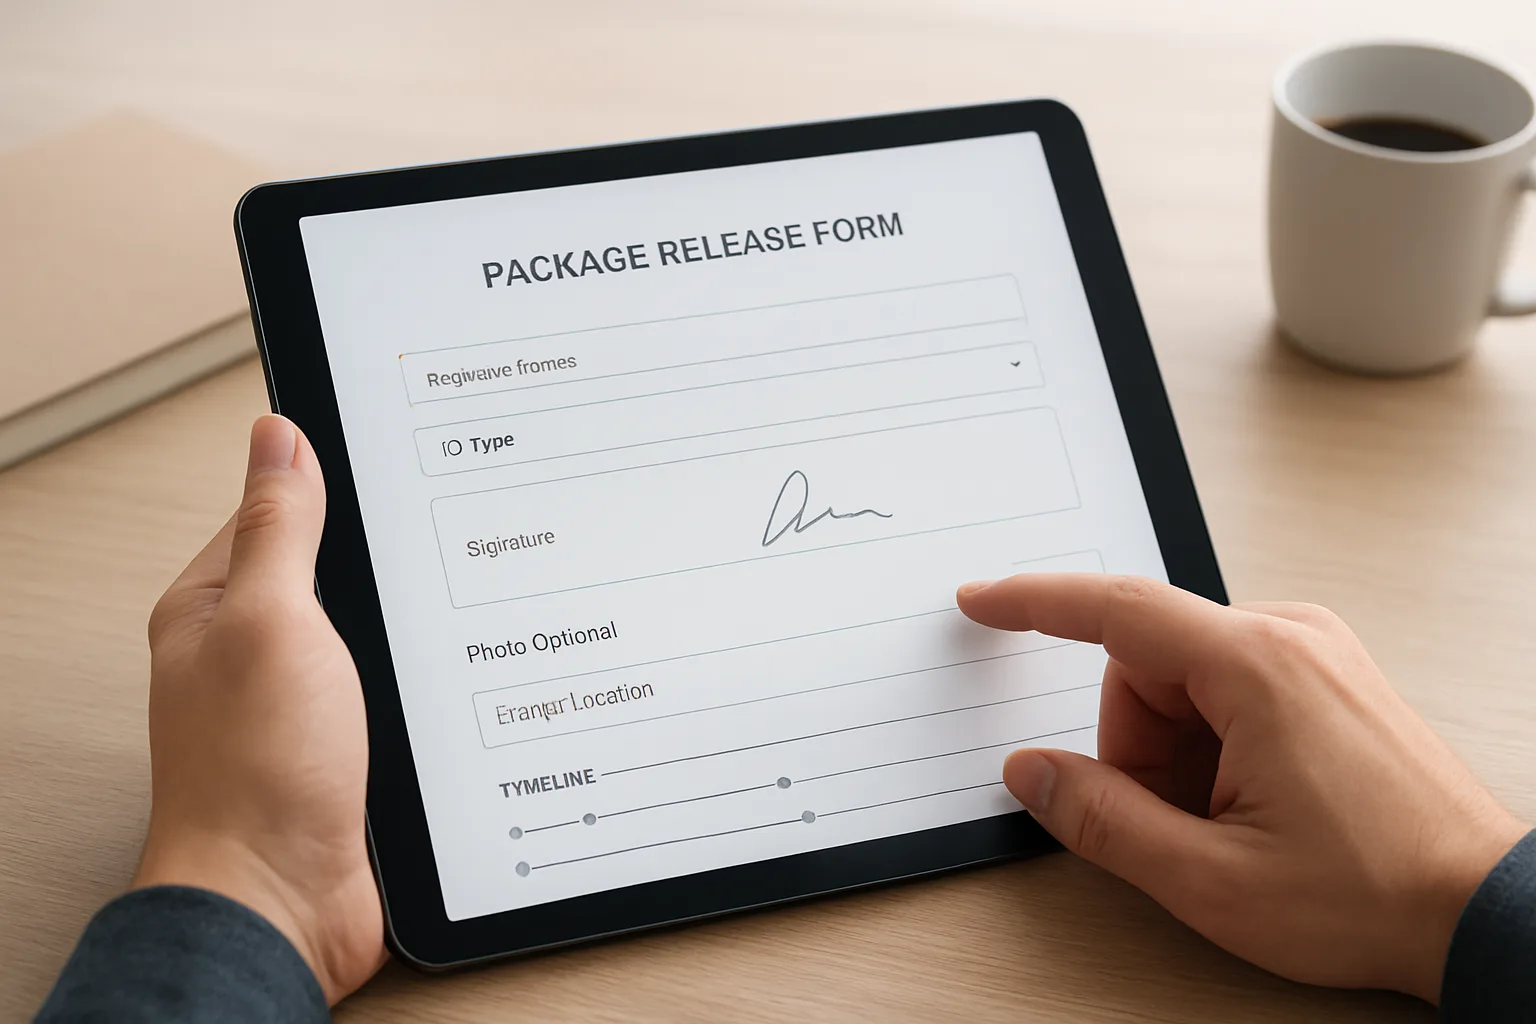
Your proof of pickup process should scale with risk. For standard items, a quick confirmation may suffice. For high-value, adopt a consistent release package:
- Verify identity: company badge or government ID (policy-driven). Record ID type only—avoid storing ID numbers unless your policy explicitly allows it.
- Verify entitlement: recipient name matches notification OR pickup is by approved delegate (assistant/facilities runner) recorded in notes.
- Capture acknowledgement: digital signature, name + relationship, and optional photo of recipient holding the package (only if policy allows).
- Close out: release timestamp + releasing staff user.
Operational insight: If you can’t prove a handoff, you don’t have custody control—you have a “lost-and-found” desk with better branding.
Shift changes and guard rotations: where chain-of-custody usually fails
Most disputes start with a shift transition. Solve that with two lightweight rituals:
1) A “custody reconciliation” at post change
At shift handover, the incoming guard scans a short list:
- All items in HV-1 (high-value cabinet/locker)
- Any items marked Exception or Hold
- Oversized items in public-adjacent zones
This creates a time-stamped checkpoint: “Incoming shift verified these items were present.” If something is missing, you catch it immediately—before the story gets complicated.
2) A standard incident note template
When something looks off, free-form notes become inconsistent. Use structured options (dropdowns) plus a short narrative:
- Reason code: damaged, opened, wrong tenant, refused by tenant, courier refused policy, after-hours delivery, suspicious person, other
- Action taken: stored HV, returned to courier, contacted tenant, escalated to supervisor, camera review requested
- People involved: courier name if known, recipient/delegate name
That’s how a secure package handoff workflow connects to incident prevention, not just package convenience.
Escalation steps: what to do when the package is high-risk or the situation is messy
Chain-of-custody isn’t only about normal pickups. It’s about documenting decisions under pressure. Use a tiered escalation model so guards know when to slow down and when to call for help.
Tier 0: Normal intake
- Scan tracking/QR, label, store, notify tenant.
Tier 1: High-value flag
- Mandatory storage in HV cabinet/locker zone
- Mandatory proof-of-pickup (ID type + signature)
- Optional photos at receive/release per policy
Tier 2: Exception / suspicious / dispute risk
- Mark record as Hold and restrict release to supervisor-approved staff
- Capture package condition photo and add incident note
- Notify tenant contact + facilities manager (when appropriate)
- Request camera review window (time and zone noted)
Boundaries that prevent your lobby from becoming a warehouse
Chain-of-custody works best when the desk controls volume. Clear boundaries with couriers and tenants reduce backlog and the number of “special cases” guards must memorize.
Set expectations with couriers (scriptable rules)
- No drop without a recipient field: if the label lacks tenant/suite, record as “Unknown recipient” and apply a shorter hold window.
- No loose high-value: high-value items must be sealed and labeled; otherwise mark Exception and escalate.
- After-hours protocol: define whether after-hours deliveries are refused, held, or routed to an approved receiving room.
Set expectations with tenants (so pickup is predictable)
- Pickup window: define how long items are held before being returned or moved to secondary storage.
- Authorized delegates: require a named delegate list for high-value pickups (assistants, runners, facilities staff).
- Notification isn’t custody transfer: make it explicit that custody transfers only upon documented release.
Implement “storage zoning” so items don’t sprawl
- Limit high-value to a locked zone only.
- Cap the desk footprint (e.g., one rolling bin) and overflow to a defined back room.
- Use QR labels so any guard can find the item by location, not memory.
FAQ: chain-of-custody at security desks
What should be mandatory for a package chain of custody security desk record?
At minimum: carrier/tracking (or internal QR), recipient/tenant, intake timestamp, intake staff user, storage location, and release timestamp + releasing staff user. For high-value items, add identity verification (ID type) and an acknowledgement (signature or equivalent).
Do we need to photograph every delivery?
No. Photos are most useful for exceptions: damaged boxes, questionable seals, missing recipient info, or disputes. For high-value categories, a label photo at intake can help prove exactly what was received without adding much time.
How do we handle pickups by assistants or runners?
Use an authorized delegate approach. Log the relationship (“Executive assistant for…”, “Facilities runner for…”) and apply the same proof-of-pickup steps. The record should show who physically collected the item, not only who it was addressed to.
What’s the simplest way to manage shift changes?
Require a quick scan-based reconciliation of the high-value storage zone at handover. It creates a checkpoint that ties custody to a specific shift, strengthening your front desk audit trail packages documentation.
How do we document a refusal (tenant won’t accept / courier won’t comply)?
Create an Exception event with a reason code, notes, and action taken (returned to courier, held for supervisor, tenant contacted). If possible, capture a label photo and the time window for any camera review request.
What if we can’t store ID numbers due to privacy policy?
You can still create defensible proof of pickup: record ID type (badge/government), the name provided, the signature, and the releasing staff user + timestamp. Keep it aligned with your building’s privacy and retention requirements.

CTA: Make chain-of-custody easy to execute
If your desk is relying on memory, sticky notes, or “someone saw it,” you don’t have a chain of custody—you have risk. TrackNest is built for security and front desks: QR labels, fast logging, shift-friendly accountability, and a clean audit trail that supports incident reporting without slowing intake.
CTA: Standardize your high-value handoff workflow—ask about setting up TrackNest with custody states, high-value flags, and proof-of-pickup steps for your lobby.
Conclusion
A strong chain-of-custody doesn’t require turning your lobby into a warehouse. It requires a small number of consistent events—received, labeled, stored, moved, released—captured with timestamps and accountable users. Add escalation steps for exceptions, and set boundaries with couriers and tenants so the desk stays fast. The result is fewer disputes, clearer answers during investigations, and a secure package handoff workflow your team can actually follow across shifts.