
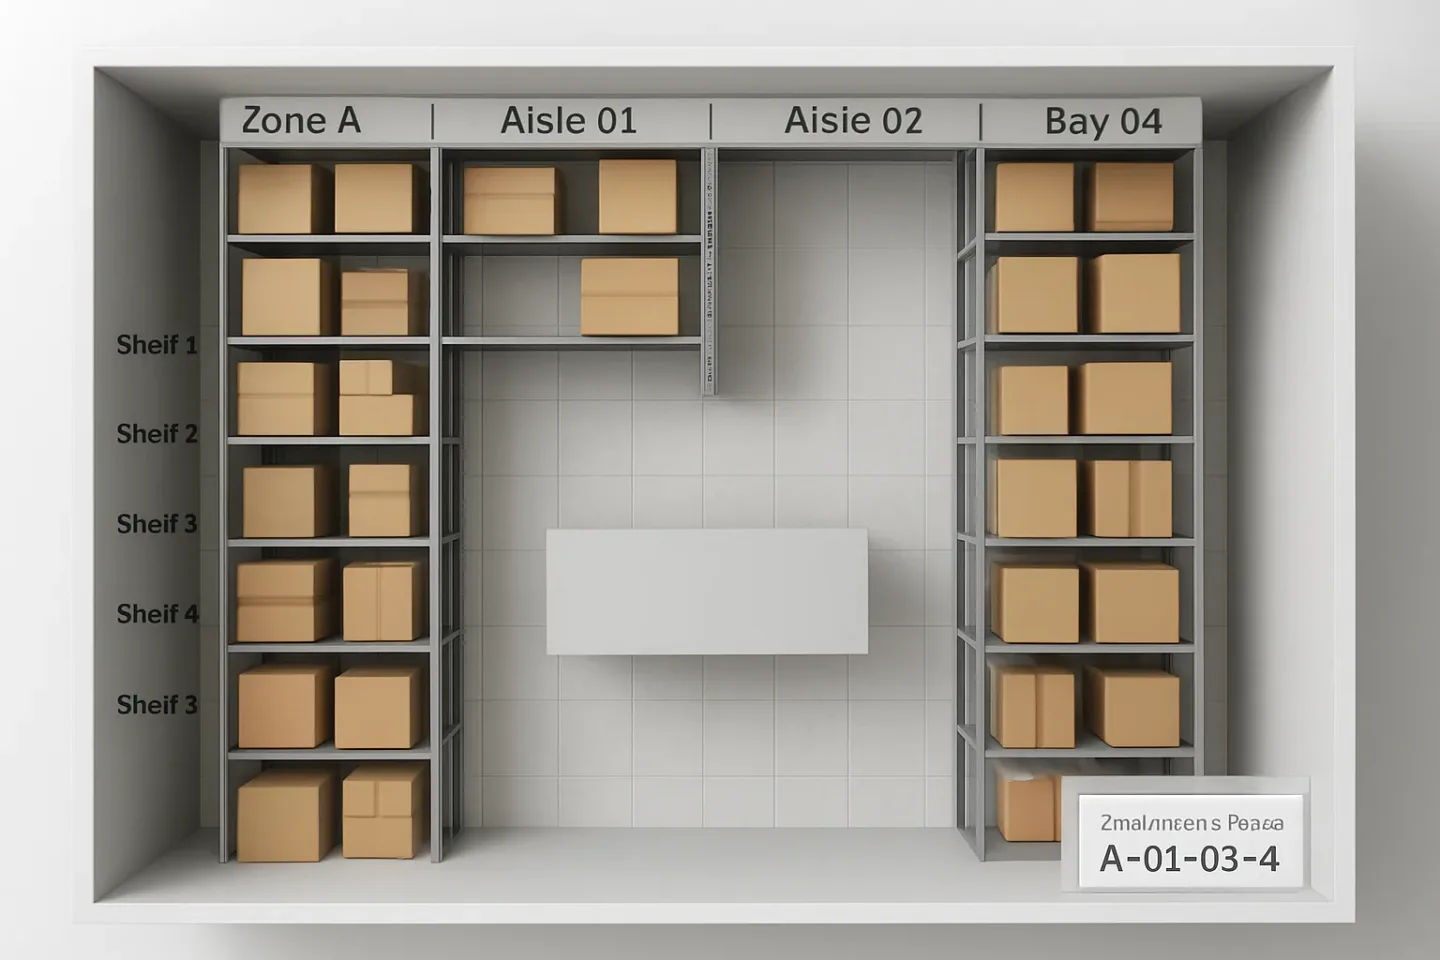
Most package-room advice gets stuck at a binary decision: lockers or a package room. If you’re running (or inheriting) a no locker package room workflow—or you have locker overflow—you already know the real challenge is different: making an open-shelf room searchable.
A searchable room means any trained person can walk in, find the right package quickly, and document the handoff without relying on institutional memory (“it’s usually on the third shelf to the left”). This article lays out a concrete open shelf package room organization system built around three pillars: a clear location taxonomy, QR shelf labels, and consistent scanning habits.
The goal: retrieval that survives volume, turnover, and messy drop-offs
In open shelving, disorder isn’t usually caused by “bad staff.” It’s caused by ambiguity. When the room doesn’t have a shared language for locations, everyone creates their own shortcuts—and the room becomes unsearchable.
Design your process so that every package gets two things on intake:
- A location code (where it physically lives)
- A logged event (who put it there and when, with proof of placement)
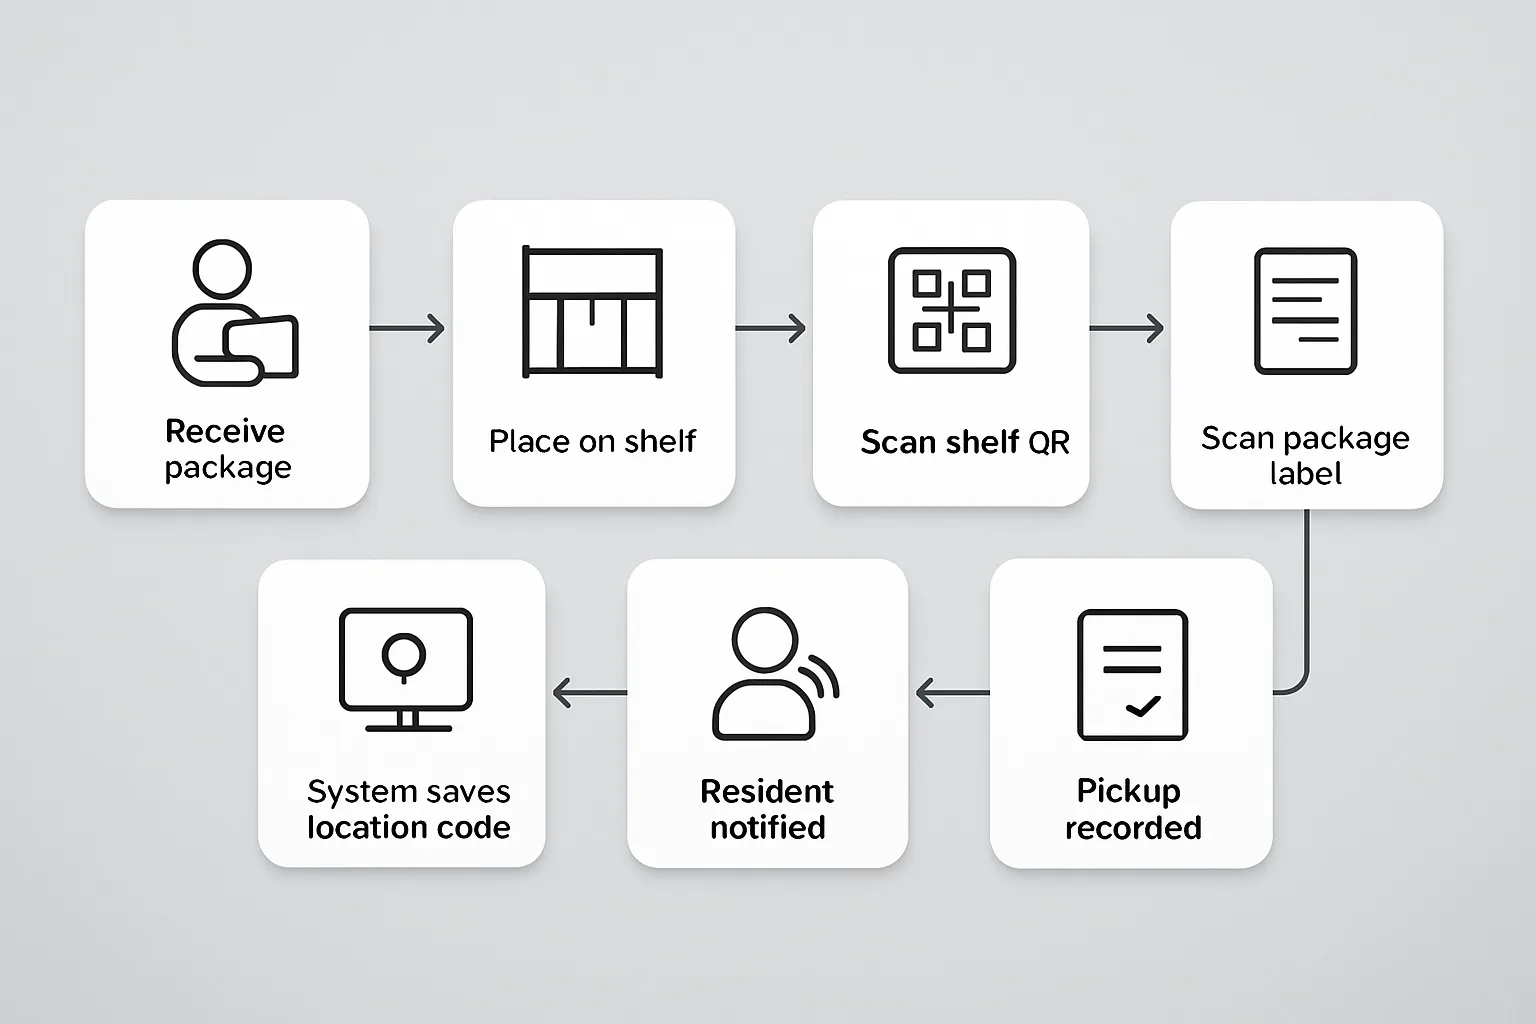
Once you have that, retrieval becomes a repeatable path: look up location → walk to shelf → scan → hand off → record pickup.
Step 1: Pick a location taxonomy that’s readable at a glance
Your package room location codes should be (1) short enough to say out loud, (2) structured enough to be unambiguous, and (3) stable even if you add shelving later.
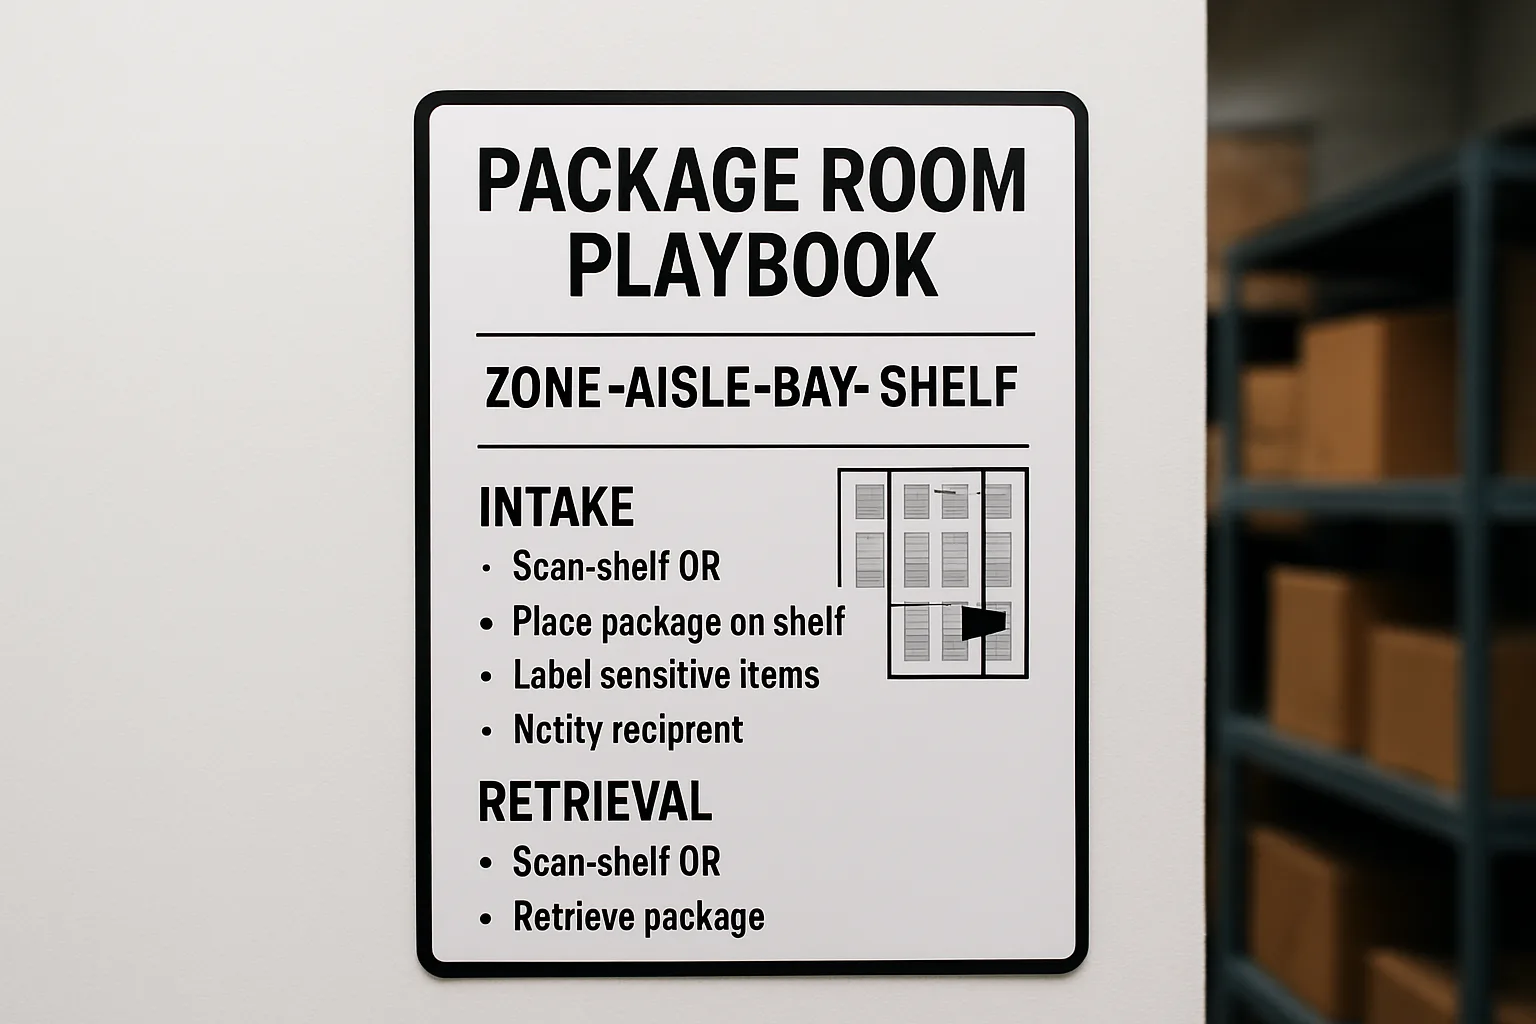
A proven format: Zone–Aisle–Bay–Shelf
Use a four-part code that maps cleanly to how people navigate a room:
- Zone: letter (A, B, C) for walls/sections
- Aisle: two digits (01, 02) for walkways or shelf runs
- Bay: two digits (01–10) for a single shelving unit or vertical frame
- Shelf: one digit (1–6) from bottom to top
Example: B-02-05-3 = Zone B, Aisle 02, Bay 05, Shelf 3.
Rules that keep it from breaking later
- Never renumber. If you add a bay, append (Bay 11) instead of re-labeling the whole wall.
- Reserve space. Leave gaps (01, 03, 05…) so you can insert units later without relabeling.
- One direction always. Number bays left-to-right when facing the shelves. Put a small arrow label at each zone start.
- Use the same shelf numbering everywhere. Bottom shelf is always “1.”
Operational insight: The best location code is the one a new team member can use correctly after a five-minute walkthrough and one practice retrieval.
Step 2: Build a package shelf labeling strategy that matches human behavior
Labels fail when they’re hard to see, easy to misread, or physically far from where hands actually place packages. A practical package shelf labeling strategy includes both navigation labels (help you get to the right area) and precision labels (confirm the exact shelf).
What to label (and how big)
- Zone markers: large letter signs at eye level (A, B, C). Think “visible from the door.”
- Aisle headers: “A-01” at the start of each run.
- Bay labels: on the vertical frame, centered, readable at arm’s length.
- Shelf labels: on the front lip, not inside the shelf where boxes cover it.
Keep the room readable under load
When volumes spike, packages will cover shelf lips and corners. Counter that with:
- Duplicate shelf IDs at both left and right ends of each shelf run
- High-contrast printing (dark text on light background)
- Consistent typography (same font, same sizing) so labels aren’t “decoded” each time
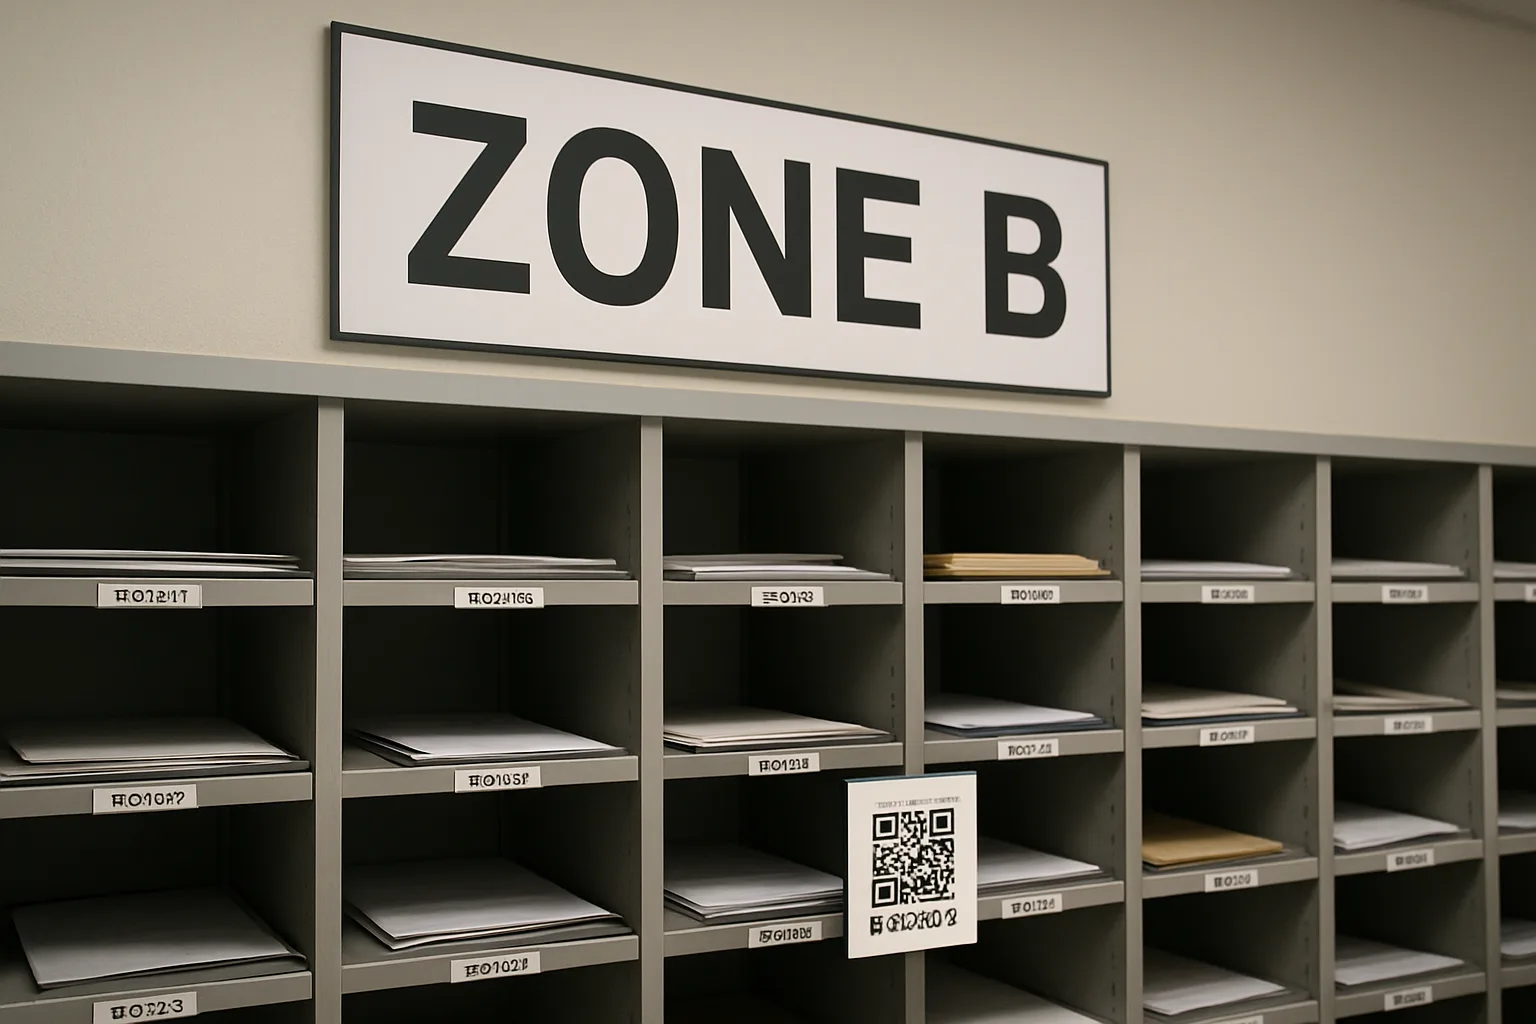
Step 3: Use QR labels as “proof of placement,” not decoration
QR labels become valuable when they’re part of the workflow: scan to confirm you’re at the right spot and to record accountability. For TrackNest-style operations, that means pairing shelf QR codes with intake and retrieval steps.
Where QR goes in the process
- Intake: Staff scans the shelf QR (or selects the location) after placing the package.
- Verification: The system records the location code and the staff member/time.
- Retrieval: Staff scans the shelf QR again when pulling the package to confirm they’re removing the correct item from the correct spot.
- Handoff: Record pickup at the front desk or package room threshold (depending on your building’s policy).
QR label design rules
- Human-readable first: print the location code in large text above/below the QR (QRs get damaged).
- One QR per exact location (per shelf position), not one per bay—unless your process only tracks bay-level.
- Laminate or cover high-touch labels; place them where boxes won’t scrape them off.
- Test scan distance (phone cameras vary). Adjust size so a scan works without awkward angles.
Step 4: Engineer a fast package retrieval process (even with new staff)
Retrieval speed is mostly decided before the resident arrives. The trick is to reduce decisions at the door: staff shouldn’t need to “search,” they should need to “go to location.”
Operational playbook: desk-to-shelf in under a minute
- Confirm identity (unit + name; match policy requirements).
- Pull up the package record and read the location code out loud (e.g., “B-02-05-3”).
- Walk directly to the zone using large signs; bays should count up predictably.
- Scan shelf QR to confirm you’re at the right location (especially useful during training).
- Retrieve and verify by matching recipient name or tracking detail per your process.
- Complete handoff and record pickup at the front desk or exit point.
Make exceptions predictable (so they don’t blow up the room)
- Oversize zone: designate one zone (e.g., “OZ-01”) for bulky items with its own QR labels.
- Cold storage: separate labeled fridge/freezer locations (e.g., “C-01-01”).
- Unknown recipient: a small “Research” shelf with a strict time limit and daily sweep.
- Damaged or leaking: a quarantined bin with signage and a documented escalation step.
Practical layout example: a mid-rise with one room and front desk handoff
Scenario: A 180-unit building with a front desk. Carriers drop packages into an open-shelf room behind the desk; staff completes intake and handles pickups.
- Zone A: Small parcels (totes + shelves), closest to the door for quick placement.
- Zone B: Standard shelving (most volume), numbered bays with 5 shelves each.
- Zone C: Overflow + pending research (small, controlled area).
- OZ: Oversize floor locations marked with taped rectangles and QR signs on the wall.
Staff workflow stays consistent: they always assign a code like A-01-02-2 or OZ-01-03 (oversize row/spot), so any desk attendant can retrieve without guessing.
FAQ
- How granular should location codes be: bay-level or shelf-level?
-
Start with shelf-level if you have enough labels and expect moderate-to-high volume. Bay-level can work for very small rooms, but retrieval slows as soon as multiple packages accumulate in the same bay and staff must “hunt” within it.
- Do we label by resident unit ranges (e.g., 100–199 on one wall)?
-
Avoid unit-range shelving unless your volume is low and static. It tends to fail during peaks (packages don’t fit the “right” range). A location-based taxonomy is more scalable, and your system can still search by resident—then direct staff to the exact location code.
- What’s the best way to handle locker overflow in an open-shelf room?
-
Run overflow as its own zone with dedicated codes (e.g.,
OF-01-xx) and apply the same QR and intake rules. The worst outcome is treating overflow as “temporary piles,” which quickly becomes unsearchable. - How do we keep the process consistent when staff rotates frequently?
-
Use (1) a single published map at the door, (2) a fixed code format printed on every label, and (3) mandatory QR scanning steps on intake/retrieval. Consistency comes from designing the workflow so the “right way” is also the easiest way.
- Where should the package room map and rules live?
-
Put a laminated map at the package room entrance and a smaller copy at the front desk. Include the code format, zone legend, and exception areas (oversize, cold storage, research). If you have a digital SOP, link it via a QR on the map for quick access.
CTA
Want this to run without relying on one “package-room expert”? TrackNest teams often standardize open-shelf operations by pairing location codes with QR shelf labels and a front-desk handoff workflow—so intake is accountable and retrieval is fast even when staffing changes.
Conclusion: Make it searchable, then make it habitual
An open-shelf room can perform at high volume—if it has a shared language (location codes), visible shelf labeling, and QR-supported habits that create proof of placement. Treat your package room like a small warehouse: map it, label it, and require the scan steps that keep it findable day after day.