
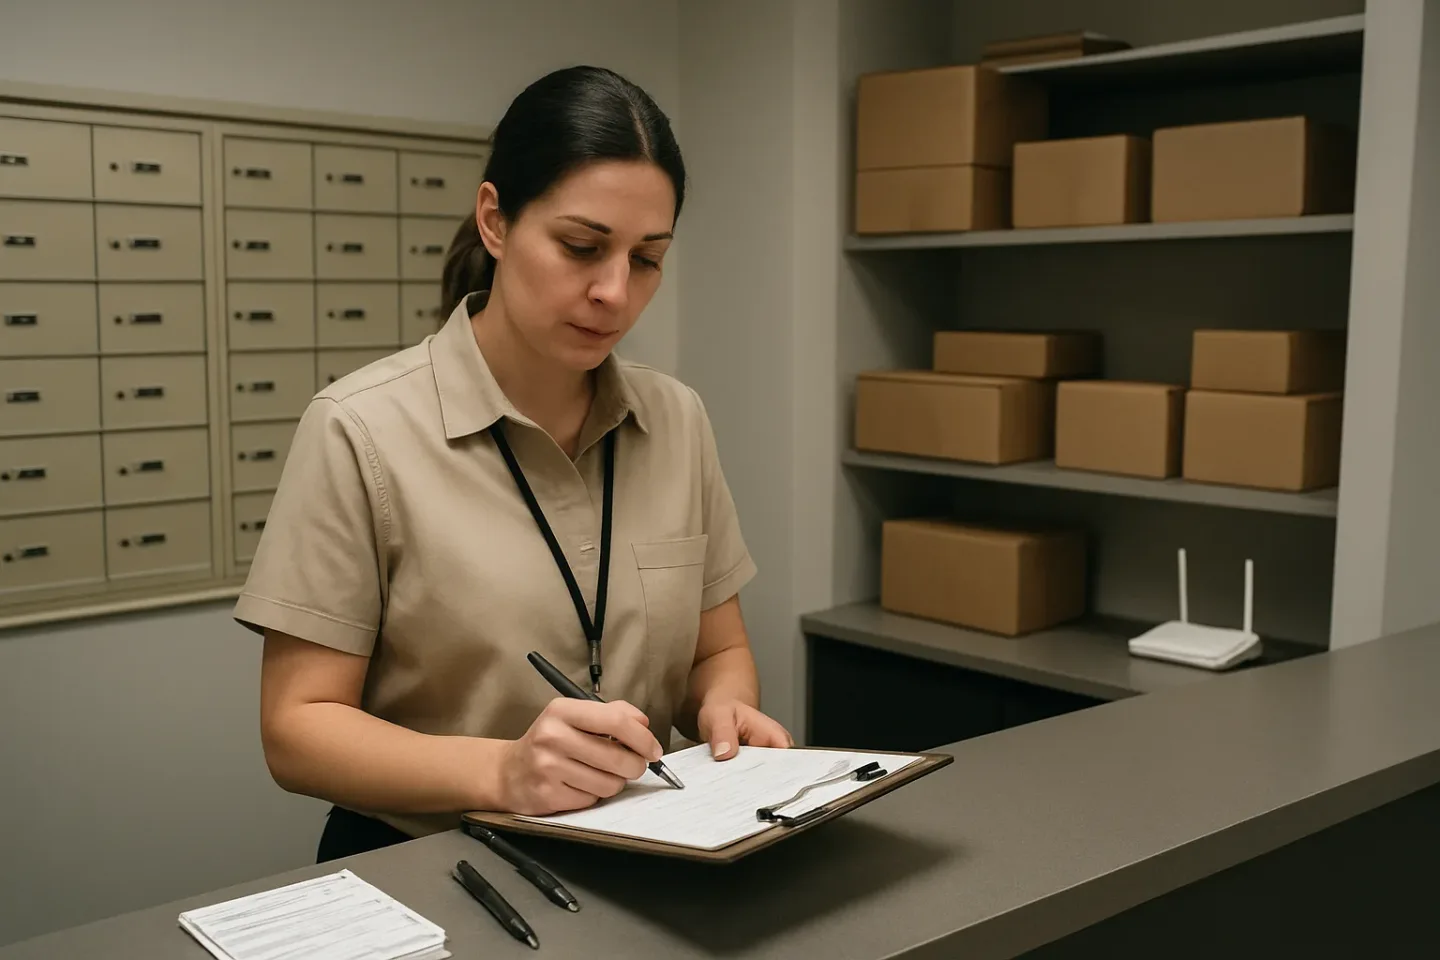
When the Internet Goes Down, Chain-of-Custody Cannot
Internet and system outages are not rare “black swan” events in a busy front desk or mailroom. They are a predictable operational risk: Wi-Fi drops, a vendor has an incident, power flickers, a device cannot authenticate, or a network change goes sideways. Packages still arrive. Residents and employees still show up expecting pickup. The only real choice is whether your team handles that gap with improvisation—or with a documented offline package logging procedure that preserves chain-of-custody and makes system catch-up clean.
The goal of downtime operations is not just “keep accepting deliveries.” The goal is to keep intake and pickup moving while maintaining defensible accountability: who accepted the item, where it was staged, who released it, and how identity/authorization was verified. If you cannot answer those questions later, you are vulnerable to disputes, misdelivery claims, and the dreaded “ghost pickup” (a package that appears handed off, but no one can prove to whom, when, or by whom).
This guide takes a reconciliation-first approach. Instead of treating paper as an emergency scribble pad, you treat it as a structured backup that mirrors your normal data model: time, carrier, recipient, location, and staff initials, with a consistent offline ID that follows the package from intake to pickup. That design choice is what makes restoration safe: you can reconcile without duplicate entries, missing statuses, or packages that fall between systems.
Below, you will find a downtime kit that can be deployed in minutes, a step-by-step paper fallback workflow for intake and pickup (including edge cases), a simple way to use QR backup sheets to speed post-restore entry, and a reconciliation checklist that closes the loop on every offline record—so nothing lingers as “unknown,” “already picked up,” or “maybe logged twice.”

Build a Reconciliation-First Mailroom Downtime Plan (Before Anything Breaks)
A mailroom downtime plan only works if it is ready before the outage: roles are clear, the switch to paper is fast, and every handwritten record is shaped to reconcile cleanly back into your normal package records. The goal is not just to keep moving during an incident, but to restore accurate statuses later without duplicate entries, missing pages, or ‘ghost pickups’.
Design your offline package logging procedure around reconciliation first: treat paper as a temporary “mirror” of your usual data model, not a free-form notebook. That means controlled fields, consistent codes, and form control so you can prove chain-of-custody end-to-end. The steps below set up a practical mailroom downtime plan that teams can execute under pressure.
Downtime triggers and decision authority (who calls it, when to switch)
Decide in advance what counts as downtime and who is authorized to declare it. The mistake to avoid is waiting too long while staff half-logs packages across multiple methods (some in software, some in memory, some on scraps of paper), which creates reconciliation gaps.
Recommended triggers (pick what fits your environment and document it):
– System unavailable: package system will not load, cannot save records, or scans fail for more than 5 minutes.
– Connectivity loss: Wi‑Fi/ISP outage affecting the package room/front desk.
– Partial outage: system loads but scanning devices cannot connect; printer or label station offline.
– Emergency operations: fire drill, building evacuation, or relocation to a temporary desk where normal tools are not accessible.
– Planned downtime: maintenance windows, network upgrades, or power work where you know the system may be unavailable.
Downtime kit contents: clipboards, pens, label rolls, stamp, lockable bin, incident log
A paper fallback workflow fails when the tools are scattered. Keep a sealed, labeled downtime kit in the package room and a smaller “mini kit” at the front desk. Replenish it like any other operational supply.
Minimum downtime kit (practical, not fancy):
– Clipboards: at least 2 (one for intake, one for pickup).
– Pens and permanent markers: multiple colors can help (e.g., black for standard, red for exceptions).
– Pre-printed forms: Intake Sheets, Pickup Sheets, Transfer/Custody Sheets, Reconciliation Checklist, and an Incident Log.
– Label rolls or blank stickers: to mark packages with an offline ID (even simple blank labels work).
– Date/time stamp (optional): useful when multiple staff rotate and handwriting varies.
– Lockable bin or pouch: for completed forms during downtime (prevents loss or tampering).
– Spare batteries/chargers for scanners (if your scanners can work in “offline” mode later) and a basic flashlight if the package room lighting could be affected by power events.
– A small divider envelope labeled “VOID/CORRECTIONS” to store mistakes without tearing pages out.
Field mapping: align paper fields to your normal records (time, carrier, recipient, location, staff initials)
Reconciliation is easiest when paper captures the same fields your system expects. Create your paper forms by copying your normal intake and pickup data model and simplifying only where needed. Do not let staff invent custom descriptions in the moment.
At minimum, ensure every paper entry has these required fields (keep the names consistent with your normal records):
– Date and time (24-hour time reduces ambiguity).
– Carrier (use a short code list: UPS, FD, DHL, AMZ, INT for internal, etc.).
– Recipient name (last name, first name) and unit/suite/department.
– Item count (pieces) and package type (box, envelope, tube) if your workflow uses it.
– Location code (where it is staged right now, not “somewhere in back”).
– Staff initials (the person who performed the action) and a second set of initials for exceptions if you use two-person verification.
– Offline tracking ID (a unique identifier you assign during downtime).
Form control: version/date, page numbering, and storage rules to prevent missing pages
Paper records only preserve chain-of-custody if you can show they are complete and untampered with. Form control sounds bureaucratic, but it is the difference between a clean reconciliation and an argument about missing pages.
Use these controls as standard practice:
– Form version and effective date: printed in the footer (e.g., “Package Intake Sheet v3 — Effective 2026-01-15”). When you update fields, replace old stock.
– Page numbering: “Page X of Y” on each clipboard packet for the day/incident, or pre-numbered forms. Avoid loose, unnumbered sheets.
– No page removal rule: if a mistake happens, draw a single line through the entry, mark “VOID,” initial it, and write a corrected entry on the next line.
– Single storage location: completed forms go immediately into the lockable bin/pouch, not in pockets, not under keyboards.
– Chain-of-custody for the paperwork: the shift lead (or designated role) is responsible for transferring the pouch at shift change with a quick count of pages.
– Separation by function: keep intake forms separate from pickup forms so reconciliation can follow the correct order later.
– End-of-incident sealing: once systems return, the paperwork set is closed out with a cover sheet stating the incident start/end time, number of pages, and the initials of the person who locked it for reconciliation.
Training drill: a 10-minute quarterly walk-through and what ‘good’ looks like
A downtime SOP should be muscle memory. Run a short quarterly drill that focuses on speed, completeness, and legibility. The objective is not to “simulate a perfect outage,” but to confirm that staff can switch methods without improvisation.
A simple 10-minute drill agenda:
1) Declare downtime: supervisor (or lead) announces the trigger and start time; staff pulls the kit.
2) Log a mock carrier drop: 3–6 packages with mixed recipients and one exception (e.g., unknown suite).
3) Apply offline IDs: label each package and write the same ID on the intake sheet.
4) Stage to coded locations: place each package where the form says it is.
5) Perform one pickup: verify identity, capture signature/authorization details per your rules, and record staff initials.
6) Close the drill: count packages staged vs entries logged; confirm every package has a label and every log line has required fields.
7) Quick debrief: note any missing supplies, confusing fields, or repeated handwriting issues and update the forms/kit accordingly.
Offline Package Logging Procedure for Intake: Step-by-Step Paper Fallback Workflow
This offline package logging procedure keeps intake moving during an outage while preserving chain-of-custody. The rule is simple: nothing gets staged, moved, or handed off until it is logged and labeled with an offline ID that will reconcile cleanly later.
Use one intake point if possible. If you must accept deliveries at multiple doors, treat each door as a separate location with its own offline ID sequence and clipboard to avoid collisions.
- Core principle: log first, label second, stage third; never stage an unlabeled item
- Use black ink, print clearly, and avoid free-form notes except in the incident log
- If you cannot verify a recipient, log it as unknown (do not guess) and isolate it in a controlled area
Intake flow: receive, inspect, log, label, stage, secure
1) Receive: Greet carrier, keep all pieces in view, and count packages before they leave. If the carrier provides a manifest, staple/clip it to today’s intake packet.
2) Inspect: Check for visible damage, leakage, tamper evidence, or temperature-sensitive markings. Photograph only if your site policy allows; otherwise describe the condition in the incident log and on the intake line item.
3) Log: Record each item on the Intake Sheet before applying any label. For multi-piece deliveries, log each piece separately unless your policy allows a single parent record with numbered pieces (e.g., 3 of 3). Choose one method and be consistent during the entire outage window (note the method in the incident log).
Intake flow (continued)
4) Label: Apply an offline label with the offline tracking ID (and QR if available) to the package on a clean, flat surface. For envelopes, place the label on the back to avoid covering recipient info.
5) Stage: Place the item in the correct location code (shelf/bin/locker/overflow). Write the location code on the intake line and, if your labels support it, on the label as well.
6) Secure: Lock package rooms, cages, or bins. Limit access to designated staff. If you must use an unsecured overflow spot, record who authorized it and add a time-based recheck in the incident log.
Minimum required fields and how to write them consistently (name format, unit/suite, carrier codes)
Keep fields aligned to your normal data model so restoration entry is fast and unambiguous. Minimum fields for each intake line item: date, time received, carrier, tracking number (if present), recipient name, unit/suite or department, delivery location code, item type/size (optional but useful), count (pieces), exception code (if any), and staff initials.
Write names as LAST, First (or COMPANY, Attention: Name). If the label shows only a first name, write it exactly as printed and add “NO LAST NAME” as an exception note rather than guessing.
Use controlled carrier codes (e.g., UPS, FDx, USPS, DHL, AMZ, COURIER, OTHER). If it is a local courier, write the company name once and then use COURIER plus the company abbreviation consistently (document it in the incident log).
Consistency rules that prevent reconciliation problems
Use a standard unit format (e.g., “Unit 1207” or “Ste 410”) and do not switch mid-outage. If the address includes building/tower, include it in a dedicated field or prefix (e.g., “Bldg A / Ste 410”).
If there is no tracking number, write “NO TRK” and rely on the offline ID as the primary key. If there are multiple tracking numbers on one box, copy the most prominent one and note “ALT TRK” in the incident log if needed.
Initials must be the staff member who physically handled intake. If a trainee is shadowing, the accountable staff member initials the line item; the trainee can add a second set of initials only if your policy allows.
Assigning an offline tracking ID: sequential numbering per day and per location
Offline IDs must be unique, readable, and easy to sort. Use a fixed pattern that includes date + location + sequence number. Example format: YYMMDD-LOC-### (e.g., 260827-FD-014).
Reset the sequence daily per location clipboard. If you have multiple intake points, each location maintains its own sequence (FD, PKG, DOCK). Do not merge sequences during the outage; reconciliation will map each offline ID to one final record later.
Write the offline ID in three places: on the Intake Sheet line item, on the package label, and (if available) on the carrier manifest next to the matching piece.
Using QR backup sheets: pre-printed ‘offline IDs’ with QR codes you can scan later
QR backup sheets reduce transcription errors and speed catch-up. Pre-print sheets of labels where each label contains: the human-readable offline ID, a QR code encoding the same offline ID, and a small blank for location code (optional).
During intake, peel the next label in sequence, apply it to the item, and write the same offline ID on the Intake Sheet line. Do not skip labels; if one is damaged, affix it to the incident log page and mark “VOID” with a reason.
After systems return, staff can scan the QR from the package (or from the voided label attached to the log) to pull up the offline ID and reconcile without retyping. The QR should represent only the offline ID, not sensitive recipient data.
Edge cases: damaged packages, refused deliveries, after-hours drop-offs, lockers/full rooms
Damaged/leaking: Do not stage with general inventory. Log it with an exception code (e.g., DAMAGED, LEAK, TAMPER) and move it to a designated isolation spot. Note condition, who witnessed, and any carrier interaction in the incident log. If the carrier will take it back, record “REFUSED AT DOOR” with time and initials.
Refused deliveries: If you refuse, still create an intake line item marked REFUSED, note reason, and record the carrier name/time. This protects against later “missing package” claims.
After-hours drop-offs: Use a lockable drop bin if available. The first staff member on duty logs items with time “FOUND” plus actual processing time, and records where they were found. If the bin is full or unsecured, record that risk in the incident log and notify building security per policy.
Edge cases (continued)
Lockers/full rooms/overflow: When primary staging is full, use pre-defined overflow location codes (e.g., OF1, OF2) and a physical barrier (cage/locked closet). Record the overflow authorization (who approved) in the incident log and schedule a same-day relocation once space frees up—relocation must be logged on a custody/transfer line or in a controlled “Move Log” if you use one.
Temperature-sensitive items: Identify them at receipt (perishables, medications, samples). Log with exception code TEMP and immediately stage in the approved temperature-controlled area. If no compliant storage exists, escalate per policy and record the decision path (who was contacted, when, outcome) in the incident log.
Unknown recipient: If the label is missing or unclear, log as UNKNOWN RECIPIENT and capture any visible identifiers (company, partial name, suite range, sender). Stage in a restricted “Unknown” bin. Do not distribute or notify guesses; wait for verification after restore.
Staging discipline: location codes, shelf maps, and ‘do not move without logging’ rule
Staging discipline is what preserves chain-of-custody when software is down. Every staged item must have (1) an offline ID label and (2) a recorded location code on the intake line item.
Use simple location codes tied to a posted shelf map. Example: PKG-R1-S3 (Package Room, Rack 1, Shelf 3) or FD-BIN2 (Front Desk, Bin 2). Keep the code short enough to write quickly but specific enough to find items without searching.
Adopt a strict rule: do not move without logging. If an item must be relocated (overflow, security request, space management), record a transfer entry with from-location, to-location, time, reason, and staff initials. If you do not have a separate Transfer Sheet, add a clearly labeled “MOVE” note on the intake line and mirror the move in the incident log.

Secure Pickup Verification Offline: Preventing ‘Ghost Pickups’ Without Software
During an outage, pickup is where chain-of-custody fails fastest: a package leaves the room, but the record does not catch up until later. The goal of this step in your offline package logging procedure is simple and defensible: every handoff is tied to a specific package ID, a specific person (or authorized proxy), a time, and a staff member who witnessed it.
Treat the pickup counter like a controlled handoff point. Nothing leaves the package room unless it is written down in the pickup log at the moment of release. If you cannot log it, you cannot hand it out. That single rule is what prevents "ghost pickups" when systems return and people claim they already collected items.
- Core rule: one release event equals one completed pickup record line (no later reconstruction).
- Use the same offline package ID format you used for intake labels (for example: date + location + sequential number).
- If there is a line, slow down rather than skip steps: custody accuracy matters more than speed during downtime.
- Keep completed pickup sheets in a single controlled place (clipboard behind the desk or a lockable drawer) so pages cannot walk away.
Pickup log essentials: recipient, ID check method, signature, time, staff initials, package ID
Your paper fallback workflow needs a pickup sheet that is easy to complete while the recipient is standing there. Each row should capture the minimum facts needed to prove a proper release and reconcile cleanly later.
At pickup, the staff member reads the offline package ID from the label, confirms the recipient name, verifies identity, and obtains a signature. Write legibly and consistently; if you have to interpret it later, you will lose time and introduce errors during reconciliation.
Recommended pickup log columns (keep them in this order so the process flows): package offline ID; recipient name (Last, First); unit/department; number of pieces released; ID check method; signer name (if different); signature; pickup time; staff initials; notes/exception code (optional). Strong defaults make the log defensible without being complicated.
Authorization rules: proxies, coworkers, assistants, and temporary badges
Offline is not the time to invent new authorization logic. Use the same authorization rules you use when systems are up, but make them explicit on paper so every staff member applies them consistently.
Set a clear hierarchy for who can receive a package when the named recipient is not present. For example: the named recipient; a pre-approved proxy; then a supervisor-approved exception. If you cannot verify authorization on paper, do not release the package—stage it and record the attempt in the incident log (not the pickup log).
Practical paper-based authorization checks you can use during a mailroom downtime plan: (1) a printed proxy list kept in the downtime kit (updated monthly and versioned), (2) a physical authorization letter kept on file at the front desk, or (3) a phone call to the recipient using a known directory number (not a number provided by the person at the counter). Record which method you used in the ID check/authorization field.
Two-person exceptions: high-value items, controlled access areas, or disputes
Some packages create higher risk during downtime: high-value items, regulated materials, access-controlled areas, or situations where the recipient disputes ownership or claims prior pickup. For these, add a simple two-person rule so the handoff is witnessed and harder to challenge later.
Define your triggers in advance and print them at the top of the pickup sheet (for example: anything marked signature-required by the carrier; anything labeled confidential; any item placed in a secure cage; any dispute). When triggered, two staff initials are required on the pickup line, or a second staff member signs a dedicated witness box.
If you are short-staffed, the second person can be a supervisor, security officer, or another front-desk employee. The key is that the witness is present for identity verification and the physical handoff, not just signing afterward.
Partial pickups and multi-piece orders: how to mark remaining pieces clearly
Multi-piece deliveries are where "ghost pickups" often appear later: someone picks up one box and assumes the rest are included, or staff releases part of a set and later cannot tell what is still in storage. Your offline procedure should make partial pickup unmistakable.
At intake, multi-piece deliveries should already have either (a) separate offline IDs per piece or (b) a single group ID with piece counts clearly labeled (for example: 3 of 3). At pickup, your paper record must mirror that structure.
Two safe patterns: (1) per-piece release: each offline ID gets its own pickup line and signature; (2) grouped release: one pickup line lists the group ID and the pieces released plus pieces remaining (for example: released 2, remaining 1). In both cases, update the physical staging: move remaining pieces to a clearly marked "partial" shelf location and write that location in the notes field so the next staff member can find it without guessing.
Unclaimed/returned items: documenting attempts, carrier returns, and custody transfers
Downtime does not stop aging packages. If items remain unclaimed, you still need a paper trail that shows where the package went and why. This prevents later confusion during reconciliation and protects the desk when a recipient asks what happened.
Use three distinct paper actions, each with its own record type: (1) contact attempt (log in the incident log or a dedicated attempt log, not as a pickup); (2) custody transfer (if moved to another room, security, or a manager—use a transfer/custody sheet with from/to, time, and initials); (3) carrier return (record the return date/time, carrier, and who handed it to the driver).
When a carrier takes an item back, do not rely on memory. Write the driver name if provided, and capture any return reference the carrier gives you (for example: a pickup confirmation number) in the notes field. Attach any carrier paperwork to the return record and keep it with the downtime forms so the final system entry later matches what happened physically.
QR Backup Sheets + Paper Form Templates That Match Your Data Model
A downtime paper fallback workflow works best when your forms mirror the same fields and choices your team uses every day. The goal is simple: every package gets one offline ID, every handoff is recorded once, and every paper line can be reconciled into a clean digital record later without guesswork.
Design your templates around your normal data model (time, carrier, recipient, location, staff initials) and use controlled, repeatable codes. Keep layouts scannable for humans first, and reconciliation-friendly second: clear headers, page numbers, and a place to note exceptions. Avoid free-form narratives unless they are truly needed for incidents.
- Design rule: one line equals one package ID (or one piece) unless your normal system supports parent-child pieces; if unsure, log each piece separately.
- Design rule: write the same way every time (LAST, First; Unit; building code; carrier code); inconsistency becomes reconciliation debt.
- Design rule: every form has a version/date and pre-printed page numbers (Page 1 of 25) so missing pages are obvious.
- Design rule: use checkboxes and short codes over long notes; reserve narrative for the incident log only.
Template set overview: Intake Sheet, Pickup Sheet, Transfer/Custody Sheet, Reconciliation Checklist, Incident Log
Keep the set small, standardized, and always stocked in the downtime kit. Each template should share the same core identifiers so staff can cross-reference quickly: offline ID, date/time, location code, and staff initials.
Below are practical layouts you can print as letter-size sheets; adapt column widths to your handwriting and your typical package volume.
Intake Sheet (Package Receipt Log) — suggested fields
Header fields: Site/Building, Mailroom location code, Date, Sheet #, Form version, Downtime start time (optional).
Columns (one line per package/piece):
1) Time received (24h preferred) 2) Carrier code 3) Tracking # (if visible) 4) Recipient name 5) Unit/Suite/Dept 6) Item count (if multi-piece, note “1 of 3” etc.) 7) Condition (OK/Damaged) 8) Storage location code (shelf/bin/locker) 9) Offline ID 10) Staff initials 11) Exception code 12) Notes (short).
Pickup Sheet (Package Release Log) — suggested fields
Header fields: Site/Building, Pickup desk/location code, Date, Sheet #, Form version.
Columns:
1) Time released 2) Offline ID 3) Recipient name (as on intake) 4) Unit/Suite/Dept 5) ID check method (badge/license/known) 6) Released to (self/proxy name) 7) Authorization type (self/proxy list/email note) 8) Signature (recipient/proxy) 9) Staff initials 10) Remaining pieces (if partial) 11) Exception code 12) Notes (short).
Transfer/Custody Sheet (Internal Moves, Returns, Secure Handling) — suggested fields
Use this only when custody changes without a pickup: moving overflow, shifting to a secure cage, returning to carrier, handing off to security, etc.
Columns:
1) Time 2) Offline ID 3) From location code 4) To location code / Custodian (name/role) 5) Reason code (overflow/secure/return/after-hours) 6) Seal/lock # (if used) 7) Staff initials (sender) 8) Staff initials (receiver) 9) Notes (short).
Reconciliation Checklist (post-restore) — suggested fields
This is a one-page checklist used after systems are back, but it should live in the downtime kit so it’s not forgotten.
Include: outage window (start/end), total intake lines, total pickup lines, total transfers, page count check, and a sign-off box for the shift lead after all offline IDs are mapped to a final status.
Incident Log (for anomalies only) — suggested fields
Do not bury operational detail in long notes on the intake/pickup sheets. Use the incident log for anything that could become a dispute.
Recommended entries: timestamp, who reported it, what happened, affected offline IDs, immediate action taken, witnesses (if any), and follow-up needed (e.g., “verify recipient spelling,” “carrier claim,” “security review”).
QR backup sheets: what the QR should represent (offline ID) and how to place it on a label
QR backup sheets are pre-printed stickers or peel-off labels that encode only the offline ID (not personal data). The QR is a fast, unambiguous key you can scan later during reconciliation to reduce typing errors.
What the QR represents: a unique offline ID that matches the offline ID written on every paper line. Keep the format readable in plain text too (the same ID printed under the QR).
How to place it: apply one QR label to the package near the carrier label (without covering barcodes), and apply the matching “twin” label (if using duplicates) to the intake sheet line, or write the ID manually if you only have single labels.
Practical offline ID format (human-friendly + reconciliation-friendly)
Use a consistent structure that prevents duplicates across sites and days. Example format:
SITE-YYYYMMDD-SEQ (e.g., “BLDG2-20260827-014”).
If you run multiple intake points, add a short location code: SITE-LOC-YYYYMMDD-SEQ (e.g., “BLDG2-FD-20260827-014”). Keep it short enough to write quickly and read back over the phone.
Example: completed intake line items for a 6-package carrier drop
Scenario: a carrier drops 6 packages at the front desk during an outage. You log each piece, label each package with a QR offline ID, and stage them in a known location.
Sample intake entries (one per package):
1) 09:12 | UPS | 1Z…123 | PATEL, Riya | 4A | 1 of 1 | OK | FD-S1 | BLDG2-FD-20260827-014 | JS | — | —
2) 09:12 | UPS | 1Z…124 | CHEN, Marco | 9C | 1 of 1 | OK | FD-S1 | BLDG2-FD-20260827-015 | JS | — | —
3) 09:13 | UPS | (blank) | WILSON, T. | 12B | 1 of 2 | OK | FD-S2 | BLDG2-FD-20260827-016 | JS | TRK | Tracking not visible
4) 09:13 | UPS | (blank) | WILSON, T. | 12B | 2 of 2 | OK | FD-S2 | BLDG2-FD-20260827-017 | JS | TRK | Tracking not visible
5) 09:14 | UPS | 1Z…125 | (illegible) | (blank) | 1 of 1 | OK | HOLD | BLDG2-FD-20260827-018 | JS | UNK | Needs recipient lookup
6) 09:14 | UPS | 1Z…126 | ACME CO / Receiving | Dock | 1 of 1 | DAMAGED | CAGE-1 | BLDG2-FD-20260827-019 | JS | DMG | Photo + incident log entry
Example: completed pickup record for an authorized proxy
Scenario: an assistant picks up on behalf of an executive. You cannot verify in software, so you document the authorization and ID check method on paper.
Sample pickup entry:
15:36 | BLDG2-FD-20260827-015 | CHEN, Marco | 9C | Badge | Released to: Rivera, Sam | Proxy: on file list (initials MR) | Signature: Sam Rivera | JS | — | PROX | Verified badge + proxy allowed by department policy
Preventing ambiguity: controlled vocab for locations, carriers, and exception codes
Ambiguity is where reconciliation fails: two staff may write “front desk,” “FD,” or “lobby shelf” for the same place. Use a printed legend on every form and train staff to use only approved codes.
Keep the code set small and posted at the intake/pickup point as well as printed in the downtime kit.
Suggested controlled vocab (example)
Location codes (examples): FD-S1 (front desk shelf 1), FD-S2, PKG-A3 (package room aisle A shelf 3), CAGE-1 (secured cage), HOLD (do-not-release hold bin), LOCK-07 (locker 7), RTN (return staging).
Carrier codes (examples): UPS, FDX, USPS, DHL, AMZ, COU (local courier), INT (internal).
Exception codes (examples): UNK (unknown recipient), TRK (tracking not visible), DMG (damaged), REF (refused), AFT (after-hours), OVF (overflow location), PROX (proxy pickup), PART (partial pickup), DISP (dispute), RTN (returned to carrier).
Storage and retention: where completed forms live during downtime and after restoration
During downtime, completed forms are part of your chain-of-custody record. Treat them like controlled documents: protected from loss, edits, or casual access.
Recommended handling:
– Active clipboard stays at the intake/pickup point, supervised.
– Completed pages move to a labeled downtime envelope or binder (by date and sheet #) and are stored in a lockable drawer or cabinet.
– If you use QR backup label sheets, store unused sheets in the same cabinet and record the starting/ending sequence range used that day (helps detect missing IDs).
– After restoration and reconciliation, archive the forms per your site retention policy; keep them organized by outage date so you can answer disputes quickly without rework.

System Restore Reconciliation Checklist: Clean Catch-Up Without Duplicate Entries
When connectivity returns, the goal is not speed. The goal is accuracy: every package logged during downtime should reconcile into one clean record with one final status, without creating duplicates or leaving “ghost pickups” that cannot be defended later.
This reconciliation checklist assumes you followed an offline package logging procedure with offline IDs, location codes, staff initials, and an incident log. If your outage was intermittent (some scans worked, some did not), the de-dup steps matter even more.
- Reconciliation rule of thumb: do not resume normal “move fast” operations until paper records and physical inventory match.
- Reconciliation-first sequencing: count what you have, validate what happened, then enter records in an order that preserves chain-of-custody (intakes before pickups).
- One offline ID = one outcome: in storage, picked up, returned/RTS, refused, or transferred—no exceptions.
Step 1: Freeze movement briefly and count physical inventory by location
Pause package movement for a short, defined window (often 10–20 minutes) so counts do not change mid-reconciliation. Announce the freeze to the front desk/mailroom and, if needed, post a sign: “System restoring—package processing paused for reconciliation.”
Do a quick physical inventory by location code (for example: FR-01 Front Desk Shelf 1, MR-A Mailroom Aisle A, LK-2 Locker Bank 2, OF-OV Overflow Closet). Count items and note any high-risk categories (high value, temperature-sensitive, signature-required).
Output you need before data entry: a per-location count and a short list of “oddities” (packages without labels, labels without packages, items staged in the wrong place).
Step 2: Triage the incident log (timeline, scope, missing pages, anomalies)
Use the incident log to define the outage window and operational scope: when the downtime started, whether it was total or intermittent, and when normal scanning resumed. This prevents you from reconciling the wrong time period or missing a partially restored interval.
Confirm document integrity before you type anything in: verify form versions, page numbers, and that you have every clipboard/sheet used during downtime. If pages are missing, treat that as an open exception immediately (do not assume “it’s fine”).
Flag anomalies for later handling, not for guesswork in the moment: illegible names, unknown recipients, mismatched piece counts, or pickups recorded without an offline ID. Mark each with a simple exception code in the margin and list them on a separate “Needs Resolution” line item list.
Step 3: Enter intakes first, then pickups: why the order matters
Enter intake records before pickup records. That sequence recreates the custody timeline: a package must exist in the system before it can be released. Doing pickups first is how “ghost pickups” happen (a pickup record for an item that was never entered, or entered under a different identifier).
Practical workflow:
1) Create all intake entries from the offline intake sheets, using the offline tracking ID (and any carrier tracking number) as the anchor fields. Include time received, carrier, recipient, location code, and staff initials exactly as written on paper (do not “clean up” spelling unless you are correcting an obvious error you can prove).
2) After all intakes are entered, enter pickup records from the offline pickup sheets, matching by offline ID first. If an offline ID is missing on a pickup sheet, stop and treat it as an exception (do not guess).
3) Finally, enter any transfers between locations (if you used a transfer/custody sheet during downtime) so the system reflects where items actually are now.
Step 4: De-dup rules: how to avoid double entries when some scans worked intermittently
Intermittent outages create the highest duplicate risk: a package might have been scanned successfully by one staff member, then later written on paper by another when the system failed again. Use consistent de-dup rules so the team makes the same decision every time.
Recommended de-dup rules (apply in this order):
1) Offline ID rule: if an item has an offline ID label, that offline ID must map to exactly one intake record. Search for that offline ID before creating anything new.
2) Carrier tracking rule: if a carrier tracking number is recorded on paper, search for it. If it already exists in the system during the outage window, link your reconciliation notes to the existing record instead of creating a second intake.
3) Time-location-staff rule: if no tracking number exists, compare (a) time received, (b) location code, and (c) staff initials. If you find a system record that matches those three, treat the paper line as confirmation, not a new package.
4) Photo/description rule (last resort): only if your team recorded a brief description (for example, “brown box, 12×10, vendor label”), use it to differentiate same-day duplicates. If you cannot reliably differentiate, stop and escalate as an exception instead of duplicating entries.
5) Never “merge by recipient” alone: recipients can have multiple packages on the same day. Recipient-only matching is a common source of lost items and false pickups.
Step 5: Close-out audit: every offline ID must map to exactly one final status (in storage, picked up, returned)
This is the chain-of-custody closure step. Build a simple reconciliation table (paper or spreadsheet) with columns: Offline ID, Recipient, Intake Entered (Y/N), Pickup Entered (Y/N), Current Location, Final Status, Notes/Exception Code, Initials.
Audit in two directions:
1) Paper-to-system: every offline intake line must exist digitally once, and every offline pickup line must close a matching intake.
2) Physical-to-system: every package physically present during the Step 1 count must show a “stored/available” status and correct location. If it is physically present but digitally marked picked up or returned, stop—this indicates a mismatch that can become a dispute later.
Step 6: Exception handling: unknown recipients, illegible names, disputed pickups
Exceptions should be resolved with documentation, not assumptions. Keep a short “Exception Resolution” queue so normal reconciliation does not stall, but nothing gets silently forced through.
Common exceptions and what to do:
Unknown recipient/unit: quarantine the item to a defined exception location (for example, EX-01) and create a single digital record that mirrors the paper fields, tagged/marked internally as “Unknown recipient.” Attempt resolution using directory/tenant roster, carrier label details, or building management. Document each attempt (date/time/initials) in the incident log.
Illegible names: do not guess. Use the carrier label (if still attached) to confirm spelling/unit. If you must contact the carrier or sender, record the outreach in the incident log.
Pickup recorded without offline ID: treat as high risk. Match using ID-check details (name, ID type, last four digits if your policy allows, signature time) plus package description. If you cannot confidently match to a single intake, escalate to supervisor/building management and document “unmatched pickup record” until resolved.
Disputed pickup: lock the paper pickup sheet and any related transfer sheet as evidence. Reconstruct the chain-of-custody: intake staff initials, staging location, any transfers, pickup verifier initials, ID check method, and signature. Do not edit the original paper record; add an addendum entry to the incident log with date/time and who reviewed it.
Post-incident review: what to adjust in the mailroom downtime plan and forms
Within 1–2 business days, run a short after-action review while the details are fresh. The outcome should be a small set of concrete changes, not a broad “be more careful” message.
Use these prompts:
Did the incident log clearly define the outage window and any intermittent periods?
Were any form pages missing or out of order (page numbering/version control issue)?
Which fields caused the most reconciliation friction (location codes, recipient format, carrier codes, offline IDs)?
Did any duplicate patterns repeat (same carrier drop logged twice, pickups without IDs, items moved without logging)?
Were exception locations (unknown recipient, damaged, high value) used consistently?
What single change would make the next reconciliation 30% faster (for example, bigger location code field, mandatory offline ID on pickup sheet, or a clearer rule for multi-piece deliveries)?
Update the downtime kit with revised forms (new version/date), shred outdated blanks to prevent mix-ups, and schedule a brief drill so the next outage starts clean and ends clean.
Frequently Asked Questions
How do we handle an outage where the internet is down but our local network, door access, or cameras still work (or vice versa)?
Treat outages as “capability failures,” not one single event. In your incident log, record which functions are available:
– Internet down, local network up: You may still be able to print labels locally or access a shared drive, but assume your package system is unavailable unless you can confirm it’s saving records.
– Internet up, package system down: Go fully to the paper fallback workflow; do not “temporarily” log in a spreadsheet unless that spreadsheet mirrors the same required fields and you can reconcile it cleanly.
– Power loss (partial): If you have emergency lighting but no workstations, move immediately to clipboards and pre-printed QR backup sheets. If you have battery backups for a label printer, designate a single station for offline ID labels.
Rule of thumb for an offline package logging procedure: if you cannot create a reliable, retrievable record at the moment of intake or pickup, you are in downtime mode. Log everything on paper until you have confirmed end-to-end recovery and data persistence.
What’s the simplest way to create offline tracking IDs that won’t collide across shifts or multiple package rooms?
Use an offline ID format that is human-readable, sortable, and unique by date and location.
A practical format:
– Location code + date + sequential number
Example: FR-2026-08-27-001 (Front Desk), MR-2026-08-27-014 (Mailroom)
Controls that prevent collisions:
– Each intake point has its own numbered pad/stack of QR backup sheets (separate sequences per location).
– The person who starts the day (or shift) writes the starting number on the intake sheet header.
– Never reuse a skipped number. If you mislabel, void it in the incident log (“FR-2026-08-27-009 VOID – label misprint”) and keep the label with the forms.
If you expect multiple buildings or multiple teams, add a building code: B2-FR-2026-08-27-001.
How do we prevent fraud or mistaken identity when we cannot confirm pickup status in software?
Make pickup defensible with consistent identity verification and a paper trail that links the person, the package, and the staff member.
Minimum safeguards:
– Require a government ID or company badge; record the method (“Gov ID verified” or “Company badge + photo match”). Don’t record ID numbers; just the method.
– Require the recipient name and unit/suite to be stated by the picker (not prompted by staff).
– Capture a signature and time, plus staff initials.
– For proxies: require written authorization on file or a one-time authorization note (email shown on phone can be acceptable if your policy allows). Record “Proxy – email authorization shown” and the sender name.
Escalation rule:
– If the package is high-value, controlled, or disputed, require a second staff witness and note both initials on the pickup line item.
If you can’t meet your verification standard in the moment, do not release the package; document the interaction in the incident log.
What should we do with deliveries that arrive when the office is closed and the driver wants to leave them anyway?
Decide in advance what you will accept without staff present, and document the exception path.
Recommended approach:
– Default: Do not accept after-hours drop-offs unless you have a secure, monitored receiving method (locked cage, controlled room, or designated locked bin) and a way to tie the drop to a record.
– If your building allows a secure drop: keep an after-hours clipboard in the secure area with a simplified intake line: date/time found, carrier, number of items, visible recipient info, staff initials of the person who discovered and moved it into storage, and an assigned offline ID.
– Photographing labels can help, but treat photos as support evidence, not the primary record. Note in the incident log: “Photo captured to building phone – stored in Ops folder.”
If a driver leaves packages outside policy, log it as an incident (time, carrier, where left, condition) and move items into secure storage as soon as discovered, assigning offline IDs then.
How do we reconcile if some scans or entries worked intermittently during the outage (the risky ‘half-online’ scenario)?
This is where a reconciliation-first design matters. Use conservative de-dup rules:
1) During downtime, assume the system did not record reliably. Continue paper logging even if you “think it went through.”
2) On restore, reconcile by offline ID and physical inventory:
– Count physical packages by location first.
– Enter all paper intakes before paper pickups.
3) De-dup check before creating a new record:
– Search by recipient name + delivery date + carrier + last 4–6 characters of tracking number (if available).
– If you find a matching digital record, do not create a second intake. Instead, annotate the paper line item: “Matched existing record – record ID/notes,” and ensure the package label still carries your offline ID for traceability.
4) If you cannot confirm a match, create a new record and flag it for review rather than guessing.
Your goal is: one physical package equals one final record and one final status—no duplicates and no “ghost pickups.”
How long should we keep paper downtime forms, and how do we store them to protect chain-of-custody?
Retention should follow your organization’s policy and any regulatory requirements, but operationally you want the paper trail available long enough to resolve disputes and reconcile audits.
Practical storage rules:
– During downtime: keep completed forms in a labeled, lockable folder/bin at the intake point; only the lead on duty (or manager) controls it.
– After restore: staple or bundle forms by date and incident number, and store in a secure cabinet. Mark the cover: outage window, locations covered, and who performed reconciliation.
– Never remove individual pages. If a page must be copied, note it in the incident log and keep the original.
Even after you enter everything digitally, the paper originals are your defensible record of custody steps taken while systems were unavailable.

CTA
Schedule a 10-minute downtime drill this week and confirm three things are ready: your downtime kit is stocked, your backup forms match your current intake and pickup fields, and your reconciliation checklist is printed and versioned. Then place one fresh set of forms where anyone on shift can grab them in under 30 seconds.
Run a Downtime Drill
Downtime Success Means a Clean, Provable Catch-Up
A strong offline package logging procedure is measured by what happens after the outage—not just during it. If your team can accept deliveries and release packages while systems are down, but cannot later prove custody, prevent duplicates, or reconcile ambiguous notes, you have only shifted the risk into the next shift (and the next dispute). The win is continuity plus clean restoration: every package logged once, every pickup verified, and every exception documented.
Keep the plan simple and disciplined: a stocked downtime kit; pre-printed forms that match your everyday fields; a paper fallback workflow that assigns an offline tracking ID and enforces “do not move without logging”; and a short, strict reconciliation checklist that starts with a physical count, enters intakes before pickups, and forces every offline ID to end in exactly one final status (in storage, picked up, returned, or transferred).
Finally, treat this like any other operational control. Run a brief drill, quarterly, for ten minutes: simulate a carrier drop, stage items, complete one proxy pickup, then practice the restore process on paper. Update your forms when your normal data model changes. Version the paperwork. Keep the incident log handy. When the next outage hits, your team should not need to invent a process under pressure—they should only need to execute it.