
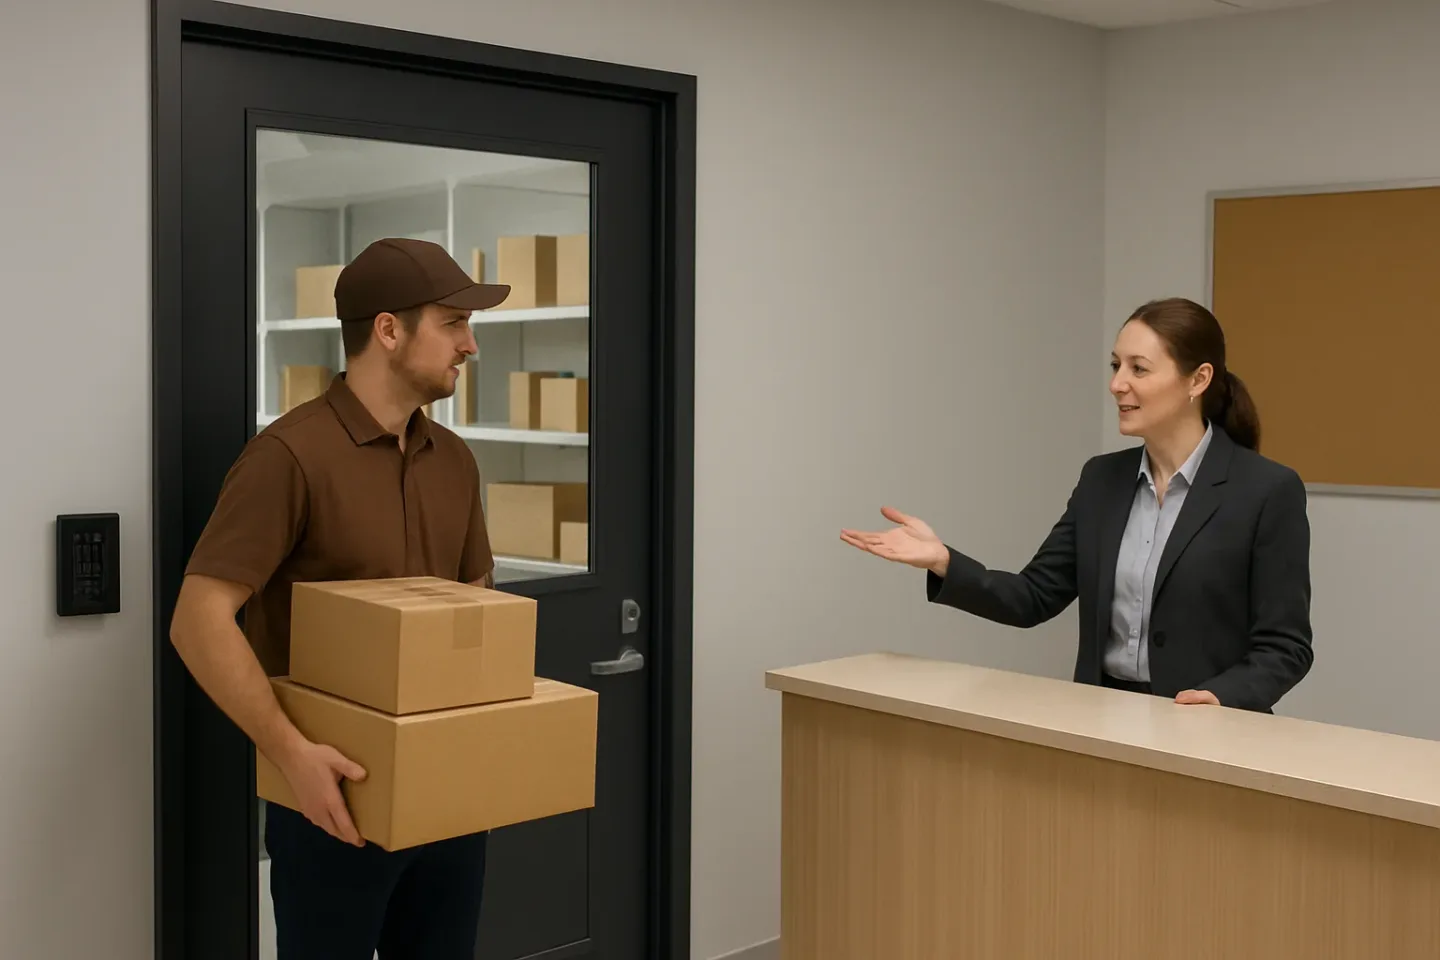
Carrier Handoff Standards for Apartment Package Rooms: The Building’s Delivery Contract Without Legalese
Every package room has an unspoken “delivery contract” between the building and carriers. When it’s vague, your staff inherits the fallout: boxes with no unit number, deliveries scanned to the wrong location, piles left in the lobby, and residents disputing what happened because there’s no clean chain of custody.
The fix is not more arguing at the door or more manual logging after the fact. It’s to treat carrier handoff like an operational interface: define minimum acceptance criteria, specify what counts as proof of delivery, and standardize what staff does when a driver can’t (or won’t) meet the requirements. When the interface is clear, intake gets faster, traceability improves, and problems get handled at the point of handoff instead of becoming resident-service tickets later.
This guide gives you a ready-to-implement framework for carrier handoff standards for apartment package rooms: a 60-second intake test, a carrier scan requirement you can enforce without picking fights, a no scan/no accept escalation ladder, and a refused delivery policy that’s consistent across shifts. You’ll also get printable delivery signage package room text and a carrier-facing script that keeps interactions calm while protecting accountability.
The goal is simple: stop accepting “mystery packages” and stop absorbing delivery exceptions that belong upstream. With a defined mailroom SOP at the door, your team can say “yes” quickly when standards are met—and say “not yet” the same way every time when they’re not.
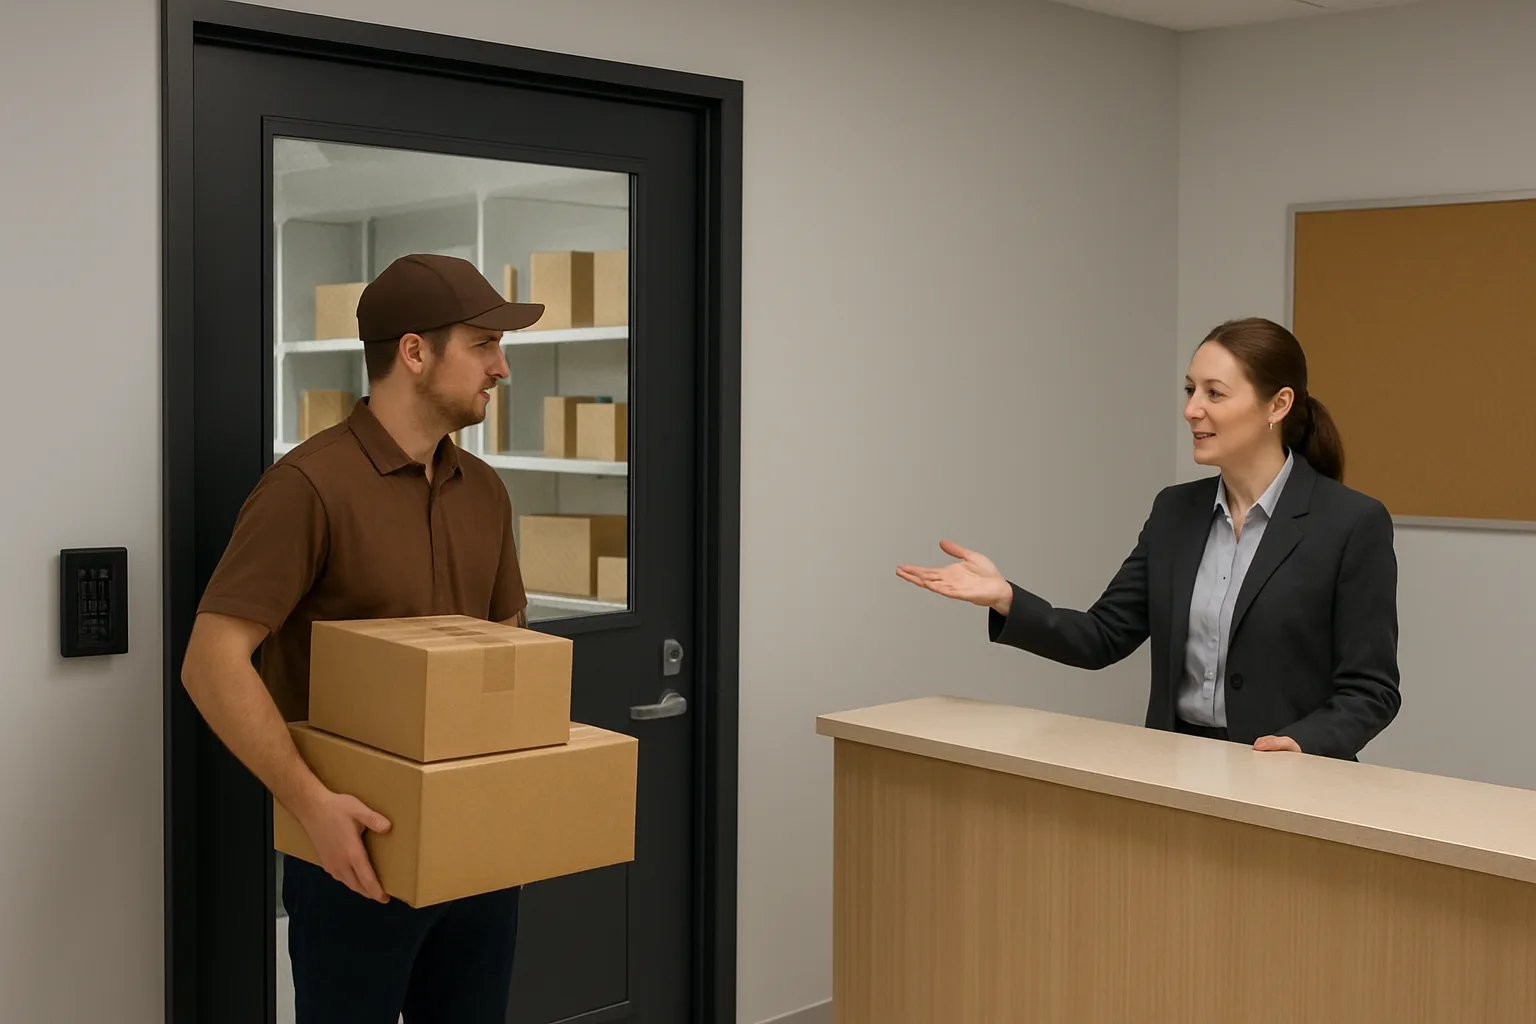
H2: The building’s “delivery contract” (without legalese): define the interface
Treat carrier handoff like an operational interface between two systems: the carrier’s delivery workflow and your building’s intake workflow. When that interface is undefined, the building becomes the “error handler” for everything carriers couldn’t (or didn’t) complete at the door: unlabeled parcels, missing unit numbers, wrong drop locations, and most importantly, no traceable proof of custody transfer. A handoff standard makes “acceptable delivery” predictable, repeatable, and enforceable across shifts and across carriers—without turning your front desk into an argument factory.
paragraphs continued: This standard is not about rewriting carrier policy or telling drivers how to run their routes. It is about defining what your site will accept into its custody and what must stay with the carrier until it meets minimum criteria. When those criteria are explicit (and posted), staff can respond consistently, residents get clearer outcomes, and disputes stop landing on whoever happened to be on duty.
- Think of the package room as an interface with inputs and outputs: inputs must meet minimum format requirements (name, unit, tracking/scan, correct drop zone) before your team “accepts” them.
- Your goal is not perfection; it is consistent traceability. If you cannot confidently answer “who had this last, where was it placed, and under what tracking ID,” you are inheriting risk.
- A written standard protects staff: it replaces personal judgment (“I guess we’ll take it”) with a known rule (“we accept only when X is true”).
What a handoff standard actually is (and is not)
What it is: a short, operational definition of a successful handoff, including minimum acceptance criteria, where deliveries may be placed, what scan or proof is required, and what happens when a delivery does not meet those criteria. It is your building’s “delivery contract” in plain language: the conditions under which custody transfers from carrier to property.
What it is not: a legal document, a customer-service promise to residents (“we guarantee delivery”), or a demand that carriers change their internal procedures. It also is not a one-off memo. If it isn’t teachable in a few minutes, enforceable at the door in real time, and visible to drivers, it won’t work.
Where package rooms fail: undefined acceptance criteria
Most package rooms don’t fail because the room is too small; they fail because the handoff rules are fuzzy. If “delivery completed” could mean “left in the lobby,” “placed somewhere inside the package room,” “handed to a person who didn’t sign,” or “photo taken near the wrong door,” your intake process starts with uncertainty.
Undefined acceptance criteria creates predictable downstream pain: staff spend time decoding labels and searching for missing units, residents dispute non-receipt, and managers get pulled into carrier claims with no clean chain of custody. The hidden cost is inconsistency: one shift accepts unscanned bulk drops to keep the line moving; another shift refuses them; the carrier then treats your building as unreliable and adapts in ways that make traceability worse.
When you define the interface, you reduce the most common failure modes before they become resident-facing incidents: no name or unit, wrong building/entrance, wrong room, unscanned packages, and “mystery piles” that can’t be reconciled later.
Who the standard is for: carriers, front desk, mailroom, security, and managers
A handoff standard is only effective if it serves every role that touches the delivery path—and if each role knows what “done” looks like.
Carriers need clear, low-friction instructions they can follow fast (where to go, what to scan, where to place items). Front desk and mailroom teams need a consistent rule set so they can accept, exception, or refuse deliveries without improvising. Security needs alignment so after-hours access and thresholds are handled the same way every night. Managers need a defensible policy they can point to when resolving resident disputes or recurring carrier issues.
In practice, you are standardizing one moment: custody transfer. The moment it becomes clear who is responsible for the item, where it is stored, and what proof exists. Everything else—notifications, shelving, QR labels, audits—works better once that interface is defined.
H2: Minimum acceptance criteria for apartment package rooms (what staff can accept)
Minimum acceptance criteria are your building’s “definition of done” for a clean handoff. If a package meets the criteria, staff can accept it confidently. If it doesn’t, it goes to exception handling (hold at threshold, request a rescan, redirect to the correct drop-zone, or refuse—based on your policy).
The goal is speed and consistency. Staff should be able to apply the same rules in under a minute, even during peak delivery waves, without debating each driver or improvising standards by shift.
- Decision rule: if any “hard stop” item fails, do not accept into the package room; keep carrier custody until corrected.
- Keep the checklist visible at the intake point (clipboard, desk card, or posted inside the package-room door) so enforcement doesn’t depend on memory.
- Use plain-language labels: “Accept,” “Accept with exception,” “Do not accept” to avoid gray areas during rush periods.
The 60-second intake test: label, unit, recipient, and carrier ID
Use this quick test for every package that’s handed over at the desk or left at the package-room threshold. If it passes, it can enter your controlled space. If it fails, you either fix it immediately (while the carrier is still present) or route it to exceptions.
Run the test in the same order every time so it becomes muscle memory: Destination, Recipient, Tracking, Placement.
Required address elements: resident name + unit, building address, and carrier tracking
To accept a package into an apartment package room, the label must let you answer one question without guessing: “Exactly which resident and which unit is this for?” If staff has to rely on handwriting, a partial name, or a driver’s verbal assurance, you’ve inherited a traceability problem.
Minimum label requirements (building acceptance criteria):
1) Recipient: resident first/last name (or verified resident identifier your site uses). If it’s a business name only, it must still map to a specific unit or approved on-site recipient list.
2) Unit/apartment number: required for standard resident deliveries. If your property uses building/stack/door instead of unit numbers, require the equivalent.
3) Correct property address: street address plus any required building letter/phase.
4) Trackable carrier identifier: a scannable tracking barcode or clearly printed tracking number. (If the barcode is destroyed or unreadable, it’s an exception.)
5) Carrier/source identity: enough to identify the carrier channel (e.g., UPS/FedEx/Amazon/USPS/other) for logging and dispute resolution.
Condition and tamper checks: when to note damage vs. refuse
Staff are not expected to inspect contents, but you do need a quick exterior condition check before accepting custody. This protects residents and protects staff from being blamed for pre-existing damage.
Use a simple three-outcome rule: Accept as-is, Accept with exception notes, or Do not accept (refuse/return to carrier custody).
Accept as-is when: packaging is intact, sealed, and not visibly compromised.
Accept with exception notes when: there’s minor crushing, a small tear, re-taping by the carrier, or a label that’s partially scuffed but still readable/scannable. Note what you see (e.g., “corner crushed,” “tape split on seam”) and, if your process allows, take an intake photo.
Do not accept when: contents are exposed, there’s evidence of tampering (cut seams, mismatched tape on high-value packaging), active leaking, strong odor suggesting spill, or the item creates a safety issue (broken glass rattling, sharp edges protruding). In these cases, keep the carrier in custody and follow your exception/refusal flow.
Drop-zone rules: correct room, correct shelf/bin, and no “lobby piles”
A package is not “delivered” for operational purposes until it is placed in the correct controlled drop-zone. This is where most apartment disputes begin: items left in a lobby corner, at an unlocked door, or on the wrong shelf with no traceability.
Set drop-zone rules that are easy for a driver to follow quickly and easy for staff to audit later:
1) Correct room only: packages go inside the designated package room/mailroom, not in the lobby, vestibule, leasing hallway, or outside resident doors (unless your property explicitly allows door delivery for specific cases).
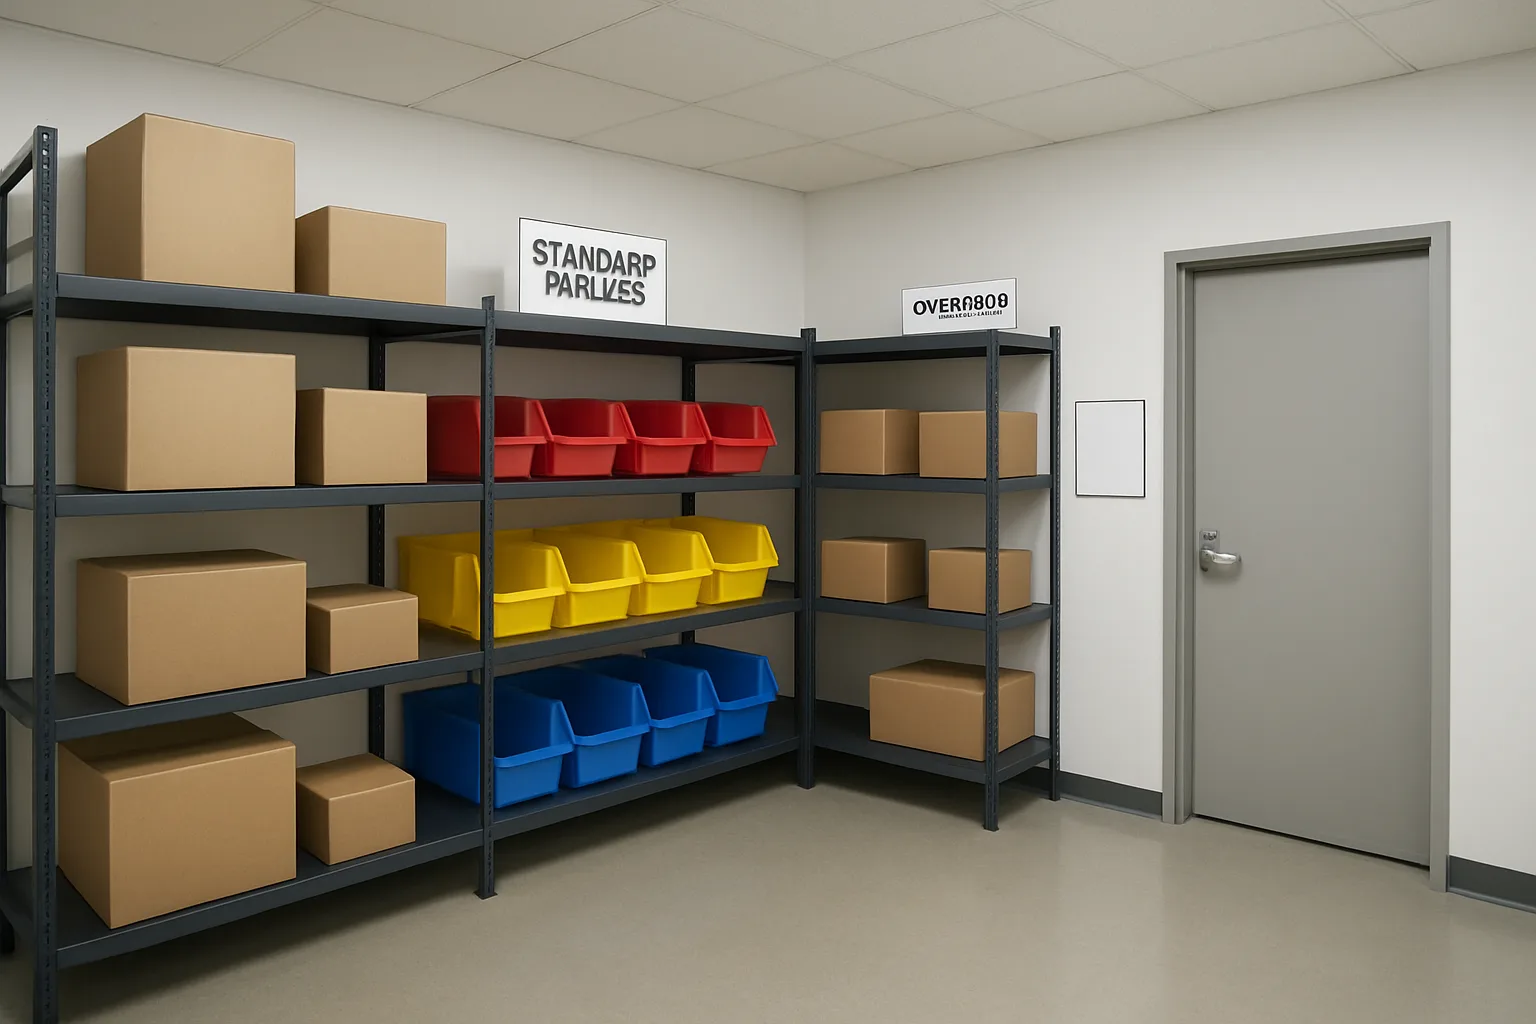
2) Correct zone within the room: use clear zones such as “A–F,” “G–L,” “M–R,” “S–Z,” plus “Oversized,” “Refrigerated/Perishable (if available),” and “Exceptions/Hold.”
3) No floor piles: if shelving is full, the correct action is overflow handling (an overflow cage, secured back room, or documented exception)—not creating an untracked pile at the entrance.
4) Keep labels visible: packages should be placed so the resident name/unit and tracking label can be read without moving other parcels. This reduces mis-picks and speeds audits.
5) One package = one home: if a driver tries to leave a mixed stack “for multiple residents” without separation, staff should require sorting into zones or treat the whole stack as an exception until it’s separable.
Special classes: oversized items, perishable/temperature-sensitive, and signature-required
Special classes need pre-decided handling so staff isn’t making policy at the door. Define these in your mailroom SOP and train the desk to recognize them quickly.
Oversized items:
– Acceptance criteria: must have clear recipient + unit and trackable carrier identifier.
– Placement rule: “Oversized” zone only (do not block egress routes, doors, or electrical panels).
– If no safe placement exists, route to exception handling rather than leaving it in common areas.
Perishable/temperature-sensitive items:
– Only accept if your building has a designated, approved holding method (e.g., a refrigerated locker/fridge with access control) and staff are trained on it.
– If you do not have appropriate storage, treat as a defined exception: the carrier retains custody or follows their own attempt/return process. Avoid informal promises to “keep it cold” if you can’t actually do it consistently across shifts and weekends.
Signature-required and restricted deliveries:
– If the label indicates “signature required,” “adult signature,” “ID required,” or similar restrictions, staff should not accept unless your property explicitly authorizes designated signers and has a documented chain-of-custody process.
– If the driver requests a signature from staff for an item that is not addressed to the property (it’s addressed to a resident), follow your rule: either a designated signer signs under policy, or the carrier must attempt delivery via their required method.
– If a resident is present and can sign, direct the driver to complete the resident handoff rather than routing through the package room.
To keep this workable during busy periods, post a short “special classes” reminder where drivers naturally pause (front desk counter or package-room entry). The key is consistency: the same package should be handled the same way every day, regardless of who is working or which carrier route shows up.

H2: Carrier scan requirement: make traceability non-negotiable (without picking fights)
For carrier handoff standards for apartment package rooms to work, traceability has to be the one non-negotiable. Not because the building wants to police drivers, but because a missing or wrong scan turns every later question into a time-consuming argument: the resident says it never arrived, the carrier says it was delivered, and the front desk inherits a problem it cannot prove either way.
A clear carrier scan requirement is the simplest way to prevent those disputes. The trick is to define what proof is acceptable in your environment (front desk vs. secured package room), apply it consistently across FedEx UPS Amazon handoff realities, and keep the interaction calm: you are not rejecting a driver, you are enforcing the building’s delivery interface.
Use this section as your mailroom SOP language: it tells staff what to ask for, what counts as acceptable proof of delivery, and what to do when the scan is missing or wrong. (Signage and scripts come later; this is the rule set behind them.)
What “scan” means in practice: delivered scan, stop-level scan, photo proof
In day-to-day operations, “scan” can mean several different things depending on the carrier and device workflow. Your standard should name the outcomes you need, not the carrier’s internal terms.
Define your building’s carrier scan requirement with three levels of proof, in order of preference:
1) Package-level delivered scan: Each tracking number is scanned as delivered to your address and time-stamped. This is the cleanest proof for disputes and the best fit for high-volume package rooms.
2) Stop-level completion scan: The carrier marks the stop as completed, but not every package is individually scanned at the point of handoff (common with bulk drops). This can work only if your building also controls the drop location and can document receipt.
3) Photo proof of placement: A photo taken by the driver at delivery time showing the drop location (often used in app-driven workflows). Photo proof is helpful, but it is not a substitute for a delivered scan when your main issue is “which package, which tracking number, for which resident.” It is best treated as a supporting artifact, not the primary proof, unless you have a very controlled drop zone that is unmistakable in the image.
Acceptable outcomes: scan at door vs. scan at package room
Drivers will scan where it is fastest and where their workflow expects it. Your job is to define what is acceptable in your building layout and then hold the line consistently.
Set two acceptable outcomes and pick one as your default depending on where custody transfers:
Option A: Scan at the handoff point (preferred for staffed handoffs)
– The driver scans packages as delivered while still in custody, at the front desk, loading vestibule, or package room door.
– Staff visually confirms the scan occurred (you do not need to handle the device; you just need to see the scan action and that the stop is marked delivered).
– Best when: you have a staffed front desk/security post, frequent disputes, or multiple drop zones that can be confused.
Option B: Scan at the secured package room drop zone (acceptable for controlled, access-restricted rooms)
– The driver gains access to the package room and scans upon placement at the designated area.
– The scan location and/or photo should clearly correspond to the secured package room, not a generic lobby or exterior entry.
– Best when: the package room is behind access control, clearly labeled, and the driver can complete the workflow without staff time.
What to avoid: “scan later in the truck” or “scan at the curb” for a building handoff. That breaks the chain of custody and is where most disputes start, especially when the scan location shows as an exterior door, leasing office, or another building entirely.
Common failure modes: no scan, wrong location scan, bulk scan, unreadable labels
Most scan problems repeat in predictable ways. Naming them in your mailroom SOP makes it easier for staff to respond without improvising (and without escalating tone).
Common failure modes to plan for:
– No scan presented at handoff: The driver attempts to leave packages without completing a delivered scan or stop completion. In your standard, this is a trigger for “hold at threshold” until the scan is completed, unless your exception policy explicitly allows otherwise.
– Wrong location scan: The device shows delivery to a different address, a different building entrance, or an ambiguous location (for example “Front Door” when your package room is the custody point). Treat this as a correction request, not an accusation: “Can you update the delivery location to the package room?”
– Bulk scan or manifest-only handoff: A driver indicates the stop is delivered but cannot show that individual tracking numbers were scanned. This is common with large drops. If you allow it at all, require a controlled alternative (for example: driver provides a printed or digital list of tracking numbers for that drop, or the driver completes a stop-level scan plus photo proof at the correct door signage package room location).
– Unreadable or damaged labels: If the tracking barcode or address elements are torn, wet, or covered, the scan may fail or the item may be misrouted internally. Your standard should require the driver to re-label if possible, or to keep custody and return it to the station for relabeling, depending on your refused delivery policy.
– Duplicate or conflicting labels: Retail returns and third-party sellers sometimes produce multiple barcodes. Require the carrier to scan the carrier-issued tracking number associated with that delivery, not a marketplace or merchant barcode that your staff cannot use later.
Operational note: staff should never handwrite tracking numbers off a box as a substitute for a carrier scan unless your escalation ladder explicitly allows “accept with exception” and you have a clear documentation method. Handwritten numbers are slow, error-prone, and often escalate disputes rather than resolve them.
How to handle mixed loads: some scanned, some not
Mixed loads happen when a driver is rushed, when multiple workflows are used on one route, or when one subset requires a different process (oversized, hazmat-labeled consumer goods, signature-required, etc.). Your standard should tell staff exactly how to proceed so the building does not accidentally accept the untraceable portion.
Use a split-decision rule: accept only what meets the scan requirement, and keep the rest in the driver’s custody until it is fixed. This prevents “we already took the cart, so we might as well take all of it” drift.
A practical process for the door:
– Step 1: Ask for the scan to be completed for the entire drop (package-level delivered scans, or your approved alternative if you allow stop-level).
– Step 2: If some packages are already scanned and some are not, physically separate them into two groups at the threshold: “scanned/accepted” and “not yet scanned/not accepted.”
– Step 3: If the driver can complete scans immediately, proceed and then bring all accepted items inside.
– Step 4: If the driver cannot complete scans, accept only the scanned group and document the remainder as “left in carrier custody due to incomplete scan.”
This approach keeps your carrier handoff standards consistent across busy periods without requiring long conversations. It also protects staff from being blamed later for packages that were never actually delivered in the carrier’s system.
Mailroom SOP alignment: when staff logs vs. when carriers scan
A frequent source of friction is trying to make staff logs do the job of a carrier scan. They solve different problems.
Your mailroom SOP should define two parallel records:
– Carrier proof of delivery (carrier-owned): The delivered scan (and any photo proof) is the carrier’s record that custody transferred. This must happen before the building accepts responsibility for the item.
– Building intake record (building-owned): Your internal log (manual, spreadsheet, package room system, QR-label workflow, or shelf/bin assignment) is how you track where the item went inside the building and when the resident was notified or retrieved it.
Key alignment rules:
– Staff logging never replaces the carrier scan requirement. If the carrier did not scan as delivered (or meet your approved alternative), staff should treat the handoff as incomplete and follow the escalation ladder.
– Carrier scans do not replace internal controls. Even with a perfect delivered scan, your building still needs consistent placement rules and an intake workflow so items do not disappear inside the package room.
– If you use building labels (for example, a QR-label applied during intake), apply them only after the item has met minimum acceptance criteria and the carrier scan requirement. That keeps your internal tracking from laundering a bad handoff into an apparently “received” package.
Finally, keep the standard carrier-neutral. Do not write separate rules that staff cannot remember in the moment. Your policy can acknowledge different FedEx UPS Amazon handoff patterns, but the interface stays the same: no verified proof of delivery to the correct drop zone, no acceptance into the building’s custody (except for the narrow exceptions you explicitly approve).
H2: No scan/no accept escalation ladder (and a clear refused delivery policy)
When carrier handoff standards for apartment package rooms are vague, staff ends up “owning” missing scans, unlabeled parcels, and wrong-location drops. The fix is a simple, repeatable escalation ladder: a consistent sequence of options that protects traceability without escalating conflict.
This ladder is a mailroom SOP staff can execute in real time at a busy front desk. It standardizes when you request a re-scan, when you accept with clearly tagged exceptions, when you pause at the threshold, and when a refused delivery policy applies. The goal is not to block deliveries—it is to ensure every accepted package is traceable to a resident, a unit, a location, and a carrier event.
- Core rule: If it cannot be linked to a resident and unit and it has no acceptable carrier scan requirement outcome, it does not enter building custody unless it meets a narrowly defined “accept with exception” case.
- Consistency beats intensity: staff should follow the same steps for FedEx UPS Amazon handoff and any other carrier, regardless of driver familiarity or time pressure.
- Document the exception, not the argument: if you deviate from standard, capture a minimal set of facts so managers can resolve disputes later.
- Keep the driver’s workflow in mind: offer the fastest compliant option first (re-scan, correct door, correct drop-zone) before escalating.
- Never create a new process at the counter: the ladder should fit on one page and be teachable in a 10-minute shift huddle.
Level 0: quick fix at the door (label correction, unit lookup, re-scan request)
Level 0 is your fastest path to compliance. Assume good intent and aim for a 30–60 second correction that satisfies your carrier handoff standards for apartment package rooms without slowing the line.
Use this level when the issue is fixable immediately: the label is readable but missing a unit, the driver scanned the wrong door, or a package is headed to the wrong drop area. The key is to solve it while the driver is still holding custody and can correct the scan or placement.
Level 0 actions (pick the smallest that resolves the gap):
– Ask for a re-scan at the correct delivery signage package room location (door/room) if the scan was done in the lobby, street, or a different building.
– Request a scan for any package that would otherwise be “no scan/no accept.”
– Unit lookup only if your building policy allows it and it can be done quickly (for example, checking a resident directory when the name is clear). If the recipient is unclear, do not guess.
– Label correction: if the unit is known and staff policy allows, write the unit on a small internal sticker or note and attach it visibly. Do not alter carrier labels. Mark it as a building note (for example, “Unit confirmed via directory”).
– Redirect to the correct drop-zone (package room vs. lockers vs. oversized area). Ask the driver to place it where your SOP requires, not where it’s convenient.
Minimal words that work at Level 0:
– “We can take it as soon as it’s scanned to this package room and shows Delivered. Could you re-scan here?”
– “I’m not able to accept anything without a unit. If you have the unit on your manifest, we can fix it right now.”
If the driver cannot or will not correct the issue quickly, move to Level 1 or Level 2 instead of debating.
Level 1: accept with exception (only for defined cases) + mandatory notes
Level 1 is a controlled compromise: you accept the package into the building even though one acceptance criterion is missing, but only for pre-approved scenarios and only with mandatory documentation. This prevents “everyone improvises” behavior that undermines your mailroom SOP.
Use Level 1 sparingly, and define it in writing. If you allow exceptions, keep the list short so staff can apply it consistently across shifts.
Common Level 1 “accept with exception” cases (examples you can adopt or reject):
– Carrier system outage: the device cannot scan, and the driver can show an official stop record or a dispatch message. (Do not accept “my scanner is dead” without any proof.)
– Mixed-load partial failure: most packages in the batch are properly scanned, but one label is damaged; the tracking number is still readable and ties to the same stop.
– Weather or safety constraint: conditions make scanning at the package room unsafe (for example, active hazard at entry). Staff directs a safe alternate spot and records it.
Mandatory notes for every Level 1 acceptance (keep it fast and consistent):
– Date/time accepted
– Carrier (FedEx/UPS/Amazon/other) and route identifier if available (name, badge number, or vehicle number—only what’s visible and appropriate)
– Tracking number (or last 6–8 digits if your system allows partial entry)
– Recipient name and unit (if unknown, Level 1 should usually not apply)
– Reason code (choose from a short list: “No scan-device,” “Label damaged,” “Wrong-location scan,” “Safety redirect”)
– Where it was placed (specific shelf/bin/zone)
Important: Level 1 is not a workaround for missing recipient/unit. If you can’t connect it to a resident and unit confidently, Level 1 should not be used—move to Level 2 or Level 3 based on your refused delivery policy.
Level 2: hold at threshold (driver keeps custody) while dispatcher contacted
Level 2 is the “pause button.” The driver keeps custody, the packages do not cross into the package room, and staff involves a supervisor/manager or the carrier’s dispatch channel. This step protects your building from inheriting traceability gaps while still giving the carrier a chance to resolve it without a full refusal.
Use Level 2 when:
– The driver insists they cannot meet your carrier scan requirement (or wants to drop without scanning).
– There is a pattern issue (repeat no-scan attempts, repeated wrong-room drops) and staff needs a documented intervention.
– The delivery includes high-risk items (signature-required, controlled access, visibly damaged) and the driver cannot complete the correct process.
How to run Level 2 in real life (busy desk version):
1) Physically stop the handoff at the threshold: “I can’t bring these into building custody yet. Let’s resolve the scan/location first.”
2) Offer the compliant option again: re-scan here, place in the correct drop-zone, or confirm unit.
3) Escalate to a designated building contact (manager-on-duty, security supervisor) who can make a final call.
4) Ask the driver to contact dispatch/supervisor if they disagree. Staff should not argue policy details; the manager confirms the standard.
5) If resolution happens, accept under Level 0 (preferred) or Level 1 (if approved). If not, proceed to Level 3 refusal for the affected packages only (partial acceptance is allowed).
Level 3: refuse delivery policy (what gets refused, and how to document)
Level 3 is a formal refusal: the building does not accept custody. A refused delivery policy works only if it is clear, consistently applied, and documented in a way that reduces repeat conflict. Refusal is not punishment; it is a boundary that protects residents and staff when minimum criteria are not met.
Refuse only what you must. If a load has 40 compliant packages and 3 noncompliant ones, accept the 40 and refuse the 3, documenting the difference. This keeps operations moving while enforcing standards.
Common refusal triggers for apartment package rooms (adapt to your property’s risk tolerance):
– No unit and staff cannot confidently identify the resident (unknown recipient, multiple matches, or unclear name).
– No acceptable proof of delivery event and the driver will not perform a scan at the correct location (no scan/no accept).
– Wrong building/address on label (not your property or wrong street number).
– Signature-required items when no signature can be captured per carrier rules (do not “sign for residents” unless your building has a written, legally reviewed authorization process; many properties choose not to).
– Visible tampering or severe damage where acceptance could shift liability disputes to the building (for minor dents, document instead of refusing).
– Hazardous or prohibited items per building policy (for example, leaking packages). If discovered, follow safety procedures first.
How to document a refusal in a way carriers recognize:
– Record date/time, carrier, and tracking numbers refused
– Record the specific refusal reason code (“No unit,” “Refused: no delivered scan,” “Wrong address,” “Signature required”)—avoid long narratives
– Record staff initials and manager approval if required
– If your process allows, take a quick reference photo of the label and the refused pile at the threshold (do not photograph residents)
– Note where the driver took the packages (returned to vehicle, reattempt later)
A calm, firm refusal sentence staff can use:
– “I’m not able to accept these into the package room without the unit and a delivered scan here. You’re welcome to reattempt once that’s available.”
Hard stops vs. soft stops: decide what is never accepted
Staff can only enforce standards if you define what is non-negotiable (hard stops) versus what can be handled with an exception path (soft stops). This is where many package rooms fail: the policy exists, but everything becomes negotiable at the door.
Hard stops are conditions under which the building never takes custody. Soft stops are conditions under which the building may accept with exception under Level 1, with mandatory notes.
Example hard stops (typical for a strict but workable mailroom SOP):
– No resident name or no unit (and cannot be resolved at Level 0)
– Wrong property address
– Driver refuses to complete any acceptable delivery scan or proof event and insists on leaving items anyway
– Signature-required item when signature cannot be captured properly
– Safety hazards (leaking, strong odor, exposed contents)
Example soft stops (typical for practical operations):
– Minor label damage but tracking is readable and resident/unit are clear
– Wrong drop-zone attempt (lobby vs. package room) that can be corrected immediately
– Stop-level or photo-based proof used by a carrier, if it clearly shows the correct package room signage/door and time window (only if your standard allows it)
Manager tip: publish the hard stops as a one-page “refused delivery policy” summary so staff does not have to make judgment calls under pressure. Consistency is what makes FedEx UPS Amazon handoff smoother over time.
After-action flow: resident notifications and incident logging
The ladder doesn’t end when the driver leaves. Your after-action flow prevents repeat problems and helps resolve resident disputes quickly without putting staff in the middle.
Keep after-action lightweight—small, consistent records are better than detailed reports no one completes.
Recommended after-action steps:
1) Log the event in your exception log (even a simple shared tracker): carrier, time, tracking, reason code, and which ladder level was used.
2) If a package was accepted with exception (Level 1), flag it for audit (for example, “Needs scan reconciliation” or “Unit confirmed by directory”).
3) If a package was refused (Level 3), notify the resident only if you can identify them confidently from the label. Keep the message factual:
– What happened (refused/held)
– Why (missing unit, no scan, wrong address)
– What the resident can do (contact carrier/shipper, verify address, re-send with unit)
Avoid promising re-delivery times.
4) Escalate repeat issues: if the same carrier/route repeatedly triggers Levels 2–3, a manager should contact the local terminal/dispatch with specific examples (dates, tracking numbers, reason codes). This is where your documentation pays off.
5) Weekly quick review: spend 10 minutes identifying the top recurring failure mode (no unit, no scan, wrong location). Update training or delivery signage package room instructions accordingly.
Done well, the escalation ladder becomes a predictable operational interface: staff stops inheriting traceability gaps, and carriers learn the fastest path is simply meeting the standard at the door.
H2: Delivery signage package room kit + carrier-facing script (printable, calm, consistent)
Signage and a consistent script turn your carrier handoff standards for apartment package rooms into something drivers can follow in seconds, even when they are new to the route or under time pressure. The goal is not to “educate” carriers; it is to remove ambiguity at the door: where to go, what must be scanned, what information must be on the label, and what happens when minimum criteria are not met.
Think of signage as your building’s operational interface: short instructions, visible at the decision point, and identical across entrances. When staff relies on memory or explains rules differently each shift, carriers improvise and you inherit traceability gaps (no scan, wrong room, lobby piles). The kit below is designed to be printed as-is and used consistently across FedEx UPS Amazon handoff and other carriers.
- Keep signs instruction-first: “DO THIS” beats “POLICY.”
- Use 3–5 lines max per sign. If it needs paragraphs, it belongs in staff SOP, not on a door.
- Make the “where” unmissable: the correct door, correct room, correct shelf/zone.
- State the minimum acceptance criteria plainly: scan required, resident name + unit required, no lobby drops.
- Offer a fast alternative when criteria are not met: “Return to truck and re-scan,” “Bring to desk,” “Call dispatcher,” “Use overflow door.”
- Standardize terminology across signs and staff: choose one phrase (e.g., “Package Room A” and “Overflow Shelf”) and stick to it.
- Reduce conflict with neutral phrasing: “To protect residents and drivers, we require…” not “You must…”
- Design for photos: drivers and supervisors often snap a picture of the sign; make it readable at arm’s length.
- Update by replacing, not crossing out. Handwritten edits invite debate.
Signage principles: short, visible, and instruction-first
Put instructions exactly where the wrong decision usually happens: at the entrance door, at the package-room door, and inside the room at the shelving zones. If a driver can walk in and drop without seeing guidance, the sign is too far away.
Use simple formatting that prints cleanly: large title, 3–5 short lines, then one fallback instruction. Avoid sarcasm, threats, or carrier-specific callouts (they cause defensiveness and get ignored). Keep it consistent across all entrances so drivers do not learn “this door is stricter than that door.”
Printable door sign templates (standard, after-hours, overflow, oversized)
Copy/paste the templates below into a document, print, and laminate. Replace bracketed fields with your building’s details. Keep the language identical across doors unless the workflow truly differs.
Template 1: Standard package-room door sign (daytime / staffed)
PACKAGE ROOM DELIVERY INSTRUCTIONS (ALL CARRIERS)
1) Deliveries must be scanned as DELIVERED to: [BUILDING NAME] – Package Room [A/B].
2) Labels must show RESIDENT NAME + UNIT (e.g., “Taylor R – 1207”). No unit = bring to Front Desk for lookup (do not drop). (carrier scan requirement) (delivery signage package room) (mailroom SOP) (refused delivery policy) (FedEx UPS Amazon handoff) (carrier handoff standards for apartment package rooms)
Template 1 (continued)
3) Place packages in the correct zone:
• Small/Medium: Shelves 1–6
• Large: Floor Line “L” (no blocking exits) (carrier scan requirement) (delivery signage package room) (mailroom SOP) (refused delivery policy) (FedEx UPS Amazon handoff) (carrier handoff standards for apartment package rooms)
Template 1 (continued)
4) No lobby drops. No unsecured hallway drops.
If you cannot scan or the label is incomplete: bring to Front Desk at [LOCATION] or keep in custody and contact your dispatcher. Thank you.
Template 2: After-hours / unstaffed delivery sign (secured access)
AFTER-HOURS DELIVERIES (NO STAFF ON DUTY)
1) Access: Use callbox code [####] or scan credential at reader.
2) Scan each package as DELIVERED to: [BUILDING NAME] – Package Room [A/B]. (photo-only proof is not accepted as delivery confirmation) (carrier scan requirement) (delivery signage package room) (mailroom SOP) (refused delivery policy) (FedEx UPS Amazon handoff) (carrier handoff standards for apartment package rooms)
Template 2 (continued)
3) Place by zone signs inside the room. Close the door behind you.
If you cannot access or cannot scan: do not leave packages outside. Mark as “No Access” and return per your carrier process.
Template 3: Overflow / peak-volume sign (when primary shelving is full)
OVERFLOW ROUTING (WHEN SHELVES ARE FULL)
1) Do not stack in front of lockers/doors. Do not create lobby piles.
2) Use Overflow Area: [LOCATION / ROOM NAME]. Scan as DELIVERED to: [BUILDING NAME] – Overflow. (carrier scan requirement) (delivery signage package room) (mailroom SOP) (refused delivery policy) (FedEx UPS Amazon handoff) (carrier handoff standards for apartment package rooms)
Template 3 (continued)
3) Large items only in Overflow; keep fire exits clear.
If Overflow is locked: bring to Front Desk or keep in custody.
Template 4: Oversized / team-lift / freight-like items sign
OVERSIZED / HEAVY ITEMS (TEAM-LIFT)
1) Do not leave oversized items in lobby or mailroom walkway.
2) Deliver to: [OVERSIZED DROP ZONE LOCATION] only. Scan as DELIVERED to: [BUILDING NAME] – Oversized Zone. (carrier scan requirement) (delivery signage package room) (mailroom SOP) (refused delivery policy) (FedEx UPS Amazon handoff) (carrier handoff standards for apartment package rooms)
Template 4 (continued)
3) If signature is required or item is damaged: bring to Front Desk for staff acknowledgment (do not drop).
If you cannot place safely: keep in custody and follow carrier return procedure.
Optional add-on strip: “Label requirements” (place at eye level near scanner/door handle)
LABEL MUST INCLUDE: Resident Name + Unit • Full Building Address • Tracking Barcode
Missing unit or unreadable label = bring to Front Desk (do not drop).
Placement map: entry door, package-room door, inside shelving zones
Use a simple “three-point placement” so drivers see the same instruction at the moment they choose where to go and where to put the parcel:
1) Property entry / loading-side door: One directional sign that says where deliveries go and what to do after-hours.
2) Package-room door: The full standard instruction sign (Template 1 or 2). This is your main interface contract and should be the same every day, every shift. (delivery signage package room) (mailroom SOP) (carrier handoff standards for apartment package rooms)
Placement map (continued)
3) Inside the package room: Zone labels at each shelving bank and an “Overflow routing” sign at the point where shelves typically fill up. Make the “wrong” spots unlabeled; drivers naturally aim for labeled destinations.
Practical placement tips:
• Mount at the driver’s approach eye line (not behind a plant, not on the hinge side of a door). (delivery signage package room) (mailroom SOP) (carrier handoff standards for apartment package rooms)
Placement map (continued)
• Put the most critical rule closest to the handle: “Scan as delivered to Package Room” and “No lobby drops.”
• If you have multiple package rooms (A/B), put the room letter on the door in large text and repeat it in the scan instruction. This reduces wrong-location scans.
• If you use QR labels for internal tracking, place the QR check-in point inside the room, not at the lobby threshold, so packages are physically in the right place before staff logs them. (mailroom SOP)
Carrier-facing script: polite enforcement + options that save time
Your script should do three things: acknowledge time pressure, restate the non-negotiable (scan and correct destination), and offer the fastest compliant option. Staff should not argue about policy or “what another building allows.” Repeat the same line, point to the sign, and give a choice.
Use this as a standard front-desk/security script (say it the same way across shifts):
1) Opening (neutral + shared goal) (carrier scan requirement) (carrier handoff standards for apartment package rooms) (FedEx UPS Amazon handoff) (mailroom SOP) (refused delivery policy) (delivery signage package room)
Carrier-facing script (continued)
“Thanks. For resident and driver protection, we can only accept deliveries that are scanned as delivered to our package room and labeled with name and unit.”
2) Point + instruction (remove ambiguity)
“The package room is through that door. Please scan to ‘[BUILDING NAME] – Package Room [A/B]’ and place items in the signed zones.”
Carrier-facing script (continued)
3) Offer the time-saver option (give choices)
“If anything will not scan or is missing a unit, you can either re-scan/relable before dropping, or bring those items to me and I will help route them as exceptions.”
4) Close (calm boundary) (refused delivery policy) (carrier scan requirement) (mailroom SOP) (carrier handoff standards for apartment package rooms) (FedEx UPS Amazon handoff) (delivery signage package room)
Carrier-facing script (continued)
“If we cannot get a delivery scan or a unit, we cannot take custody today.”
Notes for staff:
• Avoid saying “we refuse” first. Start with “we can only accept…” then escalate if needed. (refused delivery policy) (mailroom SOP)
Micro-scripts for common pushback: “I don’t have to scan,” “No time,” “It’s not my job”
These micro-scripts are designed to reduce conflict while keeping your carrier scan requirement consistent. Keep them short, repeatable, and paired with a clear option.
Pushback: “I don’t have to scan.”
Response: “Understood. Our building standard is no scan, no accept. If it won’t scan here, please keep custody and contact your dispatcher, or I can direct you to the correct scan location on the device if that helps.”
Follow-up if needed (repeat once, then stop debating): “I cannot take custody without a delivery scan to the package room. The instructions are posted on the door.” (carrier scan requirement) (refused delivery policy)
Pushback: “I don’t have time.”
Response: “I hear you. The fastest compliant option is: scan as delivered to the package room and drop directly to the labeled shelves. If any label is missing a unit, hand me just those pieces and take the rest in.”
If they try to lobby-drop: “I can’t allow lobby drops. If you’re short on time, keep custody and bring them back on the next attempt.” (delivery signage package room) (refused delivery policy)
Pushback: “It’s not my job to sort/it’s not my job to find the unit.”
Response: “You do not need to sort beyond the posted zones. We just need each label to include a unit and each item scanned as delivered to the package room. If the unit is missing, bring it to the desk and we’ll handle the lookup or mark it for exception.”
Boundary line: “Without a unit on the label, we can’t confirm the recipient, so we can’t accept custody.” (carrier handoff standards for apartment package rooms) (mailroom SOP)
Pushback: “Other buildings let me leave it in the lobby.”
Response: “I understand, but our site does not. The package room is the only approved drop point. The sign on the door lists the steps.”
If they persist: “I can’t take responsibility for lobby deliveries. Please deliver to the package room or keep it in custody.” (refused delivery policy)
Pushback: “I already took the photo/marked it delivered.”
Response: “Thanks. We still need it placed in the package room zones so residents can retrieve it and we can audit issues. Please place it inside now.”
If the photo/scan shows the wrong location: “Please correct the delivery location on your device if you can. If not, note it with your dispatcher; we will log it as an exception.” (FedEx UPS Amazon handoff)
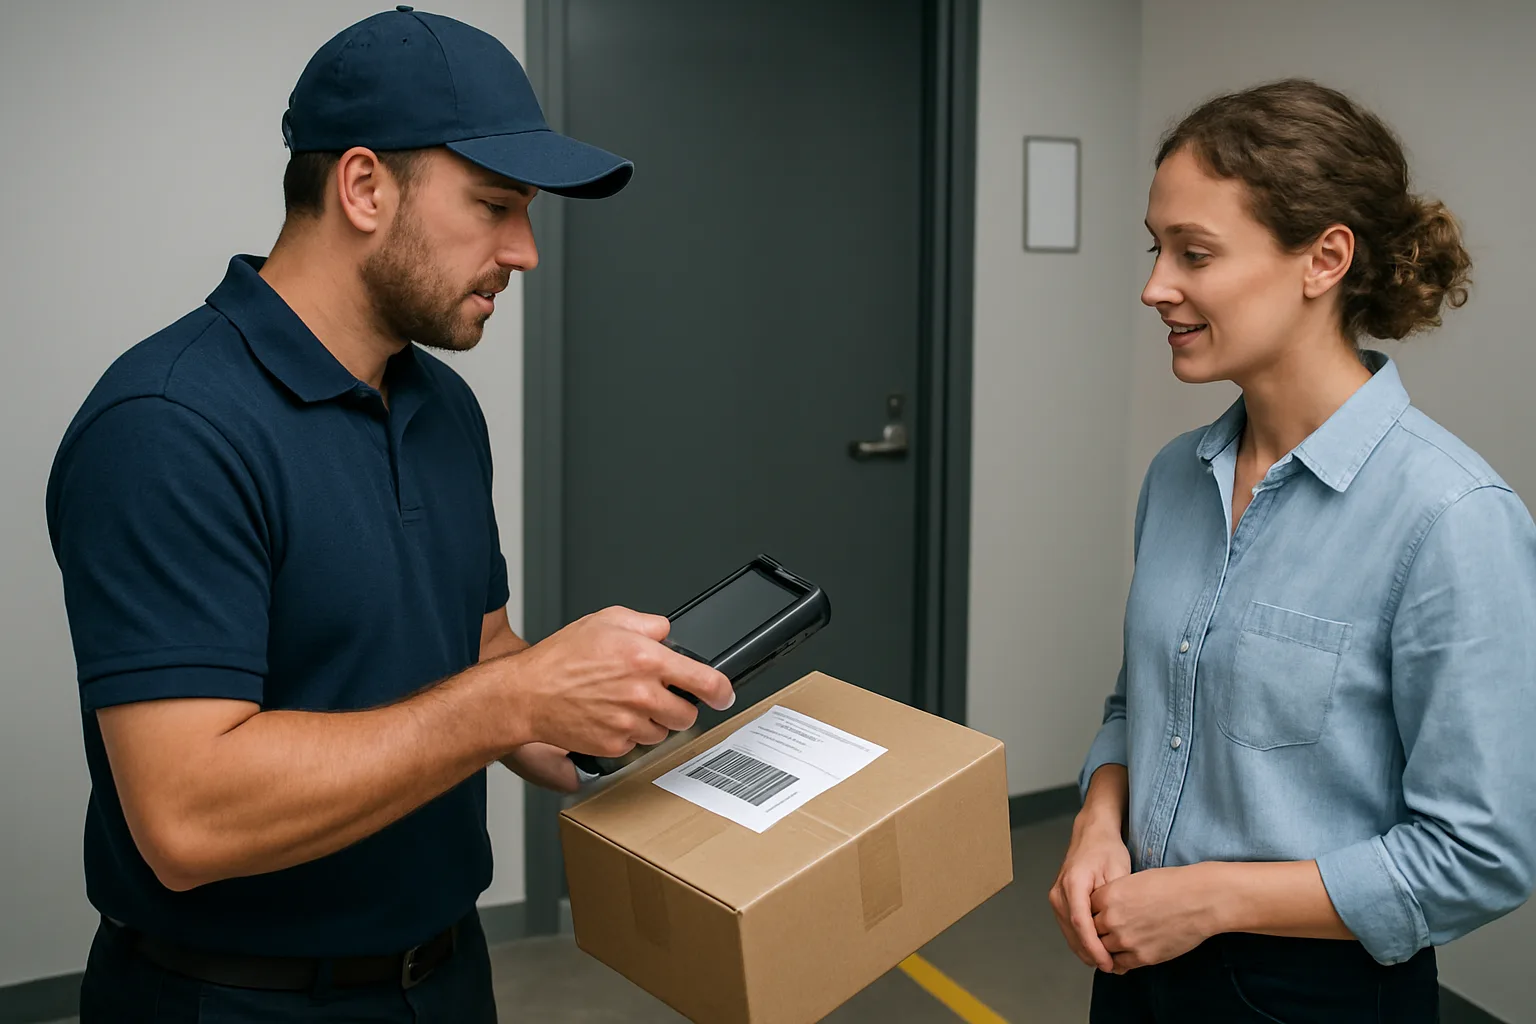
H2: Rollout plan for managers: train, pilot, audit, and keep it fair across FedEx UPS Amazon handoff
A handoff standard only works if it is applied the same way on Mondays and Saturdays, at noon and after-hours, and across FedEx UPS Amazon handoff routines. The rollout goal is not to “win” arguments at the door; it is to make acceptance criteria predictable, coachable, and auditable so staff can enforce carrier handoff standards for apartment package rooms without escalating every interaction.
The simplest way to keep it fair is to treat the standard like an operational interface: staff follows the same steps every time, and exceptions are logged the same way every time. Consistency reduces conflict because carriers learn what will happen next (quick fix, accept-with-exception, hold at threshold, or refused delivery policy) instead of negotiating from scratch at each stop.
- Manager setup (before day 1): choose one owner for the mailroom SOP, publish the one-page standard, and stock the basics (markers, label sleeves, tape, “Exception” stickers, a clipboard or shared log).
- Training rule: teach behavior, not theory. Staff should be able to run the 60-second intake test, ask for a carrier scan requirement calmly, and document exceptions without leaving the desk.
- Fairness rule: the same minimum acceptance criteria apply regardless of carrier, driver, resident, or staffing level; only the defined “accept with exception” cases get flexibility.
Two-week pilot: pick one entrance/shift and tighten the loop
Start small to avoid chaos. Pick the highest-volume entrance or the shift with the strongest coverage (often weekday daytime) and run the full standard there for two weeks. The purpose of the pilot is to surface real-world edge cases (bulk drops, mixed scanned/unscanned loads, after-hours overflow) and refine the refused delivery policy language before you scale it building-wide.
Keep the pilot tight: one entrance, one set of signs, one exception log, one escalation path. If carriers have multiple doors they can use, temporarily funnel them to the pilot door so you can reinforce one consistent routine.
Shift-change checklist: what gets handed off between staff
Most package-room failures happen at shift boundaries: an unscanned pile becomes “someone else’s problem,” or a driver returns claiming a drop that nobody can verify. A short, repeatable shift-change checklist keeps accountability intact without turning into a meeting.
Use a checklist that can be completed in under five minutes and requires no detective work—only confirmation that the handoff standard was followed and exceptions are visible.
Exception log review: identify repeat issues by carrier/route/time
You do not need complex reporting to improve performance; you need consistent exception notes. Review exceptions on a set cadence (for example, twice weekly during the pilot, then weekly after rollout). Look for patterns you can act on: the same carrier at the same time, the same failure mode (no unit number, no scan, wrong drop-zone), or the same entrance being bypassed.
Keep the review operational, not punitive. The output of the review should be a small set of actions: adjust signage placement, retrain one shift, clarify one acceptance rule, or contact a carrier supervisor with specific examples.
Resident expectations: what to communicate (and what not to promise)
Residents are part of the interface too. If they believe the building “accepts everything,” staff will be pressured to bypass the carrier scan requirement and minimum acceptance criteria. Set expectations that protect staff while still being resident-friendly: the building will accept packages that are properly addressed and traceable, and it may refuse or delay intake when labels are incomplete or proof of delivery is missing.
Avoid promising outcomes you cannot control (for example, exact delivery times, guaranteed carrier behavior, or that a package is “in the building” just because a carrier tracking page says delivered). Instead, promise process: what the building requires to accept a package, how residents will be notified, and what happens when a delivery is refused or held at threshold.
Continuous improvement: update signage, refine refusal rules, re-train quarterly
After the pilot, freeze the core rules (minimum acceptance criteria, scan requirement, refusal triggers) and only tweak what reduces friction: sign wording, drop-zone labels, and the specific “accept with exception” cases. If you change rules too often, staff and carriers stop trusting the standard.
Plan brief refresher training quarterly or whenever you see drift (new staff, new carrier route, seasonal volume changes). Retraining should focus on the top three exception types from your log and the exact phrases staff should use at the door to enforce the refused delivery policy consistently.
Frequently Asked Questions
What are carrier handoff standards for apartment package rooms, and why treat them like an “operational interface”?
Carrier handoff standards for apartment package rooms are the building’s consistent, written rules for what qualifies as an accepted delivery and what happens when a delivery does not meet minimum requirements. Thinking of handoff like an operational interface (like an API) helps because it forces clarity: inputs (packages) must meet defined acceptance criteria (label, unit, traceability, correct drop zone) before the building takes custody. Without that interface, staff inherits problems that are hard to fix later: no unit, unreadable labels, “delivered” scans to the wrong location, lobby piles, and resident disputes with no usable proof.
A good standard is not a legal document and not a promise that every package is secure forever. It is a repeatable handoff procedure across front desk, mailroom, and security that makes custody and traceability clear at the moment of delivery.
What should the building control vs. what carriers control in a handoff process?
A workable mailroom SOP separates responsibilities so expectations stay realistic.
Building controls (your side of the interface):
– Where deliveries are accepted (which door/desk/room) and during what hours
– Drop-zone layout (shelves/bins/oversize area), access rules, and signage
– What staff will accept, what requires exceptions, and what is refused
– How staff documents exceptions and transfers custody internally
Carriers control (their side):
– Their scan events, route timing, and delivery method (hand to staff, secure room drop, photo proof)
– Label quality as tendered by the shipper, and whether they can re-label
– Whether dispatch can correct address issues in real time
The handoff standard lives at the seam: it defines the minimum acceptance criteria that must be true before your staff takes responsibility for the item.
What are minimum acceptance criteria for apartment package rooms (a 60-second intake test)?
Use a fast, enforceable checklist. If any “hard stop” fails, the package goes to the escalation ladder instead of being quietly absorbed.
The 60-second intake test:
1) Recipient and destination: resident name plus unit number present and readable
2) Building address: correct property name/address (watch for similar street names)
3) Carrier tracking: visible tracking ID or scannable code on the label
4) Condition: obvious tampering, leakage, hazardous smell, or severe damage triggers exception/refusal rules
5) Placement: delivered to the correct approved drop zone (not left in lobby piles, stairwells, or unsecured corners)
Recommended hard stops (never accept into your package room as “normal”):
– No resident name or no unit (unless your SOP explicitly allows a documented lookup path)
– No tracking identifier (nothing to tie the item to a carrier record)
– Driver will not complete an acceptable proof-of-delivery step when your building requires it
– Item is leaking, unsafe, or clearly compromised
Special classes to define up front:
– Oversized: where it goes and when it can be moved
– Perishable/temperature-sensitive: whether you accept at all, and what “accept with exception” looks like
– Signature-required/age-restricted: staff should not bypass the carrier’s signature process unless your policy explicitly authorizes who can sign and when.
What counts as a “carrier scan requirement” in real life (FedEx UPS Amazon handoff), and how do we enforce it without conflict?
A carrier scan requirement is your building’s definition of acceptable proof that custody transferred at a specific time and place. In practice, proof may show up as:
– A delivered scan tied to the tracking number
– A stop-level or bulk scan that covers multiple packages (riskier for disputes)
– Photo proof (common in some Amazon-style workflows) that shows the drop location
Your standard should specify acceptable outcomes, for example:
– Preferred: individual package tracking shows “Delivered” at the property, with location consistent with your drop zone
– Acceptable alternate: photo proof clearly shows the package in the approved package room drop zone (if your building uses photos as a substitute)
– Not acceptable: “Delivered” scan marked to a vague or incorrect location (“Front door” when you have a secured room), bulk scans with no package-level traceability when issues are frequent, or no scan/proof at all
Enforcement without picking fights:
– Make it predictable: same response every shift, every carrier
– Keep it operational, not personal: “We can’t accept custody without a delivery confirmation step”
– Offer fast options: “Scan now and drop,” “I’ll open the room so you can photo the correct location,” or “Please keep custody while you contact dispatch”
Also decide how your staff logging relates to carrier scans: staff logs are for internal accountability and resident notifications; they are not a substitute for carrier proof of delivery. Your SOP should say when staff logs (always, or only for exceptions) and what fields are mandatory (tracking ID, unit, drop zone, exception notes).
What is a “no scan/no accept” escalation ladder, and what should a refused delivery policy include?
A no scan/no accept escalation ladder is a step-by-step playbook that tells staff exactly what to do when minimum acceptance criteria are not met. It prevents improvisation and keeps enforcement consistent.
Example escalation ladder:
Level 0: Quick fix at the door (30–60 seconds)
– Ask for a re-scan / correct scan location
– Ask driver to place items in the correct room/shelf zone
– If label is missing unit but has name, use your approved unit-lookup method (only if permitted) and mark as exception
Level 1: Accept with exception (only for defined cases)
– Allowed only if the item is clearly intended for the building and has a tracking ID
– Mandatory notes: “No unit on label; matched to resident roster; accepted with exception”
– Apply an internal QR-label or intake tag if your building uses them, so the item is traceable inside the property
Level 2: Hold at threshold (driver retains custody)
– Staff does not take possession
– Driver contacts dispatch/support to resolve address/scan requirement
Level 3: Refuse delivery (documented)
– Triggers: no scan/proof; wrong building; unsafe/tampered; repeated refusal to use correct drop zone; or label lacks minimum identifiers per your hard stops
– Documentation: time, carrier, driver name if available, tracking IDs (or photos of labels), reason code, and staff initials
A clear refused delivery policy should state:
– Exactly what conditions cause refusal (hard stops)
– Whether partial acceptance is allowed (accept the compliant packages, refuse the noncompliant ones)
– Where refused items remain (with the carrier, not stored behind desk)
– Who can authorize exceptions (shift lead/manager only)
– How residents are notified (keep language factual; avoid promising carrier outcomes)
Can you provide printable delivery signage package room text and a carrier-facing script that reduces conflict?
Yes. Keep signage short, instruction-first, and consistent with your SOP.
Printable door sign template (standard)
DELIVERIES: PACKAGE ROOM HANDOFF STANDARD
1) Deliver only to: Package Room (Door A)
2) Place packages on labeled shelves by unit range
3) Package must show: Resident Name + Unit + Tracking ID
4) Proof of delivery required: Scan or photo in this room
If a package does not meet requirements: please keep custody and contact dispatch.
Thank you for helping prevent misdeliveries.
Printable sign (after-hours)
AFTER-HOURS DELIVERIES
– Use call box: “Front Desk”
– Do not leave packages in lobby or outside doors
– Proof of delivery required in approved drop zone
Noncompliant deliveries may be refused.
Printable sign (overflow/oversized)
OVERSIZED / OVERFLOW DROP ZONE
– Place oversized items here only
– Keep exits clear
– Proof of delivery required in this area
Placement tips
– Entry door: one sign that tells carriers where to go
– Package-room door: requirements (unit, tracking, proof-of-delivery)
– Inside room: shelf labels and a simple zone map (A–D, unit ranges)
Carrier-facing script (calm, fast, consistent)
“Hi. For this building we can accept deliveries only with a proof-of-delivery step in the package room and labels must include resident name and unit. If you can scan or photo in the room, I’ll open the door and you can drop right away. If not, you’ll need to keep custody and contact dispatch.”
Micro-scripts for common pushback
– “I don’t have to scan.”
“I understand. Our building standard is no scan/no accept because we can’t take custody without traceability. If you can’t scan here, please keep the packages and contact dispatch.”
– “No time.”
“I’ll make it quick. The room is ready; scan and drop takes less than a minute. Otherwise I can’t accept custody.”
– “It’s not my job.”
“I’m not asking you to do extra work, just to complete delivery in the approved drop zone so the tracking matches where residents pick up.”
Implement your handoff standard this week
Pick one package-room entry point and set the interface: (1) post simple delivery signage that states the minimum acceptance criteria and scan requirement, (2) train staff on the no scan/no accept ladder and the refusal documentation steps, and (3) audit exceptions for two weeks to identify repeat failure modes by time, route, or drop zone. If you want to reduce disputes and speed intake, start by making “acceptable delivery” unambiguous at the door.
Make the handoff predictable, and the package room stops being a problem sink
Carrier handoff standards for apartment package rooms work when they’re specific, visible, and enforced the same way across every shift. Once you define minimum acceptance criteria (clear recipient + unit, scannable label, correct drop zone, and basic condition checks), you remove the ambiguity that creates disputes and time-wasting rework.
The practical backbone is a carrier scan requirement paired with an escalation ladder: start with a quick fix at the door, allow limited “accept with exception” cases only when you can document them, and use a clear hold/refuse pathway when traceability is missing. “No scan/no accept” isn’t about being difficult—it’s about keeping custody and accountability aligned so staff doesn’t become the default owner of missing-proof deliveries.
Next steps: print and post the signage where drivers actually make decisions, train staff on the script and the ladder (not improvisation), run a two-week pilot on one entrance/shift, and review exceptions to tune your refused delivery policy. When the interface is clear, it’s fair to carriers, defensible to residents, and sustainable for your team.