
From ‘Delivered’ to ‘Received’: The One Definition That Ends the Blame Loop
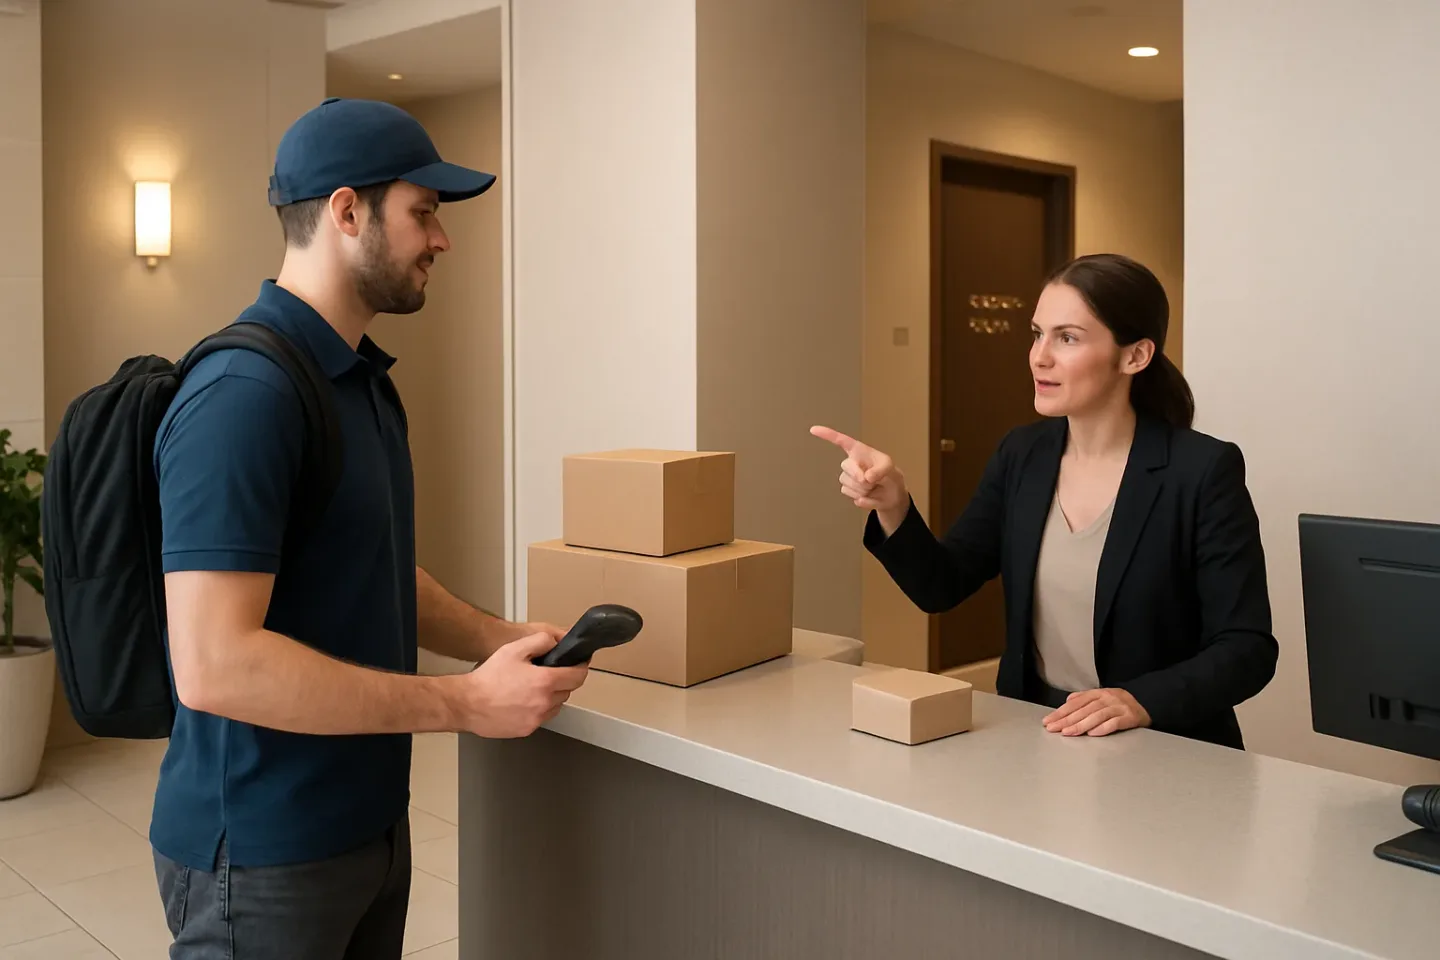
Every property team knows the pattern: a carrier tracking page says Delivered, a resident says Not received, and the building gets pulled into a back-and-forth it can’t win. Carriers point to a scan. Residents point to an empty pickup shelf. Staff end up doing detective work in the lobby while fielding escalating frustration—often without a clear way to say what the building can verify and where the building’s responsibility actually begins.
The fix isn’t arguing harder. It’s defining one measurable acceptance moment—an exact place and process where the building formally transitions a package from “carrier responsibility” to “building custody.” That acceptance moment might be a front-desk counter, a controlled package room door, or (in limited cases) a designated “door acceptance” point. Once you choose it, you timestamp it, standardize it, and support it with physical signage and simple intake rules so everyone (carriers, staff, residents) shares the same definition of received.
This article gives you a practical package receiving SLA apartment building leaders can publish and enforce—without overpromising. You’ll walk away with a template SLA, operational rules for receiving timestamps and chain of custody, and an implementation approach that replaces “maybe it’s here somewhere” with an auditable, repeatable process that drives dispute reduction and calmer resident conversations.
The goal isn’t perfection. It’s clarity: what counts as building acceptance, what counts as carrier delivery proof before acceptance, and what evidence the property will provide when something goes wrong. When the acceptance moment is unambiguous, you can stop the carrier blame loop—and start resolving issues in minutes instead of days. (Unique request: dcc4ffb7-af38-4d1a-9dd1-de2bee392453)
Why ‘Delivered’ Isn’t ‘Received’: Where Disputes Actually Start
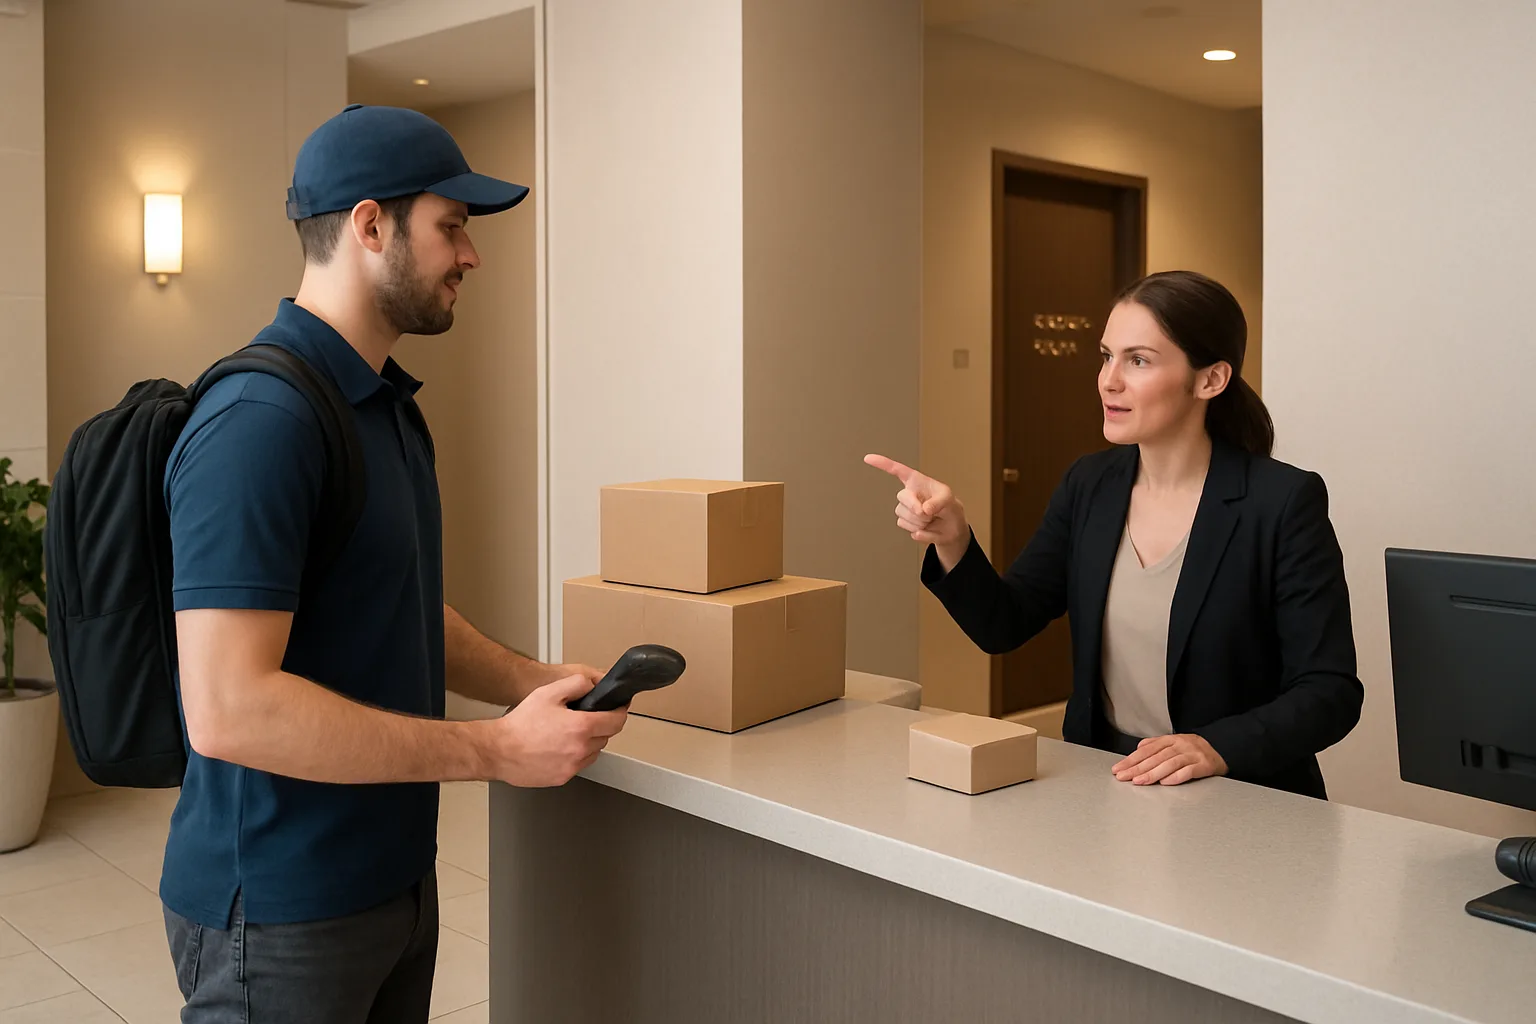
In a package receiving SLA apartment building context, most conflicts start with one deceptively simple word: delivered. A carrier scan can be true (they left the parcel somewhere on the property), and a resident complaint can also be true (they never actually got it). When the building doesn’t define what it can verify, the conversation turns into a carrier blame loop: residents point to the tracking page, staff point to the scan, and nobody can prove what happened between “left at property” and “in resident’s hands.”
The fix isn’t arguing harder about tracking scans. It’s agreeing on vocabulary and drawing a clear operational boundary between carrier delivery proof and building acceptance. Once the building defines a measurable acceptance moment (and logs receiving timestamps from that moment forward), disputes become triageable instead of emotional. You can say, confidently and consistently, what the property can verify—and what it cannot.
- Key distinction: carrier delivery proof shows where the carrier says they left it; building acceptance shows when and where the property took custody.
- Most disputes live in the gap between ‘delivered to property’ and ‘accepted by building’—especially in uncontrolled spaces like lobbies and open mailrooms.
- A building-level SLA should not promise what the building can’t actually measure (e.g., ‘we receive every package’)—it should promise what it can document (e.g., ‘packages are accepted only at X point and timestamped’).
Common mismatch scenarios (lobby drop, mailroom pile, resident pickup delay)
These are the repeat offenders that create resident anger and staff churn. They’re not always theft or staff error—they’re often process gaps where no one owns the handoff moment.
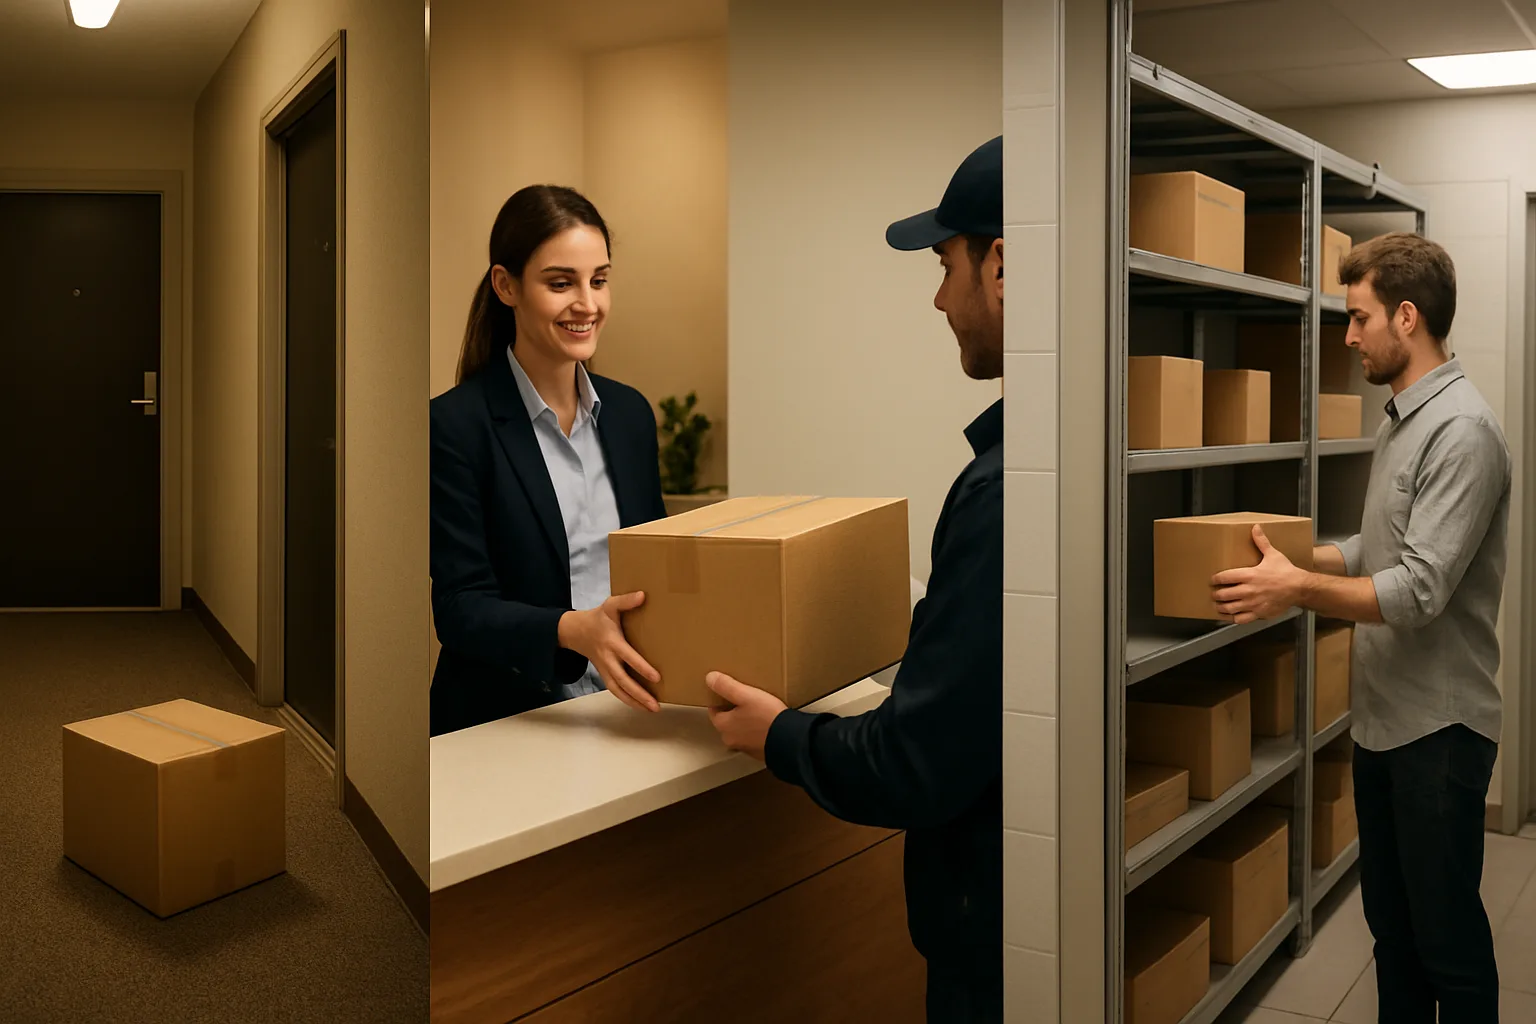
1) Lobby drop: The carrier scans “Delivered” and leaves parcels on a bench, by the intercom, or near the leasing office door. Residents interpret “Delivered” as “securely received.” Staff interpret it as “carrier handled it.” In reality, it’s an unattended drop with no chain of custody.
2) Mailroom pile: Packages end up in an open mailroom (or a room that’s ‘mostly controlled’ but frequently propped open). Items are stacked, moved around, or taken by the wrong person. Later, no one can identify who touched what, or when a specific box arrived, because receiving timestamps were never captured at intake—only the carrier scan exists as a reference point for everyone arguing the case at the counter or over email.
What carriers typically consider delivery proof vs what residents expect
Carrier delivery proof and resident expectations are calibrated to different realities. Carriers need a scalable way to confirm drop completion across thousands of stops; residents want confirmation of receipt, not just drop location. A building-level SLA needs to acknowledge that mismatch without sounding defensive.
What carrier delivery proof often includes: a scan event tied to the route, a general delivery code (e.g., ‘left at front door’), sometimes a photo, and occasionally GPS coordinates. That evidence can be helpful—but it is not the same as verifying that the building took custody.
What residents often expect: confirmation that the package is inside a controlled area, that it’s retrievable, and that someone can prove where it was placed and when it became available for pickup. When the building can’t produce a receiving timestamp, a shelf location, or a handoff log, the resident naturally treats the carrier scan as ‘the building has it,’ because there’s no other visible receipt event.
The operational cost of ambiguity (time, staff morale, resident trust)
Ambiguity doesn’t just create complaints; it creates repeat work. Each “It says delivered” ticket triggers a mini-investigation: staff check the package room, review camera angles (if they exist and are accessible), ask other team members, and sometimes call the carrier—often multiple times. Because there’s no defined acceptance moment, the building ends up doing detective work for events it never measured in the first place.
Over time, the cost shows up in predictable places: front-desk interruptions, leasing teams pulled off tours, strained resident interactions, and inconsistent decisions (“we refunded once so now everyone expects it”). Staff morale drops when they feel responsible for outcomes they can’t control, and resident trust drops when the building’s answer changes depending on who’s on duty. Dispute reduction starts when the property can respond with the same evidence-backed boundary every time.
Goal state: a single, auditable acceptance moment
The goal is not to ‘win’ disputes—it’s to prevent them from becoming personal. The operational goal state is one clearly defined, auditable acceptance moment that separates carrier responsibility from building chain of custody.
In practice, that means: the building chooses exactly where acceptance occurs (door, desk, or package room), defines what counts as accepted, and records receiving timestamps only when that acceptance condition is met. After that moment, the building can credibly document chain of custody—where the package was placed, who accessed the area, and when it was handed off. Before that moment, the building should be explicit that it cannot verify what happened, because it did not take custody.
When everyone—carriers, staff, and residents—uses the same definition, “Delivered” stops being the end of the story and becomes a fork in the decision tree: delivered-but-not-accepted (carrier issue) versus accepted (building accountable from that timestamp onward). That’s how you end the blame loop without overpromising.
Define the Acceptance Moment: Door, Desk, or Package Room (Pick One and Measure It)
A package receiving SLA apartment building can enforce lives or dies on one question: When does the building officially accept responsibility for an item? If your answer is vague (for example, “when it’s delivered”), you’ll keep replaying the same dispute: carrier delivery proof says one thing, the resident experience says another, and your team is stuck trying to prove a negative.
paragraphs
The fix is to define a single, measurable acceptance moment tied to a specific place and action in your building—then treat everything before that moment as carrier responsibility and everything after as building chain of custody. Choose one of the three acceptance models below based on your staffing, access control, and how much you can realistically verify.
- Decision rule: pick the acceptance point you can consistently control 95%+ of the time. Consistency beats ambition.
- Operational test: if staff can’t point to a timestamped record and a physical location for the item after acceptance, you don’t actually have acceptance—you have hope.
- Resident-alignment test: your acceptance moment should match what you tell residents you can verify (and what you cannot).
Option A: Door acceptance (limits: access, cameras, unit-by-unit proof)
Use this model only if your building truly does not handle packages (no desk intake, no controlled package room) and carriers deliver directly to unit doors. In this setup, your “acceptance moment” is not building acceptance at all—it’s carrier-to-resident delivery, and the building should avoid implying otherwise.
What you can credibly verify is limited to access conditions (for example, whether exterior doors were functioning) and general-area cameras—not unit-by-unit custody. If residents expect the property to “find” a missing package, door acceptance makes that promise nearly impossible to keep.
When door acceptance can work
You might choose door acceptance if: (1) the property has minimal staff presence, (2) carriers have reliable unit access procedures, and (3) you’re comfortable stating that the building does not accept custody of resident parcels at any point.
If you go this route, your SLA should be explicit that the building’s responsibility is limited to maintaining reasonable access controls and common-area security measures—not receiving, logging, storing, or handing off packages.
Operational limits to acknowledge up front
Access: If carriers tailgate, use resident codes, or are buzzed in remotely, you may not be able to verify who entered or where they went without strong camera coverage.
Cameras: A lobby camera that shows someone holding a parcel is not unit-level proof. Door acceptance disputes often hinge on “it was left somewhere,” which is hard to resolve without unit corridor coverage (and even then, not foolproof).
Unit-by-unit proof: Unless the carrier provides a photo clearly at the correct unit door and scan metadata aligns with the right floor/wing, you will not have defensible proof of correct placement.
Option B: Front-desk acceptance (strongest chain of custody, requires staffing)
Front-desk acceptance is the most defensible model when you have consistent staffing. The acceptance moment is: a staff member (or designated concierge) takes physical possession of the item at the desk and records a receiving timestamp. From that moment forward, the building can maintain chain of custody because it controls the handoff, storage, and release process.
This is the best option for dispute reduction when resident volume is high or when you frequently deal with high-value deliveries, because it creates a clean boundary: if it’s accepted, it’s logged; if it’s not logged, it wasn’t accepted (even if a carrier scan says “Delivered”).
Minimum requirements to make desk acceptance real (not performative)
Coverage: Define acceptance hours that match actual staffing. If the desk is unstaffed at lunch or after 6 pm, your SLA must say what happens then (do not quietly allow “just leave it”).
Intake discipline: Staff must capture a receiving timestamp at the moment of possession, not later during sorting. Back-dating or end-of-shift batch entry destroys credibility.
Secure staging: There must be a controlled behind-desk area, cage, or access-limited room. If packages are stacked in an open lobby “near the desk,” you’ve lost the chain of custody you’re claiming.
Best-fit examples
High-rise with concierge: Carriers are directed to a single desk; staff applies a QR label and logs item count and time immediately.
Mid-rise with leasing desk: Acceptance hours are limited to leasing hours; after-hours deliveries are refused or redirected to a controlled package room (if available).
Option C: Package-room acceptance (controlled space + logged placement)
Package-room acceptance works when you can control a dedicated space and enforce a “deliver only here” rule. The acceptance moment is: the item is placed inside the controlled package room and that placement is logged with a receiving timestamp (by staff, by a controlled scan step, or by a documented delivery procedure you can audit).
This model can scale with lower staffing than front-desk acceptance, but only if the room is truly controlled and the placement process is structured. A “mailroom” that is open to anyone is not a package-room acceptance point—it’s a common area drop zone.
What makes package-room acceptance defensible
Access control: Fob/credentialed access, working locks, and a policy that the door is not propped open. If carriers can enter at will without any oversight, acceptance becomes ambiguous.
Logged placement: The building needs a reliable way to record receiving timestamps tied to the room, not just a carrier scan in the lobby. This can be as simple as a staff intake window each day or as structured as a scan-and-shelf workflow.
Zoning and shelf discipline: Define shelves/rows for units or floors and require a location note. The fastest way to “accepted but missing” claims is random stacking.
Where package-room acceptance fails most often
Uncontrolled overflow: When the room fills up, staff starts letting carriers leave items “just outside the door.” That creates two acceptance standards at once—guaranteed dispute fuel.
Shared use with trash/storage: If the room doubles as janitorial storage, items move for cleaning, which breaks chain of custody unless you have strict rules and an audit trail.
No clear exception process: Perishables, oversized items, and signature-required deliveries need a defined path. If they get handled ad hoc, your acceptance moment becomes inconsistent.
What to standardize (so the SLA is measurable across teams and shifts)
Regardless of whether you choose door, desk, or package room, standardize the operational variables that turn a concept into an enforceable SLA. These are the fields and rules your team will rely on when disputes happen. Consistency here is the core of dispute reduction.
Standardization checklist
1) Location definition (be painfully specific): Name the exact acceptance point: “Front desk inside the main lobby” or “Package Room A behind Door 1, level P1.” Avoid vague labels like “mailroom.” Include a backup only if it is equally controlled and explicitly defined.
2) Eligible carriers and delivery types: List the carriers you will accept at the point (and which services are excluded). Decide how you handle grocery, medical, alcohol, or age-restricted items, and state it plainly.
3) Acceptance hours: Post the time window when acceptance is available. If you cannot accept outside that window, your policy should instruct carriers where to go (or that delivery will be attempted next business day). Avoid “24/7” unless it’s truly supported by access control and logging discipline at all times.
Exceptions you must decide before launch (not during a dispute)
Oversized items: Define whether they go to an overflow zone, require scheduled pickup, or are refused. Include who moves them and when.
Perishables: Decide whether you accept them at all, and if so, where they are stored and how residents are notified. If you can’t ensure timely pickup, it may be better to exclude perishables from acceptance.
Restricted/signature-required deliveries: Clarify whether staff can sign, whether carriers must obtain resident signature, or whether such items are not accepted by the building. Do not let staff “helpfully” sign without a clear policy—this is a common liability trap.
Receiving timestamps: what counts as a valid building timestamp
A receiving timestamp is the building’s official record of acceptance. It must be (1) tied to the acceptance point you selected, (2) recorded at the moment of acceptance, and (3) attributable to a person or controlled step. This is the anchor for chain of custody; without it, you’re effectively arguing from memory.
To reduce carrier blame loops, treat carrier delivery proof and building receiving timestamps as separate artifacts. The carrier scan may still matter, but it is not your acceptance record unless your SLA explicitly says so (and you can audit it reliably).
Valid vs invalid timestamp examples
Valid building receiving timestamps: “Item physically handed to front-desk staff; timestamp recorded immediately; staff initials or ID attached.” “Item placed inside controlled package room; placement logged at entry; shelf/zone noted.”
Invalid building receiving timestamps: “Carrier marked delivered to ‘mailroom’ (but mailroom is a public hallway alcove).” “Staff logged all packages at 6 pm based on what was on the floor.” “Resident says it was delivered at 2:13 pm; building has no acceptance record.”
Template: Package Receiving SLA for an Apartment Building (Copy, Customize, Publish)
Use this template as your building’s package receiving SLA apartment building policy. The goal is to define one measurable acceptance moment and the rules that follow it so your team can confidently separate carrier delivery proof from building acceptance, reduce “delivered but not received” loops, and set resident expectations without sounding defensive.
Copy the text below into your house rules, resident portal, and carrier-facing signage. Replace bracketed fields with your property details and keep the language consistent across channels (policy, training, and signage).
- Document owner: [Property Name] Operations
- Effective date: [Date]
- Applies to: [Building address(es) / property name(s)]
- Acceptance location (choose one): [Front Desk / Package Room / Secure Locker Area] at [exact location description]
- Receiving hours (when staff can accept): [Days/Times]
- After-hours policy: [No acceptance / Controlled drop zone / Lockers only]
1) Definitions (use these words consistently)
Delivered: A carrier scan or status indicating the carrier has completed its delivery attempt. “Delivered” may occur at a door, lobby, loading area, or other location and is not the same as building acceptance unless it occurs at the acceptance location defined in this SLA.
Accepted: The moment building staff (or an approved automated system such as controlled lockers, if applicable) takes custody of a package at the acceptance location and records a building receiving timestamp. Accepted means the building can verify the item entered the building’s chain of custody.
Available for pickup: The package has been placed in its assigned storage location (shelf/bin/locker) and is ready for resident retrieval according to this SLA. “Available for pickup” requires both acceptance and storage placement (not just a carrier drop).
2) SLA statement (what the building verifies vs what it cannot)
What we verify: We verify packages that are Accepted at the acceptance location during receiving hours (or via the approved after-hours method, if listed). For these packages, we can provide receiving timestamps, storage location assignment, and internal chain of custody records (handoff logs and access controls, if used).
What we do not verify: We do not verify carrier Delivered scans that occur outside the acceptance location (example: lobby floor, outside door, unsecured mailroom entry, or any area not designated for acceptance). We also do not verify package condition prior to acceptance or any delivery left unattended outside the defined acceptance process.
Service expectation: Once Accepted, we target making packages Available for pickup within [X hours] during receiving hours. Delays may occur during peak volume, emergencies, or when exception rules apply (oversized items, restricted items, or labeling issues).
3) Carrier delivery proof requirements at handoff (clear and minimal)
To establish a clean handoff and reduce disputes, carriers are asked to complete delivery proof at the acceptance location. The building’s acceptance record begins only when the package is physically handed to staff (or placed into approved controlled intake) and a receiving timestamp is recorded.
Acceptable carrier delivery proof at handoff may include (depending on carrier and service level): scan at acceptance location, photo at acceptance location, signature capture when required by the shipment, and package count confirmation for multi-piece deliveries.
4) Operational rules (how acceptance works day to day)
Intake requirements (minimum standard):
1) Confirm the package is for a current resident or approved recipient name/unit. If the label is missing or illegible, follow the exception process (do not place in general shelving).
2) Record a building receiving timestamp at acceptance (this is your building’s auditable “acceptance moment”). If you use a QR-label or internal intake label, apply it at this time and link it to the resident/unit and carrier if known; do not label later without a timestamped intake note explaining why (to preserve chain of custody).","3) Assign a storage zone and exact location (example: Room A, Shelf 3, Bin 2; or Locker bank and compartment number).","4) Move the item promptly from intake surface to its storage location to prevent “mystery packages” and mis-shelving during rush periods."],
Storage zones and shelf discipline (recommended structure)
Set up storage so staff can place packages consistently and audit quickly. A practical structure is:
– Standard parcels: sorted by [unit number range / last name alphabet / building wing]
– Large/oversized: dedicated floor zone with clear boundary lines and unit tags attached at intake (not loose notes) - Fragile: designated shelf/bin with limited stacking - Mislabel/unknown recipient: quarantine shelf/bin (see exceptions) - Outbound returns (if offered): separate table/bin to avoid mixing with inbound packages Overflow plan: Define what happens on peak days (holidays, move-ins). Example: when standard shelving is full, open an overflow rack labeled by date; require a second check (two-person verification or quick cross-check) for any item placed in overflow to prevent loss.
5) Exceptions (write these as rules, not improvisation)
Oversized items: Oversized items are Accepted only when they can be placed in the designated oversized zone or secured area. If no space is available, staff may refuse acceptance and instruct the carrier to reattempt delivery or schedule directly with the resident, depending on your property’s policy.
Perishables (including meal kits): [Choose one policy and publish it.] Example options: (A) Not accepted; carriers must deliver to resident directly. (B) Accepted only during receiving hours and held for up to [X hours]; after that, items may be discarded. (C) Accepted only if the resident has provided written authorization and immediate pickup is feasible. Always avoid making promises you can’t operationally meet.
Restricted items: The building does not accept [weapons/ammunition, controlled substances, cash equivalents, live animals, hazardous materials, etc.] and may refuse handoff. If such items are discovered after acceptance, move to a secure quarantine area and escalate to management immediately following your legal and policy guidance.
After-hours drops (choose and enforce one path)
After-hours acceptance policy: [No after-hours acceptance / Lockers only / Controlled drop zone with documented intake next business day].
If no after-hours acceptance: Carrier deliveries left unattended after hours are not considered Accepted. These items are outside the building’s chain of custody until verified through the exception process (if recoverable).
If a controlled drop zone exists: Define the exact drop location, the access control method, and the next-business-day intake procedure. Require staff to log a receiving timestamp when the package is first discovered and brought into intake (note: this timestamp reflects building discovery, not carrier delivery time).
6) Dispute pathway (what evidence we provide, and when)
This pathway is designed for dispute reduction by quickly separating three scenarios: (1) delivered-not-accepted, (2) accepted-not-collected, and (3) accepted-missing.
When a resident reports “Delivered, not received,” the building will respond within [X business hours] with one of the following outcomes:
A) Not Accepted (delivered-not-accepted): We have no receiving timestamp at our acceptance location. We will provide the resident with our acceptance definition and, if requested, a statement that the package is not in building custody based on our logs. We may request the resident obtain carrier delivery proof details (GPS, photo, scan location) or we may request them directly from the carrier, depending on your workflow. This is a carrier issue unless additional evidence shows the item entered the building’s acceptance process.
B) Accepted (accepted-not-collected): We have a receiving timestamp and storage location assignment. We will provide the acceptance time and pickup instructions and confirm the last verified internal location. If the item remains uncollected after [X days], it may be moved to long-hold storage or return-to-sender per policy.
C) Accepted but missing (accepted-missing): We have a receiving timestamp, but the item cannot be located at its recorded storage location. We will open an internal review within [X business hours], including: shelf audit of the relevant zone(s), review of intake notes, verification of any handoff log entries, and a check of any applicable camera checkpoints per your building’s privacy and retention rules. If still unresolved, management will document findings and provide the resident with a written summary of what the building can verify (timestamps, locations, and process steps completed) to support carrier/shipper claims as needed.
Evidence bundle we can provide (for Accepted packages): receiving timestamps, intake identifier (if used), storage location assignment, chain of custody notes (moves/relocations), and pickup/handoff record if collected through a logged process. We do not create or alter timestamps after the fact except to correct clerical errors with a supervisor note explaining the change.
Resident obligations (publish plainly): Residents are responsible for (1) using correct name/unit on shipping labels, (2) picking up within the stated holding period, and (3) reporting missing packages within [X days] of the carrier’s Delivered date so evidence is still available (carrier links, camera retention windows, and logs).
Implement It with Signage + Workflow: Make the SLA Real in 10 Feet of Space
An SLA only reduces disputes if the space forces the right behavior. The fastest way to stop “mystery packages” is to control two things in a tight footprint: where carriers are allowed to leave items, and what staff must capture the moment the building accepts custody. This section gives you a practical setup you can implement in a small lobby zone, at a front desk, or at the entry to a package room—without needing more square footage.
Think of this as a small “receiving lane” with three elements: (1) clear signs that direct carriers and set limits, (2) a consistent intake workflow that produces a receiving timestamp and location, and (3) a chain-of-custody handoff that’s repeatable even on busy days. When these three elements exist, staff can confidently separate carrier delivery proof from building acceptance, using the same evidence every time.
- Design goal: one obvious drop point, one intake surface, one labeled storage flow (even if it’s just two shelves).
- Operational rule: if it’s not in the acceptance zone and not logged, it wasn’t accepted by the building—even if a carrier scan says “Delivered.”
- Behavioral rule: signage should tell people what to do next (not just what they can’t do).
Carrier-facing signage: “No unattended drops” and where to go instead
Carrier-facing signage is your first control. It prevents the most common failure mode: packages left in lobbies, by mailboxes, outside locked doors, or inside a package room doorway without staff awareness. The sign’s job is to route the driver to a single acceptance point and make it clear what qualifies as building acceptance.
Place carrier signage at the decision points drivers naturally encounter: the exterior entry, the vestibule/intercom, and the immediate lobby/mail area. If you have a package room, place it at the package room door too—because drivers will try it first.
Use simple, direct language that aligns with your SLA terms. Avoid argumentative phrasing. You’re not debating delivery—you’re defining acceptance. Example copy you can adapt: "Package acceptance location: Front Desk (or Package Room Receiving Shelf). Unattended lobby drops are not accepted. If staff is unavailable, follow after-hours drop instructions (location + procedure)."
Resident-facing signage: what “accepted” means and pickup expectations
Resident-facing signage reduces anger by setting expectations before a dispute starts. Residents don’t need internal policy details; they need a clear meaning of “accepted,” where to pick up, and what to do if a carrier notification arrives before the building has accepted the item.
Keep resident signage in the same physical zone where they pick up packages, not hidden in a handbook. The wording should be resident-friendly and time-based (what happens when), with one clear escalation path.
Practical resident sign content to include: (1) definition of acceptance in plain language (for example, "Accepted = logged by staff in the package area"), (2) when items become “available for pickup” (for example, after logging and shelving), (3) pickup window and ID/authorization requirement, and (4) what to do if a carrier says delivered but the building hasn’t notified them yet (for example, “allow X hours during business hours for intake; if no notice, submit a ticket with tracking number”). This prevents residents from treating a carrier scan as proof the building has custody.
Front-desk/package-room checklist: intake, QR-label, timestamp, shelf location
Your workflow needs to produce a consistent receiving timestamp and a searchable trail. The best intake process is the one staff can complete in under a minute per package during rushes—because rushes are when gaps happen.
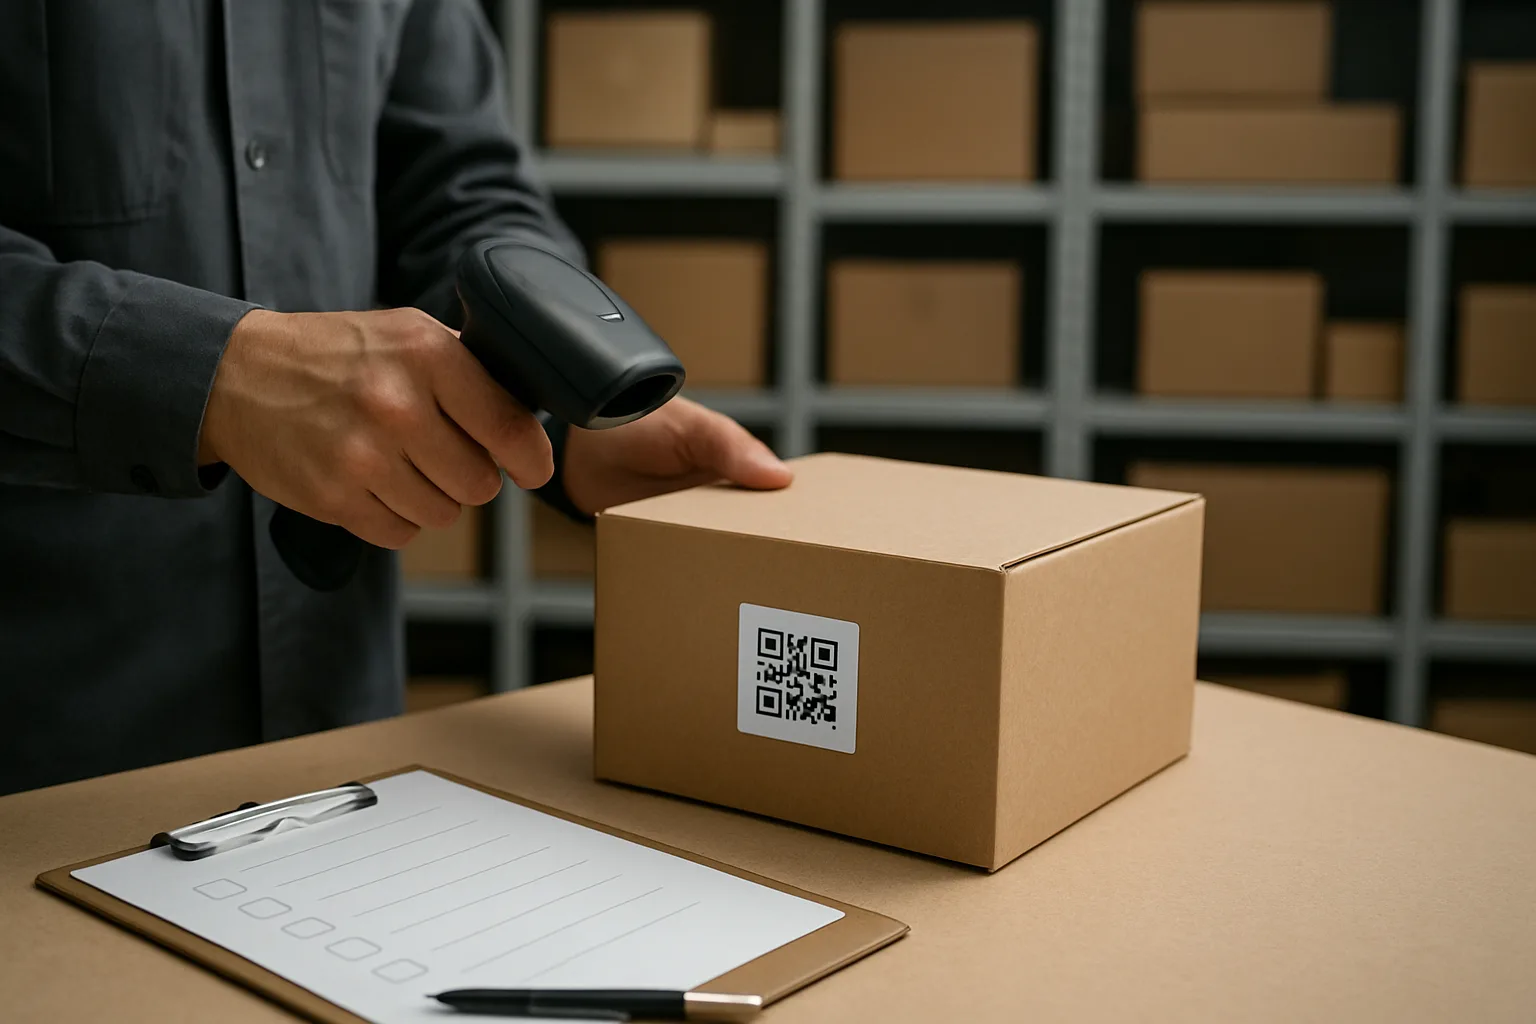
Set up a dedicated intake surface (counter or small table), a label/marker station, and clearly labeled storage zones. If you use QR labels, keep them physically at the intake point so they’re applied before the package moves anywhere else. If you don’t use QR labels, a simple sticker with date/time initials and shelf zone still prevents most ambiguity.
A workable intake checklist looks like this: confirm the item is eligible, confirm it is at the acceptance point, label it, log it with a receiving timestamp, and place it in a specific shelf location. The shelf location matters as much as the timestamp—it turns “we received it” into “we received it and put it here.”
Chain of custody after acceptance: restricted access, audit trail, handoff protocol
Once the building accepts a package, your job shifts from intake to custody. Disputes move from “carrier vs building” to “building custody vs resident pickup.” That only works if access is controlled and every handoff has a record.
Start with physical controls: residents should not be able to browse intake shelves, and drivers should not be able to enter storage areas beyond the acceptance point. If you have a package room, separate “receiving shelf” (staff-only) from “pickup area” (resident-facing) where possible. If space is tight, the minimum control is a barrier (door, gate, counter) and a rule: items are only retrievable through staff or an authorized pickup process.
Then build an audit trail that matches your SLA language. At minimum, maintain: receiving timestamp, staff identifier (initials or login), storage location, and pickup record (who collected and when). If a resident authorizes a proxy pickup, require a consistent method (written authorization in the resident portal, ID check, or a saved note tied to the unit). Consistency is what makes the record defensible when emotions are high.
Handling noncompliant drop-offs: tag, quarantine area, incident log
Even with signage, some deliveries will arrive outside process: left in the lobby, pushed through a door, stacked near mailboxes, or placed inside the package room without logging. Your response must be consistent and documented; otherwise you recreate the blame loop internally (staff vs staff, shift vs shift).
Create a “quarantine area” for noncompliant drops that is separate from accepted inventory. This protects your acceptance definition: items can be secured without being treated as accepted. Quarantine can be as simple as one clearly marked bin or shelf behind the desk labeled “Unverified Drop-Offs — Do Not Shelve Until Logged.”
Use a quick incident log with the minimum fields staff can complete fast: date/time found, exact location found, carrier name if known, tracking number if visible, and staff initials. Apply a bright tag or sticker that indicates “Found Unattended — Not Accepted at Delivery Time” plus the date/time discovered. Then route the resident through a consistent message: you secured an unattended item and logged it at the time found; the building cannot verify when/where the carrier left it. This keeps your SLA intact while still protecting residents’ property.
Dispute Reduction Playbook: How to Answer ‘It Says Delivered’ Without Blame
When a resident says “It shows delivered,” they are asking one question: “Where is my stuff?” A building-level package receiving SLA apartment building policy gives you a second question that ends the blame loop: “Was it accepted by the building yet?” Your job in the moment is to stay neutral, anchor on timestamps and locations, and move the issue down a clear path that matches the evidence you can actually verify.
The playbook below assumes you have defined an acceptance moment (door, desk, or package room) and you are capturing receiving timestamps after acceptance. If you are not capturing building acceptance yet, treat “delivered” as carrier delivery proof only, and be explicit that the property cannot verify chain of custody until acceptance.
- Operating principle: Never argue about what the carrier “should have done.” Only separate (1) carrier delivery proof from (2) building acceptance and chain of custody, then act based on which part is missing.
- Service expectation you can consistently meet: a same-business-day triage response with next steps, even if the package is not immediately found.
- Standard language to use internally: “Delivered is a carrier event. Accepted is a building event.”
Triage map: delivered-not-accepted vs accepted-not-collected vs accepted-missing
Use this three-lane triage every time. It keeps staff consistent, speeds dispute reduction, and prevents ad hoc promises that create new problems.
Lane 1: Delivered-not-accepted. Carrier shows delivered, but there is no building acceptance record (no receiving timestamp tied to your acceptance point). This is primarily a carrier delivery proof issue unless you have evidence the item entered your controlled space.
Lane 2: Accepted-not-collected. You have an acceptance record (receiving timestamp) and a known storage location, but the resident has not picked up (or pickup is not recorded). This is a resident pickup / process clarity issue—your chain of custody is intact if access is controlled and handoff is logged appropriately for your building’s SLA level (desk vs package room). Lane 2 is usually resolvable quickly with location guidance and pickup verification steps (name, unit, ID where required). Lane 3: Accepted-missing. You have a receiving timestamp (building accepted it), but it is not on the shelf/in the bin/at the desk, or the handoff log shows a mismatch. This triggers an internal trace: last-known location, camera checkpoints, access review, and a documented incident workflow.
Evidence bundle: receiving timestamps, camera checkpoints, shelf location, handoff log
To reduce disputes, standardize what “evidence” means at your property. Residents don’t need a lecture; they need a simple, factual timeline. Carriers need specific artifacts to investigate. Staff need a checklist they can follow under pressure.
Build an evidence bundle that matches your acceptance moment and your realistic chain of custody. The point is not surveillance—it’s clarity: who had it, when, and where it moved.
Resident-facing evidence bundle (what you can share)
Share only what’s appropriate for privacy and safety, but be prepared to reference these items consistently:
1) Building acceptance record: receiving timestamp, acceptance point (front desk/package room), and who logged it (initials or role).
2) Storage location: shelf zone, bin number, locker ID, or desk hold area. (Use a standardized location naming system so two staff members describe it the same way.) 3) Availability message: when it was marked “available for pickup” (if you use that step). 4) Handoff record (if used): pickup timestamp, recipient name/unit, and method (ID checked, signature, QR-label scan, etc.).
Internal-only evidence bundle (what staff uses to trace)
Use this bundle for the internal trace and for carrier escalation documentation:
1) Carrier delivery proof details you have (scan time, claimed delivery location, photo if available).
2) Camera checkpoints mapped to your acceptance point: entry door, desk counter, package-room door, package-room interior. Note: you are not promising camera availability; you are creating a consistent review path when cameras exist. 3) Exception log: after-hours drops, overflow placement, noncompliant unattended drop-offs, damaged parcels, or relabeling events. 4) Chain of custody notes: any movement after acceptance (relocated due to overflow, moved to secure cage, returned to carrier).
Resident communication script: what you can verify, what you can’t, what happens next
Your script should do three things: validate the resident’s urgency, state the acceptance facts without blaming, and give a timed next step. This keeps emotions from escalating and prevents staff from improvising.
Use calm, neutral language and avoid speculation (e.g., “the carrier must have…”). Stick to what your SLA defines.
Script A: When it’s delivered-not-accepted (no building receiving timestamp)
1) Confirm and align: “I understand this is frustrating. Let’s check whether the building accepted it or whether it’s only showing carrier delivery.”
2) State the fact: “Right now, we do not have a building acceptance record for that package—no receiving timestamp at our acceptance point.”
3) Define what that means: “That means we can’t verify it entered our package room/front desk chain of custody yet.” 4) Immediate action: “Here’s what we can do now: we’ll re-check the usual mis-sorts (wrong shelf/neighboring unit name) and confirm it didn’t arrive under a different tracking number.” 5) Next step + timeline: “If it’s not here, the next step is a carrier trace. We can provide the carrier with our acceptance records showing it was not received by the building. You can also open a case with them; if you share the case number, we’ll add our notes today.”
Script B: When it’s accepted-not-collected (building timestamp exists; location exists)
1) Anchor on acceptance: “We did accept this package at [time] at [desk/package room].”
2) Give location: “It’s stored in [Zone B / Shelf 3 / Bin 12].”
3) Set pickup expectations: “It’s available for pickup during [hours]. Please bring [ID / unit info], and we’ll hand it over.” 4) If resident says they already checked: “Let’s do a quick trace: we’ll confirm the exact shelf location, check for mis-sorts under similar names, and verify it wasn’t moved to overflow.”
Script C: When it’s accepted-missing (accepted but not found)
1) Own the trace process without admitting fault prematurely: “We accepted it at [time]. Since it’s not in its recorded location right now, we’re starting an internal trace.”
2) Explain the steps: “We will check the shelf zone, overflow area, and any logged relocations, then review the relevant camera checkpoints and our handoff log.”
3) Provide a commitment: “We’ll update you by [specific time today/tomorrow], even if the trace is still in progress.” 4) Close with options: “If the item is time-sensitive, you may also want to notify the sender that a trace is underway so they can advise on replacement timing.”
Carrier escalation: what to request (scan details, GPS, photo) and how to document
Carrier escalation works best when your request is specific and you can show your building acceptance records. You are not asking the carrier to “try again”; you are asking them to reconcile their delivery proof with your acceptance moment.
When you escalate, document as if you may need to repeat the story later (regional ops, ownership, legal, or insurance). Consistency is the key to dispute reduction.
Carrier escalation checklist (send with every case)
Request these items, depending on carrier capability and shipment type:
1) Scan details: exact delivery scan timestamp and scan event type (delivered, left at front door, left with individual, etc.).
2) Delivery location detail: address string as recorded, including any suite/unit fields. 3) GPS coordinate (if available) and whether it matches your building entrance/acceptance point. 4) Photo of delivery (if available): ask for the original, not a screenshot, when possible. 5) Signature record (if a signature service was used): name or marker showing “handed to” vs “left at.” 6) Driver notes: where they claim it was left (lobby table, mailroom, leasing office, package room door, etc.).
How to document the building side (make it easy for carriers and for you)
In your internal log, capture:
1) Tracking number and carrier.
2) Resident name/unit as addressed on the label (or what the resident reports). 3) Building acceptance status: accepted yes/no; receiving timestamp if yes; acceptance point (door/desk/package room). 4) Staff actions taken: shelf check completed, overflow check completed, camera checkpoint review requested/completed, handoff log checked. 5) Outcome classification: carrier issue (delivered-not-accepted), resident pickup clarification (accepted-not-collected), internal incident (accepted-missing), or unresolved/pending. 6) Case numbers: carrier case ID, sender case ID (if any), and resident ticket ID.
Internal review: when to audit staff process vs treat as carrier issue
A measurable acceptance moment lets you decide quickly whether you are dealing with a carrier delivery proof gap or a building chain of custody gap. The mistake many teams make is treating every “delivered” complaint the same—either reflexively blaming carriers or reflexively assuming internal mishandling. Use triggers to decide when to audit your process.
Run internal audits to protect staff (clear them quickly when logs are clean) and to improve procedures when patterns emerge.
Treat as a carrier issue (most likely) when:
1) There is no building receiving timestamp for the tracking number within your staffed/monitored acceptance window.
2) The carrier’s proof indicates a drop location that is outside your defined acceptance point (e.g., “left in lobby” when your signage says “deliver to desk/package room only”).
3) GPS/photo evidence does not match your building entrance or shows another address/door. 4) Multiple units report delivered-not-accepted on the same day/time band (possible route behavior or mis-scan batch).
Audit staff process (priority) when:
1) A package shows accepted (receiving timestamp exists) but is missing from its recorded shelf/zone.
2) The handoff log shows a pickup event that the resident disputes, or a pickup was completed without the required verification steps (per your SLA).
3) You see repeated exception patterns: items moved to overflow without being logged, QR-label not applied, shelf locations not recorded consistently, or intake happening outside the acceptance point. 4) Missing packages cluster by shift, by intake staffer role, or by a specific storage area (signals a workflow or access-control problem, not a one-off).
Rollout Plan for Regional Teams: Standardize Across Buildings Without Overpromising
Regional leaders can reduce dispute volume fastest by standardizing the package receiving SLA apartment building model across the portfolio, while still allowing each property to choose an acceptance moment it can actually defend (desk vs package room vs door). The goal is not to promise perfection; it is to create consistent, auditable receiving timestamps and a clear chain of custody starting at acceptance—so teams can separate carrier delivery proof from building acceptance with confidence.
Use this rollout as a repeatable playbook: one-page policy, one intake workflow, one evidence standard, and one monthly review loop. Where a property differs (hours, staffing, access), document it once and keep everything else consistent so residents and staff don’t have to relearn expectations at every site.
- Portfolio rule of thumb: standardize the definitions and evidence you will provide; localize only the acceptance location and hours.
- Default to the strongest acceptance moment each building can reliably execute every day (not just on a good day).
- If a property can’t control access and log placement, don’t claim chain of custody past the acceptance moment—this is where overpromising creates resident anger.
- Treat receiving timestamps as an operational control: if they’re inconsistent, your dispute reduction efforts won’t stick.
- Keep “exceptions” narrow and written. Every unwritten exception becomes tomorrow’s policy by accident.
Step 1: Choose acceptance point per property and publish a one-page SLA
Start by selecting one acceptance moment per building (front desk, package room placement, or door) and locking it in for that site. Your SLA should clearly state what the building verifies (accepted at X location at Y time) and what it does not verify (carrier-delivered-to-property without acceptance, delivery to unit door, or items left outside the acceptance area).
Create a one-page, resident-readable SLA that includes: acceptance location, staffed/controlled hours, eligible carriers, what counts as carrier handoff, and what evidence the building can provide during disputes. Keep it stable—frequent wording changes undermine credibility.
Operationally, define the acceptance location in physical terms, not just names. Example language you can reuse internally: “Acceptance location is the front desk counter inside the leasing office” or “Acceptance location is inside the package room, placed on a labeled shelf after intake.” This prevents later arguments over lobby tables, mailroom piles, or “near the door.”
Step 2: Train staff on intake + exceptions; run a 7-day calibration
Roll out one standard intake workflow and one exception workflow. Training should be practical and scenario-based: carrier arrives with a mixed stack, resident interrupts with a pickup request, oversized item blocks the aisle, after-hours drop shows up in the lobby, etc. The goal is repeatable behavior that produces reliable receiving timestamps and a clean chain of custody after acceptance.
Run a 7-day calibration period per property: supervisors (or a floating regional trainer) observe intake in real time, tighten steps that are being skipped, and confirm the acceptance moment is actually being followed. During calibration, you’re looking for the small breaks that create “mystery packages”: unlabeled items, items set down outside the acceptance area “just for a minute,” or staff creating unofficial overflow zones.
Define exceptions as decision trees, not improvisation. For example: perishables (accept only during staffed hours, notify resident immediately), oversized (accept only if there is a designated zone; otherwise require reattempt), restricted items (never accept), after-hours drops (do not retroactively “accept” unless your policy explicitly allows a secured drop process). Document these rules in the training handout so the team’s answers remain consistent.
Step 3: Add compliance checks: spot audits, timestamp accuracy, shelf discipline
To make the SLA real, add lightweight compliance checks that verify the building is creating the evidence it promises. The point is not to police; it is to prevent drift back into “anywhere in the lobby counts.”
Use three simple controls across all properties: (1) spot audits, (2) timestamp accuracy checks, and (3) shelf/zone discipline checks. Keep them measurable so you can compare sites and coach fairly.
Spot audits: once or twice weekly, randomly select a small sample of accepted packages and verify they have a complete intake record (label/identifier, receiving timestamp, and assigned storage location). Timestamp accuracy: confirm receiving timestamps reflect the actual acceptance moment (not end-of-shift batching). Shelf discipline: walk the package room (or desk holding area) to confirm items are only in approved zones, with overflow handled per written plan—not in hallways, mailrooms, or unlabeled piles. When you find noncompliance, fix the process step, not just the one package.
Step 4: Update resident onboarding and renewal communications
A building-level SLA works only if residents understand what “received” means at your property. Make it part of the resident lifecycle so it doesn’t feel like a new rule invented during a dispute.
Add the one-page SLA to: move-in materials, resident portal resources, and renewal emails. Use plain language: “We can confirm packages once they are accepted at our [desk/package room]. A carrier scan of ‘Delivered’ to the property is not the same as building acceptance.” This sets expectations without blaming carriers.
Include two practical resident behaviors that reduce disputes: (1) addressing guidance (unit number, name consistency), and (2) pickup expectations (time window before overflow risk, what to do if they receive a carrier ‘delivered’ notification but no building acceptance notice). If your process includes QR-labeling or a pickup log, explain it briefly so residents recognize legitimate steps in the chain of custody rather than assuming “extra bureaucracy.”
Step 5: Review dispute cases monthly and refine rules (not ad hoc exceptions)
Set a monthly portfolio review focused on dispute reduction: look at a handful of “delivered-not-received” cases and classify them using your acceptance moment. The purpose is to determine whether the issue is carrier delivery proof (delivered but not accepted), building process (accepted but can’t be located), or resident pickup delay (accepted and available, not collected).
For each category, decide one improvement action and standardize it. Examples: tighten carrier-facing signage if you’re seeing frequent unattended drops; adjust overflow plans if shelves are breaking; retrain staff if receiving timestamps are delayed or missing; improve resident messaging if most cases are accepted-not-collected misunderstandings. The rule is: refine the written process once per month, not one-off in the heat of individual disputes.
Close the loop by publishing changes as controlled updates: new signage text, revised exception rule, or adjusted service window. This prevents “policy creep,” keeps staff confident about what the building can and cannot verify, and makes your evidence bundle consistent across the region when escalations occur.
Frequently Asked Questions
If a carrier scan says “Delivered” but our building has no “Accepted” record, what should we do first?
Treat it as “delivered-not-accepted” until proven otherwise. Start by checking: (1) whether the package matches your building’s eligible acceptance window (hours, entrance, carrier), (2) whether there is any intake evidence (receiving timestamp, QR label, shelf location log), and (3) whether cameras show the carrier entering your defined acceptance area. If you cannot tie the package to your acceptance moment, respond consistently: “We can’t verify building acceptance for this tracking number; please request carrier delivery proof (photo/GPS/scan details). We will support your claim with our acceptance logs showing no intake.” Document the request and keep a short internal case note so the resident doesn’t have to restart the story on every follow-up.
What’s the minimum evidence package a property should keep to reduce disputes without creating a paperwork burden?
Aim for a lightweight “evidence bundle” that can be produced in minutes: receiving timestamp (when the building accepted it), acceptance location (desk/package room identifier), staff identifier (initials or login), package identifier (carrier + tracking number or last 6 digits), and storage location (zone/shelf/bin). Add one optional item if feasible: a quick camera checkpoint reference (camera name + time range) for accepted items. This creates a basic chain of custody after acceptance without turning the front desk into a records department.
How do we handle after-hours deliveries if we don’t have 24/7 staff?
Decide one policy and enforce it consistently: either (A) no after-hours acceptance (carriers must attempt during staffed hours), or (B) a controlled after-hours drop protocol in a single, camera-covered location that is explicitly labeled as “not accepted until logged.” If you choose B, use a quarantine/holding zone: packages left there are treated as carrier-delivered but not building-accepted until staff performs intake the next business day and creates the receiving timestamp. This prevents staff from being held responsible for a gap you cannot supervise.
What should we do when a carrier leaves packages outside the acceptance point despite signage?
Use a noncompliance workflow that protects your SLA: (1) move items to a designated quarantine area if safe to do so, (2) tag the item with a simple “Found outside acceptance area” note and the time discovered, (3) log an incident entry (date/time, location found, carrier if known, tracking number if visible), and (4) only mark it “Accepted” when staff completes normal intake (QR label/timestamp/shelf location). If residents report missing items from noncompliant drops, you can credibly state what the building can verify: discovery time, not acceptance time, and that chain of custody did not begin until intake occurred.
Residents want us to be responsible once something is “delivered.” How do we set expectations without sounding defensive?
Use plain language tied to your acceptance moment: “Carrier ‘Delivered’ means the carrier ended their route step. Building ‘Accepted’ means our staff took custody at the desk/package room and created a receiving timestamp. We can investigate anything after acceptance using our logs; before acceptance, the carrier’s delivery proof is the key evidence.” Pair that with a resident-friendly commitment: you will (a) provide acceptance logs within a stated timeframe, (b) help request carrier delivery proof when needed, and (c) notify promptly once items are accepted and available for pickup.
How do we prevent mix-ups between similar packages (same carrier, same day, same unit) when intake volume is high?
Standardize two controls at intake: (1) a unique internal identifier (QR label or simple sequential sticker) linked to the tracking number or last 6 digits, and (2) a required storage location entry (zone/shelf/bin) before the package leaves the intake counter. Train staff to avoid “temporary piles” that never get logged. If a resident disputes a pickup, you can use the internal ID + shelf history to confirm whether the item was ever accepted, where it was placed, and when it left custody (collected/handed off).

Get a One-Page SLA Your Team Can Use at the Desk Tomorrow
If you want help turning your policy into an operational script your staff can follow under pressure, TrackNest can help you map a clear acceptance point, define receiving timestamps, and standardize chain-of-custody steps across buildings—so disputes become triage, not drama.
Clarity Wins: One Acceptance Moment, Consistent Timestamps, Fewer Disputes
A “Delivered” scan is a carrier milestone. “Received” needs to be a building milestone—with a defined location, a defined handoff method, and a defined receiving timestamp. When you separate those two moments, your team can respond to disputes with facts instead of guesses: delivered-not-accepted (carrier issue), accepted-not-collected (resident timing), or accepted-missing (internal chain of custody review).
The properties that reduce disputes don’t rely on memory or goodwill. They make acceptance physical (a desk, a door, a marked zone), visible (signage that tells carriers where to go and tells residents what “accepted” means), and auditable (a timestamp, a label or identifier, and a recorded placement or handoff). That’s how you build a defensible chain of custody without promising what you can’t verify.
To start this week: pick a single acceptance point per building, publish the one-page SLA, install carrier-facing and resident-facing signs at the exact decision points, and train staff on a tight intake and exception process. Within days, you’ll feel the difference—because your team will finally be able to say, consistently and confidently, what the building can and cannot verify, and exactly what happens next.